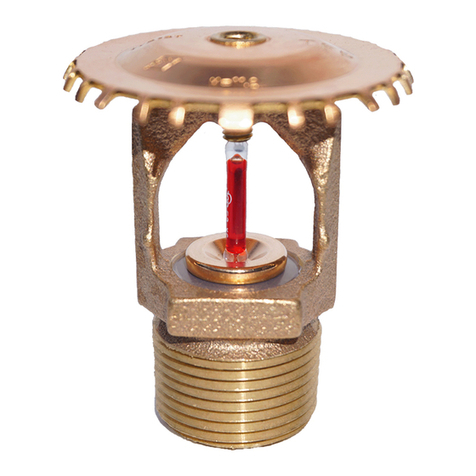
Operation
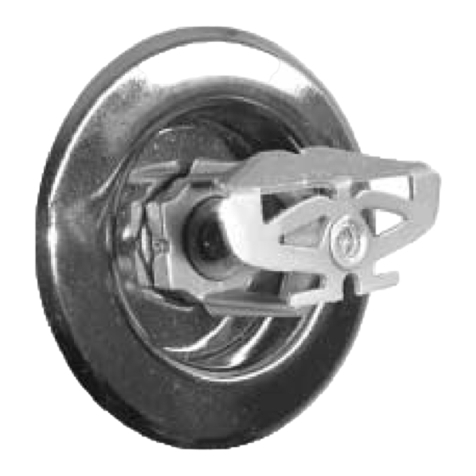
In the standby condition, the unique
features of the RAVEN provide a tam-
per resistant sprinkler design that
helps reduce the opportunity for indi-
viduals to injure themselves or others
with components of a fire sprinkler.
The RAVEN has been specifically de-
signed to minimize components, as
well as holes or shapes that could
provide a point for securing an exter-
nal non-sprinkler associated object.
Also, when properly installed, the es-
cutcheon is held fast to the ceiling or
wall to deter its removal. The shape of
the sprinkler and escutcheon cannot
be grasped easily, which further de-
ters tampering.
A link assembly covers the sealing as-
sembly. The link is soldered with an
eutectic solder that melts when ex-
posed to heat. When the link reaches
its rated temperature, the link sepa-
rates and releases the sealing assem-
bly, allowing the deflector assembly
to extend from the body and water to
flow.
Installation
The Tyco®RAVEN™ Institutional
Sprinklers must be installed in accor-
dance with the following instructions:
NOTICE
Refer to the Design Criteria section for
important information regarding the
piping installation design and its ef-
fect on maintaining the integrity of the
tamper resistant design of the Institu-
tional Escutcheons.
A 1/2 inch NPT sprinkler joint should
be obtained with a minimum to max-
imum torque of 7 to 14 ft.lbs. (9,5 to
19,0 Nm). Higher levels of torque may
damage the sprinkler with consequent
leakage or impairment of the sprinkler.
Do not attempt to compensate for
improper location of the sprinkler fit-
ting by under-or over-tightening the
sprinkler.
After the installation is complete,
make certain that the RAVEN Es-
cutcheon is held fast (i.e., tight with
no movement or gap) to the mounting
surface and that the Escutcheon sits
squarely against the mounting sur-
face around the entire perimeter of the
Escutcheon.
PENDENT SPRINKLERS
Step 1. The RAVEN Pendent Sprinkler
must be installed pendent and with
the centerline of the waterway perpen-
dicular to the ceiling.
Step 2. With the Escutcheon in place
and with pipe thread sealant applied
to the pipe threads, hand tighten the
sprinkler into the sprinkler fitting using
the W-type 25 Sprinkler Wrench.
Note: The sprinkler has intention-
ally been designed to be difficult to
grasp by hand; therefore, the use of
the W-type 25 Sprinkler Wrench for
hand tightening will assist in thread-
ing the sprinkler. Also use of the W-
type 25 Sprinkler Wrench will help
avoid damage to the Sprinkler during
installation.
Step 3. Wrench tighten the Sprinkler
using only the W-Type 25 Sprinkler
Wrench (Ref. Fig. 3) with the wrench
prongs fully engaged with the Sprin-
kler Wrenching Notches. The wrench
prongs are designed to engage with
the wrenching notches in the sprin-
kler body. The wrench prongs are
also uniquely spaced to align with the
sprinkler wrenching notches in one
position.
Note: To help prevent slippage of the
Sprinkler Wrench and while using a 1/2
inch ratchet drive, place one hand over
the Sprinkler Wrench while tightening
with the other hand.
Step 4. After the installation is com-
plete, make certain that the RAVEN
Escutcheon is held fast to the mount-
ing surface and that it sits squarely
against the ceiling around its entire
perimeter. When using the technique
shown in Figure 7, the Escutcheon can
be pulled up onto the ceiling by pulling
up on the sprinkler/supply pipe and
then tighten the Retaining Flange Set
Screw. See Figure 3 inset for post in-
stallation identification.
Note: If the Escutcheon is NOT held
fast (i.e., tight with no movement or
gap) to the mounting surface and as
an option to relocating the sprinkler
pipe fitting (i.e., increasing the “face of
fitting” to “face of mounting surface”
distance) up to two Adjustment Spac-
er Rings as shown in Figure 3 may be
utilized. Each Adjustment Spacer Ring
can account for 0.075 inches of gap
between the Escutcheon and mount-
ing surface. Therefore, if the gap is
greater than 0.150 inches, the sprin-
kler fitting will need to be relocated
to assure proper installation of the
RAVEN Sprinkler and Escutcheon.
HORIZONTAL SIDEWALL
SPRINKLERS
Step 1. The RAVEN Horizontal Side-
wall Sprinkler must be installed with
the centerline of their waterway paral-
lel with the ceiling and perpendicular
to the back wall.
Step 2. With the Escutcheon in place
and with pipe thread sealant applied
to the pipe threads, hand tighten the
sprinkler into the sprinkler fitting using
the W-type 25 Sprinkler Wrench.
Note: The sprinkler has intention-
ally been designed to be difficult to
grasp by hand; therefore, the use of
the W-type 25 Sprinkler Wrench for
hand tightening will assist in thread-
ing the sprinkler. Also use of the W-
type 25 Sprinkler Wrench will help
avoid damage to the Sprinkler during
installation.
Step 3. Wrench tighten the Sprinkler
using only the W-Type 25 Sprinkler
Wrench (Ref. Fig. 4) with the wrench
prongs fully engaged with the Sprin-
kler Wrenching Notches. The wrench
prongs are designed to engage with
the wrenching notches in the sprin-
kler body. The wrench prongs are
also uniquely spaced to align with the
sprinkler wrenching notches in one
position so as to assure that the sprin-
kler defector is properly positioned
with respect to the ceiling.
Note: To help prevent slippage of the
Sprinkler Wrench and while using a 1/2
inch ratchet drive, place one hand over
the Sprinkler Wrench while tightening
with the other hand.
Note: Upon completion of tighten-
ing the sprinkler, the word “UP” on the
wrench must be positioned towards
the ceiling. The use of a level applied
the flat of the wrench below the word
“UP” is recommended to help as-
sure that the sprinkler deflector is po-
sitioned correctly with respect to the
ceiling.
Step 4. After the installation is com-
plete, make certain that the Escutch-
eon is held fast to the mounting sur-
face and that it sits squarely against
the wall around its entire perimeter.
When using the technique shown
in Figure 7, the Escutcheon can be
pulled back onto the wall by pulling
back on the sprinkler/supply pipe and
then tighten the Retaining Flange Set
Screw.
Note: If the Escutcheon is NOT held
fast (i.e., tight with no movement or
gap) to the mounting surface and as
an option to relocating the sprinkler
pipe fitting (i.e., increasing the “face of
fitting” to ”face of mounting surface”
distance) up to two Adjustment Spac-
er Rings as shown in Figure 4 may be
utilized. Each Adjustment Spacer Ring
can account for 0.075 inches of gap
between the Escutcheon and mount-
ing surface. Therefore, if the gap is
greater than 0.150 inches, the sprinkler
fitting will need to be relocated to as-
sure proper installation of the RAVEN
Sprinkler and Escutcheon.
Step 5. After all the horizontal sidewall
sprinklers are installed, use the W-
type 25 Sprinkler Wrench to verify that
the each sprinkler defector is proper-
ly aligned with respect to the ceiling.
See Step 3. See Figure 4 inset for post
installation identification.
TFP651 Page 3 of 10
