Move to the Center Mounting Bracket. Select (1) Center Support
Bracket-note the two different sizes of mounting holes in the
Bracket, (Figure 10). Slide the end of the Center Support Bracket
with the larger mounting hole between the factory body mount
and the Center Mounting Bracket, (Figure 11). Attach the
Support Bracket to the factory hole or slot in the body mount
using the included (1) 12mm x 30mm Hex Bolt, (2) 12mm Flat
Washers, (1) 12mm Lock Washer and (1) 12mm Hex Nut,
(Figures 10 & 11). IMPORTANT: There are multiple slots in the
Bracket to allow for several models/years of vehicles. Choose a
mounting point for the Support Bracket that cannot come in
contact with brake cables or wiring. Do not tighten hardware at
this time. NOTE: Larger hole on the Center Support Bracket
attaches to inside of center body mount, (Figure 11).
STEP6
Determine the next procedure for your model and year.
All 1500 Models:
Attach the bent end of the Front Support Bracket to the top hole
in the Front Mounting Bracket with (1) 10mm x 30mm Hex Bolt,
(2) 10mm Flat Washers, (1) 10mm Lock Washer and (1) 10mm
Hex Nut, (Figure 7). Do not tighten at this time.
Up to 2010 25-3500 Models only (IMPORTANT: front
and center Support Brackets are not required on
2011-16 25-3500 Models-skip to Step 8):
Note that the Front Support Bracket will not reach up to the
lower slot in the Mounting Bracket, (Figure 8). Tighten the
Support Bracket to the Nut Plate in the frame. Carefully push up
on the Support Bracket until it reaches the lower slot, (Figures 8
& 9). Attach the Support Bracket to the back of the Mounting
Bracket with (1) 10mm x 30mm Hex Bolt, (2) 10mm Flat Wash-
ers, (1) 10mm Lock Washer and (1) 10mm Hex Nut, (Figure 9).
Do not tighten at this time.
4/5
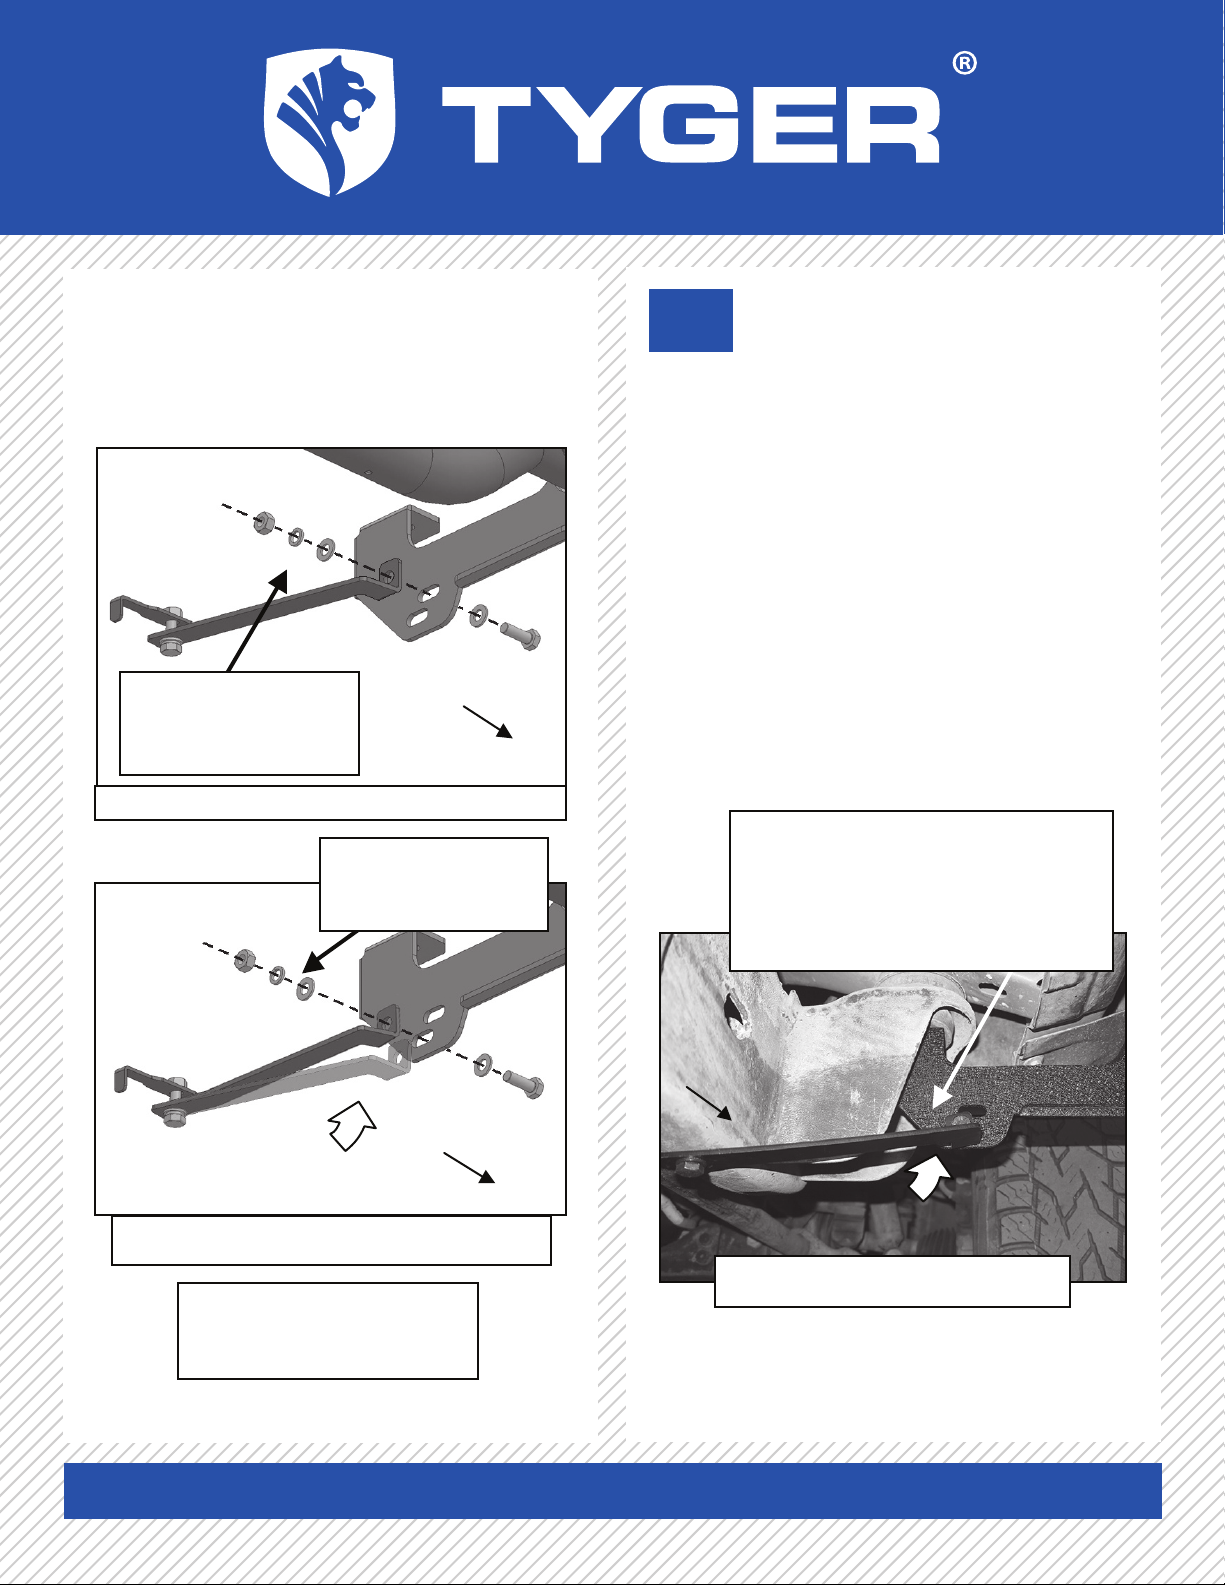
10mm x 30mm Hex Bolt
(2) 10mm Flat Washers
10mm Lock Washer
10mm Hex Nut
(Fig 7) Example 1500 front Support Bracket Install
Front
NOTE: Support Brackets
not required on 2011-16
25-3500 Models
Front
(Fig 8) Example 25-3500 front Support Bracket
Installation. Push Bracket up to meet slot
10mm x 30mm Hex Bolt
(2) 10mm Flat Washers
10mm Lock Washer
10mm Hex Nut
IMPORTANT NOTE: 25-3500 Model Front
Support Bracket Installation Pictured
Bend Support Bracket up by hand to
meet the Front Mounting Bracket.
NOTE: Support Bracket not required on
2011-16 25-3500 Models
(Fig 9) 2001-10 25-3500 Model Center
Support Bracket Installation Pictured
Front
Customer Support: www.TygerAuto.com/Contact