manuals.online logo
Brands
  1. Home
  2. •
  3. Brands
  4. •
  5. Tyger
  6. •
  7. Automobile Accessories
  8. •
  9. Tyger T1 User manual

Tyger T1 User manual

User Manual of Product 1:
Tyger Auto T1 Soft Roll-up Truck Bed Tonneau Cover
Compatible with 2019-2023 Ram 1500 New Body (Excl.
Classic) | 5'7" (67") Bed | TG-BC1D9046, Black
1
2
Before Installation
Please check the checklist attached to make sure all parts are in the package.
T1 SOFT ROLL UP COVER
Driver’s
Side Rail Passenger’s
Side Rail
Cover
Assembly
*Clamp
Safety Straps
Bulkhead
Assembly
Tools Needed
(Not Included)
Ratchet Wrench
10mm Socket
Phillips Head
Screwdriver
Installing Cover Assembly
Place cover assembly on the front truck rail, loosen the screw in bulkhead assem-
bly, slide the side rail into the channel, then re-tighten the screw to secure the
bulkhead assembly. Follow the same procedure for the other side.
1
* Quantity and shape of clamps may vary by different vehicles. Please refer to the checklist.
V. 20181115
NOTE: For Over-the-Bedrail bed liner,
small 2"x 4" holes will need to be cut
on the liner in order to fasten the clamp
Tightening Clamps
Do not tighten clamps until all clamps and side rails are in proper position. (Refer
to Step 5)
For Nissan and Toyota with factory utility track rail system, clamp installation
instruction is attached separately.
3
Positioning Side Rails
Align the inside edge of the side rail to the inner edge of the truck bed rail. Then,
leaving approximately 6”- 8" of space on each end, evenly space the clamps
provided along the side rail. Make sure the side rails are placed so that the
distance from the tailgate is equal on both sides.
2
Driver’s
Side Rail
Passenger’s
Side Rail
APPROX 6” to 8”
Rear Front
APPROX 6” to 8”
Correct Level
(Both side rails must be even)
Rolling down the cover
When rolling down the cover, make sure the ends of the crossbar are resting on
the side rails and the direction of the crossbar is arched upward. (Fig 1a, Fig 2a,
Fig 3a).
CAUTION: Incorrect position of the crossbar; this will cause water to pool in the
middle (Fig 1b, Fig 2b, Fig 3b).
4
Fig 3bFig 3a
Cover should appear slightly
arched.
Cover not supported by the
crossbars, will not hold up to
heavy rain or snow.
Fig 1a Fig 1b
Direction of the crossbar is arched upward.
Fig 2a
Do not ip the crossbars to curve down.
Fig 2b
Press down to latch cover.
Latching
Push down on the cover
1
2
Pull on either side of the latch cable to release
Unlatching
1/16”
Fig 4 a
1/16”
Fig 4b
Latching and Unlatching the cover
Please ensure the gap between the locking clip and the side rail at end of the
tailgate is less than 1/16" for proper security of the cover (Fig 4a). Make sure to
adjust the position of the side rails if necessary.
CAUTION: The cover will not lock securely if the gap is greater than 1/16"(Fig 4b).
5
Velcro Fastener Strip
Pull Cover Over Rails
Press Edges
1
2
Safety Straps
Tension Plate
Loosen the screwSlide the plate
Tailgate
12
Open the Cover
Roll the cover towards the cab and secure by hooking the safety strap to the front
loop on both sides.
Tension Control System
Depending on the weather condition it may be necessary to adjust the tension
control system. To adjust, loosen the screw on the tension plate, then the tension
plate can be slided back and forth.
►Only move the tension plate one increment at a time.
►Each increment will give 1/8inches of tension adjustment.
NOTENOTES
Secure Velcro Fastener
Pull cover horizontally over the side rails and press down the edge to secure the
Velcro fastener. This step should be done after the cover is latched down.
NOTE: Cover must be latched down prior to closing the tailgate.
6TROUBLESHOOTING
1. Latch pops up easily
2. Latching system is
jammed
3. Water pooling on the
cover
4. Cover appears to be
a little short
5. Front bed rail is
lower than the sides
6. Maintenance & care
►Check Fig 4a to see if the horizontal gap
between the locking clip and the side rail is
under 1/16 inches.
►Make sure cover is latched down prior to
closing the tailgate.
►Check if the cover is properly attached to the
Velcro strips on the side rails; cover must be
latched down first prior to sealing the Velcro
strips on both sides.
►Check STEP 2, make sure the side rails are
placed so that the distance from the tailgate is
equal on both sides.
►It's suggested when unlatching the cover, to
use one hand to push down on the cover while
pulling on the latch cable on either side for an
easier release, this will reduce the wear and
tear of the latching system.
►Adjust the tension plate towards the bulk-
head if the cover seems too tight.
►Check STEP 2, make sure the side rails are
placed so that the distance from the tailgate is
equal on both sides.
►Cover should appear slightly arched as in Fig
3a; make sure the ends of the crossbars are
resting on the side rails (Fig 1a, Fig 2a).
►Make sure side rails are positioned properly,
not too far from the tailgate, check STEP 2.
►Move the whole cover assembly towards the
tailgate, while making sure it's properly sealed
at the front.
►Some specific truck models have lower front
bed rail. Apply front seal strip provided to the
front bed rail to seal the gap.
►Use regular soap and water, avoid using
strong abrasive chemical cleaners.
If you could not nd the answer, please contact us directly at
www.TygerAuto.com/contact with pictures showing the issues.
We are always here to help!
www.TygerAuto.com
Other Tyger Automobile Accessories manuals

Tyger TG-GD6D60078 User manual

Tyger

Tyger TG-GD6D60078 User manual

Tyger TG-BP6J85368 User manual

Tyger

Tyger TG-BP6J85368 User manual

Tyger TG-BP9F80298 User manual

Tyger

Tyger TG-BP9F80298 User manual

Tyger STAR ARMOR TG-AM2C20218 User manual

Tyger

Tyger STAR ARMOR TG-AM2C20218 User manual

Tyger TG-RK1B204B User manual

Tyger

Tyger TG-RK1B204B User manual

Tyger TG-BP9D80398 User manual

Tyger

Tyger TG-BP9D80398 User manual

Tyger ARMOR TG-AM2F20098 User manual

Tyger

Tyger ARMOR TG-AM2F20098 User manual

Tyger TG-BP6TTG-BP6T80568 User manual

Tyger

Tyger TG-BP6TTG-BP6T80568 User manual

Tyger STAR ARMOR TG-AM2C20108 User manual

Tyger

Tyger STAR ARMOR TG-AM2C20108 User manual

Tyger TG-SB7J88678 User manual

Tyger

Tyger TG-SB7J88678 User manual

Tyger STAR ARMOR TG-AM2D20608 User manual

Tyger

Tyger STAR ARMOR TG-AM2D20608 User manual

Tyger T3 User manual

Tyger

Tyger T3 User manual

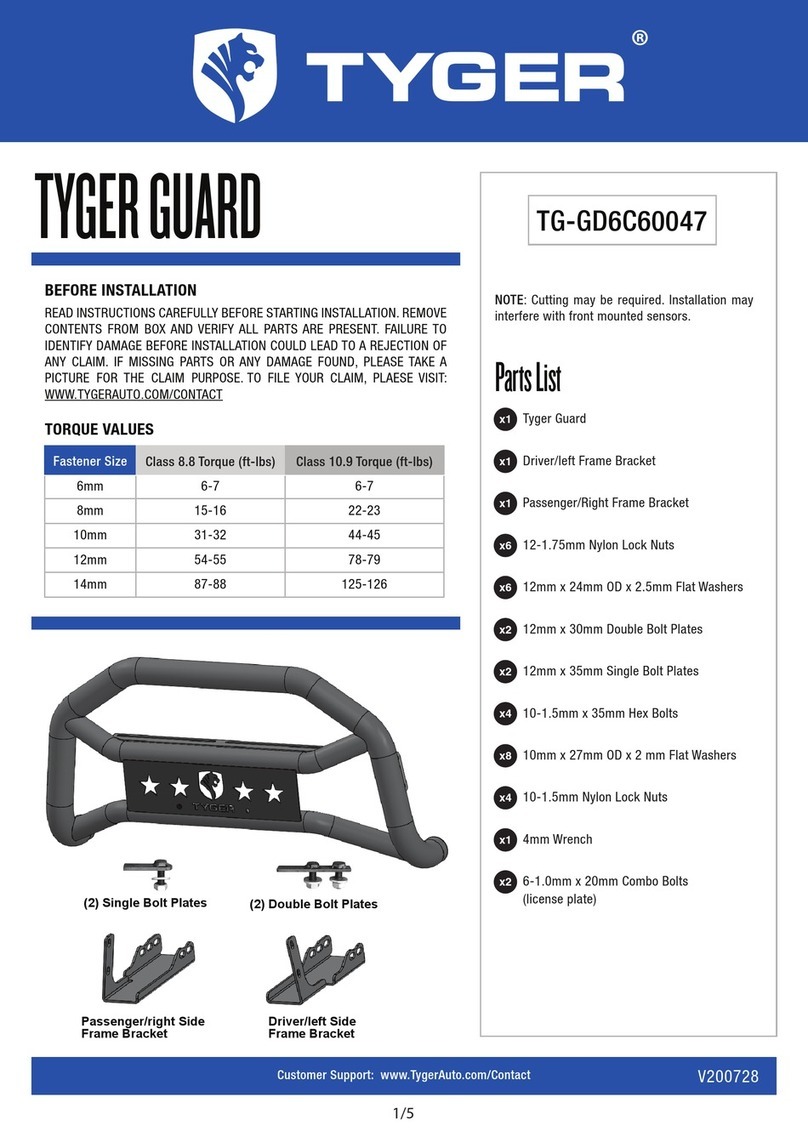
Tyger Guard TG-GD6C60047 User manual

Tyger

Tyger Guard TG-GD6C60047 User manual

Tyger Armor TG-AM2T20208 User manual

Tyger

Tyger Armor TG-AM2T20208 User manual

Popular Automobile Accessories manuals by other brands

aFe Power 51-82722 instruction manual

aFe Power

aFe Power 51-82722 instruction manual

Soundoff Signal MPower PMP2BK004 manual

Soundoff Signal

Soundoff Signal MPower PMP2BK004 manual

Subaru H501SAJ000 installation instructions

Subaru

Subaru H501SAJ000 installation instructions

Diamondback HD installation guide

Diamondback

Diamondback HD installation guide

Autel MaxiCharger DC Fast Installation and operation manual

Autel

Autel MaxiCharger DC Fast Installation and operation manual

Front Runner TRCA010 Operation manual

Front Runner

Front Runner TRCA010 Operation manual

Whispbar K182W Fitting instructions

Whispbar

Whispbar K182W Fitting instructions

curt 70130 installation manual

curt

curt 70130 installation manual

HAUL MASTER 58114 Owner's manual & safety instructions

HAUL MASTER

HAUL MASTER 58114 Owner's manual & safety instructions

rough country 92179500000 manual

rough country

rough country 92179500000 manual

SEO Electronics CANi user manual

SEO Electronics

SEO Electronics CANi user manual

Aussie Tonneaus ATR01132 Fitting instructions

Aussie Tonneaus

Aussie Tonneaus ATR01132 Fitting instructions

SSBC W123-A installation instructions

SSBC

SSBC W123-A installation instructions

Yescom YES5062 user manual

Yescom

Yescom YES5062 user manual

Menabo DL FIX 207FP Fitting instructions

Menabo

Menabo DL FIX 207FP Fitting instructions

Prorack K062 Fitting instructions

Prorack

Prorack K062 Fitting instructions

VIAIR TLC DUAL 444C user manual

VIAIR

VIAIR TLC DUAL 444C user manual

Metra Electronics 95-7324 installation instructions

Metra Electronics

Metra Electronics 95-7324 installation instructions

manuals.online logo
manuals.online logoBrands
  • About & Mission
  • Contact us
  • Privacy Policy
  • Terms and Conditions

Copyright 2025 Manuals.Online. All Rights Reserved.