4/4
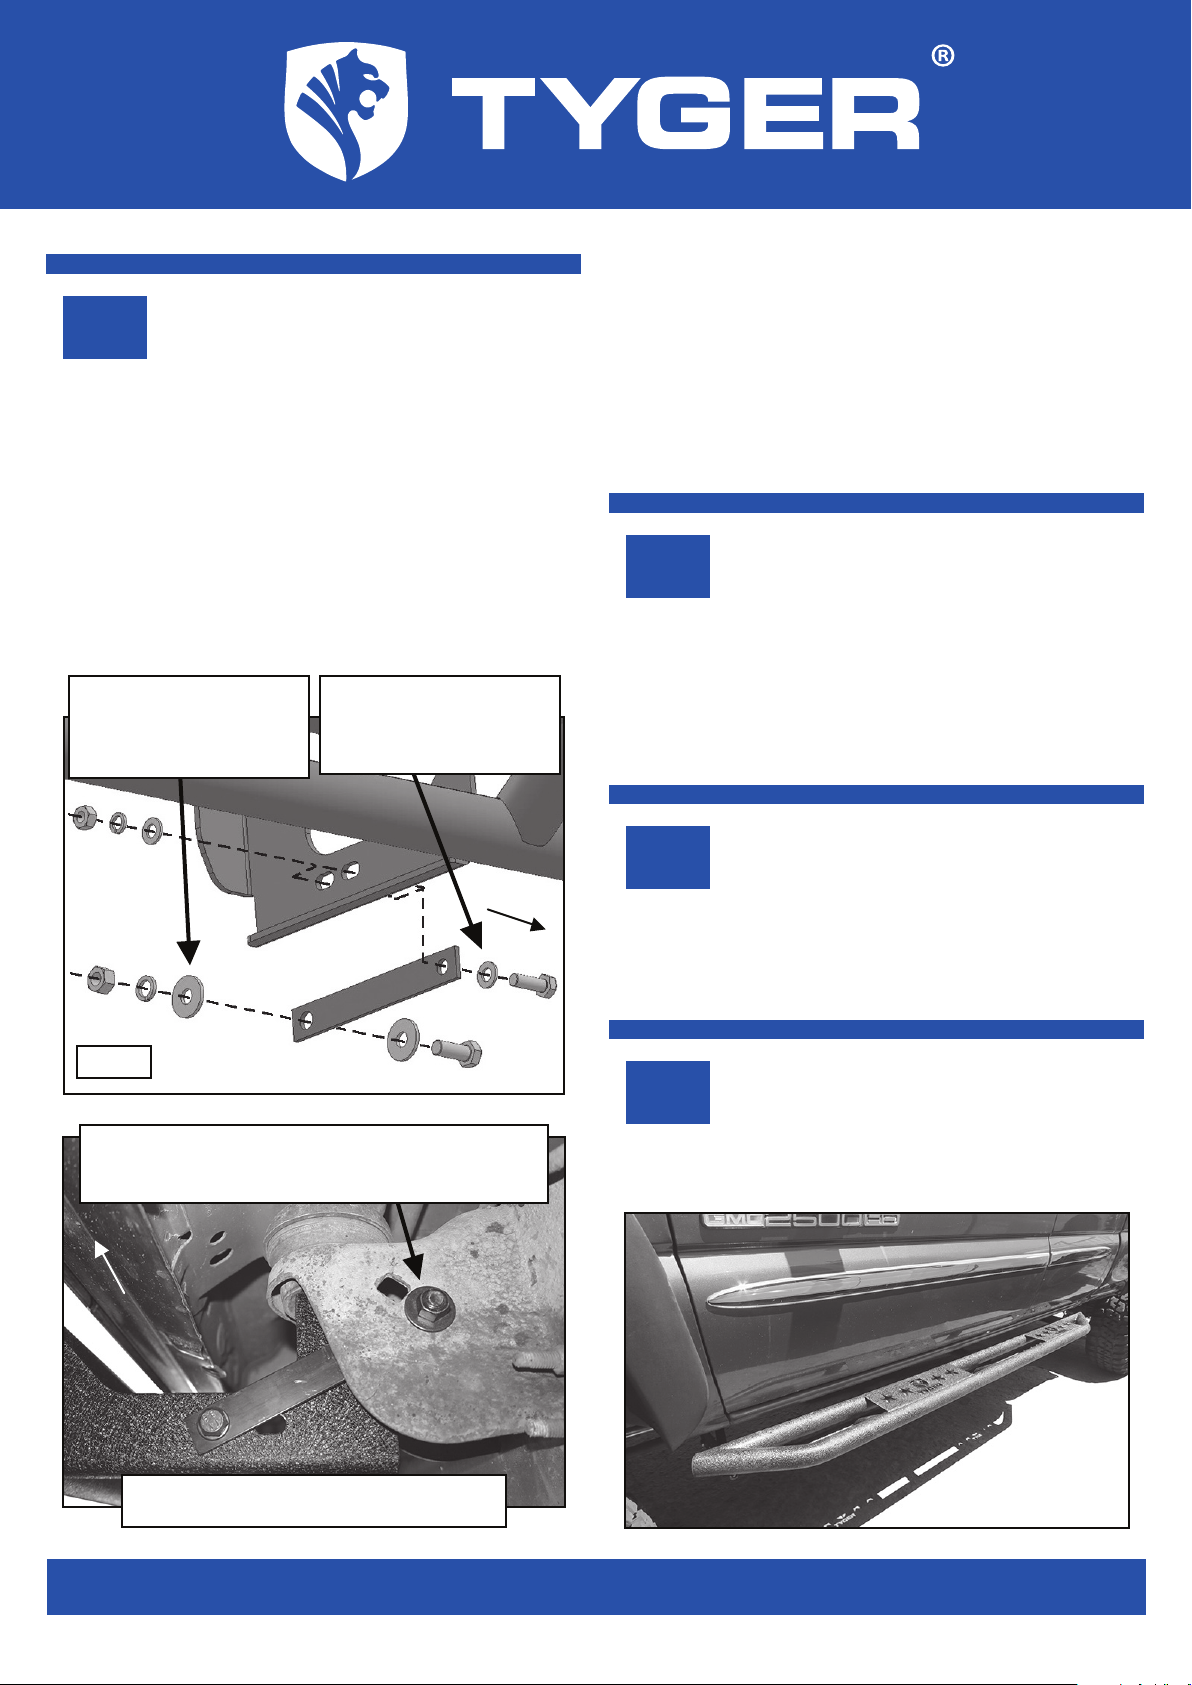
Move to the Center Mounting Bracket. Select (1)
Center Support Bracket-note the two different sizes of
mounting holes in the Bracket, (Fig 10). Slide the end
of the Center Support Bracket with the larger mount-
ing hole between the factory body mount and the
Center Mounting Bracket, (Fig 11). Attach the Support
Bracket to the factory hole or slot in the body mount
using the included (1) 12mm x 30mm Hex Bolt, (2)
12mm Flat Washers, (1) 12mm Lock Washer and (1)
12mm Hex Nut, (Fig 10 & 11).
STEP 6
Attach the opposite or outer end of the Support
Bracket to either slot in the Center Bracket with (1)
10mm x 30mm Hex Bolt, (2) 10mm Flat Washers, (1)
10mm Lock Washer and (1) 10mm Hex Nut, (Fig 10 &
11). Do not tighten at this time.
STEP 7
Level and adjust the TYGER Armor and tighten all
hardware. Repeat Steps 2 -8 for driver/left Side Armor
installation.
STEP 8
Do periodic inspections to the installation to make
sure that all hardware is secure and tight.
STEP 9
10mm x 30mm Hex Bolt
(2) 10mm Flat Washers
10mm Lock Washer
10mm Hex Nut
12mm x 30mm Hex Bolt
(2) 12mm Flat Washers
12mm Lock Washer
12mm Hex Nut
Front
Fig 10
Complete Installation
IMPORTANT: There are multiple slots in the Bracket to
allow for several models/years of vehicles. Choose a
mounting point for the Support Bracket that cannot
come in contact with brake cables or wiring. Do not
tighten hardware at this time.
NOTE: Larger hole on the Center Support Bracket
attaches to inside of center body mount, (Fig 11).
(Fig 11) Example of 1500 model Center
Support Bracket Installation
Front
IMPORTANT: Models may be equipped with
factory round holes, square holes or long slots.
Adjust installation as required for proper fit
Customer Support: www.TygerAuto.com/Contact