manuals.online logo
Brands
  1. Home
  2. •
  3. Brands
  4. •
  5. Tyger
  6. •
  7. Automobile Accessories
  8. •
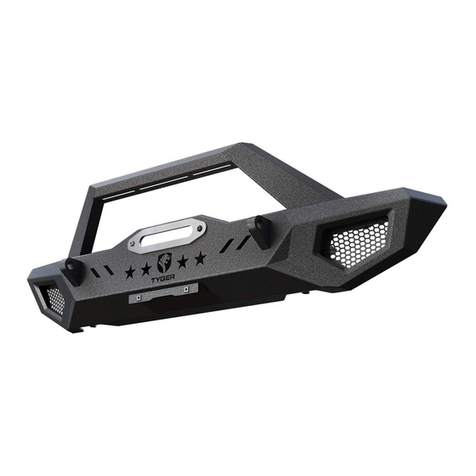
  9. Tyger TG-BP6TTG-BP6T80568 User manual

Tyger TG-BP6TTG-BP6T80568 User manual

1/7
Customer Support: www.TygerAuto.com/Contact
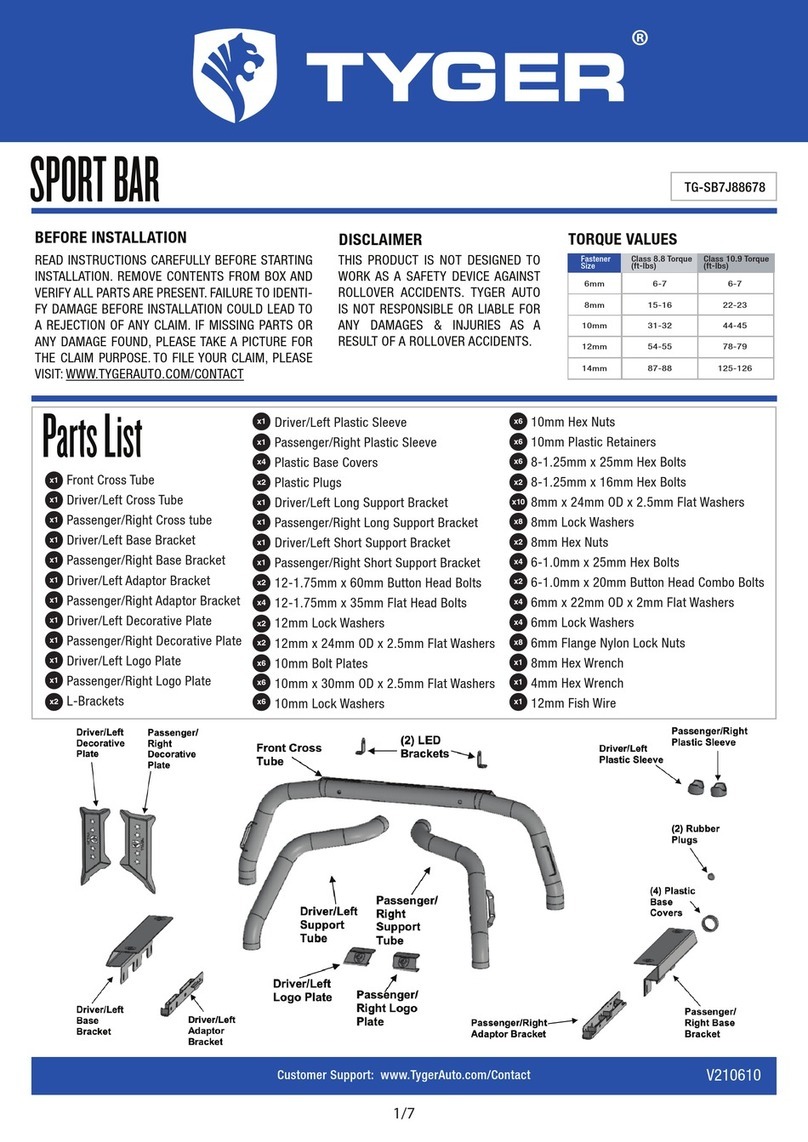
Parts List Front Bumper
Light Hoop
Driver/Left Mounting Bracket
Passenger/Right Mounting Bracket
Driver/Left Support Bracket
Passenger/Right Support Bracket
L-Brackets
License Plate Bracket
License Plate Plugs
10-1.5mm x 35mm Hex Bolts
10mm x 34mm x 3mm Flat Washers
x1
x1
x1
x1
x1
x1
x2
x2
x10
x20
x1
10mm Lock Washers
10mm Hex Nuts
8mm-1.25mm x 25mm Button Head Bolts
8-1.25mm x 16mm Hex Bolts
8mm x 28mm x 3mm Large Flat Washers
8mm x 24mm x 2mm Small Flat Washers
8mm Lock Washers
8mm Hex Nuts
6-1.0mm x 20mm Button Head Bolts
6mm x 18mm x 1.6mm Flat Washers
6mm Nylon Lock Nuts
x1
x1
x1
x1
x1
x1
x2
x2
x10
x20
x1
5mm Hex Wrench
4mm Hex Wrench
x1
x1
TG-BP6T80568
BEFORE INSTALLATION
READ INSTRUCTIONS CAREFULLY BEFORE STARTING
INSTALLATION. REMOVE CONTENTS FROM BOX AND
VERIFY ALL PARTS ARE PRESENT. FAILURE TO IDENTI-
FY DAMAGE BEFORE INSTALLATION COULD LEAD TO A
REJECTION OF ANY CLAIM. IF MISSING PARTS OR ANY
DAMAGE FOUND, PLEASE TAKE A PICTURE FOR THE
CLAIM PURPOSE. TO FILE YOUR CLAIM, PLEASE VISIT:
WWW.TYGERAUTO.COM/CONTACT
TORQUE VALUES
6mm
8mm
10mm
12mm
6-7
15-16
31-32
54-55
6-7
22-23
44-45
78-79
14mm 87-88 125-126
Class 10.9 Torque (ft-lbs)
Class 8.8 Torque (ft-lbs)
Fastener Size
FRONT BUMPER
Passenger/Right
Support Bracket
Passenger/Right
Mounting Bracket
Driver/Left
Mounting Bracket
License Plate Bracket (2) License Plate Plugs
(2) L-Brackets
Front Bumper
Light Hoop
Driver/Left
Support Bracket
V200914
2/7
Customer Support: www.TygerAuto.com/Contact
Move to the Passenger/Right wheel opening. Remove the
hardware attaching the plastic cover to the back and bottom of
the outer end of the front bumper, (Figs 1 & 2). Next, remove the
plastic clip attaching the cover to the side of the frame and
remove the cover, (Fig 3).
STEP 1
Repeat STEP 1 to remove the plastic covers from the Driver/Left
side of the vehicle.
STEP 2
On models with factory fog lights and/or bumper mounted
sensors, unplug the harness leading to the front bumper, (Fig 4).
NOTE: Fog lights and sensors will not be reinstalled.
STEP 3
PROCEDURE:
REMOVE CONTENTS FROM BOX. VERIFY ALL PARTS ARE PRESENT.
READ INSTRUCTIONS CAREFULLY BEFORE STARTING INSTALLATION.
BUMPER IS HEAVY, ASSISTANCE IS HIGHLY RECOMMENDED TO AVOID
POSSIBLE INJURY OR DAMAGE TO THE VEHICLE.
INSTALLATION IS NOT COMPATIBLE WITH LASER CONTROLLED
CRUISE CONTROL SYSTEMS.
WARNING! Do not crawl under bumper unless the bumper is
properly supported on blocks or stands or the bumper may fall.
(Fig 1) Remove hardware attaching plastic
cover to back of bumper (arrows)
(Fig 4) Disconnect fog lights and move
wiring harness away from bumper (arrow)
(Fig 2) Remove hardware attaching plastic
cover to bottom of bumper (arrows)
(Fig 3) Remove clip attaching plastic
cover to side of frame (arrow)
3/7
Customer Support: www.TygerAuto.com/Contact
Remove the license plate. Remove hardware attaching the plastic
cover on bottom of bumper, (Fig 5). Next, temporarily remove both
tow hooks, (if equipped).
STEP 4
Place blocks or jack stands under the front bumper to support it
during mounting bolt removal. Once the bumper has been
supported, remove the factory hex nuts attaching the inner
bumper bracket to the end of the frame, (Fig 6).
WARNING! Assistance is required to hold the bumper in place
during hardware removal to prevent the bumper from falling.
STEP 5
With assistance, remove the bumper and move to a flat stable
surface, (Fig 7).
STEP 6
Front
(Fig 5) Remove hardware attaching plastic cover
on bottom of bumper to cross member (arrows)
Remove both tow hooks
(Fig 6) Remove hex nuts attaching bumper
brackets to end of frame. Passenger side
bumper bracket pictured from below
(Fig 7) Driver/Left mounting location
4/7
Customer Support: www.TygerAuto.com/Contact
Select Driver/Left Mounting Bracket. Slide the Bracket onto the
(4) factory studs on the mounting plate at the end of the frame.
Attach the Mounting Bracket with (4) factory hex nuts and (4)
8mm x 28mm x 3mm Large Flat Washers, (Figs 8 & 9). DO NOT
tighten hardware at this time.
STEP 7
Next, select the Driver/Left Support Bracket. Attach the Support
Bracket to the bottom of the Mounting Bracket with (2) 10mm
Hex Bolts, (4) 10mm Flat Washers, (2) 10mm Lock Washers and
(2) 10mm Hex Nuts, (Figs 10 & 11). Leave hardware loose at this
time. Reuse the factory tow hook hardware to attach the tow
hook to the bottom of the Support Bracket and frame.
STEP 8
(4) 8mm x 28mm
Large Flat Washers
(Fig 8) Attach the Driver/Left Mounting
Bracket. (Reuse the factory hex nuts)
(Fig 9) Driver/Left Mounting Bracket attached (Fig 11) Reuse tow hook bolts to attach
Support Bracket and tow hook to bottom
of frame (pictured without tow hook, optional)
(Fig 10) Attach Driver/Left Support Bracket
to the Mounting Bracket and frame
Front
Front
(2) 10mm Hex Bolts
(4) 10mm Flat Washers
(2) 10mm Lock Washers
(2) 10mm Hex Nuts
Reuse factory tow hook
bolts for the bottom of
the support bracket
Reuse factory tow hook
bolts for the bottom of
the support bracket
Hoop mounted bar style light, (light not included).
a. Select the (1) L-Bracket. Attach the Bracket to the bottom of
the Hoop with (1) 8mm x 25mm Button Head Bolt, (2) 8mm Flat
Washers, (1) 8mm Lock Washer and (1) 8mm Hex Nut, (Fig 13).
DO NOT tighten hardware at this time.
b. Repeat STEP 11a to attach (1) L-Bracket to the
Passenger/Right side of the Hoop.
c. Select light, (light not included). Attach light to L- Brackets with
(2) 8mm x 16mm Hex Bolts, (2) 8mm Lock Washers and (2) 8mm
x 24mm Small Flat Washers. Adjust the width of the Brackets to
the light and fully tighten bracket hardware, (Fig 14).
5/7
Customer Support: www.TygerAuto.com/Contact
Repeat STEPS 7 & 8 to attach the Passenger/Right Mounting and
Support Brackets and reinstall tow hook.
STEP 9
Determine if lights, (not included), will be installed at this time.
IMPORTANT: It may be easier to install lights before attaching the
Bumper to the vehicle
STEP 11
Unwrap the Bumper. Remove the plugs in the top of the bumper.
Select the Light Hoop. Attach the Hoop to the top of the Bumper
with (4) 8mm x 25mm Button Head Bolts, (8) 8mm x 24mm Small
Flat Washers, (4) 8mm Lock Washers and (4) 8mm Hex Nuts, (Fig
12). (Installation optional)
STEP 10
(Fig 12) Attach the Light Hoop
to the top of the bumper
(2) 8mm Button Head Bolts
(4) 8mm Small Flat Washers
(2) 8mm Lock Washers
(2) 8mm Hex Nuts
(Fig 13) Attach L-Bracket to the Light Hoop
8mm Button Head Bolt
(2) 8mm Small Flat Washers
8mm Lock Washer
8mm Hex Nut
(Fig 14) Attach Light to the L-Bracket
(light not included)
8mm Hex Bolt
8mm Lock Washer
8mm Small Flat Washer
Outer light installation (light not included).
a. Remove mesh panel in outer light location.
b. Attach lights (not included) to mounting tabs on back of the
Bumper, (Fig 15).
6/7
Customer Support: www.TygerAuto.com/Contact
Attach the Bumper to the outside of the Mounting Brackets with
(6) 10mm Hex Bolts, (12) 10mm Flat Washers, (6) 10mm Lock
Washers and (6) 10mm Hex Nuts, (Figs 16 & 17). DO NOT fully
tighten hardware at this time.
STEP 13
Attach the License Plate Bracket to the Bumper with (2) 6mm x
20mm Button Head Screws, (4) 6mm Flat Washers and (2) 6mm
Nylon Lock Nuts. Insert (2) Plastic Plugs into the square holes in
the Bracket. Reuse the factory screws to attach the license plate
to the plastic plugs, (Figs 18 & 19).
STEP 14
12. With assistance, position the Bumper up to the outside of the
Mounting Brackets. Temporarily support the weight of the
Bumper.
WARNING: To avoid possible injury or damage to the vehicle, do
not proceed until the Bumper is fully and safely supported.
STEP 12
(Fig 15) Remove Mesh Panel to
attach light, (light not included)
(Fig 17) Front Bumper attached
to Driver/Left Mounting Bracket
(Fig 16) Attach Bumper to outside of
the Driver/Left Mounting Bracket
(3) 10mm Hex Bolts
(6) 10mm Flat Washers
(3) 10mm Lock Washers
(3) 10mm Hex Nuts
Front
Front
7/7
Customer Support: www.TygerAuto.com/Contact
Level and adjust the Bumper and fully tighten all hardware.
STEP 15
Do periodic inspections to the installation to make sure that all
hardware is secure and tight.
STEP 16
(Fig 18) Attach License Plate
Bracket to Front Bumper
Front
(2) 6mm Button Head Bolts
(4) 6mm Flat Washers
(2) 6mm Nylon Lock Nuts
(Fig 19) Insert License Plate Plugs
into the License Plate Bracket
(2) Plastic Plugs

Other Tyger Automobile Accessories manuals

Tyger ARMOR TG-AM2F20098 User manual

Tyger

Tyger ARMOR TG-AM2F20098 User manual

Tyger T3 User manual

Tyger

Tyger T3 User manual

Tyger TG-BP9F80298 User manual

Tyger

Tyger TG-BP9F80298 User manual

Tyger TG-RK1B204B User manual

Tyger

Tyger TG-RK1B204B User manual

Tyger TG-BP9D80398 User manual

Tyger

Tyger TG-BP9D80398 User manual

Tyger STAR ARMOR TG-AM2C20108 User manual

Tyger

Tyger STAR ARMOR TG-AM2C20108 User manual

Tyger Guard TG-GD6C60047 User manual

Tyger

Tyger Guard TG-GD6C60047 User manual

Tyger STAR ARMOR TG-AM2D20608 User manual

Tyger

Tyger STAR ARMOR TG-AM2D20608 User manual

Tyger T1 User manual

Tyger

Tyger T1 User manual

Tyger Armor TG-AM2T20208 User manual

Tyger

Tyger Armor TG-AM2T20208 User manual

Tyger TG-BP6J85368 User manual

Tyger

Tyger TG-BP6J85368 User manual

Tyger STAR ARMOR TG-AM2C20218 User manual

Tyger

Tyger STAR ARMOR TG-AM2C20218 User manual

Tyger TG-SB7J88678 User manual

Tyger

Tyger TG-SB7J88678 User manual

Tyger TG-GD6D60078 User manual

Tyger

Tyger TG-GD6D60078 User manual

Popular Automobile Accessories manuals by other brands

WABCO TP19108 installation guide

WABCO

WABCO TP19108 installation guide

Curt Group 60638 installation manual

Curt Group

Curt Group 60638 installation manual

Axxess AXDSPX-GL9 installation instructions

Axxess

Axxess AXDSPX-GL9 installation instructions

Bestop 42503 installation instructions

Bestop

Bestop 42503 installation instructions

APS Auto Parts Specialist IA06SAG5B installation instructions

APS Auto Parts Specialist

APS Auto Parts Specialist IA06SAG5B installation instructions

Prime Design AR1930 manual

Prime Design

Prime Design AR1930 manual

K&K M7500 manual

K&K

K&K M7500 manual

STO N SHO SNS 261 Installation procedures

STO N SHO

STO N SHO SNS 261 Installation procedures

Directed DS4 Plus FORD12 installation guide

Directed

Directed DS4 Plus FORD12 installation guide

ProClip 539894 quick start guide

ProClip

ProClip 539894 quick start guide

AVS Ventvisor installation instructions

AVS

AVS Ventvisor installation instructions

TOP VEHICLE TECH GRKNS01 installation manual

TOP VEHICLE TECH

TOP VEHICLE TECH GRKNS01 installation manual

DV8 OFFROAD SPBR-01 installation manual

DV8 OFFROAD

DV8 OFFROAD SPBR-01 installation manual

ST M95040-125 user manual

ST

ST M95040-125 user manual

Schartec CR 4 manual

Schartec

Schartec CR 4 manual

Bracketron MVM-35-05 installation manual

Bracketron

Bracketron MVM-35-05 installation manual

Prestigio PCCRA1 manual

Prestigio

Prestigio PCCRA1 manual

Verbatim FWC-02 quick start guide

Verbatim

Verbatim FWC-02 quick start guide

manuals.online logo
manuals.online logoBrands
  • About & Mission
  • Contact us
  • Privacy Policy
  • Terms and Conditions

Copyright 2025 Manuals.Online. All Rights Reserved.