manuals.online logo
Brands
  1. Home
  2. •
  3. Brands
  4. •
  5. U-Line
  6. •
  7. Dispenser
  8. •
  9. U-Line Econodot H-2930 User manual

U-Line Econodot H-2930 User manual

Other U-Line Dispenser manuals

U-Line RUBBERMAID H-1019 User manual

U-Line

U-Line RUBBERMAID H-1019 User manual

U-Line TORK MATIC H-9952 User manual

U-Line

U-Line TORK MATIC H-9952 User manual

U-Line SLIMFOLD H-4701 User manual

U-Line

U-Line SLIMFOLD H-4701 User manual

U-Line UCDE215 Installation manual

U-Line

U-Line UCDE215 Installation manual

U-Line TORK H-7177 User manual

U-Line

U-Line TORK H-7177 User manual

U-Line H-1119 User manual

U-Line

U-Line H-1119 User manual

U-Line CDE224C User manual

U-Line

U-Line CDE224C User manual

U-Line H-10657 User manual

U-Line

U-Line H-10657 User manual

U-Line H-3415 User manual

U-Line

U-Line H-3415 User manual

U-Line H-2895 User manual

U-Line

U-Line H-2895 User manual

U-Line H-801 User manual

U-Line

U-Line H-801 User manual

U-Line TORK XPRESS H-1595 Service manual

U-Line

U-Line TORK XPRESS H-1595 Service manual

U-Line TORK H-7858 User manual

U-Line

U-Line TORK H-7858 User manual

U-Line TORK H-9344 User manual

U-Line

U-Line TORK H-9344 User manual

U-Line H-9953 User manual

U-Line

U-Line H-9953 User manual

U-Line SOFPULL H-2861 User manual

U-Line

U-Line SOFPULL H-2861 User manual

U-Line H-6067 User manual

U-Line

U-Line H-6067 User manual

U-Line H-878 User manual

U-Line

U-Line H-878 User manual

U-Line TORK XPRESS H-4450 User manual

U-Line

U-Line TORK XPRESS H-4450 User manual

U-Line CDE215H User manual

U-Line

U-Line CDE215H User manual

U-Line H-1019 User manual

U-Line

U-Line H-1019 User manual

U-Line H-1713 User manual

U-Line

U-Line H-1713 User manual

U-Line H-2546 User manual

U-Line

U-Line H-2546 User manual

U-Line BSM-22P User manual

U-Line

U-Line BSM-22P User manual

Popular Dispenser manuals by other brands

BOWMAN CL003-0111 manual

BOWMAN

BOWMAN CL003-0111 manual

SIKA Power Cure operating instructions

SIKA

SIKA Power Cure operating instructions

Silver King Majestic SK12MAJ Technical manual and replacement parts list

Silver King

Silver King Majestic SK12MAJ Technical manual and replacement parts list

Franke F3Dn Twin Service manual

Franke

Franke F3Dn Twin Service manual

HURAKAN HKN-MT1 manual

HURAKAN

HURAKAN HKN-MT1 manual

STIEBEL ELTRON UltraHot Plus Operation and installation instructions

STIEBEL ELTRON

STIEBEL ELTRON UltraHot Plus Operation and installation instructions

Bobrick B-828 troubleshooting guide

Bobrick

Bobrick B-828 troubleshooting guide

DAN DRYER 282 installation guide

DAN DRYER

DAN DRYER 282 installation guide

Essity Tork 473208 manual

Essity

Essity Tork 473208 manual

CBS SD300BU-88 COMPONENT MAINTENANCE MANUAL WITH ILLUSTRATED PARTS LIST

CBS

CBS SD300BU-88 COMPONENT MAINTENANCE MANUAL WITH ILLUSTRATED PARTS LIST

Sealey MK77 manual

Sealey

Sealey MK77 manual

Fluid Management Accutinter 1600 End user guide

Fluid Management

Fluid Management Accutinter 1600 End user guide

Franke DVS SD99-010 Installation and operating instructions

Franke

Franke DVS SD99-010 Installation and operating instructions

Graco Dispensit 1053-10C operation & maintenance

Graco

Graco Dispensit 1053-10C operation & maintenance

DPR SED02 user manual

DPR

DPR SED02 user manual

ITALTINTO i50 user manual

ITALTINTO

ITALTINTO i50 user manual

Coca-Cola FREESTYLE 9000 user guide

Coca-Cola

Coca-Cola FREESTYLE 9000 user guide

Hewi 805.06.150 Mounting instructions

Hewi

Hewi 805.06.150 Mounting instructions

manuals.online logo
manuals.online logoBrands
  • About & Mission
  • Contact us
  • Privacy Policy
  • Terms and Conditions

Copyright 2025 Manuals.Online. All Rights Reserved.

0314 IH-2930PAGE 1 OF 3
H-2930
ECONODOT®
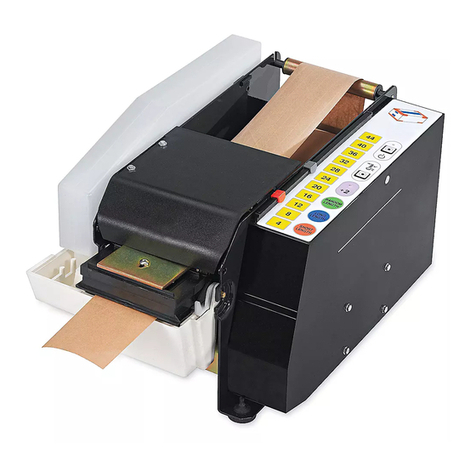
The EconoDot® is an economical bench-top machine
exclusively designed to dispense Glue Dots® Adhesive
Products in rolls of up to 8,000 adhesive patterns. These
instructions show the basic operation of the EconoDot
including set up, loading and operation.
For your safety it is important to read and
understand these instructions before using the
EconoDot. It is important to keep hands, hair,
clothing, jewelry and other loose objects away
from any moving parts during operation of this
machine.
The EconoDot is designed to exclusively dispense
patented Glue Dots Adhesive Products on registered
liner. Operating this machine outside of its intended
nature will result in poor results, damage to the machine
or compromised operator safety. Glue Dots International
will not be held liable for any damage to products or
persons resulting from improper use of the EconoDot.
IMPORTANT: Only persons who have read these
instructions and who are familiar with the
proper use of the EconoDot should operate this
machine.
All electrical work performed on the EconoDot
should be performed by a licensed electrician
or trained person supervised by a licensed
electrician.
Draw-in or squeezing can occur between the
motor-driven and clamp rollers.
SAFETY
MATERIALS Steel, Aluminum
DIMENSIONS 18.5"L x 10.5"H x 7.0"D
WEIGHT 10 lbs
NOISE 45db
POWER 100-240VAC
50-60Hz
0.5A
24VDC
CYCLES 1 adhesive pattern per second
CAPACITY Up to an 8,000-count roll on registered liner;
Maximum 9.25" roll diameter
TEMP Min 50˚F; Max 122˚F
SPECIFICATIONS
0314 IH-2930PAGE 2 OF 3
TO OPERATE THE ECONODOT
1. Plug the electrical cord into the back of the
machine and then into a wall outlet.
2. Load a roll of Glue Dots products and thread the
liner so a single adhesive pattern comes to rest on
the nose plate. (See Figure 2)
3. Turn on the power using the power button located
on the top of the control box.
4. Press the item to be adhered firmly against the
adhesive pattern resting on the nose plate, peeling
the item off the liner towards the supply reel. (See
Figure 1)
IMPORTANT: Lifting an adhesive pattern directly
up off the liner or in a direction away from the
supply reel may result in pulling excess liner
from the supply reel or tearing of the liner.
Avoid touching Glue Dots Adhesives as dust
and oils will compromise the bond.
5. When the item to be adhered is pressed to the
nose plate and covers the beam on the photo
sensing eye a signal is sent to the machine that the
adhesive pattern is being removed. Once the item
is removed from the nose plate, uncovering the
beam, the motor automatically advances the next
adhesive pattern.
IMPORTANT: The photo sensing eye's beam
must be covered then uncovered to ensure the
advancement of the Glue Dots Adhesives.
6. Repeat application instructions.
7. The EconoDot has a built-in
counter that displays the number
of adhesive patterns used. To reset
the counter push the reset button
located on top of the control box
and hold for 2 seconds.
TO LOAD THE ECONODOT
1. Loosen supply reel clamp knob located in front of
the supply reel plate. Remove the plate by turning it
clockwise and pulling it straight off the spindle. (See
Figure 2)
2. Load the Glue Dots roll onto the supply reel,
ensuring the liner runs in a clockwise direction. For
3/4" wide rolls, place the supply reel with pads
facing inward. For 1" wide rolls, place the supply reel
with pads facing outward.
3. Replace the supply reel plate. Tighten the supply
reel clamp knob.
4. Pull the liner over the first roller, under the second
roller, up through the U-channel sensor and over the
nose plate.
5. Press down on the peeler roller separation lever
located to the left and beneath the peeler rollers
in order to create space between the two rollers.
Thread the liner between the separated rollers.
6. Open the hinged door located on the side of the
shroud and continue to thread the liner downward
through the slit on the top of the shroud.
OPERATION AND LOADING INSTRUCTIONS
Nose
Plate
Figure 1
Reset
Control
Box
The EconoDot is designed to automatically dispense
Glue Dots or Glue Lines®, one at a time. The EconoDot
can dispense stock 1/4", 3/8" and 1/2" diameter Glue
Dots in all standard tack levels and profiles. It can also
dispense 1" Glue Lines and other custom products which
fall within the registration marks. No programming is
required with the EconoDot.
The EconoDot is not intended to apply other adhesive
types and should be operated indoors.
IMPORTANT: Altering the EconoDot and its
controls from its original manufactured state,
nullifies its CE standards compatibility.
IMPORTANT: Before starting any job, it is
important you test various Glue Dots to
determine the proper adhesive pattern, size,
tack level and profile. Product samples for
testing can be obtained by calling a ULINE
Parts Specialist at 1-800-295-5510.
OPERATION
0314 IH-2930PAGE 3 OF 3
TO LOAD THE ECONODOT CONTINUED
7. Press down on the spring-loaded lever located
to the right of the motor-driven and clamp rollers
in order to create space between the two rollers.
Thread the liner between the two rollers. Release the
spring loaded lever so the motor-driven and clamp
rollers sandwich the liner. Close the door on the
shroud. (Shroud door must be closed to operate the
machine.)
8. Pull on the liner until a single adhesive pattern
comes to rest on the nose plate.
9. Spent liner should trail into a trash receptacle.
All maintenance and repairs should be performed
by a technical staff member such as a technician,
electrician, maintenance personnel or equivalent.
Maintenance performed by unqualified persons
nullifies the EconoDot warranty.
It is important to keep the sensors free from debris.
Malfunctions not addressed in the troubleshooting
section of these instructions can be directed to the
Repairs Department at ULINE.
The following chart outlines problems that could arise
while using the EconoDot. Malfunctions experienced
outside of the issues outlined below will need to be
addressed by an experienced, professional technician
or electrician.
MAINTENANCE/REPAIRS
TROUBLESHOOTING
OPERATING ISSUE CAUSES RECOMMENDATIONS
Motor doesn’t turn Too much tension on Adjust tension on
the Supply Reel Spindle;
Adhesive patterns built up on Peeler
Rollers.
Adjust tension accordingly
Peel adhesive patterns off the Peeler
Rollers
Liner advances more than
one adhesive pattern at a
time
Dirty registration sensor Clean
When the liner advances,
the adhesive pattern is not
centered on the nose plate
Improper registration Loosen the screws behind the sensor
and adjust accordingly.
π CHICAGO • ATLANTA • DALLAS • LOS ANGELES • MINNEAPOLIS • NYC/PHILA • SEATTLE • MEXICO • CANADA
1-800-295 -5510
uline.com
OPERATION AND LOADING INSTRUCTIONS CONTINUED
Nose Plate
U-Channel
Sensor
Supply Reel
Clamp Knob
Peeler Roller
Separation
Lever
Shroud with
Hinged Door
Spring-loaded
Lever
Supply
Reel
Plate
Figure 2