66250966 - V4.0 - 15/05/19
- 9 -
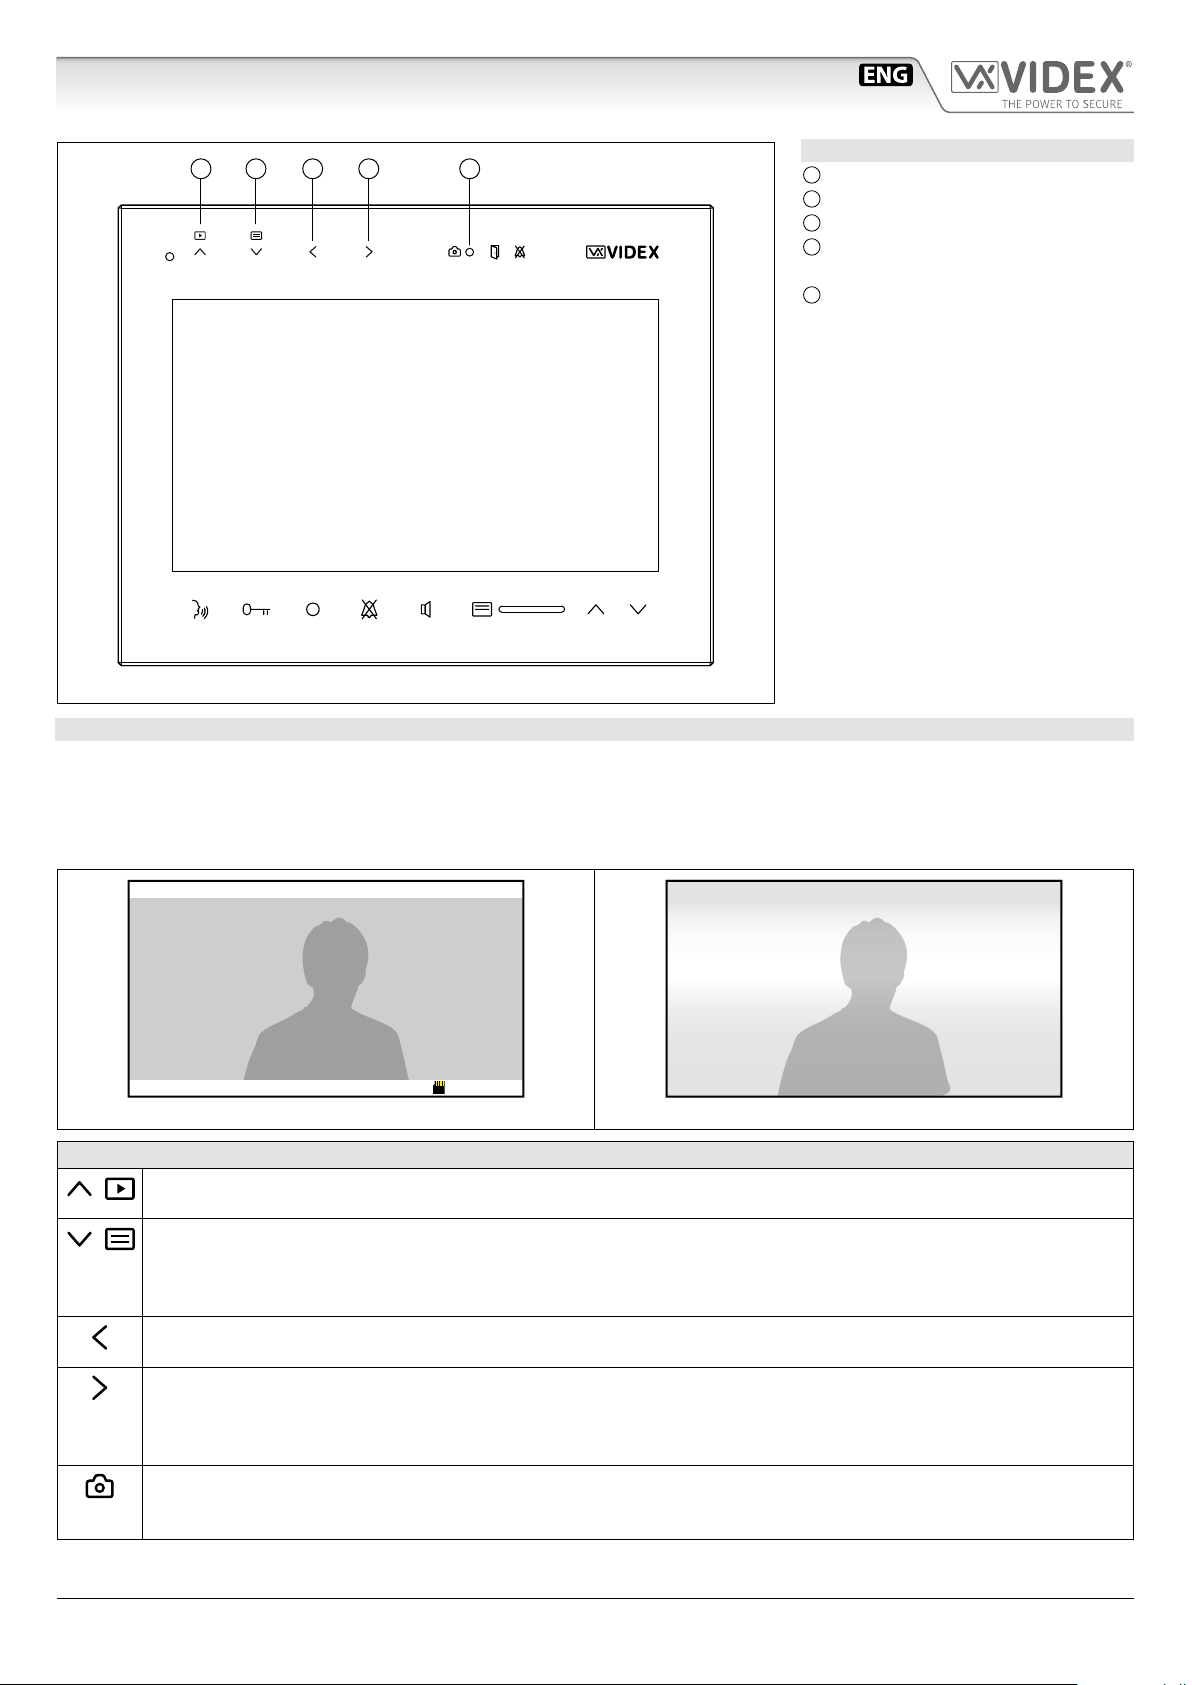
Serie Kristallo videocitofoni 7"
Serie Kristallo videocitofoni 7" - Manuale utente Memoria Video
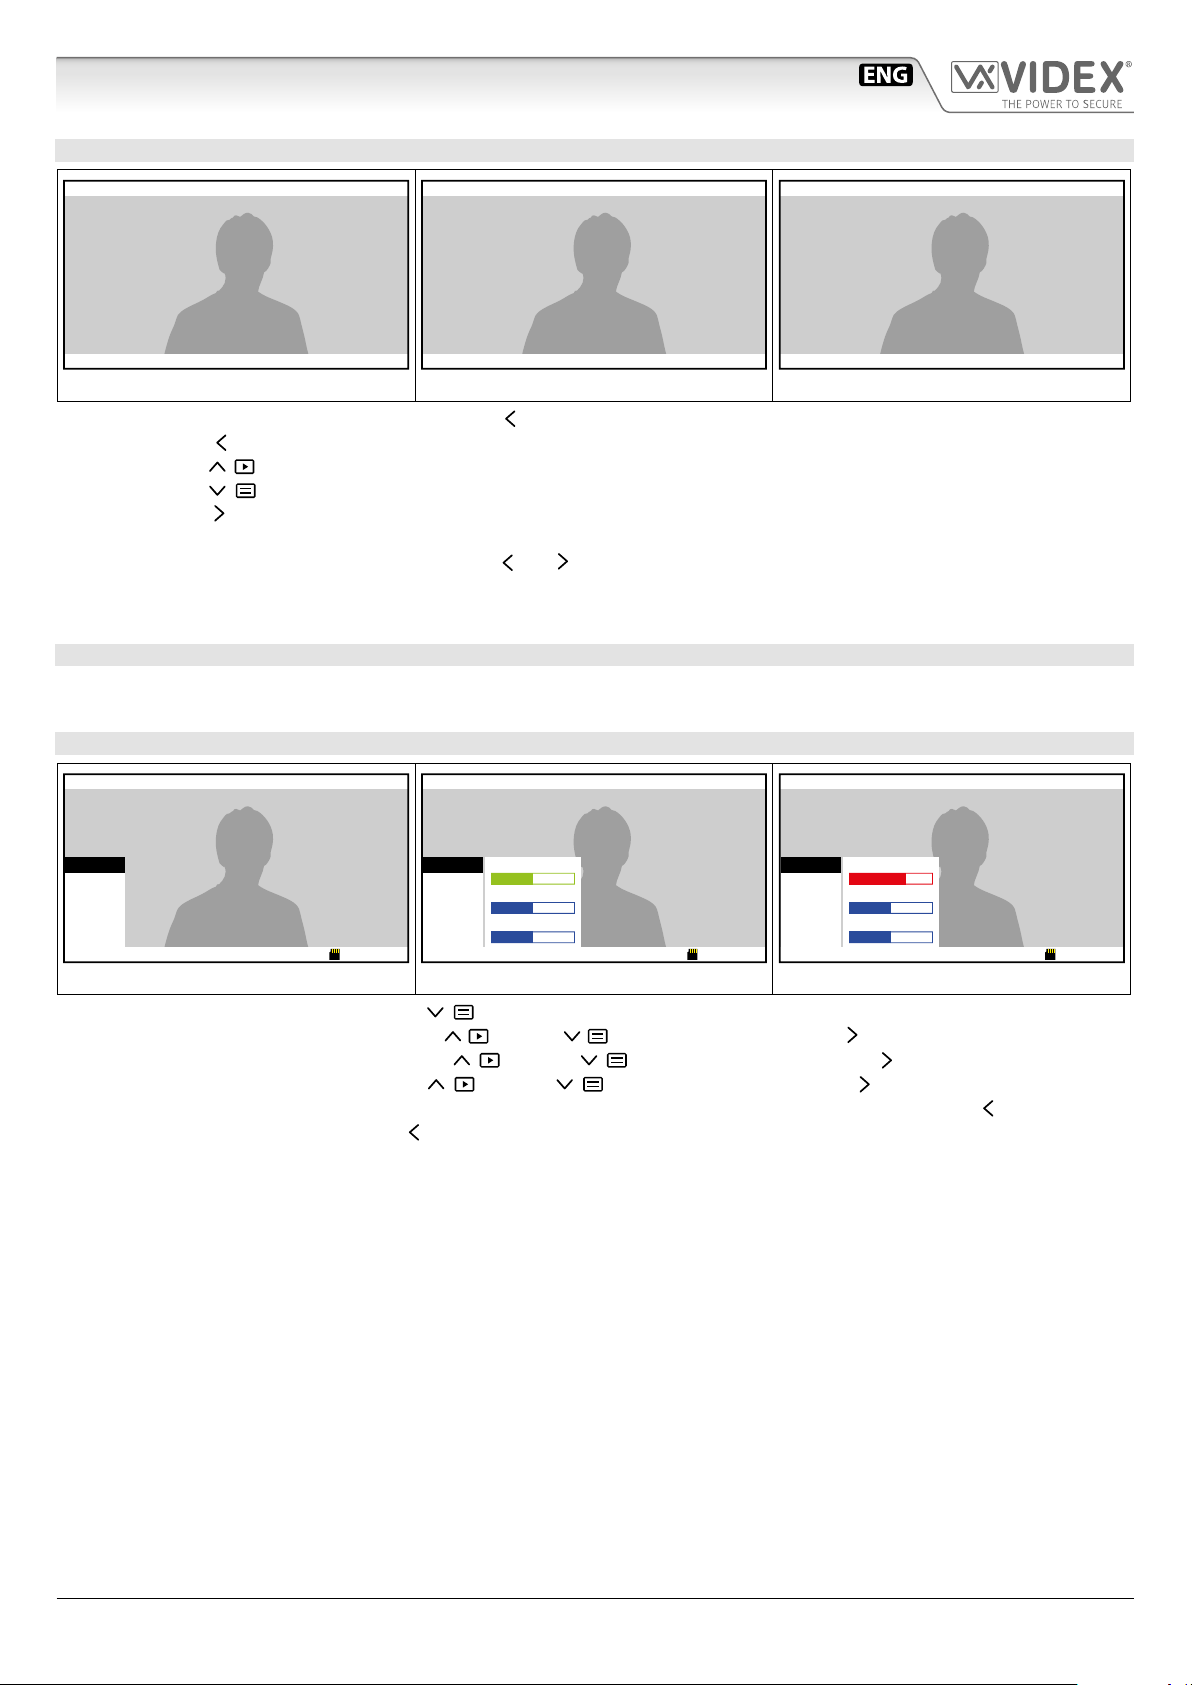
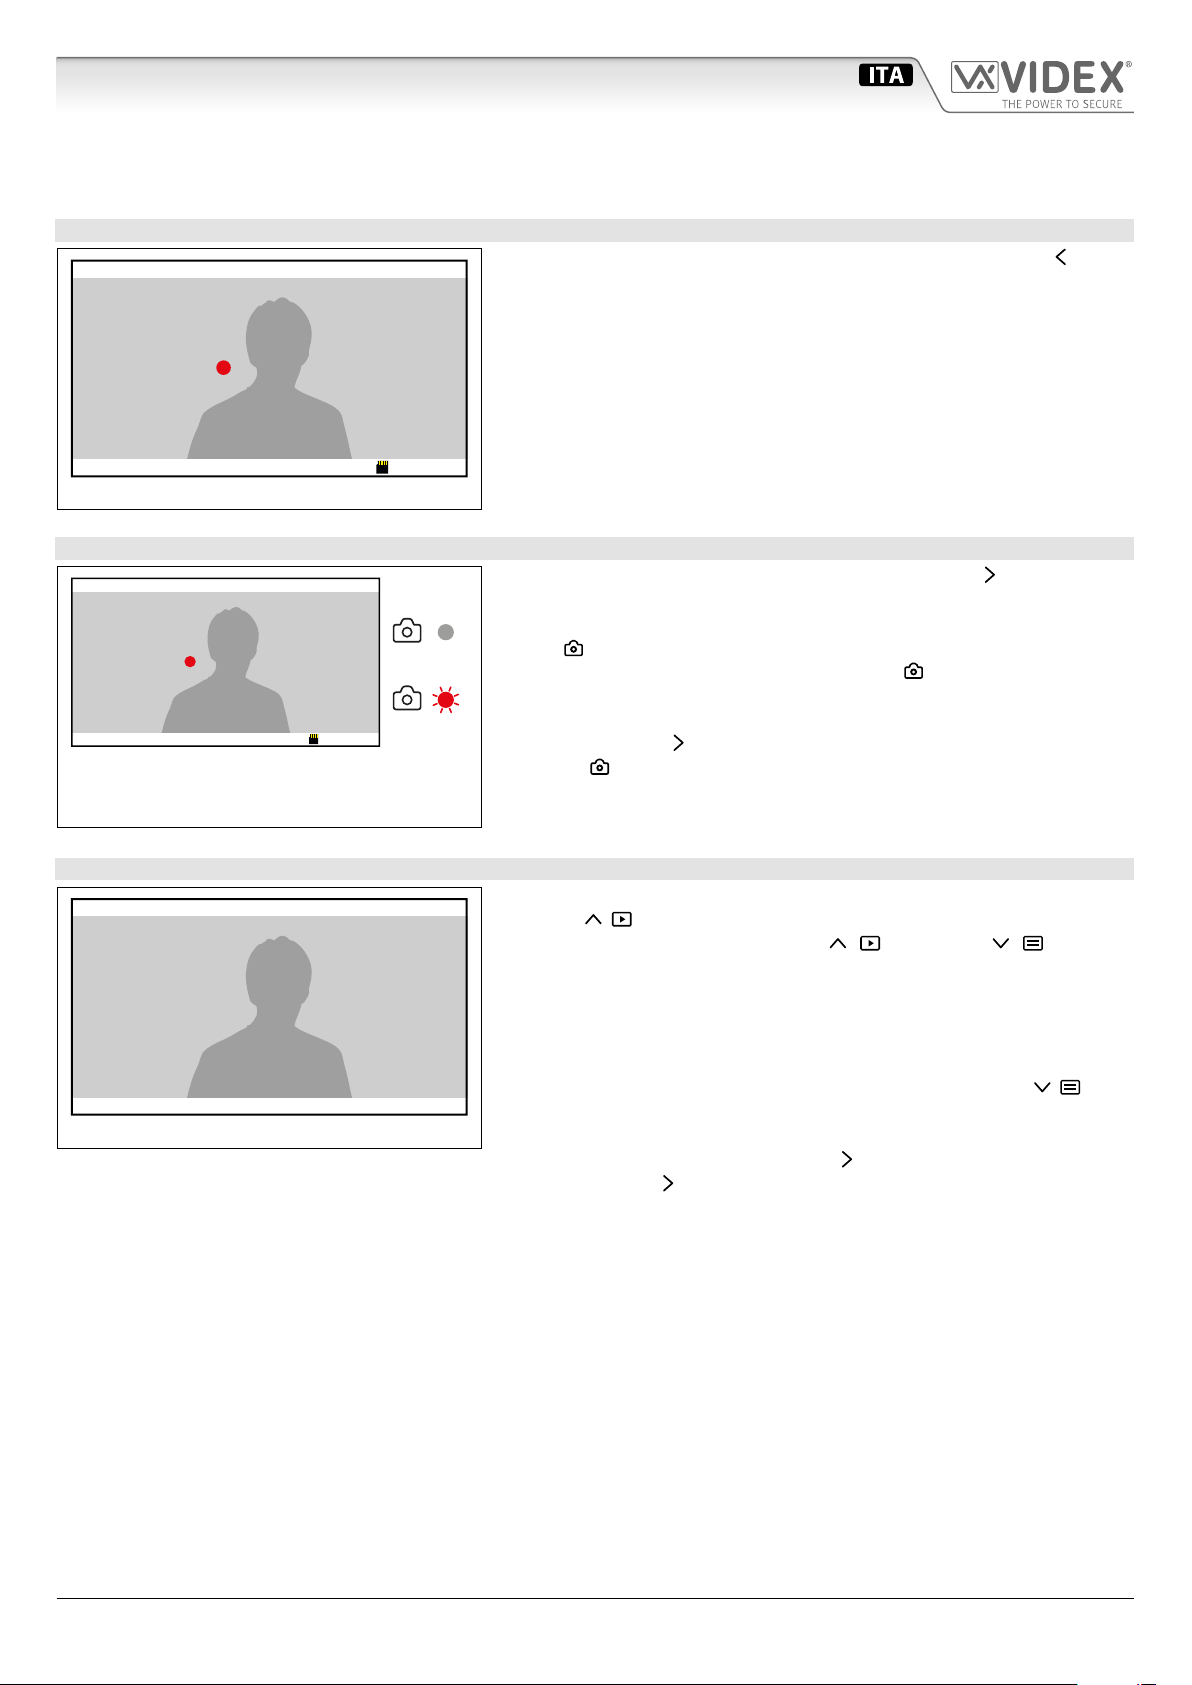
IMPOSTAZIONE DATA E ORA
Up Down EnterQuit
MENU
DISPLAY
MEMORY
TIME
EXIT
2018-03-07 09:46:45 ver2.05
Fig. 13
MENU
DISPLAY
MEMORY
TIME
EXIT
DAY 28
MONTH 07
YEAR 2016
HOUR 09
MINUTE 46
2018-03-07 09:46:45 ver2.05
Up Down EnterQuit
Fig. 14
MENU
DISPLAY
MEMORY
TIME
EXIT
DAY 28
MONTH 07
YEAR 2016
HOUR 09
MINUTE 46
2018-03-07 09:46:45 ver2.05
Up Down EnterQuit
Fig. 15
• Dallo stato di Fig. 3, premere il pulsante (Menu) per aprire il menù;
• Selezionare“TIME” tramite i pulsanti (Up) e (Down) quindi premere il pulsante (Enter) per aprire il sottomenù (Fig. 14);
• Selezionare il parametro da impostare tramite i pulsanti (Up) e (Down) quindi premere il pulsante (Enter) per mo-
dicare il parametro selezionato, modicare il valore tramite i pulsanti (Up) e (Down) quindi premere il pulsante
(Enter) per confermare e tornare alla selezione (Fig. 15);
• Per modicare altri parametri procedere nuovamente come descritto al precedente punto altrimenti premere il pulsante (Quit)
per uscire dal menù “TIME”;
• Per uscire dal menù, premere il pulsante (Quit).
UTILIZZO CON SCHEDA MEMORIA MICROSD
Quando si installa una scheda di memoria MicroSD nel videocitofono, in aggiunta alle altre funzioni descritte in precedenza, è possibile:
• Memorizzare più di 100 immagini (in base alla capacità della scheda MicroSD);
• Scegliere se registrare immagini sse o videoclip di 15 secondi;
• Copiare le immagini registrate nella memoria interna in quella della scheda MicroSD;
• Spostare le immagini o i videoclip registrati in altri dispositivi (PC, smartphone ecc.)
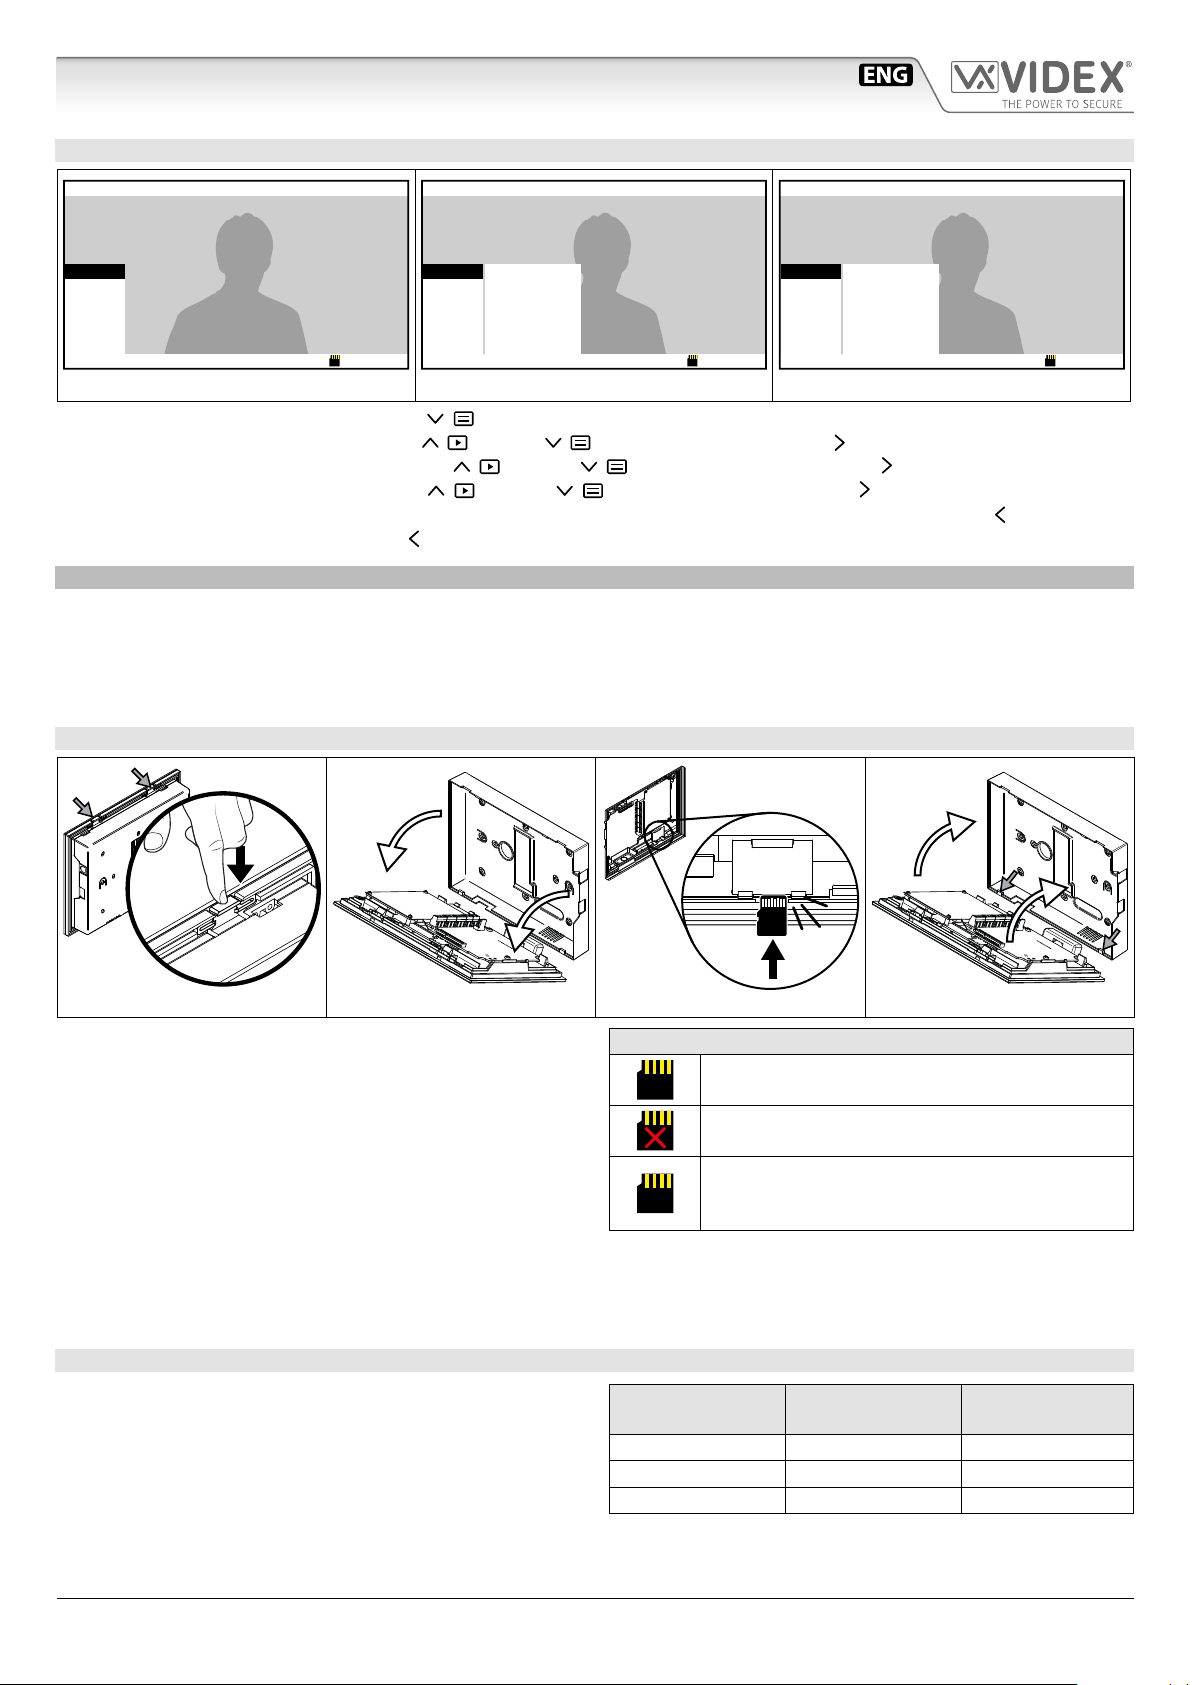
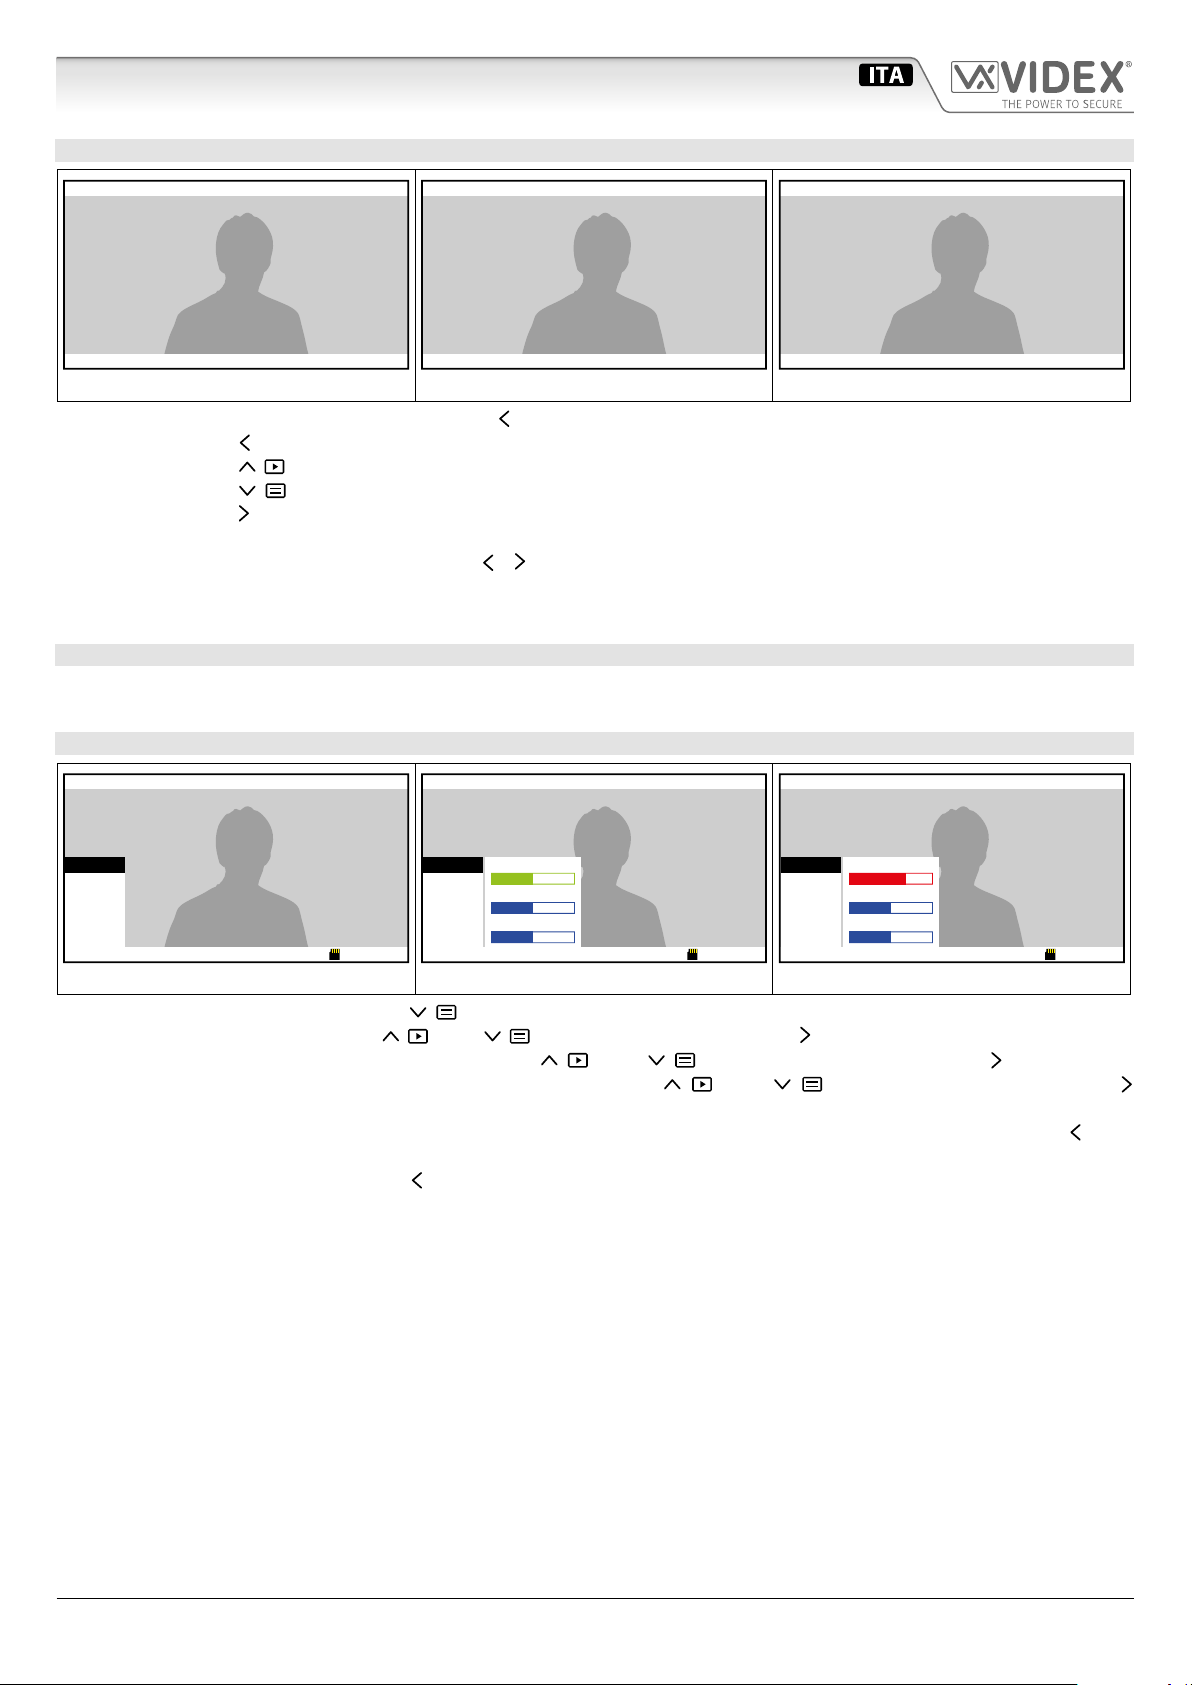
INSTALLARE UNA SCHEDA MEMORIA MICROSD CARD
Fig. 16 Fig. 17
Fig. 18 Fig. 19
• Scollegare l'alimentazione;
• Separare la base del videocitofono dalla parte frontale eserci-
tando una pressione sulle due clip indicate dalle frecce grigie
(Fig. 16) e contemporaneamente tirare delicatamente la parte
frontale nella direzione indicata dalle frecce bianche (Fig. 17).
N.B. L’operazione va ripetuta per entrambe le clip;
• Inserire la scheda MicroSD nella sede e premerla no a sentire
un "click" (Fig. 18);
• Per rimuovere la scheda, premerla nuovamente no a sentire
un "click" e slarla dalla sede;
• Fissare la parte frontale del videocitofono al coperchio poste-
riore come mostrato in Fig. 19: agganciare prima la parte in-
feriore quindi la parte superiore:
• Ripristinare l'alimentazione.
ICONA MICROSD NELLA BARRA DI STATO
Scheda installata correttamente.
La scheda è pronta per l'utilizzo.
Scheda non installata correttamente o non
presente nel dispositivo.
Controllare la scheda all'interno del dispositivo.
Errore formattazione.
La scheda deve essere formattata: vedi "Formattare
una scheda memoria MicroSD card" a"Formatta-
re una scheda memoria MicroSD card" on pag.
10
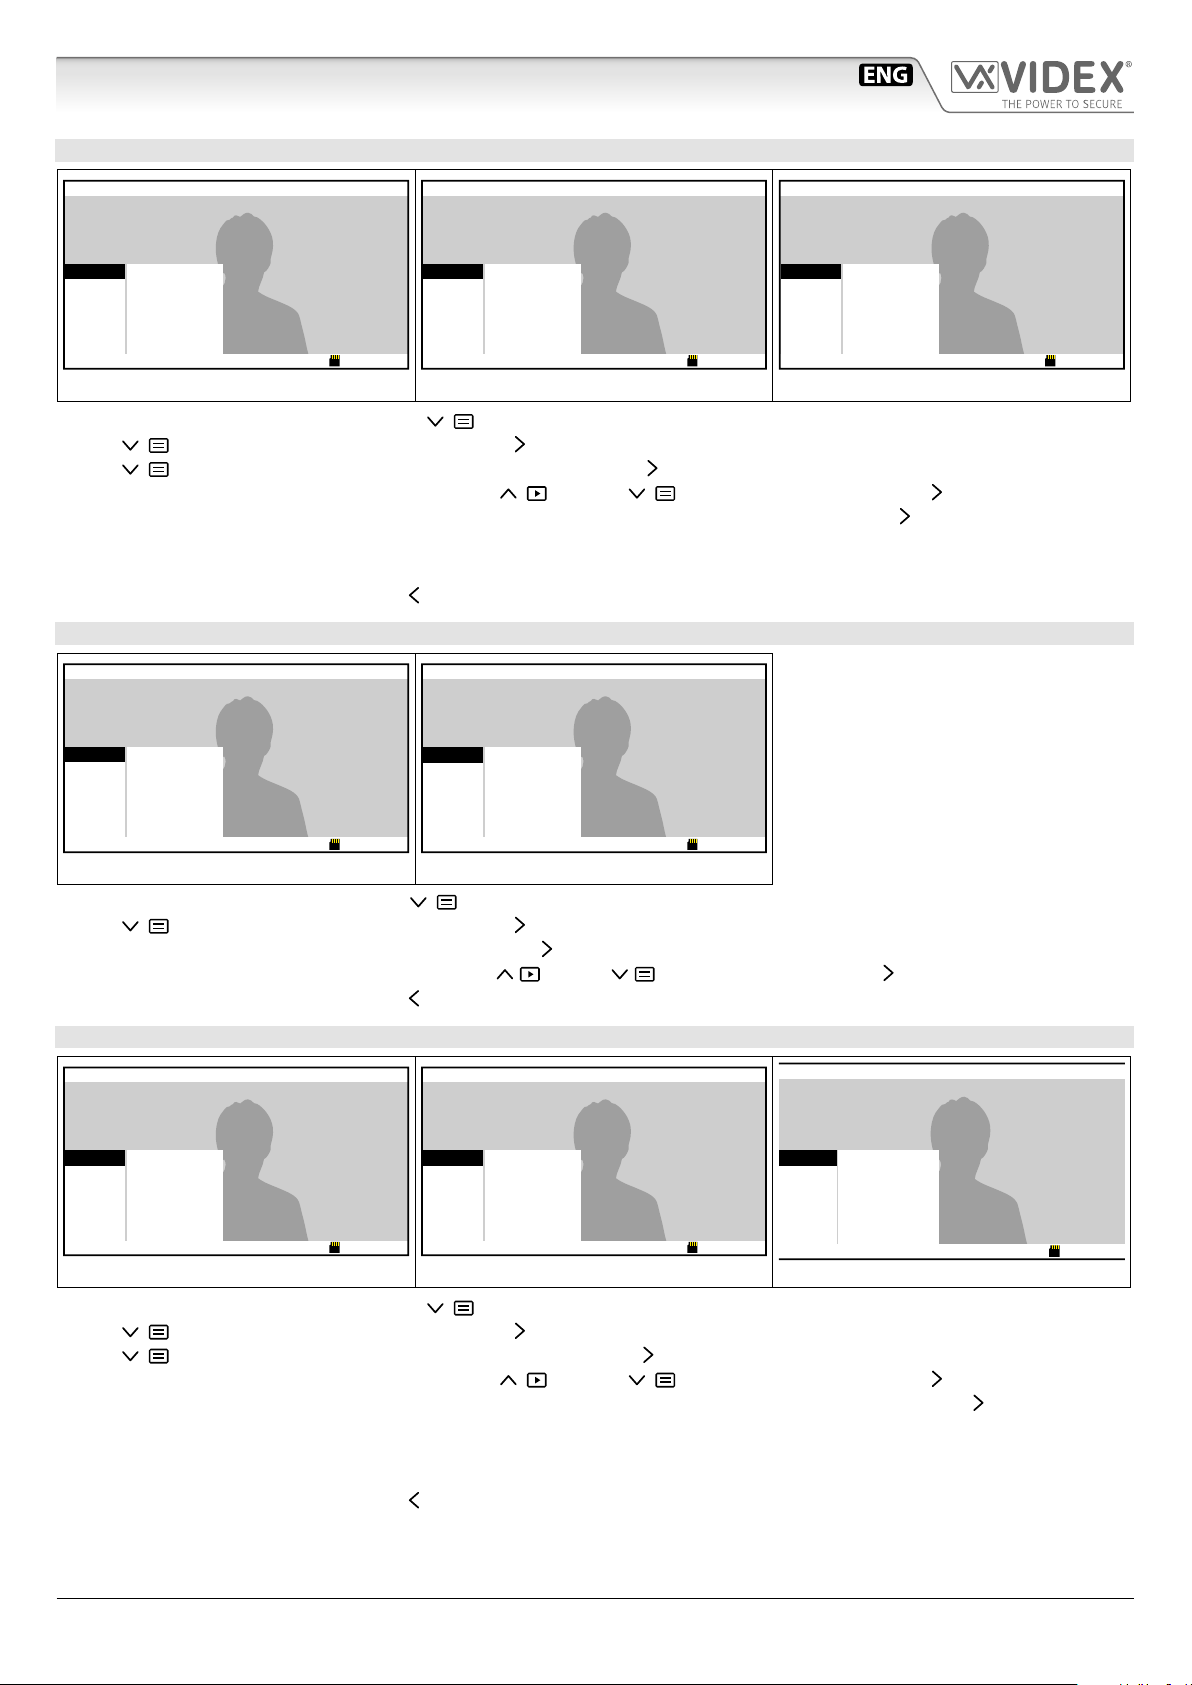
GESTIONE DELLA MEMORIA DELLA SCHEDA MICROSD
Quando la memoria della scheda MicroSD è piena, la nuova im-
magine/videoclip registrata cancellerà la più vecchia in memo-
ria (First-In-First-Out).
Capacità massima MicroSD consentita: 16GB.
Capacità MicroSD Immagini JPG Videoclips MJPEG
15 sec.
4GB 1024 128
8GB 2048 256
16GB 4096 512
Memoria videoSerie Kristallo 7" Manuale utente