manuals.online logo
Brands
  1. Home
  2. •
  3. Brands
  4. •
  5. Vimar
  6. •
  7. Intercom System
  8. •
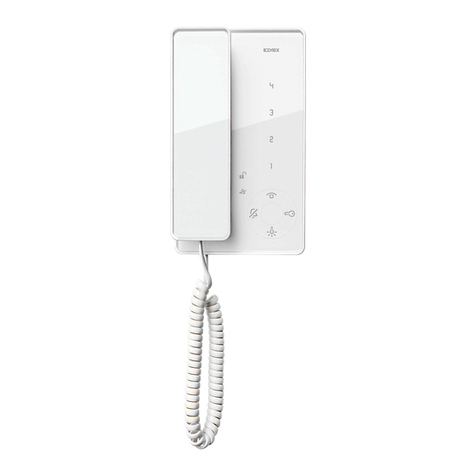
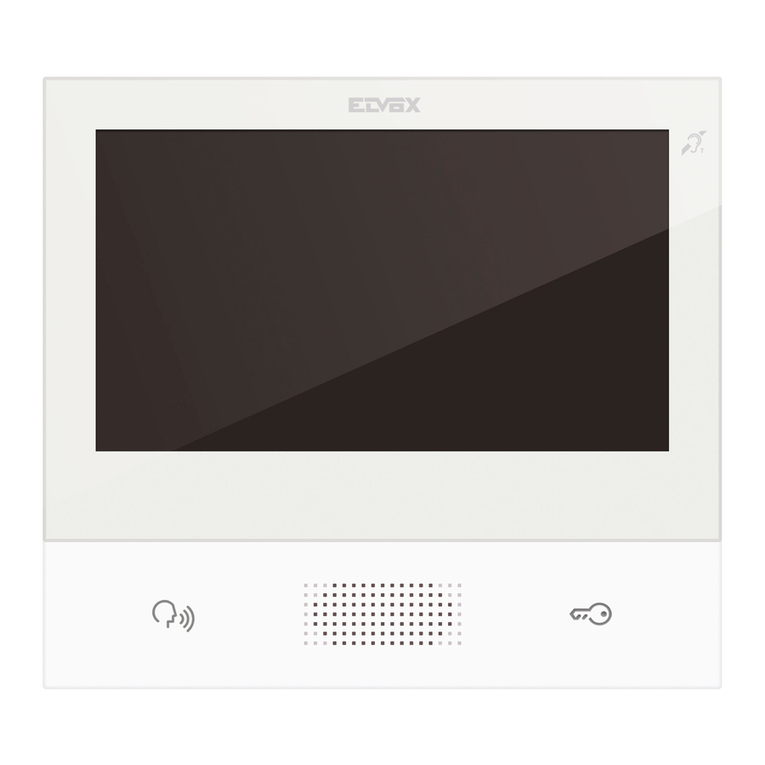
  9. Vimar ELVOX 40547 User manual

Vimar ELVOX 40547 User manual

Viale Vicenza, 14
36063 Marostica VI - Italy
www.vimar.com
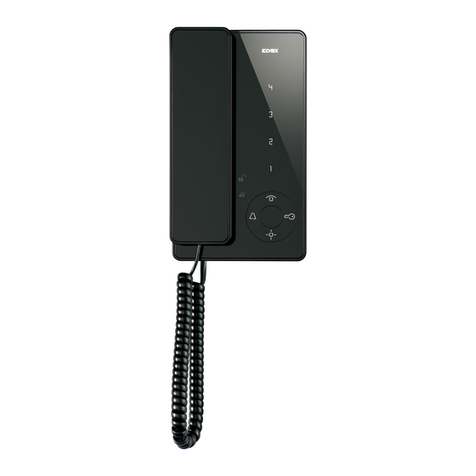
Voxie: 40547
49401680A0 03 2107
Foglio istruzioni multilingua - Multilanguage instructions sheet - Feuille d’instructions multilangues - Mehrsprachig-Gebrauchsinformation -
Hoja de instrucciones multilingüe - Folheto de instruções multilingue - Πολυγλωσσικό φύλλο οδηγιών -    
Pb
WWYY
1
2
Pb
WWYY
Pb
WWYY
Pb
WWYY
160/165 cm
120 cm
Nota: Un serraggio eccessivo può comportare imperfezioni nell’allineamento e nella funzionalità dei tasti.
Note: Excessive tightening can cause imperfections in the alignment and operation of the buttons.
Remarque : Ne pas serrer trop fort pour éviter de désaligner les touches et de compromettre leur fonctionnement.
Hinweis: Ein übermäßiger Anzug kann die einwandfreie Ausrichtung und Funktion der Tasten beeinträchtigen.
Nota: Un apriete excesivo puede causar imperfecciones en la alineación y en el funcionamiento de las teclas.
Nota: Um aperto excessivo pode originar imperfeições no alinhamento e na funcionalidade das teclas.
Σημείωση: Η υπερβολική σύσφιξη μπορεί να προκαλέσει εσφαλμένη ευθυγράμμιση και δυσλειτουργία των πλήκτρων.
.            :
Installations possibles :
• En saillie avec vis (comprises) et
goujons (non compris).
• Installation sur boîte :
- Boîte ronde (Vimar V71701)
- Boîte rectangulaire 3 modules
(Vimar V71303, V71703), pose
verticale.
- Boîte carrée standard
britannique.
• De table : avec accessoire base
de table 40598
Installationsmöglichkeiten:
• Aufputz-Installation mit Schrauben
(beigestellt) und Dübeln (nicht
beigestellt).
• Installation in Dose:
- Runde Dose (Vimar V71701)
- Rechteckige 3-Modul-Dose
(Vimar V71303, V71703) vertikal.
- Quadratische Dose British
Standard.
•Als Tischgerät: mit Tischzubehör
40598
Posibilidades de montaje:
• Montaje de superficie con tornillos
(suministrados) y tacos (no
incluidos).
• Montaje en caja:
- Caja redonda (Vimar V71701)
- Caja rectangular 3 módulos
(Vimar V71303, V71703) en
vertical.
- Caja cuadrada estándar británico.
• De sobremesa: con accesorio
base de sobremesa 40598
Possibilidades de instalação:
• Na parede com parafusos
(fornecidos) e buchas (não
incluídas).
• Instalação em caixa:
- Caixa circular (Vimar V71701)
- Caixa retangular de 3 módulos
(Vimar V71303, V71703) na
vertical.
- Caixa quadrada British standard.
• De mesa: com acessório base de
mesa 40598
Δυνατότητα εγκατάστασης:
• Επιτοίχια, με βίδες (παρέχονται)
και ούπα (δεν περιλαμβάνονται).
• Εγκατάσταση σε κουτί:
- Στρογγυλό κουτί (Vimar V71701)
- Ορθογώνιο κουτί 3 στοιχείων
(Vimar V71303, V71703)
κατακόρυφα.
- Τετράγωνο κουτί βρετανικού
προτύπου.
• Επιτραπέζια: με εξάρτημα
επιτραπέζιας βάσης 40598
: 
)  ()   
•
.(
:  •
(Vimar V71701)  
-
 3     -
(Vimar V71303  V71703)
. 
.    -
    : 
•
40598
Possibilità di installazione:
• A parete con viti (fornite in
dotazione) e tasselli (non inclusi).
• Installazione su scatola:
- Scatola circolare (Vimar V71701)
- Scatola rettangolare 3 moduli
(Vimar V71303, V71703) in
verticale.
- Scatola quadrata British standard.
• Da tavolo: con accessorio base da
tavolo 40598
Installation possibilities:
• Surface mounting with screws
(supplied) and wall plugs (not
included).
• Installation in mounting box:
- Round mounting box (Vimar
V71701)
- Vertical rectangular mounting box
with 3 modules (Vimar V71303,
V71703).
- British standard square mounting
box.
• Desktop mounting: with desktop
base accessory 40598
• Dati dimensionali
• Dimensional data
• Dimensions
• Maßangaben
• Medidas
• Dados dimensionais
• 
•
• Installazione
• Installation
• Installation
• Installation
• Montaje
• Instalação
• 
•
• Altezza consigliata salvo diversa normativa vigente.
• Recommended height, unless different regulations are specified.
• Hauteur recommandée sauf autre norme en vigueur.
• Empfohlene Höhe, falls die gesetzlichen Vorschriften nichts anderes
vorschreiben.
• Altura recomendada salvo normativa vigente diferente
• Altura recomendada, salvo normativa vigente em contrário.
• Συνιστώμενο ύψος εκτός εάν ισχύει διαφορετική νομοθεσία.
•.           
12A 2B
4
3
5
95
mm
146,6
mm
19,8
mm
Viale Vicenza, 14
36063 Marostica VI - Italy
www.vimar.com
Voxie: 40547
49401680A0 03 2107
Foglio istruzioni multilingua - Multilanguage instructions sheet - Feuille d’instructions multilangues - Mehrsprachig-Gebrauchsinformation -
Hoja de instrucciones multilingüe - Folheto de instruções multilingue - Πολυγλωσσικό φύλλο οδηγιών -    
• Vista frontale
• Front view
• Vue de face
• Frontansicht
• Vista frontal
• Vista frontal
• 
•
15
14
1
13
3
7
8
12
11
10
9
4
5
6
1 - Altoparlante.
2 - Microfono.
Tasti (funzioni di Default) e segnalazioni:
3 - Parla/Ascolta: attiva la comunicazione
audio; se premuto a riposo seguito dal
tasto serratura effettua la chiamata a
centralino.
4 - Segnalazione (LED bianco):
• conversazione in corso, acceso fisso;
• mute, lampeggiante alla pressione del
pulsante 2durante una conversazione.
• a riposo lampeggia dopo la pressione
del tasto parla/ascolta, in attesa del
tasto serratura per la chiamata a
centralino;
5 - Apertura Porta (Serratura): attiva la
serratura del posto esterno; a riposo
se segue il tasto parla/ascolta invia la
chiamata a centralino.
6 - Segnalazione (LED bianco):
• chiamata entrante, lampeggiante (0.5
s on 0.5 s off).
• porta aperta, acceso fisso.
• apertura automatica serratura attiva,
lampeggio breve (0.2 s on/ 4.8 s off).
• porta aperta e apertura automatica
serratura attiva, acceso fisso con
spegnimento breve (0.2 s off/4.8 s on).
7 - Attivazione ausiliaria (luce scale):
attiva il primo relè del sistema Due fili
(Aux 1).
8 - Indicatore Volume suoneria: Suoneria
esclusa / Livello 1 / Livello 2 / Livello 3.
9 - Segnalazione (LED rosso):
• Primo avvio, o ripristino
dell'alimentazione lampeggia per circa
15sec.
• Allerta, lampeggiante veloce (0.1 s on
0.1 s off).
• chiamata persa da centralino,
acceso fisso con spegnimento breve
(9.8 s on 0.2 s off).
10 -Pulsante 1: attiva il secondo relè del
sistema Due fili (69RH / 69PH).
11 - Pulsante 2:
• a riposo, chiamata intercomunicante
"Generale" di appartamento.
• In conversazione, Mute (esclude il
microfono del citofono, rimane attivo lo
speaker).
12 -Pulsante 3: F1 ultima targa chiamata.
13 -Pulsante 4: F2 ultima targa chiamata.
14 -Regolazione del volume delle
suonerie di chiamata su tre livelli più
esclusione. L'esclusione suoneria non
disattiva l'uscita CH.
15- Regolazione del volume di
conversazione su quattro livelli;(nota:
non c'è esclusione). La regolazione ha
effetto sul volume dell’altoparlante e non
sul microfono.
1 - Speaker.
2 - Microphone.
Buttons (Default functions) and signals:
3 - Talk/Listen: activates audio
communication; when pressed on stand-
by followed by the lock release button, it
calls the switchboard.
4 - Signalling (white LED):
• conversation in progress,
permanently lit.;
• mute, flashing when push button 2is
pressed during a conversation.
• on stand-by, it flashes after the talk/
listen button has been pressed pending
the lock release button to call the
switchboard;
5 - Door Opening (Lock): it activates
the outdoor station lock; on stand-by,
if followed by the talk/listen button, it
sends the call to the switchboard.
6 - Signalling (white LED):
• incoming call, flashing (0.5 s on 0.5
s off).
• door open, permanently lit.
• automatic lock release active, brief
flashing (0.2 s on/4.8 s off).
• door open and automatic lock
release active, permanently lit with
short power-off (0.2 s off/4.8 s on).
7 - Auxiliary activation (stair light): it
activates the first relay of the Due fili
system (Aux 1).
8 - Ringtone volume indicator: Ringtone
mute / Level 1 / Level 2 / Level 3.
9 - Signalling (red LED):
• First start-up, or when power is
restored, flashing for approximately 15
sec.
• Alert, rapid flashing (0.1 s on 0.1 s off).
• missed call from switchboard,
permanently lit with short power-off (9.8
s on 0.2 s off).
10 -Push button 1: it activates the second
relay of the Due fili system (69RH/
69PH). (*)
11 - Push button 2:
• On stand-by, "General" apartment
intercom call.
• During a conversation, Mute (excludes
the entryphone microphone, the speaker
remains active).
12 -Push button 3: F1 last entrance panel
called.
13 -Push button 4: F2 last entrance panel
called.
14 -Call ringtone volume control on three
levels plus muting. Ringtone muting
does not disable the CH output.
15- Talk volume control on four levels;
(N.B.: there is no muting). The
adjustment affects the speaker volume
and not the microphone.
2
1 - Haut-parleur.
2 - Microphone.
Touches (fonctions par défaut) et
signalisations :
3 - Parler/Écouter : valide la
communication audio ; en appuyant
dessus au repos suivi de la touche
gâche, elle effectue l'appel au standard.
4 - Signalisation (led blanche) :
• conversation en cours, allumée ;
• mute, clignote en appuyant sur le
poussoir 2en cours de conversation.
• au repos, clignote après avoir appuyé
sur la touche parler/écouter, en attente
de la touche gâche pour l'appel au
standard ;
5 - Ouverture Porte (gâche) : déclenche
la gâche du poste extérieur ; au repos,
après avoir appuyé sur la touche parler/
écouter, elle envoie l'appel au standard.
6 - Signalisation (led blanche) :
• appel entrant, clignotante (0,5 s on
0,5 s off).
• porte ouverte, allumée.
• ouverture automatique gâche
activée, clignotement bref (0,2 s on/
4,8 s off).
• porte ouverte et ouverture
automatique gâche activée, allumée
avec extinction brève (0,2 s off/4,8 s on).
7 - Activation auxiliaire (éclairage
escalier) : valide le premier relais du
système Due fili (Aux 1).
8 -
Indicateur du volume sonnerie :
Sonnerie exclue / Niveau 1 / Niveau 2 /
Niveau 3.
9 - Signalisation (Led rouge) :
• Premier allumage, ou remise sous
tension, clignote environ 15 secondes.
• Alerte, clignotement rapide (0,1 s on
0,1 s off).
• appel manqué depuis standard,
allumée avec extinction brève (9,8 s on
0,2 s off).
10 -Poussoir 1 : valide le deuxième relais du
système Due fili (69RH / 69PH).
11 - Poussoir 2 :
• au repos, appel intercommunicant «
Général » d’appartement.
• En conversation, Mute (silence) (exclut
le micro de l'interphone, le haut-parleur
reste actif).
12 -Poussoir 3 : F1 dernière platine appelée.
13 -Poussoir 4 : F2 dernière platine appelée.
14- Réglage du volume des sonneries
d’appel sur trois niveaux plus exclusion.
L'exclusion de la sonnerie ne désactive
pas la sortie CH.
15- Réglage du volume de conversation
sur quatre niveaux ; (remarque :
l'exclusion n'est pas disponible). Le
réglage concerne le volume du haut-
parleur et non pas celui du microphone.
1 - Lautsprecher.
2 - Mikrofon.
Tasten (Standardfunktionen) und Anzei-
gen:
3 - Sprechen/Hören: aktiviert die Audio-
kommunikation; ruft bei Drücken im
Ruhezustand und gefolgt von der Taste
Türöffner die Zentrale an.
4 - Anzeige (weiße LED):
• , erleuchtet;
• Mute, Blinken beim Drücken der Taste
2während eines Gesprächs.
• blinkt im Ruhezustand nach Drücken
der Taste Sprechen/Hören und wartet
auf die Taste Türöffner für den Ruf an
die Zentrale;
5 - Türöffnung (Schloss): aktiviert den Tür-
öffner der Außenstelle; ruft die Zentrale
im Ruhezustand nach Drücken der Taste
Sprechen/Hören an.
6 - Anzeige (weiße LED):
• eingehender Ruf, Blinken (0.5 s ein
0.5 s aus).
• Tür geöffnet, erleuchtet.
• automatische Türöffnung aktiviert,
kurzes Blinken (0.2 s ein/ 4.8 s aus).
• Tür geöffnet und automatische Tür-
öffnung aktiviert, erleuchtet mit kurzem
Erlöschen (0.2 s aus/4.8 s ein).
7 - Zusatzaktivierung (Treppenhausbe-
leuchtung): aktiviert das erste Relais des
Systems Due Fili (Aux 1).
8 - Anzeige der Ruftonlautstärke: Rufton ab-
geschaltet/ Pegel 1 / Pegel 2 / Pegel 3.
9 - Anzeige (rote LED):
• Erster Start oder Wiederherstellung
der Versorgung ca. 15s langes Blinken.
• Warnmeldung, schnelles Blinken (0.1
s ein 0.1 s aus).
• verpasster Ruf von Zentrale, erleuch-
tet mit kurzem Erlöschen (9.8 s ein 0.2
s aus).
10 - Taste 1: aktiviert das zweite Relais des
Systems Due Fili (69RH / 69PH).
11 - Taste 2:
• im Ruhezustand, "Allgemeiner"
Wohnungs-Internruf.
• Beim Gespräch, Stummschaltung
(schließt das Mikrofon des Haustelefons
aus, der Lautsprecher bleibt aktiviert).
12 - Taste 3: F1 letztes angerufenes Klin-
geltableau.
13 - Taste 4: F2 letztes angerufenes Klin-
geltableau.
, drei
Pegel plus Abschaltung. Die Ruftonab-
schaltung deaktiviert nicht den Ausgang
CH.
15- ,
vier Pegel; (Hinweis: keine Abschaltung).
Die Einstellung wirkt auf die Lautstärke
des Lautsprechers, nicht auf das Mikro-
fon.
Viale Vicenza, 14
36063 Marostica VI - Italy
www.vimar.com
Voxie: 40547
49401680A0 03 2107
Foglio istruzioni multilingua - Multilanguage instructions sheet - Feuille d’instructions multilangues - Mehrsprachig-Gebrauchsinformation -
Hoja de instrucciones multilingüe - Folheto de instruções multilingue - Πολυγλωσσικό φύλλο οδηγιών -    
Nota: le funzioni associate ai pulsanti , , , , , , possono essere modicate tramite programmazione, per eseguire altre funzioni ausiliarie o chiamate intercomunicanti. Per
le funzioni attivabili fare riferimento al manuale uso e congurazione e al software di congurazione.
Note: the functions associated with the , , , , , push buttons can be modied via programming, to perform other auxiliary functions or intercom calls. For the functions
which can be activated, please refer to the conguration software use and conguration manual.
Remarque : les fonctions associées aux poussoirs , , , , , , peuvent être modiées à travers une programmation, pour obtenir d’autres fonctions auxiliaires ou des appels
intercommunicants. Pour les fonctions activables, consulter le manuel d’utilisation et de conguration et utiliser le logiciel de conguration.
Hinweis: Die mit den Tasten , , , , , gekoppelten Funktionen können mittels Programmierung geändert werden, um andere Zusatzfunktionen oder Internrufe auszuführen.
Für die aktivierbaren Funktionen wird auf die Bedienungs- und Kongurationsanleitung und die Kongurationssoftware verwiesen.
Nota: las funciones asociadas a los botones , , , , , se pueden modicar con la programación, para ejecutar otras funciones auxiliares o llamadas intercomunicantes.
Para las funciones activables, consulte el manual de uso y conguración y el software de conguración.
Nota: as funções associadas aos botões , , , , , , podem ser modicadas através de uma programação, para executar outras funções auxiliares ou chamadas
intercomunicantes. Para as funções ativáveis, consulte o manual de uso e conguração e o software de conguração.
 οι λειτουργίες που συνδέονται με τα μπουτόν , , , , , μπορούν να τροποποιηθούν μέσω προγραμματισμού, ώστε να εκτελούνται άλλες βοηθητικές λειτουργίες
ή κλήσεις ενδοεπικοινωνίας. Για τις λειτουργίες που μπορούν να ενεργοποιηθούν, ανατρέξτε στο εγχειρίδιο χρήσης και διαμόρφωσης και στο λογισμικό διαμόρφωσης.
          
.            
     "
  
:(*) 
.  
1 - Altavoz.
2 - Micrófono.
Botones (funciones predeterminadas) y
señalizaciones:
3 - Hablar/Escuchar: activa la
comunicación audio; si se pulsa
estando en reposo y después se pulsa
el abrepuertas, realiza la llamada a
centralita.
4 - Señalización (LED blanco):
• comunicación en curso, encendido
fijo;
• Desactivación del sonido, parpadea
al pulsar el botón 2durante una
comunicación.
• en reposo parpadea después de
pulsar el botón Hablar/Escuchar, a la
espera del abrepuertas para la llamada
a centralita;
5 - Abrepuertas (cerradura): activa la
cerradura del aparato externo; estando
en reposo, si se pulsa el botón Hablar/
Escuchar, envía la llamada a centralita.
6 - Señalización (LED blanco):
• Llamada entrante, parpadeante (0,5 s
On/0,5 s Off).
• Puerta abierta, encendido fijo.
• 
activada, parpadeo corto (0,2 s On/4,8
s Off).
• 
de cerradura activada, encendido fijo
con apagado corto (0,2 s Off/4,8 s On).
7 - Activación auxiliar (luz de escalera):
activa el primer relé del sistema Due Fili
(Aux 1).
8 - Indicador del volumen del timbre: Timbre
excluido / Nivel 1 / Nivel 2 / Nivel 3.
9 - Señalización (LED rojo):
• Primer encendido, o al restablecer la
alimentación parpadea durante.
• Alerta, parpadeo rápido (0,1 s On/0,1
s Off).
• Llamada perdida desde centralita,
encendido fijo con apagado corto (9,8 s
On/0,2 s Off).
10 -Botón 1: activa el segundo relé del
sistema Due Fili (69HR / 69PH).
11 - Botón 2:
• En reposo, llamada intercomunicante
"General" de apartamento.
• Comunicando, Silenciar (excluye
el micrófono del portero automático,
quedándose activado el altavoz).
12 -Botón 3: F1 última placa llamada.
13 -Botón 4: F2 última placa llamada.
14 -Ajuste del volumen de los timbres
de llamada en tres niveles, además de
la exclusión. La exclusión del timbre no
desactiva la salida CH.
15- Ajuste del volumen de comunicación
en cuatro niveles (nota: no hay
exclusión). El ajuste tiene efecto
sobre el volumen del altavoz y no del
micrófono.
1 - Altifalante.
2 - Microfone.
Teclas (funções predefinidas) e
sinalizações:
3 - Falar/Escutar: ativa a comunicação
áudio; se premida em repouso seguida
da tecla de trinco efetua a chamada
para a central.
4 - Sinalização (LED branco):
• conversação em curso, aceso fixo;
• mute, intermitente ao premir o botão 2
durante uma conversação.
• em repouso pisca depois de premir a
tecla falar/escutar, à espera da tecla do
trinco para a chamada para a central;
5 - Abertura da Porta (Trinco): ativa o
trinco do posto externo; em repouso
se segue a tecla falar/escutar envia a
chamada para a central.
6 - Sinalização (LED branco):
• chamada recebida, intermitente (0,5 s
on 0,5 s off).
• porta aberta, aceso fixo.
• ,
intermitência breve (0,2 s on/ 4,8 s off).
• 
do trinco ativa, aceso fixo com
apagamento breve (0,2 s off/4,8 s on).
7 - Ativação auxiliar (luz das escadas):
ativa o primeiro relé do sistema Due fili
(Aux 1).
8 - Indicador de Volume do toque: Toque
excluído / Nível 1 / Nível 2 / Nível 3.
9 - Sinalização (LED vermelho):
• Primeira ligação, ou restabelecimento
da alimentação, pisca durante cerca de
15 seg.
• Alerta, intermitente rápido (0,1 s on
0,1 s off).
• chamada perdida da central, aceso
fixo com apagamento breve (9,8 s on
0,2 s off).
10 -Botão 1: ativa o segundo relé do
sistema Due fili (69RH / 69PH).
11 - Botão 2:
• em repouso, chamada

apartamento.
• Em conversação, Mute (exclui
o microfone do intercomunicador,
mantém-se ativo o altifalante).
12 -Botão 3: F1 última botoneira chamada.
13 -Botão 4: F2 última botoneira chamada.
14 -Regulação do volume dos toques
de chamada para três níveis mais
exclusão. A exclusão do toque não
desativa a saída CH.
15- Regulação do volume de
conversação para quatro níveis; (nota:
não há exclusão). A regulação surte
efeito no volume do altifalante e não no
microfone.
1 - Μεγάφωνο.
2 - Μικρόφωνο.


 : ενεργοποιεί την
επικοινωνία ήχου. Εάν πατηθεί σε
κατάσταση αδράνειας και μετά επιλεγεί
το πλήκτρο κλειδαριάς, πραγματοποιείται
κλήση προς τον πίνακα.
4 - Επισήμανση (Λευκή λυχνία LED):
• , ανάβει σταθερά
• , αναβοσβήνει με πάτημα του
μπουτόν 2 κατά τη διάρκεια συνομιλίας.
• σε κατάσταση αδράνειας, αναβοσβήνει
μετά το πάτημα του πλήκτρου ομιλίας/
ακρόασης, σε αναμονή του πλήκτρου
κλειδαριάς για την κλήση προς πίνακα
 (κλειδαριά)ενεργοποιεί
την κλειδαριά του εξωτερικού σταθμού και
σε κατάσταση αδράνειας, εάν μετά πατηθεί
το πλήκτρο ομιλίας/ακρόασης προωθεί την
κλήση στον πίνακα.
6 - Επισήμανση (Λευκή λυχνία LED):
• , αναβοσβήνει
(αναμμένη για 0,5 δευτ., σβηστή για 0,5
δευτ.).
• , ανάβει σταθερά.
• 
, αναβοσβήνει για σύντομο
διάστημα (αναμμένη για 0,2 δευτ./ σβηστή
για 4,8 δευτ.).
• 
, ανάβει
σταθερά με σύντομο σβήσιμο (σβηστή για
0,2 δευτ./αναμμένη για 4,8 δευτ.).
7 - 
(φως κλιμακοστασίου): ενεργοποιεί το
πρώτο ρελέ του συστήματος Due fili (Aux
1).
8 - Ένδειξη έντασης ήχου κουδουνιού:
Απενεργοποιημένο κουδούνι / Επίπεδο 1 /
Επίπεδο 2 / Επίπεδο 3.
9 - Επισήμανση (Κόκκινη λυχνία LED):
•  ή αποκατάσταση της
τροφοδοσίας, αναβοσβήνει για περίπου 15
δευτ.
• , αναβοσβήνει γρήγορα
(αναμμένη για 0,1 δευτ., σβηστή για 0,1
δευτ.).
• , ανάβει
σταθερά με σύντομο σβήσιμο (αναμμένη
για 9,8 δευτ., σβηστή για 0,2 δευτ.).
10 - Μπουτόν 1: ενεργοποιεί το πρώτο ρελέ του
συστήματος Due fili (69RH / 69PH).
11 - Μπουτόν 2:
• σε κατάσταση αδράνειας. 

.
• Κατά τη συνομιλία, 
(απενεργοποιεί το μικρόφωνο
του θυροτηλέφωνου, παραμένει
ενεργοποιημένο το ηχείο).
12 - Μπουτόν 3: Τελευταία μπουτονιέρα F1
προς την οποία έγινε κλήση.
13 - Μπουτόν 4: Τελευταία μπουτονιέρα F2
προς την οποία έγινε κλήση.

κλήσης σε τρία επίπεδα συν
απενεργοποίηση. Όταν απενεργοποιηθεί
το κουδούνι, δεν απενεργοποιείται η
έξοδος CH.
15-  σε
τέσσερα επίπεδα (σημείωση: δεν υπάρχει
δυνατότητα απενεργοποίησης). Η ρύθμιση
επηρεάζει την ένταση ήχου του μεγαφώνου
και όχι το μικρόφωνο.
.  - 1
 - 2
: ( ) 
       :/ - 3
        
.    
:(  )  - 4
     •
.  2     •
         •
        /

      :()   - 5
    /      
.    
:(  )  - 6
.( 0.5   0.5)    •
.  
 
•
 0.2)       •
.(  4.8 / 
       •
.(  4.8 /   0.2)    
    :( )   - 7
.(Aux 1)  
 /    :    - 8
.3  / 2  / 1
:(  )  - 9
         •
.  15 
.(  0.1   0.1)    •
         •
.(  0.2    9.8)  
      :1 - 10
.(69RH / 69PH)
:2  - 11
. ""       •
  )     •
.(  
.     F1 :3  - 12
.     F2 :4  - 13
        - 14
     .  
.CH 
       15-
    .(    :)
.     
Viale Vicenza, 14
36063 Marostica VI - Italy
www.vimar.com
Voxie: 40547
49401680A0 03 2107
Foglio istruzioni multilingua - Multilanguage instructions sheet - Feuille d’instructions multilangues - Mehrsprachig-Gebrauchsinformation -
Hoja de instrucciones multilingüe - Folheto de instruções multilingue - Πολυγλωσσικό φύλλο οδηγιών -    
• Vista interno (citofono aperto)
• Internal view (entryphone open)
• Vue intérieure (interphone ouvert)
• 󰀨
• 
• Vista do interior (intercomunicador aberto)
•  •
c
d
CH12V1 MAL2FP M
b
a
a - Morsettiera di collegamento
Morsetti Descrizione
FP Ingresso "Chiamata Fuori Porta locale" (riferimento al morsetto M)
MRiferimento di massa
1Bus Due Fili Plus
2
AL
Ingresso per collegamento contatto (N.O. di default/N.C. configurabile
con software di configurazione) per funzione Allerta; riconfigurabile per
attivazione della funzione "studio professionale" (solo N.O.); Riferimento
al morsetto M
MRiferimento di massa
12V 12V (50 mA max): alimentazione ripetizione di chiamata.
CH Uscita (open-collector, 24 V max) "Ripetizione di chiamata"
Nota: la distanza massima dei collegamenti ai morsetti, tranne per il Bus Due Fili
Plus, è di 10m.
Nota: le funzioni associate all'ingresso FP "Chiamata Fuori Porta locale" e all'uscita
Open Collector CH possono essere modicate tramite programmazione. Per le
funzioni attivabili fare riferimento al manuale uso e congurazione e al software di
congurazione.
b - Dip Switch di "Terminazione Bus Due Fili Plus"
TABELLA SWITCH
A= Il cavo del BUS entra nei morsetti 1, 2 e prosegue ad un altro posto
interno
B= Il cavo BUS con impedenza caratteristica di 100 Ohm (cavo Elvox
732I o 732H) entra nei morsetti 1, 2 ed il montante si ferma nel posto
interno
C= Il cavo BUS con impedenza caratteristica di 50 Ohm (cavo Cat.5 o
Cat.6 con i doppini accoppiati) entra nei morsetti 1, 2 ed il montante si
ferma nel posto interno
c - Dip-switch di configurazione
d - Tasto "Config": per modalità di configurazione tramite Dip-switch
a - Connection terminal block
Terminals Description
LC "Local Landing Call" input (reference to terminal M)
MEarth reference
1Due Fili Plus Bus
2
AL Input for contact connection (N.O. by default/N.C. configurable with the
configuration software) for Alert function; reconfigurable to activate the
“professional firm” function (only N.O.); Reference to terminal M
MEarth reference
12V 12V (50 mA max): call repetition power supply.
CH “Call repetition” output (open-collector, 24 V max)
N.B.: the maximum connection distance to the terminals , except for the Due Fili
Plus Bus, is 10m.
N.B.: the functions associated with the LC “Local Landing Call” input and the CH
Open Collector output can be modied via programming. For the functions which
can be activated, please refer to the conguration software use and conguration
manual.
b - "Due Fili Plus Bus Termination” dip switch
SWITCH TABLE
A= The BUS cable enters terminals 1, 2 and continues to another indoor
station
B= The BUS cable with a characteristic impedance of 100 Ohms (Elvox
732I or 732H cable) enters terminals 1, 2 and the riser stops in the indoor
station
C= The BUS cable with characteristic impedance of 50 Ohms (Cat. 5 or
Cat. 6 twisted pair cable) enters terminals 1, 2 and the riser stops in the
indoor station
c - Configuration Dip switch
d - “Config” button: for Dip switch configuration mode
a - Bornier de connexion
Bornes Description
FP Entrée « Appel palier local » (reliée à la borne M)
MRéférence de masse
1Bus Due Fili Plus
2
AL Entrée pour connexion contact (NO par défaut/NF configurable avec
logiciel) pour fonction Alerte ; reconfigurable pour l’activation de la fonction
« bureau/cabinet professionnel » (uniquement NO) ; Reliée à la borne M
MRéférence de masse
12V 12V (50 mA maxi) : alimentation répétition d’appel.
AP Sortie (open-collector, 24 V maxi) « Répétition d’appel »
Remarque : la distance maximale des connexions aux bornes, à l'exception du
Bus Due Fili Plus, correspond à 10m.
Remarque : les fonctions associées à l’entrée Palier « Appel Palier local » et à la
sortie Open Collector CH peuvent être modiées à travers une programmation.
Pour les fonctions activables, consulter le manuel d’utilisation et de conguration et
utiliser le logiciel de conguration.
a - Anschlussklemmenleiste
Klemmen Beschreibung
FP Eingang "lokaler Etagenruf" (Signal an Klemme M)
MMassesignal
1Bus Due Fili Plus
2
AL
Eingang für Kontaktanschluss (NO standardmäßig/NC mit
Konfigurationssoftware konfigurierbar) für die Funktion Warnmeldung; zur
Aktivierung der Funktion "professionelles Büro" neu konfigurierbar (nur
NO); Signal an Klemme M
MMassesignal
12V 12V (50 mA max.): Versorgung Rufwiederholung.
CH Ausgang (Open-Collector, 24 V max.) "Rufwiederholung"
Hinweis: Die maximale Anschlusslänge an die Klemmen, den Bus Due Fili Plus
ausgenommen, beträgt 10m.
Hinweis: Die mit Eingang FP "lokaler Etagenruf" und Open Collector-Ausgang CH
verknüpften Funktionen können mittels Programmierung geändert werden. Für die
aktivierbaren Funktionen wird auf die Bedienungs- und Kongurationsanleitung und
die Kongurationssoftware verwiesen.
Viale Vicenza, 14
36063 Marostica VI - Italy
www.vimar.com
Voxie: 40547
49401680A0 03 2107
Foglio istruzioni multilingua - Multilanguage instructions sheet - Feuille d’instructions multilangues - Mehrsprachig-Gebrauchsinformation -
Hoja de instrucciones multilingüe - Folheto de instruções multilingue - Πολυγλωσσικό φύλλο οδηγιών -    
b - Dip Switch de « Terminaison Bus Due Fili Plus »
TABLEAU SWITCH
A= Le câble du BUS arrive aux bornes 1, 2 puis se dirige vers un autre
poste intérieur
B= Le câble BUS avec une impédance caractéristique de 100 ohms
(câble Elvox 732I ou 732H) arrive aux bornes 1, 2 et la colonne montante
s'arrête au poste intérieur
C= Le câble BUS avec une impédance caractéristique de 50 ohms (câble
cat. 5 ou cat. 6 à paires torsadées) arrive aux bornes 1, 2 et la colonne
montante s'arrête au poste intérieur
c - Dip-switch de configuration
d - Touche « Config » : pour la modalité de configuration via Dip-switch
b - Dip-Schalter für "Terminierung Bus Due Fili Plus"
SCHALTERTABELLE
A= Das BUS-Kabel tritt in die Klemmen 1, 2 ein und führt zu einer
anderen Innenstelle
B= Das BUS-Kabel mit typischer Impedanz 100 Ohm (Elvox Kabel 732I
oder 732H) tritt in die Klemmen 1, 2 ein und die Steigleitung endet an der
Innenstelle
C= Das BUS-Kabel mit typischer Impedanz 50 Ohm (Kabel Cat.5 oder
Cat.6 mit gepaarten Doppeladern) tritt in die Klemmen 1, 2 ein und die
Steigleitung endet an der Innenstelle
c - Dip-Schalter für Konfiguration
d - Taste "Konfig": zur Konfiguration mittels Dip-Schalter
a - Caja de bornes
Bornes Descripción
FP Entrada "Llamada fuera puerta local" (referencia al borne M)
MReferencia de masa
1Bus Due Fili Plus
2
AL
Entrada para la conexión del contacto (predeterminado: NO; NC
configurable con software de configuración) para función Alerta;
reconfigurable para activar la función "Bufete profesional" (solo NO);
Referencia al borne M
MReferencia de masa
12V 12 V (50 mA máx): alimentación repetición de llamada.
CH Salida (Open Collector, 24 V máx) "Repetición de llamada"
Nota: la distancia máxima de las conexiones a los bornes, excepto para el bus
Due Fili Plus, es de 10 m.
Nota: las funciones asociadas a la entrada FP "Llamada fuera de puerta local" y
a la salida Open Collector CH se pueden modicar con la programación. Para las
funciones activables, consulte el manual de uso y conguración y el software de
conguración.
b - Conmutador DIP de "Terminación Bus Due Fili Plus"
TABLA DE LOS CONMUTADORES DIP
A= El cable del BUS entra en los bornes 1, 2 y continúa hasta otro
aparato interno
B= El cable BUS con impedancia característica de 100 ohmios (cable
Elvox 732I o 732H) entra en los bornes 1, 2 y el montante termina en el
aparato interno
C= El cable BUS con impedancia característica de 50 ohmios (cable
Cat.5 o Cat.6 con los cables de pares acoplados) entra en los bornes 1, 2
y el montante termina en el aparato interno
c - Conmutador DIP de configuración
d - Botón "Config": para modo de configuración mediante conmutador DIP
a - Placa de terminais de ligação
Terminais Descrição
FP Entrada de “Chamada de Patamar local” (referência ao terminal M)
MReferência de massa
1Bus Due Fili Plus
2
AL
Entrada para ligação do contacto (N.O. por defeito/N.C. configurável com
o software de configuração) para a função de Alerta; reconfigurável para
a ativação da função de “gabinete profissional” (apenas N.O.); Referência
ao terminal M
MReferência de massa
12V 12V (50 mA max): alimentação da repetição de chamada.
CH Saída (open-collector, 24 V max) “Repetição de chamada”
Nota: a distância máxima das ligações aos terminais, exceto para o Bus Due Fili
Plus, é de 10 m.
Nota: as funções associadas à entrada FP “Chamada de Patamar local” e à
saída Open Collector CH podem ser modicadas através de programação. Para
as funções ativáveis, consulte o manual de uso e conguração e o software de
conguração.
b - Dip Switch de "Terminação Bus Due Fili Plus"
TABELA SWITCH
A= O cabo do BUS entra nos terminais 1, 2 e continua para um outro
posto interno
B= O cabo BUS com impedância característica de 100 Ohm (cabo Elvox
732I ou 732H) entra nos terminais 1, 2 e a coluna montante para no posto
interno
C= O cabo BUS com impedância característica de 50 Ohm (cabo Cat.5
ou Cat.6 com os pares entrançados acoplados) entra nos terminais 1, 2 e
a coluna montante para no posto interno
c - Dip-switch de configuração
d - Tecla “Config”: para o modo de configuração através do Dip-switch
 Κλέμα σύνδεσης
 
FP Είσοδος «κλήσης τοπικής εξώπορτας» (βλ. επαφή κλέμας M)
MΑναφορά γείωσης
1Bus Due Fili Plus
2
AL
Είσοδος για σύνδεση επαφής (N.O. βάσει προεπιλογής/N.C. με
δυνατότητα διαμόρφωσης μέσω λογισμικού διαμόρφωσης) για
λειτουργία συναγερμού. Δυνατότητα επαναδιαμόρφωσης για
ενεργοποίηση της λειτουργίας «επαγγελματικού γραφείου» (μόνο
N.O.), βλ. επαφή κλέμας M
MΑναφορά γείωσης
12V 12V (50 mA το μέγ.): τροφοδοσία επανάληψης κλήσης.
CH Έξοδος (open-collector, 24 V το μέγ.) «επανάληψης κλήσης»
Σημείωση: η μέγιστη απόσταση των συνδέσεων από τις επαφές κλέμας, με
εξαίρεση το Bus Due Fili Plus, είναι 10m.
Σημείωση: οι λειτουργίες που συνδέονται με την είσοδο FP «κλήση τοπικής
εξώπορτας» και την έξοδο Open Collector CH μπορούν να τροποποιηθούν μέσω
προγραμματισμού. Για τις λειτουργίες που μπορούν να ενεργοποιηθούν, ανατρέξτε
στο εγχειρίδιο χρήσης και διαμόρφωσης και στο λογισμικό διαμόρφωσης.
 Dip Switch «τερματισμού Bus Due Fili Plus»

A = Το καλώδιο του BUS εισάγεται στις επαφές κλέμας 1, 2 και συνεχίζει
προς άλλο εσωτερικό σταθμό
B = Το καλώδιο BUS με χαρακτηριστική σύνθετη αντίσταση 100 Ohm
(καλώδιο Elvox 732I ή 732H) εισάγεται στις επαφές κλέμας 1, 2 και η
κεντρική γραμμή τερματίζεται στον εσωτερικό σταθμό
C = Το καλώδιο BUS με χαρακτηριστική σύνθετη αντίσταση 50 Ohm
(καλώδιο κατ.5 ή κατ.6 με τα ζεύγη συνδεδεμένα) εισάγεται στις επαφές
κλέμας 1, 2 και η κεντρική γραμμή τερματίζεται στον εσωτερικό σταθμό
 Dip-switch διαμόρφωσης
 Πλήκτρο «διαμόρφωσης»: για λειτουργία διαμόρφωσης μέσω Dip-switch
   - 



FP.(M   ) "    " 
M 
1
Due Fili Plus  2
AL
(40542  )   (     N.C./  N.O.)   
M    (.N.O ) " "     
M 
12V.    :(    50)  12
CH" " (    ) 
. 10   Bus Due Fili Plus         :
  Open Collector CH  "    " FP      : 
             .
.
"Bus Due Fili Plus "    - b
 
     2 1     BUS     = A
1     (732H  Elvox 732I )  100    BUS   = B
      2
(    Cat.6  Cat.5 )  50    BUS   = C
      2 1    
dip-switch    - 
Dip     :"Config"  - 
Viale Vicenza, 14
36063 Marostica VI - Italy
www.vimar.com
Voxie: 40547
49401680A0 03 2107
Foglio istruzioni multilingua - Multilanguage instructions sheet - Feuille d’instructions multilangues - Mehrsprachig-Gebrauchsinformation -
Hoja de instrucciones multilingüe - Folheto de instruções multilingue - Πολυγλωσσικό φύλλο οδηγιών -    
- Collegamento del pulsante fuoriporta (contatto NO)
- Connecting the landing push button (NO contact)
- Connexion du poussoir appel palier (contact NO)
- Anschluss der Etagenruftaste (NO-Kontakt):
- Conexión del pulsador fuera de la puerta (contacto NO)
- Ligação do botão de patamar (contacto NO)

(NO )     -
85 74PRI
1C RC 3 42 515
2
1
AL
CH
M
12V
M
FP
2
1
AL
CH
M
12V
M
FP
2
1
AL
CH
M
12V
M
FP
2
1
AL
CH
M
12V
M
FP
2
1
AL
CH
M
12V
M
FP
2
1
AL
CH
M
12V
M
FP
2
1
AL
CH
M
12V
M
FP
2
1
AL
CH
M
12V
M
FP
2
1
AL
CH
M
12V
M
FP
*
85 74PRI
1C RC 3 42 515
2
1
AL
CH
M
12V
M
FP
2
1
AL
CH
M
12V
M
FP
2
1
AL
CH
M
12V
M
FP
2
1
AL
CH
M
12V
M
FP
2
1
AL
CH
M
12V
M
FP
2
1
AL
CH
M
12V
M
FP
2
1
AL
CH
M
12V
M
FP
2
1
AL
CH
M
12V
M
FP
2
1
AL
CH
M
12V
M
FP
*
- Collegamento funzione Allerta, tramite ingresso dedicato ai morsetti AL-M (contatto NO/NC; default: NO)
- Alert function connection, via input dedicated to terminals AL-M (NO/NC contact; default: NO)
- Connexion fonction Alerta, via entrée dédiée aux bornes AL-M (contact NO/NF ; par défaut : NO)
- Anschluss Funktion Warnmeldung, über dedizierten Eingang an Klemmen AL-M (NO/NC-Kontakt; Standard: NO)



(NO : NO / NC ) AL-M          -
85 74PRI
1C RC 3 42 515
2
1
AL
CH
M
12V
M
FP
2
1
AL
CH
M
12V
M
FP
2
1
AL
CH
M
12V
M
FP
2
1
AL
CH
M
12V
M
FP
2
1
AL
CH
M
12V
M
FP
2
1
AL
CH
M
12V
M
FP
2
1
AL
CH
M
12V
M
FP
2
1
AL
CH
M
12V
M
FP
2
1
AL
CH
M
12V
M
FP
N.0. N.C.
- Collegamento funzione "studio professionale", attivazione in fasce orarie tramite contatto N.O. di un orologio

- Connexion fonction « bureau/cabinet professionnel », activation par tranches horaires via contact NO d’une horloge
- Anschluss Funktion "professionelles Büro", Aktivierung zu Zeitintervallen mittels NO-Kontakt einer Uhr
- Conexión función "Bufete profesional", activación en franjas horarias mediante contacto NO de un reloj


.N.O         " "   -
85 74PRI
1C RC 3 42 515
2
1
AL
CH
M
12V
M
FP
2
1
AL
CH
M
12V
M
FP
2
1
AL
CH
M
12V
M
FP
2
1
AL
CH
M
12V
M
FP
2
1
AL
CH
M
12V
M
FP
2
1
AL
CH
M
12V
M
FP
2
1
AL
CH
M
12V
M
FP
2
1
AL
CH
M
12V
M
FP
2
1
AL
CH
M
12V
M
FP
*
MONTANTE - RISER
COLONNE MONTANTE - STEIGLEITUNG
MONTANTE - COLUNA MONTANTE
ΚΕΝΤΡΙΚΗ ΓΡΑΜΜΗ -
  
85 74PRI
1C RC 3 42 515
2
1
AL
CH
M
12V
M
FP
2
1
AL
CH
M
12V
M
FP
2
1
AL
CH
M
12V
M
FP
2
1
AL
CH
M
12V
M
FP
2
1
AL
CH
M
12V
M
FP
2
1
AL
CH
M
12V
M
FP
2
1
AL
CH
M
12V
M
FP
2
1
AL
CH
M
12V
M
FP
2
1
AL
CH
M
12V
M
FP
Pulsante di chiamata Fuoriporta
Landing call button
Poussoir d'appel palier
Etagenruftaste
Pulsador de llamada desde fuera de la puerta
Botão de chamada de Patamar
Κουμπί κλήσης εξώπορτας
   
- Variante per il collegamento dell'uscita programmabile (Ripetizione di chiamata)
- Variant for connecting the programmable output (Repeat call)
- Variante pour le branchement de la sortie programmable (Répétition d’appel)
- Anschlussvariante des programmierbaren Ausgangs (Rufwiederholung)
- Variante para la conexión de la salida programable (repetición de llamada)


( )      -
85 74PRI
1C RC 3 42 515
2
1
AL
CH
M
12V
M
FP
2
1
AL
CH
M
12V
M
FP
2
1
AL
CH
M
12V
M
FP
2
1
AL
CH
M
12V
M
FP
2
1
AL
CH
M
12V
M
FP
2
1
AL
CH
M
12V
M
FP
2
1
AL
CH
M
12V
M
FP
2
1
AL
CH
M
12V
M
FP
2
1
AL
CH
M
12V
M
FP
- Uscita 12 V, 100 mA
- 12 V output, 100 mA
- Sortie 12 V, 100 mA
- Ausgang 12 V, 100 mA
- Salida 12 V, 100 mA
- Saída 12 V, 100 mA

  100  12  -
0170/101
Relè - Relay
Relais - Relais
Relé - Relé
Ρελέ - 
Suoneria
Ringtone
Sonnerie
Läutwerk
Timbre
Campainha
Κουδούνι
 
Alimentazione Suoneria
Ringtone power supply
Alimentation Sonnerie
Läutwerk-Versorgung
Alimentación del timbre
Alimentação da campainha
Τροφοδοσία κουδουνιού
 
85 74PRI
1C RC 3 42 515
2
1
AL
CH
M
12V
M
FP
2
1
AL
CH
M
12V
M
FP
2
1
AL
CH
M
12V
M
FP
2
1
AL
CH
M
12V
M
FP
2
1
AL
CH
M
12V
M
FP
2
1
AL
CH
M
12V
M
FP
2
1
AL
CH
M
12V
M
FP
2
1
AL
CH
M
12V
M
FP
2
1
AL
CH
M
12V
M
FP
- Uscita Open Collector
- Open Collector output
- Sortie Open Collector
- Open Collector-Ausgang
- Salida Open Collector
- Saída Open Collector

Open Collector  -
860A
Suoneria supplementare
Additional ringtone
Sonnerie supplémentaire
Zusätzliches Läutwerk
Timbre suplementario
Campainha suplementar
Συμπληρωματικό κουδούνι
  
Rete - Mains
Réseau - Netz
Red - Rede
Δίκτυο -








/        -







        -
• Schemi di collegamento
• Wiring diagrams
• Schémas de connexion
• 
• Esquemas de conexión
• Esquemas de ligação
• 
•
Nota: la regolazione del volume della suoneria non ha effetto sul volume della suoneria supplementare (Ripetizione di chiamata).
N.B.: the ringtone volume adjustment has no effect on the volume of the additional ringtone (Repeat call).
Remarque : le réglage du volume de la sonnerie n’inuence pas le volume de la sonnerie supplémentaire (Répétition d’appel).
Hinweis: Die Einstellung der Ruftonlautstärke hat keinen Einuss auf die Lautstärke des Zusatzläutwerks (Rufwiederholung).
Nota: el ajuste del volumen del timbre no surte efecto en el volumen del timbre adicional (repetición de llamada).
Nota: a regulação do volume do toque não tem qualquer efeito sobre o volume do toque suplementar (Repetição de chamada).
Σημείωση: η ρύθμιση έντασης ήχου του κουδουνιού δεν επηρεάζει την ένταση ήχου του συμπληρωματικού κουδουνιού (επανάληψη κλήσης).
.( )            :
*
*
MONTANTE - RISER
COLONNE MONTANTE - STEIGLEITUNG
MONTANTE - COLUNA MONTANTE
ΚΕΝΤΡΙΚΗ ΓΡΑΜΜΗ -
  
< 10 m
< 10 m
< 10 m
< 10 m
< 10 m
Viale Vicenza, 14
36063 Marostica VI - Italy
www.vimar.com
Voxie: 40547
49401680A0 03 2107
Foglio istruzioni multilingua - Multilanguage instructions sheet - Feuille d’instructions multilangues - Mehrsprachig-Gebrauchsinformation -
Hoja de instrucciones multilingüe - Folheto de instruções multilingue - Πολυγλωσσικό φύλλο οδηγιών -    
• Prima accensione
• First power up
• Premier allumage
• Erstmalige Einschaltung
• Primer encendido
• Primeira ligação
• 
•
> 6s
beep1 BEEP
BEEP
beep
1
1a
32 4
*
+ 2 s
beep2
> 6s
beep BEEP
BEEP
beep
1 32 4
*
ID primario • Primary ID • ID primaire •  • ID primario •  •  •   
ID secondario • Secondary ID • ID Secondaire •  • ID secundario •  •  •   
1
Premere e mantenere premuto il pulsante serratura per almeno 6 s.
Allo scadere del tempo il posto interno emette un “beep” in cornetta (0,5 s).
1a
Nel caso di configurazione come "Id secondario", continuare a tenere premuto il pulsante
serratura per ulteriori 2 s, fino al secondo “beep”.
2
Rilasciare il pulsante serratura.
Al rilascio del pulsante si attiverà la comunicazione segnalata con un “beep” di frequenza
diversa.
3
Premere il tasto del posto esterno dal quale si desidera ricevere la chiamata (MASTER).
Questa procedura è valida per targhe a pulsanti; per targhe alfanumeriche digitare il codice
ID e confermare con il tasto di chiamata.
4
Posto interno ed esterno emettono un suono per confermare l’operazione.
* Nota: Se nell’impianto esiste già un posto interno con lo stesso codice identificativo
associato, la targa emette un segnale sonoro basso ed è necessario ripetere l’operazione.
1
Pulse y mantenga pulsado el abrepuertas durante 6 s.
Transcurrido este tiempo, el aparato interno emite una señal acústica en el auricular (0,5 s).
1a
En caso de configuración como "ID secundario", siga pulsando el abrepuertas 2 s más, hasta
escuchar la segunda señal acústica.
2
Suelte el pulsador abrepuertas.
Al soltar el pulsador se activa la comunicación, lo que se indica con una señal acústica de
frecuencia distinta.
3
Pulse la tecla del aparato externo del que se desea recibir la llamada (MASTER).
Este procedimiento es válido para placas con pulsadores; para placas alfanuméricas teclee
el código ID y confirme con el botón de llamada.
4
Los aparatos interno y externo emiten un sonido para confirmar la operación.
* Nota: Si en la instalación ya existe un aparato interno con el mismo código de identificación
asociado, la placa emite una señal acústica baja y es necesario repetir la operación.
1
Press and hold down the door lock release push button for at least 6 s.
When the time runs out the indoor station will emit a “beep” in the handset (0.5 s).
1a
In the case of a configuration as a “secondary ID”, continue to hold down the door lock
release push button for a further 2 s, until you hear the second “beep”.
2
Release the door lock release push button.
When the push button is released the communication will be signalled by a “beep” with a
different frequency.
3
Press the button on the outdoor station you wish to receive the call from (MASTER).
This procedure applies to entrance panels with push buttons; for alphanumerical entrance
panels, type in the ID code and confirm with the call button.
4
Both the indoor station and the outdoor station emit a sound to confirm the operation.
* N.B.: If the system contains an indoor station that already has the same associated
identification code, the entrance panel emits a low tone and the operation will have to be
repeated.
1
Prima e mantenha premido o botão do trinco durante pelo menos 6 s.
No fim do tempo, o posto interno emite um “bip” no auscultador (0,5 s).
1a
No caso de uma configuração como "Id secundário", continue a manter premido o botão do
trinco por mais 2 s, até ao segundo “bip”.
2
Solte o botão do trinco.
Ao soltar o botão, ativa-se a comunicação assinalada com um “bip” de frequência diferente.
3
Prima a tecla do posto externo do qual deseja receber a chamada (MASTER).
Este procedimento é válido para botoneiras com botões; para botoneiras alfanuméricas
digite o código ID e confirme com a tecla de chamada.
4
O posto interno e externo emitem um som para confirmar a operação.
* Nota: Se já houver na instalação um posto interno com o mesmo código identificativo
associado, a botoneira emite um sinal sonoro baixo, sendo necessário repetir a operação.
1
Appuyer au moins 6 secondes sur le poussoir de commande de la gâche.
Une fois le temps expiré, le poste intérieur émet un « bip » dans le combiné (0,5 s).
1a
En cas de configuration comme « Id secondaire », garder le doigt sur le bouton de
commande de la gâche encore 2 secondes, jusqu’au deuxième « bip ».
2
Relâcher le poussoir de commande de la gâche.
Ceci permettra la communication signalée par un « bip » d'une fréquence différente.
3
Appuyer sur la touche du poste extérieur à partir duquel doit arriver l’appel (MAÎTRE).
Cette procédure est valable pour les platines à poussoirs ; pour les platines alphanumériques,
taper le code ID et le confirmer en appuyant sur la touche d’appel.
4
Le poste intérieur et le poste extérieur émettent un son qui confirme l’opération.
* Remarque : Si le système comprend déjà un poste intérieur associé au même identifiant, la
platine émet un signal sonore grave : répéter l'opération.
1 Πατήστε παρατεταμένα το μπουτόν κλειδαριάς για τουλάχιστον 6 δευτ.
Όταν λήξει το χρονικό διάστημα, ο εσωτερικός σταθμός εκπέμπει ένα ηχητικό σήμα «μπιπ» στο
ακουστικό (0,5 δευτ.).
1a
Στην περίπτωση διαμόρφωσης ως «Δευτερεύον ID», πατήστε παρατεταμένα το μπουτόν κλειδαριάς για
ακόμη 2 δευτ. μέχρι να ακουστεί το ηχητικό σήμα «μπιπ».
2 Αφήστε το μπουτόν κλειδαριάς.
Όταν αφήσετε το μπουτόν, θα ενεργοποιηθεί η επικοινωνία που επισημαίνεται με ένα ηχητικό σήμα
«μπιπ» διαφορετικής συχνότητας.
3 Πατήστε το πλήκτρο του εξωτερικού σταθμού από τον οποίο θέλετε να λάβετε την κλήση (MASTER).
Αυτή η διαδικασία ισχύει για μπουτονιέρες με μπουτόν. Για αλφαριθμητικές μπουτονιέρες, πληκτρολογήστε
τον κωδικό ID και επιβεβαιώστε με το πλήκτρο κλήσης.
4 Ο εσωτερικός σταθμός και ο εξωτερικός σταθμός εκπέμπουν έναν ήχο ως επιβεβαίωση της διαδικασίας.
* : Εάν στην εγκατάσταση υπάρχει ήδη εσωτερικός σταθμός με τον ίδιο αναγνωριστικό κωδικό
αντιστοιχισμένο, η μπουτονιέρα εκπέμπει ένα χαμηλό ηχητικό σήμα και η διαδικασία θα πρέπει να
επαναληφθεί.
1
Die Taste Türöffner drücken und mindestens 6 s lang gedrückt halten.
Nach Ablauf der Zeit gibt die Innenstelle einen “Piepton” im Hörer aus (0,5 s).
1a
Bei Konfiguration als "sekundäre ID" die Taste Türöffner für weitere 2 s bis zum zweiten
“Piepton” gedrückt halten.
2
Die Taste Türöffner loslassen.
Beim Loslassen der Taste aktiviert sich das Gespräch, was durch einen “Piepton” anderer
Frequenz.
3
Die Taste der Außenstelle drücken, von der der Anruf empfangen werden soll (MASTER).
Dieser Vorgang ist für Klingeltableaus mit Tasten gültig; bei alphanumerischen Klingeltableaus
den ID-Code eingeben und mit der Ruftaste bestätigen.
4
Zur Bestätigung des Vorgangs geben Innenstelle und Außenstelle einen Ton wieder.
* Hinweis: Wenn in der Anlage eine Innenstelle vorhanden ist, der bereits die gleiche
Kennnummer zugewiesen wurde, gibt das Klingeltableau einen leisen Ton aus und der
Vorgang muss wiederholt werden.
.   6       
1
.( 0.5)    ""      
. ""             "  "    
1a
.  
2
.   ""            
.(MASTER)          
3
                  
.
.      
4
                    : *
. 
Viale Vicenza, 14
36063 Marostica VI - Italy
www.vimar.com
Voxie: 40547
49401680A0 03 2107
Foglio istruzioni multilingua - Multilanguage instructions sheet - Feuille d’instructions multilangues - Mehrsprachig-Gebrauchsinformation -
Hoja de instrucciones multilingüe - Folheto de instruções multilingue - Πολυγλωσσικό φύλλο οδηγιών -    
• DEEE - Informations destinées aux utilisateurs. Le pictogramme de la poubelle barrée apposé sur l'appareil ou sur l'emballage indique que le produit doit être séparé des autres déchets à la n de son cycle de vie. L'utilisateur devra coner l'appareil à un centre municipal de tri
sélectif des déchets électroniques et électrotechniques. Outre la gestion autonome, le détenteur pourra également coner gratuitement l'appareil qu'il veut mettre au rebut à un distributeur au moment de l'achat d'un nouvel appareil aux caractéristiques équivalentes. Les distributeurs
de matériel électronique disposant d'une surface de vente supérieure à 400 m2 retirent les produits électroniques arrivés à la n de leur cycle de vie à titre gratuit, sans obligation d'achat, à condition que les dimensions de l'appareil ne dépassent pas 25 cm. La collecte sélective visant
à recycler l'appareil, à le retraiter et à l'éliminer en respectant l'environnement, contribue à éviter la pollution du milieu et ses effets sur la santé et favorise la réutilisation des matériaux qui le composent.
• WEEE-Richtlinie über Elektro- und Elektronik-Altgeräte - Benutzerinformation. Das Symbol der durchgestrichenen Mülltonne auf dem Gerät oder der Verpackung weist darauf hin, dass das Produkt am Ende seiner Lebensdauer getrennt von anderen Abfällen zu sammeln ist. Der
Benutzer muss das Altgerät bei den im Sinne dieser Richtlinie eingerichteten kommunalen Sammelstellen abgeben. Alternativ hierzu kann das zu entsorgende Gerät beim Kauf eines neuen gleichwertigen Geräts dem Fachhändler kostenlos zurückgegeben werden. Darüber hinaus
besteht die Möglichkeit, die zu entsorgenden Elektronik-Altgeräte mit einer Größe unter 25 cm bei Elektronikfachmärkten mit einer Verkaufsäche von mindestens 400 m2 kostenlos ohne Kaufpicht eines neuen Geräts abzugeben. Die korrekte getrennte Sammlung des Geräts für
seine anschließende Zuführung zum Recycling, zur Behandlung und zur umweltgerechten Entsorgung trägt dazu bei, mögliche nachteilige Auswirkungen auf die Umwelt und auf die Gesundheit zu vermeiden und fördert die Wiederverwertung der Werkstoffe des Geräts.
• RAEE - Información a los usuarios. El símbolo del contenedor tachado que aparece en el aparato o en su embalaje indica que el producto, al nal de su vida útil, debe desecharse por separado de otros residuos. Al nal de su vida útil, el usuario deberá entregar el equipo a un
centro de recogida de residuos electrotécnicos y electrónicos. También puede entregar gratuitamente el equipo usado al establecimiento donde vaya a comprar un nuevo equipo de tipo equivalente. En los distribuidores de productos electrónicos con una supercie de al menos 400
m
2
es posible entregar gratuitamente, sin obligación de compra, productos electrónicos usados de tamaño inferior a 25 cm. La recogida selectiva de estos residuos facilita el reciclaje del aparato y sus componentes, permite su tratamiento y eliminación de forma compatible con el
medioambiente y evita posibles efectos perjudiciales para la naturaleza y la salud de las personas.
• REEE - Informação para os utilizadores. O símbolo do contentor barrado existente no equipamento ou na sua embalagem indica que, no m da respetiva vida útil, o produto deve ser recolhido separadamente dos outros resíduos. O utilizador deverá, portanto, depositar o
equipamento em m de vida nos respetivos centros municipais de recolha seletiva de resíduos eletrotécnicos e eletrónicos. Em alternativa à gestão autónoma, é possível entregar gratuitamente ao distribuidor o aparelho que se pretende eliminar, aquando da compra de um novo
equipamento de tipo equivalente. Nos distribuidores de produtos eletrónicos com uma superfície de venda de pelo menos 400 m
2
é ainda possível entregar gratuitamente, sem obrigação de compra, os produtos eletrónicos a eliminar com dimensões inferiores a 25 cm. A recolha
seletiva adequada para o posterior reencaminhamento do aparelho em m de vida para a reciclagem, tratamento e eliminação ambientalmente compatível contribui para evitar possíveis efeitos negativos sobre o ambiente e sobre a saúde e favorece a reutilização e/ou reciclagem dos
materiais que compõem o equipamento.
• ΑΗΗΕ - Πληροφορίες για τους χρήστες. Το σύμβολο διαγραμμένου κάδου που αναγράφεται στη συσκευή ή στη συσκευασία υποδεικνύει ότι το προϊόν πρέπει να συλλέγεται ξεχωριστά από τα υπόλοιπα απόβλητα στο τέλος της ωφέλιμης διάρκειας ζωής του. Για τον λόγο αυτό,
ο χρήστης πρέπει να παραδίδει τις συσκευές που έχουν φτάσει στο τέλος της διάρκειας ζωής τους στα ειδικά δημοτικά κέντρα διαφοροποιημένης συλλογής αποβλήτων ειδών ηλεκτρικού και ηλεκτρονικού εξοπλισμού. Εκτός από την αυτόνομη διαχείριση, είναι δυνατή η δωρεάν
παράδοση της συσκευής προς απόρριψη στον διανομέα, κατά την αγορά καινούριας, αντίστοιχης συσκευής. Στους διανομείς ηλεκτρονικών προϊόντων τουλάχιστον με καταστήματα πώλησης 400 m
2
, μπορείτε επίσης να παραδίδετε δωρεάν, χωρίς υποχρέωση αγοράς, ηλεκτρονικά
προϊόντα προς απόρριψη με διαστάσεις κάτω από 25 cm. Η κατάλληλη διαφοροποιημένη συλλογή με σκοπό τη μετέπειτα ανακύκλωση, επεξεργασία και φιλική προς το περιβάλλον απόρριψη της συσκευής συμβάλλει στην αποφυγή πιθανών αρνητικών επιπτώσεων για το
περιβάλλον και την υγεία, καθώς και στην εκ νέου χρήση ή/και ανακύκλωση των υλικών από τα οποία αποτελείται η συσκευή.
•                 .                          .  - (RAEE)    
                 2  400             .                        . 
.                                         . 25   
• RAEE - Informazione agli utilizzatori. Il simbolo del cassonetto barrato riportato sull’apparecchiatura o sulla sua confezione indica che il prodotto alla ne della propria vita utile deve essere raccolto separatamente dagli altri riuti. L’utente dovrà,
pertanto, conferire l’apparecchiatura giunta a ne vita agli idonei centri comunali di raccolta differenziata dei riuti elettrotecnici ed elettronici. In alternativa alla gestione autonoma, è possibile consegnare gratuitamente l’apparecchiatura che si desidera
smaltire al distributore, al momento dell’acquisto di una nuova apparecchiatura di tipo equivalente. Presso i distributori di prodotti elettronici con supercie di vendita di almeno 400 m
2
è inoltre possibile consegnare gratuitamente, senza obbligo di
acquisto, i prodotti elettronici da smaltire con dimensioni inferiori a 25 cm. L’adeguata raccolta differenziata per l’avvio successivo dell’apparecchiatura dismessa al riciclaggio, al trattamento e allo smaltimento ambientalmente compatibile contribuisce ad
evitare possibili effetti negativi sull’ambiente e sulla salute e favorisce il reimpiego e/o riciclo dei materiali di cui è composta l’apparecchiatura.
• WEEE - Information for users. If the crossed-out bin symbol appears on the equipment or packaging, this means the product must not be included with other general waste at the end of its working life. The user must take the worn product to a sorted
waste center, or return it to the retailer when purchasing a new one. Products for disposal can be consigned free of charge (without any new purchase obligation) to retailers with a sales area of at least 400 m
2
, if they measure less than 25 cm. An
efcient sorted waste collection for the environmentally friendly disposal of the used device, or its subsequent recycling, helps avoid the potential negative effects on the environment and people’s health, and encourages the re-use and/or recycling of the
construction materials.
• Conformità normativa.
Direttiva EMC. Direttiva RoHS.
Norme EN 55032, EN 55035, EN 62368-1, EN IEC 63000.
Regolamento REACh (UE) n. 1907/2006 – art.33 Il prodotto
potrebbe contenere tracce di piombo.
• Regulatory compliance.
EMC directive. RoHS directive.
Standards EN 55032, EN 55035, EN 62368-1, EN IEC 63000.
REACH (EU) Regulation no. 1907/2006 – art.33. The product may
contain traces of lead.
• Conformité aux normes.
Directive CEM. Directive RoHS.
Normes EN 55032, EN 55035, EN 62368-1, EN IEC 63000.
Règlement REACH (EU) n° 1907/2006 – art.33. Le produit
pourrait contenir des traces de plomb.
• Normkonformität.
EMV-Richtlinie. RoHS-Richtlinie.
Normen EN 55032, EN 55035, EN 62368-1, EN IEC 63000.
REACH-Verordnung (EG) Nr. 1907/2006 – Art.33. Das Erzeugnis
kann Spuren von Blei enthalten.
• Conformidad a las normas
Directiva sobre compatibilidad electromagnética. Directiva RoHS.
Normas EN 55032, EN 55035, EN 62368-1, EN IEC 63000.
Reglamento REACH (UE) n. 1907/2006 – art. 33. El producto
puede contener trazas de plomo.
• Conformidade normativa.
Diretiva EMC. Diretiva RoHS.
Normas EN 55032, EN 55035, EN 62368-1, EN IEC 63000.
Regulamento REACh (UE) n.º 1907/2006 – art.33. O produto
poderá conter vestígios de chumbo.
• Συμμόρφωση με τα πρότυπα.
Οδηγία EMC. Οδηγία RoHS.
Πρότυπα EN 55032, EN 55035, EN 62368-1, EN IEC 63000.
Κανονισμός REACh (ΕΕ) αρ. 1907/2006- Άρθρο 33. Το προϊόν
μπορεί να περιέχει ίχνη μολύβδου.
• .(EMC)      . 
  .EN IEC 63000  EN 62368-1 ,EN 55035 ,EN 55032 
 – 1907/2006  (UE) REACh     
.       .33
• Avvertenze per l’utente
Non aprire o manomettere l’apparecchio.
In caso di guasto avvalersi di personale specializzato.
Manutenzione
Eseguire la pulizia utilizzando un panno morbido.
Non versare acqua sull’apparecchio e non utilizzare alcun tipo
di prodotto chimico.
• Warnings for the user
Do not open or tamper with the appliance.
In the event of faults, contact specialized personnel.
Maintenance
Clean using a soft cloth.
Do not pour water onto the appliance and do not use any type
of chemical product.
• Recommandations pour l’utilisateur
Ne pas ouvrir ni modier l’appareil.
En cas de panne, s'adresser à un technicien spécialisé.
Maintenance
Nettoyer avec un chiffon doux.
Ne pas verser d'eau sur l'appareil et n'utiliser aucun produit
chimique.
• Hinweise für den Benutzer
Das Gerät auf keinen Fall öffnen oder manipulieren.
Bei Störungen Fachpersonal hinzuziehen.
Pege
Für die Reinigung ein weiches Tuch verwenden.
Kein Wasser auf das Gerät verschütten und chemische
Reinigungsmittel vermeiden.
• Advertencias para el usuario
No abra ni manipule el aparato.
En caso de avería, acuda a personal especializado.
Mantenimiento
Limpie al aparato con un paño suave.
No moje el aparato con agua ni utilice ningún tipo de producto
químico.
• Advertências para o utilizador
Não abra nem adultere o aparelho.
Em caso de avaria, recorra a pessoal especializado.
Manutenção
Faça a limpeza utilizando um pano macio.
Não deite água no aparelho e não utilize nenhum tipo de
produto químico.
• Προειδοποιήσεις για τον χρήστη
Μην ανοίγετε και μην τροποποιείτε τη συσκευή.
Σε περίπτωση βλάβης, απευθυνθείτε σε εξειδικευμένο
προσωπικό.
Συντήρηση
Καθαρίστε τη συσκευή χρησιμοποιώντας μαλακό πανί.
Μη χύνετε νερό πάνω στη συσκευή και μη χρησιμοποιείτε
κανενός είδους χημικά προϊόντα.
• 
.    
.      

.       
.           
• L’installazione deve essere effettuata da personale qualicato
con l’osservanza delle disposizioni regolanti l’installazione
del materiale elettrico in vigore nel paese dove i prodotti
sono installati.
• Installation should be carried out by qualied personnel
in compliance with the current regulations regarding the
installation of electrical equipment in the country where the
products are installed.
• L’installation doit être conée à des techniciens qualiés et
effectuée dans le respect des dispositions réglant.
• Die Installation muss durch Fachpersonal gemäß den im
Anwendungsland des Produkts geltenden Vorschriften zur
Installation elektrischen Materials erfolgen.
• El montaje debe ser realizado por personal cualicado
cumpliendo con las correspondientes disposiciones en vigor.
• A instalação deve ser efetuada por pessoal qualicado de
acordo com as disposições que regulam a instalação de
material elétrico, vigentes no país em que os produtos são
instalados.
• Η εγκατάσταση πρέπει να πραγματοποιείται από
εξειδικευμένο προσωπικό σύμφωνα με τις ισχύουσες
ρυθμιστικές διατάξεις.
•           
    
• Per ulteriori informazioni www.vimar.com
• For further information see www.vimar.com website
• Pour informations détaillées voir www.vimar.com
• Für weiterführende Informationen, siehe www.vimar.com
• Más información en www.vimar.com
• Informações mais aprofundadas en www.vimar.com
• Για περισσότερες πληροφορίες www.vimar.com
•www.vimar.com    
• Assorbimento: in standby 10 mA; corrente massima 140 mA
• Alimentazione: da BUS morsetti 1, 2 - tensione nominale
28Vdc
• Classe ambientale: Classe A1 (uso interno)
• Grado di protezione IP30
• Temperatura di funzionamento: (-5 °) – (+40) °C (uso
interno)
• Umidità ambiente operativo: 10 / 80% (senza condensa)
• Absorption in standby 10 mA; maximum current 140 mA
• Power supply: from BUS terminals 1, 2 - rated voltage
28VDC
• Ambient class: Class A1 (indoor use)
• IP30 protection degree
• Operating temperature: (-5 °) – (+40) °C (indoor use)
• Operating environment humidity: 10 / 80% (non-
condensing)
• Dati tecnici
• Technical data
• Caractéristiques techniques
• Technische Daten
• Datos técnicos
• Dados técnicos
• 
•
• Stromaufnahme: in Standby 10 mA; max. Strom 140 mA
• Spannungsversorgung: vom BUS Klemmen 1, 2 -
Nennspannung 28Vdc
• Umweltklasse: Klasse A1 (Innenbereiche)
• Schutzart IP30
• Betriebstemperatur: (-5 °) – (+40) °C (Innenbereich)
• Feuchtigkeit Betriebsumgebung: 10 / 80% (ohne
Kondensation)
• Absorption : en état de veille 10 mA ; courant maximum 140 mA
• Alimentation : via BUS bornes 1, 2 - tension nominale 28 Vcc
• Classe environnementale : A1 (usage intérieur)
• Indice de protection IP30
• Température de fonctionnement : (-5° C) – (+40) °C (usage
intérieur)
• Humidité ambiante de service : 10 / 80% (sans condensation)
• Absorción: en stand-by 10 mA; corriente máxima 140 mA
• Alimentación: por BUS bornes 1, 2 - tensión nominal 28
Vcc
• Clase medioambiental: Clase A1 (uso interno)
• Grado de protección IP30
• Temperatura de funcionamiento: (-5 °) – (+40) °C (uso
interno)
• Humedad ambiente operativo: 10 / 80% (sin
condensación)
STAND-BY    :     •
  140       10
  28  - BUS 1  2     :  •

( ) A1  :  •
IP30   •
( ) (  +40) (  -5) :  •
( ) 80% /10 :    •
• Απορρόφηση: σε κατάσταση αναμονής 10 mA, μέγιστο ρεύμα
140 mA
• Τροφοδοσία: από επαφές κλέμας BUS 1, 2 - ονομαστική τάση
28Vdc
• Περιβαλλοντική κατηγορία: Κατηγορία A1 (εσωτερική χρήση)
• Βαθμός προστασίας IP30
• Θερμοκρασία λειτουργίας: (-5°) – (+40)°C (εσωτερική χρήση)
• Υγρασία περιβάλλοντος λειτουργίας: 10 / 80% (χωρίς
συμπύκνωση)
• Consumo: em standby 10 mA; corrente máxima 140 mA
• Alimentação: do BUS terminais 1, 2 - tensão nominal
28Vdc
• Classe ambiental: Classe A1 (uso interno)
• Grau de proteção IP30
• Temperatura de funcionamento: (-5 °) – (+40) °C (uso
interno)
• Humidade do ambiente operativo: 10 / 80% (sem
condensação)
FCC (United States) Compliance Statement
This device complies with Part 15 of the FCC Rules. Operation is subject to the following
two conditions: (1) This device may not cause harmful interference, and (2) this device
must accept any interference received, including interference that may cause undesired
operation.
Caution to the user that changes or modications not expressly approved by the party
responsible for compliance could void the user’s authority to operate the equipment
NOTE: This equipment has been tested and found to comply with the limits for a Class
B digital device, pursuant to part 15 of the FCC Rules. These limits are designed to
provide reasonable protection against harmful interference in a residential installation.
This equipment generates, uses and can radiate radio frequency energy and, if not
installed and used in accordance with the instructions, may cause harmful interference
to radio communications. However, there is no guarantee that interference will not occur
in a particular installation. If this equipment does cause harmful interference to radio or
television reception, which can be determined by turning the equipment off and on, the user
is encouraged to try to correct the interference by one or more of the following measures:
• Reorient or relocate the receiving antenna.
• Increase the separation between the equipment and receiver.
• Connect the equipment into an outlet on a circuit different from that to which the receiver
is connected.
• Consult the dealer or an experienced radio/TV technician for help.”
Responsible Party – U.S. Contact Information: VIOLETTE ENGINEERING
CORPORATION https://violetteengineering.com/
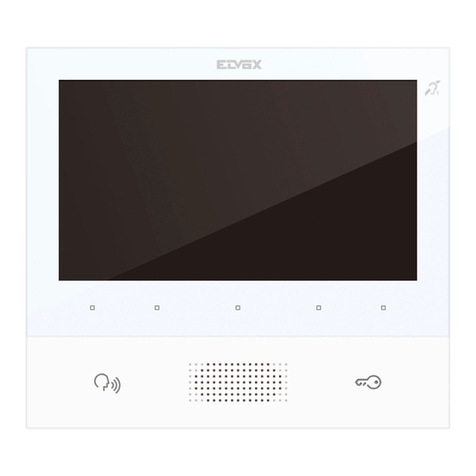
This manual suits for next models

2

Other Vimar Intercom System manuals

Vimar Elvox PATAVIUM Series Assembly instructions

Vimar

Vimar Elvox PATAVIUM Series Assembly instructions

Vimar Elvox Due Fili Plus 7549/M User guide

Vimar

Vimar Elvox Due Fili Plus 7549/M User guide

Vimar ELVOX 41010 User manual

Vimar

Vimar ELVOX 41010 User manual

Vimar elvox Due Fili Plus User manual

Vimar

Vimar elvox Due Fili Plus User manual

Vimar Eikon 20577 User guide

Vimar

Vimar Eikon 20577 User guide

Vimar Elvox 40920.P1 User manual

Vimar

Vimar Elvox 40920.P1 User manual

Vimar Elvox Giotto 6344 Assembly instructions

Vimar

Vimar Elvox Giotto 6344 Assembly instructions

Vimar 1955 User manual

Vimar

Vimar 1955 User manual

Vimar 01420 User manual

Vimar

Vimar 01420 User manual

Vimar elvox Due Fili Plus User manual

Vimar

Vimar elvox Due Fili Plus User manual

Vimar 41002 User manual

Vimar

Vimar 41002 User manual

Vimar TAB 40517 User manual

Vimar

Vimar TAB 40517 User manual

Vimar Elvox Petrarca 6209/D User guide

Vimar

Vimar Elvox Petrarca 6209/D User guide

Vimar EIMAR Pixel 41131 Assembly instructions

Vimar

Vimar EIMAR Pixel 41131 Assembly instructions

Vimar ELVOX 46237.040A User manual

Vimar

Vimar ELVOX 46237.040A User manual

Vimar Elvox 559A Assembly instructions

Vimar

Vimar Elvox 559A Assembly instructions

Vimar ELVOX K40917 User manual

Vimar

Vimar ELVOX K40917 User manual

Vimar Etvax 6328 User manual

Vimar

Vimar Etvax 6328 User manual

Vimar Eikon 20457 User manual

Vimar

Vimar Eikon 20457 User manual

Vimar ELVOX 41018 User manual

Vimar

Vimar ELVOX 41018 User manual

Vimar ELVOX 8000 Series Assembly instructions

Vimar

Vimar ELVOX 8000 Series Assembly instructions

Vimar ELVOX TAB 7S User guide

Vimar

Vimar ELVOX TAB 7S User guide

Vimar K40916 User manual

Vimar

Vimar K40916 User manual

Vimar ELVOX 6155 User manual

Vimar

Vimar ELVOX 6155 User manual

Popular Intercom System manuals by other brands

Fasttel FT600W instruction manual

Fasttel

Fasttel FT600W instruction manual

Eyevision Intelli Series manual

Eyevision

Eyevision Intelli Series manual

sks DS 2010-FS Audio operating instructions

sks

sks DS 2010-FS Audio operating instructions

urmet domus SIGNO 1740 user manual

urmet domus

urmet domus SIGNO 1740 user manual

Panasonic VL-VN1700 operating manual

Panasonic

Panasonic VL-VN1700 operating manual

RTS KP-98-7 installation instructions

RTS

RTS KP-98-7 installation instructions

2easy DMR21/D32/F1 Technical manual

2easy

2easy DMR21/D32/F1 Technical manual

SSS Siedle NG 402-03 Product information

SSS Siedle

SSS Siedle NG 402-03 Product information

LEGRAND Easy Kit Connected installation manual

LEGRAND

LEGRAND Easy Kit Connected installation manual

Cyfral PC-4000RV Operating, Installation and Programming Manual

Cyfral

Cyfral PC-4000RV Operating, Installation and Programming Manual

Axis I8016-LVE Repainting instructions

Axis

Axis I8016-LVE Repainting instructions

DTS Icom2 Operating instructions manual

DTS

DTS Icom2 Operating instructions manual

Valet SmartCentre installation manual

Valet

Valet SmartCentre installation manual

LEGRAND Bticino Terraneo 342911 instruction sheet

LEGRAND

LEGRAND Bticino Terraneo 342911 instruction sheet

PS Engineering PM1000 II Operator and installation manual

PS Engineering

PS Engineering PM1000 II Operator and installation manual

Comelit SIMPLEBUS 2 8472MB Technical manual

Comelit

Comelit SIMPLEBUS 2 8472MB Technical manual

ERA Products CONNECTA User's installation guide

ERA Products

ERA Products CONNECTA User's installation guide

DoorBird A1061 Series installation manual

DoorBird

DoorBird A1061 Series installation manual

manuals.online logo
manuals.online logoBrands
  • About & Mission
  • Contact us
  • Privacy Policy
  • Terms and Conditions

Copyright 2025 Manuals.Online. All Rights Reserved.