manuals.online logo
Brands
  1. Home
  2. •
  3. Brands
  4. •
  5. VistaLab
  6. •
  7. Laboratory Equipment
  8. •
  9. VistaLab 1136 Manual

VistaLab 1136 Manual

Operator’s Gu de
Volume Range Catalog No. Color Increment
10 to 50µL 1136 Green 0.5µL
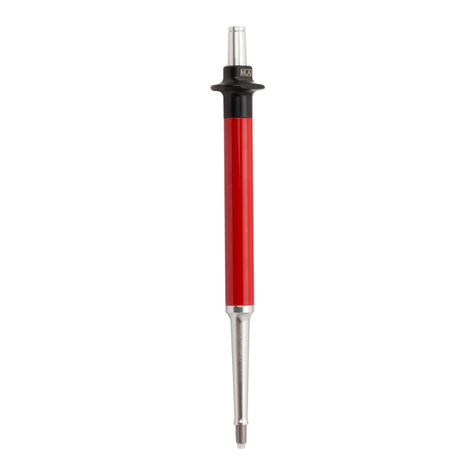
50 to 200µL 1137 Red 1.0µL
200 to 1000µL 1138 Gray 5.0µL
D g tal P pette
Volume Volume Change Volume Accepta le Accuracy
per 1/2 revolution Setting Range (µL)
10 to 50µL 2.5µL Low 10µL 9.5 - 10.5 ±5%
id 30µL 29.1 - 30.9 ±3%
High 50µL 49.0 - 51.0 ±2%
50 to 200µL 5.0µL Low 50µL 49.0 - 51.0 ±2%
id 125µL 123.75 - 126.25 ±1%
High 200µL 198.0 - 202.0 ±1%
200 to 1000µL 25µL Low 200µL 198.0 - 202.0 ±1%
id 600µL 594.0 - 606.0 ±1%
High 1000µL 990.0 - 1010.0 ±1%
Spec f cat ons Table
2 Geneva Road
Brewster NY 10509 USA
(888) 652-6520 or (914) 244-6226
05/26/10
326720 Rev.H
See www.vistalab.com for
the most current listing of
tips and accessories.
T
Introduct on
LA Digital Pipettes are “to deliver” air displacement adjustable volume instruments. Three
models are available covering a volume range of 10 to 1000µL. Volume is adjusted by
rotating the plunger. The plunger clicks in place for any desired setting. The volume display
is located in the bonnet of the pipette.
P pette T ps
It is recommended that LA Pipettes be used with VistaLab Pipette Tips. The use of tips from
other sources may degrade the pipette performance. For information on VistaLab Pipette Tips,
refer to the Tip Table.
P pett ng Procedure
a. Rotate the plunger to display desired volume (clockwise to decrease, counterclockwise to increase).
Note: Do not rotate beyond the p pette’s volume l m ts!
Th s w ll damage the p pette and vo d the warranty.
b. Using VistaLab Pipette Tips, press the pipette nozzle firmly into a fresh tip.
c. Fully depress the pipette plunger and then immerse the tip into the solution a maximum of
1/8 inch or 3mm.
d. Smoothly release the plunger and allow the solution to enter the pipette tip.
e. Remove the tip from the solution and touch the tip against the side of the vessel to remove
any solution that may have adhered to the outside of the tip.
f. Place the tip against the side of the receiving vessel as close to the bottom as possible or,
if the vessel contains liquid, as close to the liquid as possible. Smoothly depress the plunger.
g. While holding the plunger depressed, slowly withdraw the tip, keeping it against the wall of
the container.
Note: Performance may be improved by pre-wetting pipette tips. See Hint A on next page.
h. Release the plunger and remove the tip by applying a slight upward pressure to the bonnet.
(See figure below)
NON-STERILESTERILE
T I P S I Z E : S M A L L L A R G E
10 to 50µL
Digital M
odel
:50 to 200µL 201–1000µL
Vist R k™
192 tips/r ck, 5 r cks 4060-2004 4060-3004
Vist St k™, 192 tips/l yer, 5 l yers (sm ll size)
or 3 l yers (l rge size) 4060-9025 4060-9026
St cked R ck, 200 tips/l yer,
5 l yers (sm ll size) or 3 l yers (l rge size) 9025 9026
St cked R ck, Tr ce Met l Certified, 200 tips/l yer,
5 l yers (sm ll size) or 3 l yers (l rge size) 9022 9023
Vist Bulk™, 1000 tips/b g 4058-2000 4058-3000
Protect iner™Bulk P ck,
1000 tips (sm ll) or 750 tips (l rge) 4025 4026
Econo-P k™Bulk P ck,
1000 tips 4225 4226
Vist R k, Sterile,
Pyrogen-free,
RN se/DN se certified,
192 tips/r ck, 5 r cks 4060-2132 4060-3132
Vist Tip™Individu lly Wr pped
Sterile,
200 tips
2025 2026
Vist Tip Individu lly Wr pped, Sterile,
Pyrogen-free, 200 tips
2027 2028
Vist R k, Filtered, Sterile,
Pyrogen-free,
RN se/DN se certified,
192 tips/r ck, 5 r cks 4060-2332 4060-3332
T p Table
9025
Catalog
Number
Accessor es
Cat # Description
9091 Seal Kit, 10 to 50µL
9092 Seal Kit, 50 to 200µL
9094 Seal Kit, 200 to 1000µL
Cat # Description
8066 Nozzle Inserts
1700 Pipette Stand
Note: Filtered tips contain a unique hydrophobic filter which acts as a barrier to aqueous liquids and aerosols,
protecting the pipette and sample from trace amounts of carryover.
H nts
a.
When pipetting serum or other biological fluids, a liquid film may be retained in the tip that can
change the pipetted volume. Pre-wetting the tip with the liquid to be pipetted can reduce this effect.
b. Smoothly depress and release the plunger and maintain the same speed of action for all samples.
Do not let the plunger snap back.
c. Fully depress the plunger before inserting the pipette tip into a solution. This will prevent an air
bubble from forming in the solution.
d. Hold the pipette as vertically as possible at all times. Insert the tip to the same depth each time.
e.
If an air bubble forms in the tip during intake, return the sample, discard the tip and apply a fresh tip.
f. Remove and clean the nozzle insert as needed, or when ever sample is accidently aspirated into
lower nozzle assembly. Replace the nozzle insert if necessary.
g. Check that the nozzle assembly is screwed firmly into the pipette body.
Cal brat on
Calibration is accomplished by adjusting the plunger shaft. Digital Pipettes are factory calibrated at
three settings across the pipetting range. Factory tests and calibration are performed at 21.5 +2˚C
using distilled water. To change calibration, proceed as follows:
a. Determine the pipette delivered volume by testing the pipette at the lowest volume setting.
NOTE: Gravimetric or colorimetric techniques may be used to determine the pipette
delivered volume. A procedure for the gravimetric method, or information about
an LA Pipette Calibration Kit using a color dilution principle, can be found in
the support area of the VistaLab Technologies web site - www.vistalab.com.
b. Some models have a set screw on the side of the plunger. With the enclosed Allen key, loosen
this set screw (it is not necessary to remove screw). Retighten set screw when all internal
adjustments have been completed.
c. While holding the plunger between the thumb and forefinger, unscrew and remove the plunger
cap by rotating it in a counterclockwise direction. The plunger can be extended for easier
holding by increasing the digital display to a higher volume.
d. Allow plunger cover to drop down to release the plunger gear shaft.
e. With a small phillips screwdriver or fingers, rotate the plunger shaft clockwise to decrease the
volume and counterclockwise to increase the volume.
f.
The approximate change in volume for a 1/2 turn is 2.5µL for the 10-50µL, 5µL for the 50-200µL
and 25µL for the 200-1000µL Digital Pipette.
g. Pull the plunger cover up and re-engage plunger gear shaft. Hold the plunger cover up and
replace the plunger cap.
h. Retest the pipette volume deliver at the low setting.
i. Test the pipette at mid and high settings.
If further adjustments are required, return the pipette to the low volume setting and adjust plunger
shaft as needed. Retest the pipette volume delivery at the low setting before continuing to the
mid and high settings. Ensure that each setting is within the acceptable volume range. For
specifications, see Specifications Table.
Ma ntenance
During factory assembly, the internal parts of the pipette (plunger, seals, etc.) are lubricated with
grease. Unless the pipette is used with corrosive chemicals or solvents, routine cleaning and
lubrication should only be necessary at 6 month intervals. Lubrication is necessary if the plunger
movement is rough or does not return to the “up” position.
The nozzle, and the nozzle insert in particular, should be cleaned regularly. In case of accidental
sample aspiration, the nozzle assembly and insert should be cleaned immediately. Cleaning should
be done with a lint-free cloth, dampened with alcohol. Refer to Figure 2 for nozzle insert removal.
Should the pipette fail to operate or if the delivered volume is low, the seals should be checked for
wear and replaced if necessary. Instructions for pipette disassembly and seal replacement can be
found in the appropriate seal kit.
Plunger
Plunger
Cap
Digital
Display Body Seals Nozzle Assembly
Spring Cap
Assembly
Sleeve Nozzle Cover
Bonnet
Digital Pipette Assem ly – 10 to 50µL and 50 to 200µL
Plunger Digital
Display Seal Body Nozzle Assembly
Sleeve Nozzle Cover
Digital Pipette Assem ly – 200 to 1000µL
Set Screw
Figure 2: Nozzle Insert Removal
Plunger
Cap
Bonnet
Set Screw

This manual suits for next models

2

Other VistaLab Laboratory Equipment manuals

VistaLab MLA Series User manual

VistaLab

VistaLab MLA Series User manual

VistaLab Ovation M Use and care manual

VistaLab

VistaLab Ovation M Use and care manual

VistaLab Ovation QS Manual

VistaLab

VistaLab Ovation QS Manual

VistaLab Ovation M Operating and safety instructions

VistaLab

VistaLab Ovation M Operating and safety instructions

VistaLab 1070-0002 User manual

VistaLab

VistaLab 1070-0002 User manual

VistaLab Ovation ESC User manual

VistaLab

VistaLab Ovation ESC User manual

VistaLab MLA pipette MLA 1061 Manual

VistaLab

VistaLab MLA pipette MLA 1061 Manual

VistaLab Ovation 9060-4005 Guide

VistaLab

VistaLab Ovation 9060-4005 Guide

VistaLab ali-Q 2 Installation instructions

VistaLab

VistaLab ali-Q 2 Installation instructions

VistaLab Ovation Manual

VistaLab

VistaLab Ovation Manual

VistaLab MLA Micro D-Tipper Series User manual

VistaLab

VistaLab MLA Micro D-Tipper Series User manual

VistaLab ali-Q User manual

VistaLab

VistaLab ali-Q User manual

VistaLab Ovation 9057-2009 Use and care manual

VistaLab

VistaLab Ovation 9057-2009 Use and care manual

VistaLab Ovation M User manual

VistaLab

VistaLab Ovation M User manual

VistaLab Ovation 9060-5009 Guide

VistaLab

VistaLab Ovation 9060-5009 Guide

VistaLab Ovation M Use and care manual

VistaLab

VistaLab Ovation M Use and care manual

VistaLab Ovation 9060-1011 Guide

VistaLab

VistaLab Ovation 9060-1011 Guide

Popular Laboratory Equipment manuals by other brands

OPENTEXT Tableau Forensic TX1 Quick reference guide

OPENTEXT

OPENTEXT Tableau Forensic TX1 Quick reference guide

Air Vent UV-C FiltAir Quick installation guide

Air Vent

Air Vent UV-C FiltAir Quick installation guide

3D Histech PANNORAMIC CONFOCAL 3.0.3 user guide

3D Histech

3D Histech PANNORAMIC CONFOCAL 3.0.3 user guide

3D Histech iSaCS user guide

3D Histech

3D Histech iSaCS user guide

Alfalaval Heatpac EHS-71 System instructions

Alfalaval

Alfalaval Heatpac EHS-71 System instructions

PerkinElmer Spotlight 150 user guide

PerkinElmer

PerkinElmer Spotlight 150 user guide

PerkinElmer Migele user manual

PerkinElmer

PerkinElmer Migele user manual

PerkinElmer IVIS Lumina XRMS III Series Hardware manual

PerkinElmer

PerkinElmer IVIS Lumina XRMS III Series Hardware manual

Air Vent UV-C FiltAir instruction manual

Air Vent

Air Vent UV-C FiltAir instruction manual

RBCBioscience MagCore HF16 Plus Training manual

RBCBioscience

RBCBioscience MagCore HF16 Plus Training manual

PerkinElmer Lambda 365 installation instructions

PerkinElmer

PerkinElmer Lambda 365 installation instructions

Novatech Instruments 1450B instruction manual

Novatech Instruments

Novatech Instruments 1450B instruction manual

Isotech 989 User maintenance manual/handbook

Isotech

Isotech 989 User maintenance manual/handbook

J.P. SELECTA PRECISDIG 6001195 manual

J.P. SELECTA

J.P. SELECTA PRECISDIG 6001195 manual

Biotage PRESSURE+ 48 user manual

Biotage

Biotage PRESSURE+ 48 user manual

Labnet Excel P3600L-10 instruction manual

Labnet

Labnet Excel P3600L-10 instruction manual

Hettich MIKRO 120 manual

Hettich

Hettich MIKRO 120 manual

SCHOTT ColdVision user manual

SCHOTT

SCHOTT ColdVision user manual

manuals.online logo
manuals.online logoBrands
  • About & Mission
  • Contact us
  • Privacy Policy
  • Terms and Conditions

Copyright 2025 Manuals.Online. All Rights Reserved.