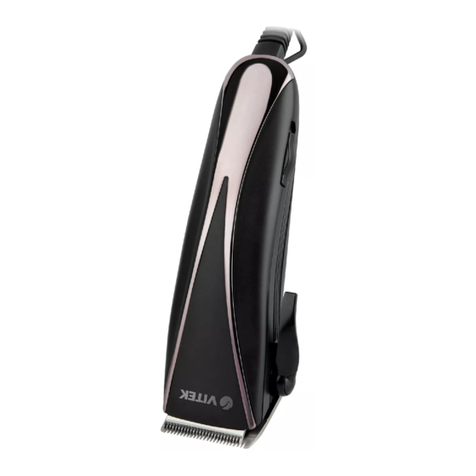
Vitek VT-2587 User manual

Hair clipper
Машинка
для стрижки
волос
VT-2587
3
7
12
17
22
27
VT-2587.indd 1VT-2587.indd 1 1/22/20 3:01 PM1/22/20 3:01 PM

10 11
7
8
9
2
6
3
1
4
5
VT-2587.indd 2VT-2587.indd 2 1/22/20 3:01 PM1/22/20 3:01 PM

3
ENGLISH
HAIR CLIPPER VT-2587
This set is intended for cutting hair and
styling.
DESCRIPTION
1. Detachable blade block
2. Protective cover
3. Clipper knob/power switch «0/I»
4. Power adapter cord
5. Power adapter
6. Hanging loop
7. 1,5 mm attachment comb
8. 3 mm attachment comb
9. 4,5 mm attachment comb
10. Cleaning brush
11. Lubricating oil
SAFETY MEASURES
Read this instruction manual carefully before
using the unit and keep it for future reference
for the whole operation period. Use the unit
for its intended purposes only, as specified in
this manual. Mishandling of the unit may lead
to its breakage and cause harm to the user or
damage to his/her property.
•
Before connecting the unit to the mains
for the first time, make sure that your
home mains voltage corresponds to the
power adapter's operating voltage.
•
The power adapter cord must not:
–
touch hot objects and surfaces;
–
be immersed into water;
–
run over sharp edges of furniture,
–
be used as a handle for carrying the
unit.
•
Do not touch the power adapter cord and
the power adapter body with wet hands
during the unit operation.
•
The hair clipper is not intended for pro-
fessional use.
•
Use the unit to cut only dry hair.
•
Use the unit to cut only natural human
hair.
•
Do not use the unit to cut artificial hair and
animal hair.
•
Use only the attachments and the power
adapter supplied.
•
Do not use the unit in places with high
temperature and relative humidity more
than 80%.
•
Do not use the unit outdoors.
•
Do not use the unit if the attachment or
the blades are damaged.
ATTENTION! Keep the unit dry. Do not
immerse the unit into water or any other
liquids.
•
Before the operation make sure that
the blade block and the attachment are
installed properly.
•
Switch the unit off before installing or
removing the attachment or the blade
block.
•
Do not use the unit near a bath/shower
and containers filled with water.
•
If the unit is dropped into water, unplug
the power adapter immediately, and only
then take the unit out of the water.
•
Always keep the blades clean and lubri-
cated.
•
After each using remove cut-off hair from
the attachment and the blade block with
the brush supplied.
•
Never leave the operating unit unattend-
ed.
•
Switch the unit off during intervals in
operation or when you are not using it.
•
Do not allow children to touch the power
adapter body during the hair clipper oper-
ation.
•
Do not leave children unattended to avoid
them using the unit as a toy.
•
This unit is not intended for usage by
children.
•
During the operation and breaks between
operation cycles, place the unit out of
reach of children and disabled persons.
•
The unit is not intended to be used by
people with physical, sensory or mental
disabilities (including children) or by per-
sons lacking experience or knowledge if
they are not under supervision of a per-
son who is responsible for their safety or
if they are not instructed by this person on
the usage of the unit.
•
Close supervision is necessary when chil-
dren or disabled persons are near the
operating unit.
•
For children safety reasons do not leave
polyethylene bags used as a packaging
unattended.
ATTENTION! Do not allow children to play
with polyethylene bags or packaging film.
Danger of suffocation!
VT-2587.indd 3VT-2587.indd 3 1/22/20 3:01 PM1/22/20 3:01 PM

4
ENGLISH
•
Do not attempt to repair the unit. Do not
disassemble the unit by yourself, if any
malfunction is detected or after it was
dropped, unplug the unit and apply to any
authorized service center from the con-
tact address list given in the warranty cer-
tificate and on the website www.vitek.ru.
•
To avoid damages, transport the unit in
the original package only.
•
Keep the unit in a dry cool place out of
reach of children and disabled persons.
THIS UNIT IS INTENDED FOR HOUSEHOLD
USE ONLY. ITS COMMERCIAL USAGE AND
USAGE IN PRODUCTION AREAS AND WORK
SPACES IS PROHIBITED.
BEFORE THE FIRST USE
After unit transportation or storage at
low temperature keep it for at least three
hours at room temperature before switch-
ing on.
–
Unpack the unit completely and remove
packaging materials that can prevent the
unit operation.
–
Check the unit for damages; do not use it
in case of damages.
–
Before using the hair clipper, make sure
that your home mains voltage corre-
sponds to the operating voltage of the
power adapter.
–
The unit is intended for operation with AC
system and 50 or 60 Hz frequency. The
unit does not need any additional settings
for operating with the required nominal
frequency.
LUBRICATING THE BLADE BLOCK
The blade block is consumable and is not
covered by the warranty.
The consumer should pay attention to the
condition of the cutting edges of the blade
block, as sharpening (polishing) of the cut-
ting edges is not covered by warranty.
–
Lubricate the blades (1) before and after
every use of the hair clipper with the oil
(11) supplied with the unit. Remove hair,
dust and other foreign objects from the
blades before every use.
–
To remove the blade block place the hair
clipper with the blades towards you and
press on the upper edge of the blade
block (1) with your thumb.
–
Apply the lubricating oil (11) to the junc-
tions between the fixed and moving parts
of the blades.
–
To install the blade block first insert its
lower part to the installation place and then
carefully press on the upper edge of the
blade block (1). Make sure that the blade
block (1) is installed and fixed properly.
–
Switch the hair clipper on by turning the
knob (3) «I» clockwise and let it operate for
approximately 30 seconds to spread the
oil across the rubbing surfaces. Switch the
hair clipper off by turning the knob (3) «0»
counterclockwise and remove the exces-
sive oil with a dry cloth or a paper towel.
Note:
–
Lubricate the blade block (1) before and
after every use of the hair clipper.
–
For lubricating the blades use only the
oil (11), supplied with the unit, or the oil
intended for similar devices.
–
Do not use vegetable oil or oil that
includes solvents. Solvents will evapo-
rate, and the remaining thick oil may slow
down the blades motion.
INSTALLING THE ATTACHMENTS (7, 8 or 9)
• Before installing or removing the attach-
ments (7, 8, 9) switch the unit off turning
the knob (3) «0» counterclockwise.
• Install the selected attachment comb
(7, 8, 9) on the blades (1), teeth up, and
press the ledge in the bottom part of the
attachment until locking. To remove the
attachment comb (7, 8, 9) lift the lower
part of the attachment comb (7, 8, 9)
and remove it from the blades (1).
HAIR STYLING INSTRUCTIONS
•
Hair should be clean and dry during hair
cutting.
• Before cutting hair switch the hair clip-
per on by turning the knob (3) «I» clock-
wise and make sure that hair clipper
operates normally and the blades move
smoothly. If there is excess oil on the
blades (1), switch the hair clipper off
turning the knob (3) «0» counterclock-
wise and remove the excessive oil with
a dry cloth.
VT-2587.indd 4VT-2587.indd 4 1/22/20 3:01 PM1/22/20 3:01 PM

5
ENGLISH
•
Seat a person so that his/her head is
approximately at your eye level, cover the
person’s shoulders with a towel and set
hair with the comb.
Reminder
–
Cut off a little amount of hair at a time; if
necessary you can always return to the
cut off part and trim off additional hair.
–
The best haircutting results are reached
on dry hair, not wet.
–
Comb the hair with a comb to reveal
uneven locks.
–
It is better to leave longer hair after cut-
ting for the first time.
–
After learning your clipper better, you will
be able to arrange your hair in any style
you need.
Step one
Install the attachment (8) by turning the knob
(3) «I» clockwise. Hold the hair clipper with
the blades pointed upwards. Start cutting
from the hair growth edge. Slowly move the
hair clipper upwards. This way cut all hair
at the bottom of the back of the head and
near the ears.
Step two
Switch the hair clipper off by turning the
knob (3) «0» counterclockwise and install the
attachment (9) for cutting longer hair, switch
the hair clipper on and continue cutting hair
near the top of the head.
Step three – cutting in the temples area
Switch the hair clipper off, install the attach-
ment (7 or 8) for shorter hair and cut hair
at the temples. Then install the attachment
(8 or 9) for longer hair and continue cutting
towards the top of the head.
Step four – cutting the crown of the head
Cut the hair from the top of the head towards
the crown against the hair growth direction.
•
You can cut hair against and along the
direction of hair growth, but keep in mind
that the hair cut against the growth will be
shorter than the hair cut along the growth.
• Use the attachment (7) for short haircut
(from 1.5 mm). To leave a little longer
hair, use the attachment (8) (from 3 mm)
or the attachment (9) (from 4.5 mm).
•
To leave longer hair, grip hair locks between
your fingers and cut it using the hair clipper.
•
You can use the comb: lift the hair locks
and cut them with the hair clipper over
the comb.
•
Always start cutting from the back of
the head.
•
Comb the hair with a comb to reveal
uneven locks.
Step 5 – the final part
In the final stage of hair styling remove the
installed attachment (7, 8 or 9) from the clip-
per, turn the blades of the clipper towards the
hair and trim hair on the temples and neck
carefully. Do not press the clipper strongly,
there is danger of injuries or cuts when open
blades come in contact with skin.
Note: during the breaks between operations
switch the hair clipper off by turning the knob
(3) «0» counterclockwise. You can hang the
hair clipper by the loop (6).
• After you finish cutting hair, switch the
hair clipper off by turning the knob (3)
«0» counterclockwise.
• Remove the installed attachment (7, 8
or 9) and clean it from hair, remove the
blade block (1) and clean it with the
brush (10).
• Lubricate the blade block (1) with a drop
of oil (11).
• Put the protective cover (2) on the
blades block (1).
CUTTING BEARD AND MUSTACHE
Use open blades (1) to shape beard and
mustache, use the attachments (7, 8, 9) to
cut off certain hair length.
• When cutting beard or mustache for
the first time, install the attachment (9),
gradually reduce the cutting hair length
until the required length by installing
attachments (7 or 8).
•
To cut the beard symmetrically, it is rec-
ommended to start cutting from the ear to
the chin on the one side of the face, and
then repeat the beard cutting on the other
side of the face.
•
When cutting mustache, first comb it with
the comb (13) and start cutting from the
middle of the mustache to the corners
of the lips.
VT-2587.indd 5VT-2587.indd 5 1/22/20 3:01 PM1/22/20 3:01 PM
Table of contents
Languages:
Other Vitek Hair Clipper manuals

Vitek
Vitek VT-2580 User manual

Vitek
Vitek Manual instruction User manual

Vitek
Vitek VT-2512 User manual

Vitek
Vitek VT-1358 User manual

Vitek
Vitek VT-2541 User manual

Vitek
Vitek VT-2573 User manual

Vitek
Vitek VT-2578 User manual

Vitek
Vitek VT-1360 User manual

Vitek
Vitek VT-2567 GR User manual

Vitek
Vitek VT-1362 User manual

Vitek
Vitek VT-2566 User manual

Vitek
Vitek VT-1363 User manual

Vitek
Vitek VT-2585 User manual

Vitek
Vitek VT-2542 GY User manual

Vitek
Vitek VT-2516 W User manual

Vitek
Vitek VT-2511 BK User manual

Vitek
Vitek VT-2543 B User manual

Vitek
Vitek VT-1359 User manual

Vitek
Vitek VT-1364 User manual

Vitek
Vitek VT-2520 BK User manual