-
Veva ner hissrutan
till
bottenläget.
Demontera
främre
fästskruven i dörrpanelen och
bänd
ut
dörrpanelen
en
Iiten
bit
.
Bänd loss
och
ta
bort
täckpanelen.
Demontera den gamla dörrbackspegeln (insex 5
mm).
På
vagnar
utan
dörrbackspegel
ska
den
yttre
pryd-
nadsplåten bytas
ut
mot
en
med hål i (detalj
nummer:
v-sida 1213663-6, h-sida
1213664-4).
Ta isär den regelbara backspegeln
vid
leden.
Trä
på
gummibälgen
på
spegelarmen.
"Ol
vo
f>Ill
fl!>O
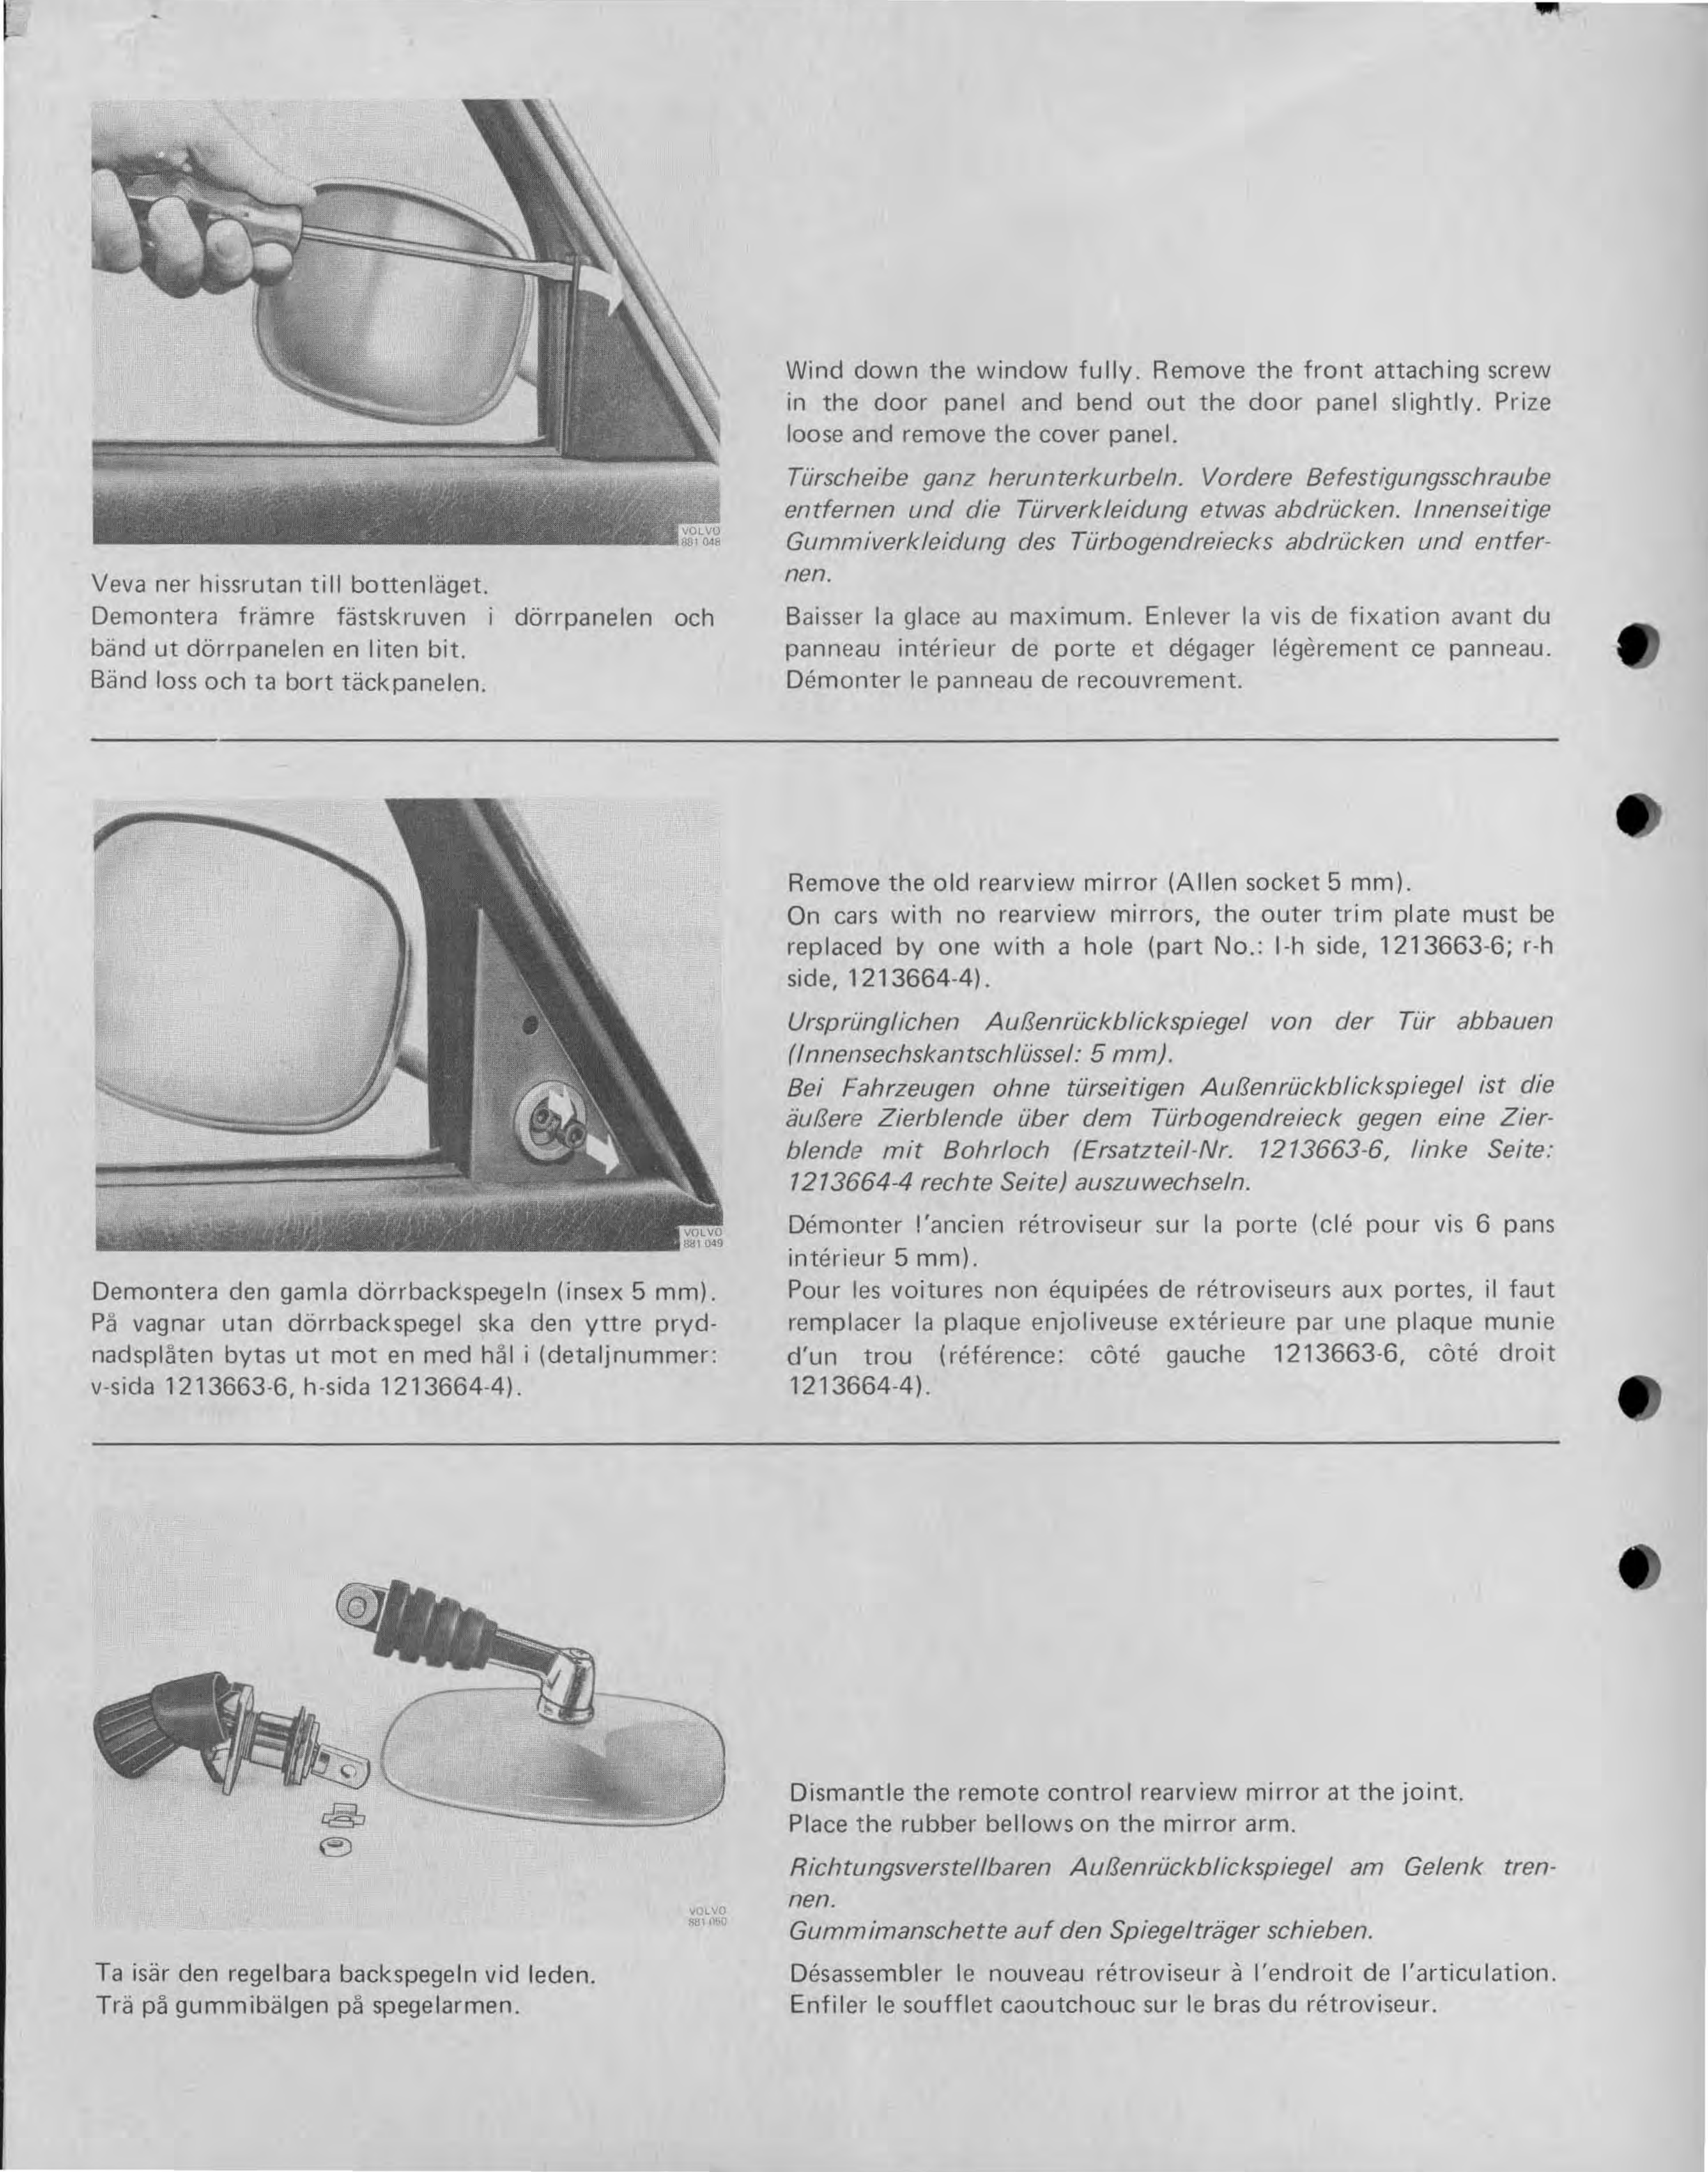
Wind
down
the
window
fully.
Remove
the
front
attaching screw
in
the
door
panel and bend
out
the
door
panel
slightly.
Prize
loose and remove
the
cover panel.
Tiirscheibe ganz
herunterkurbe/n.
Vordere Befestigungsschraube
entfernen
und
die Tiirverk/eidung etwas abdriicken. /nnenseitige
Gummiverk/eidung
des
Tiirbogendreiecks abdriicken
und
entfer-
nen.
Baisser la glace
au
maximum.
Enlever
la
vis de
fixation
avant du
panneau
interieur
de
porte
et
degager legerement
ce
panneau.
Demonter
le
panneau de recouvrement.
Remove
the
old
rearview
mirror
(Allen
socket 5
mm).
On cars
with
no
rearview
mirrors,
the
outer
trim
plate
must
be
replaced
by
one
with
a
hole
(part
No.:
l-h side,
1213663-6;
r-h
side,
1213664-4).
Urspriing/ichen AufSenriickb/ickspiege/ von
der
Tiir abbauen
(/nnensechskantsch/iisse/: 5
mm).
Bei Fahrzeugen ohne tiirseitigen AufSenriickb/ickspiege/
ist
die
äufSere
Zierb/ende
iiber
dem Tiirbogendreieck gegen eine Zier-
b/ende
mit
Bohrloch
(Ersatztei/-Nr. 7273663-6, /inke Seite:
7273664-4 rechte Seite) auszuwechse/n.
Demonter
!'ancien retroviseur sur
la
porte
(cle
pour
vis 6 pans
interieur
5
mm).
Pour
les
voitures
non
equipees de retroviseurs aux portes, il
faut
remplacer
la
plaque enjoliveuse
exterieure
par
une plaque munie
d'un
trou
(reference:
cöte
gauche
1213663-6,
cöte
droit
1213664-4)
.
Dismantie
the
remote
controi
rearview
mirror
at
the
joint.
Place
the
rubber
bellows
on
the
mirror
arm.
Richtungsverstellbaren AufSenriickb/ickspiege/ am Ge/enk tren-
nen.
Gummimanschette
auf
den Spiege/träger schieben.
Desassembler
le
nouveau
retroviseur
il
I'endroit
de
I'articulation.
Enfiler
le
soufflet
caoutchouc
sur
le
bras du retroviseur.
1.
•)


