VS Vereinigte Spezialmöbelfabriken GmbH & Co.KG
http://links.vs-service.com/downloads/70-144_V09_DEENFR_RondoLift-145926.pdf
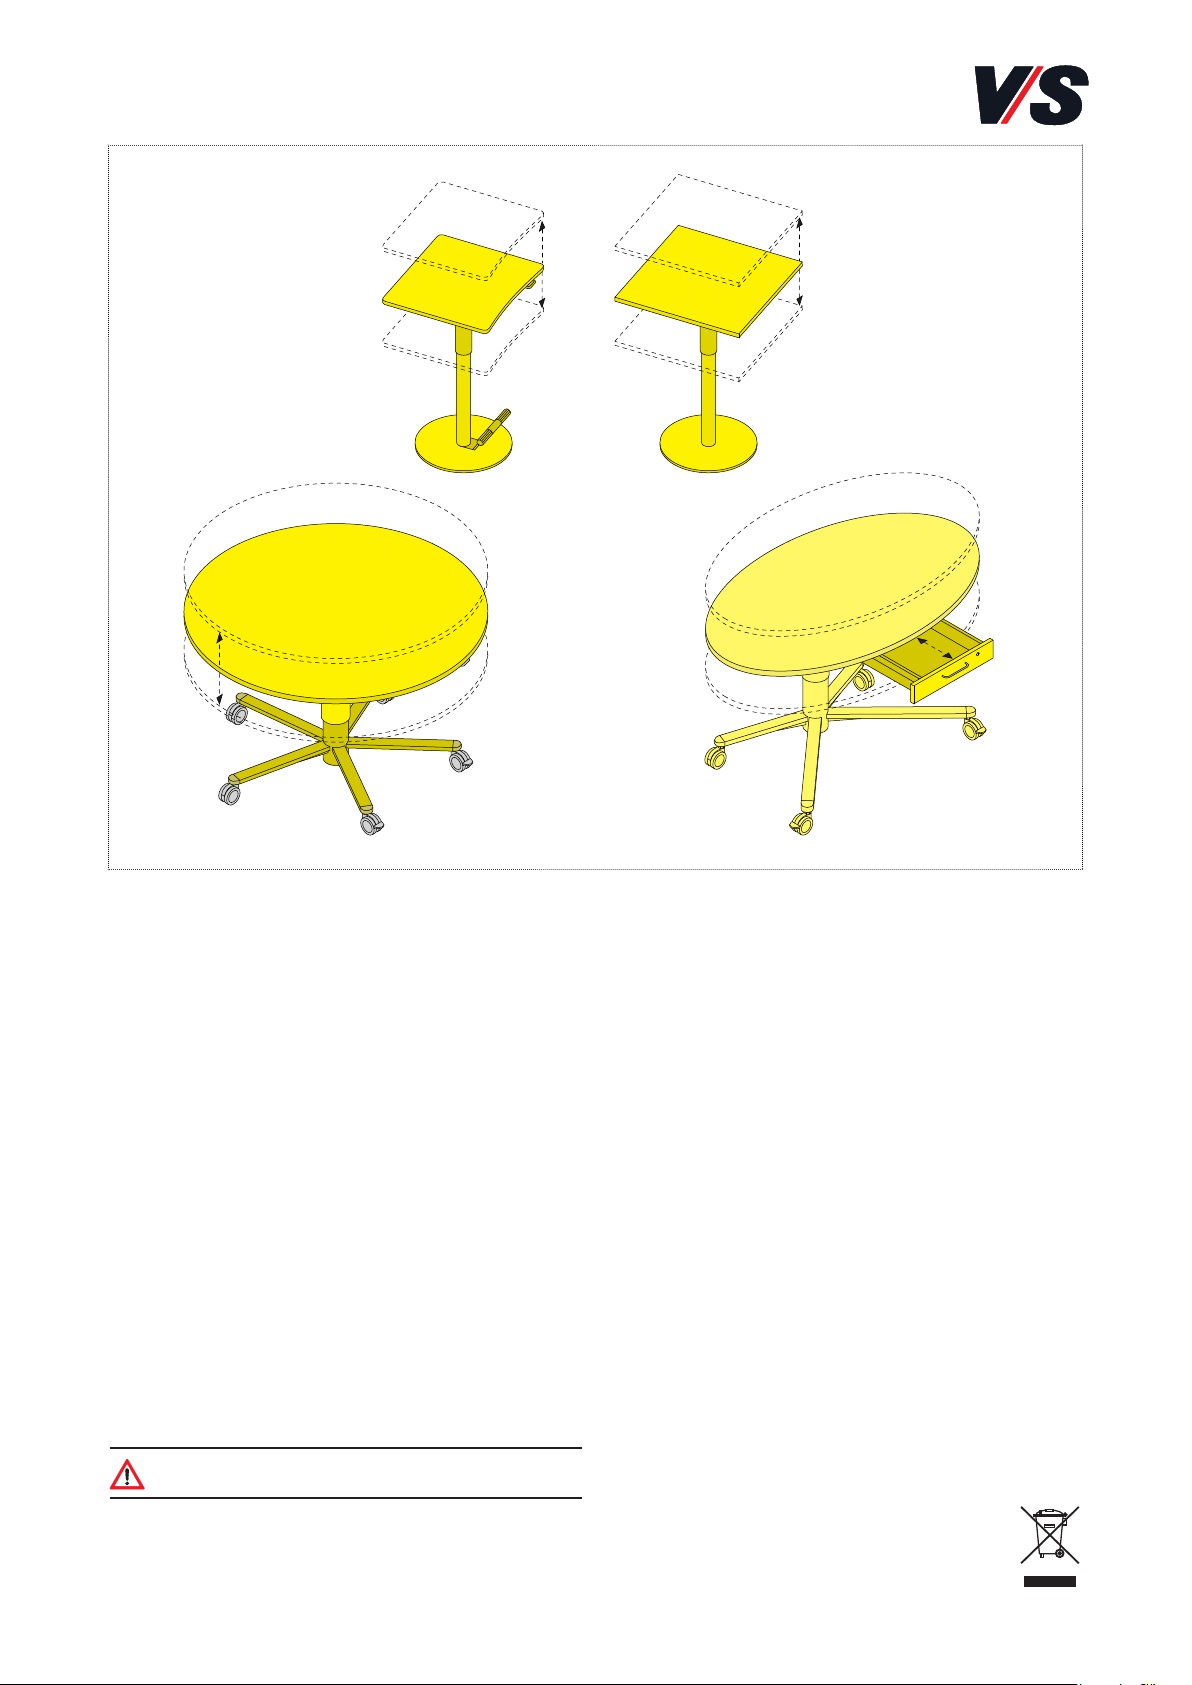
Bestimmung:
Die vorliegenden Tische wurden als Lehrer- und Besprechungs-
tische, Besuchertische und Stehpulte konzipiert und sind somit
auch nur für diesen Verwendungszweck bestimmt (siehe
Modell-Typologie am Ende). Eine andere oder darüber hinaus-
gehende Benutzung (z. B. in Werkstätten, Lagerbereich oder
Feuchträumen) gilt als nicht bestimmungsgemäß. Für hieraus
entstehende Schäden haftet die Firma VS Vereinigte Spezial-
möbelfabriken GmbH & Co. KG nicht.
Allgemeiner Hinweis zum Lesen und
Aufbewahren der Anleitung:
Lesen Sie diese Anleitung und vor allem die Sicherheitshin-
weise vor Benutzung der Produkte genau durch und beachten
Sie diese. Bewahren Sie die Anleitung zum späteren Nachlesen
sorgfältig auf und geben Sie diese an andere Benutzer weiter.
Allgemeiner Sicherheitshinweis:
In unseren Bedienanleitungen verwenden wir folgende
Symbole und Hinweise:
Achtung! Bei diesem Symbol handelt es sich um einen
sehr wichtigen Hinweis.
Im Internet:
Sie finden diese Anleitung im Internet (siehe Kopfleiste).
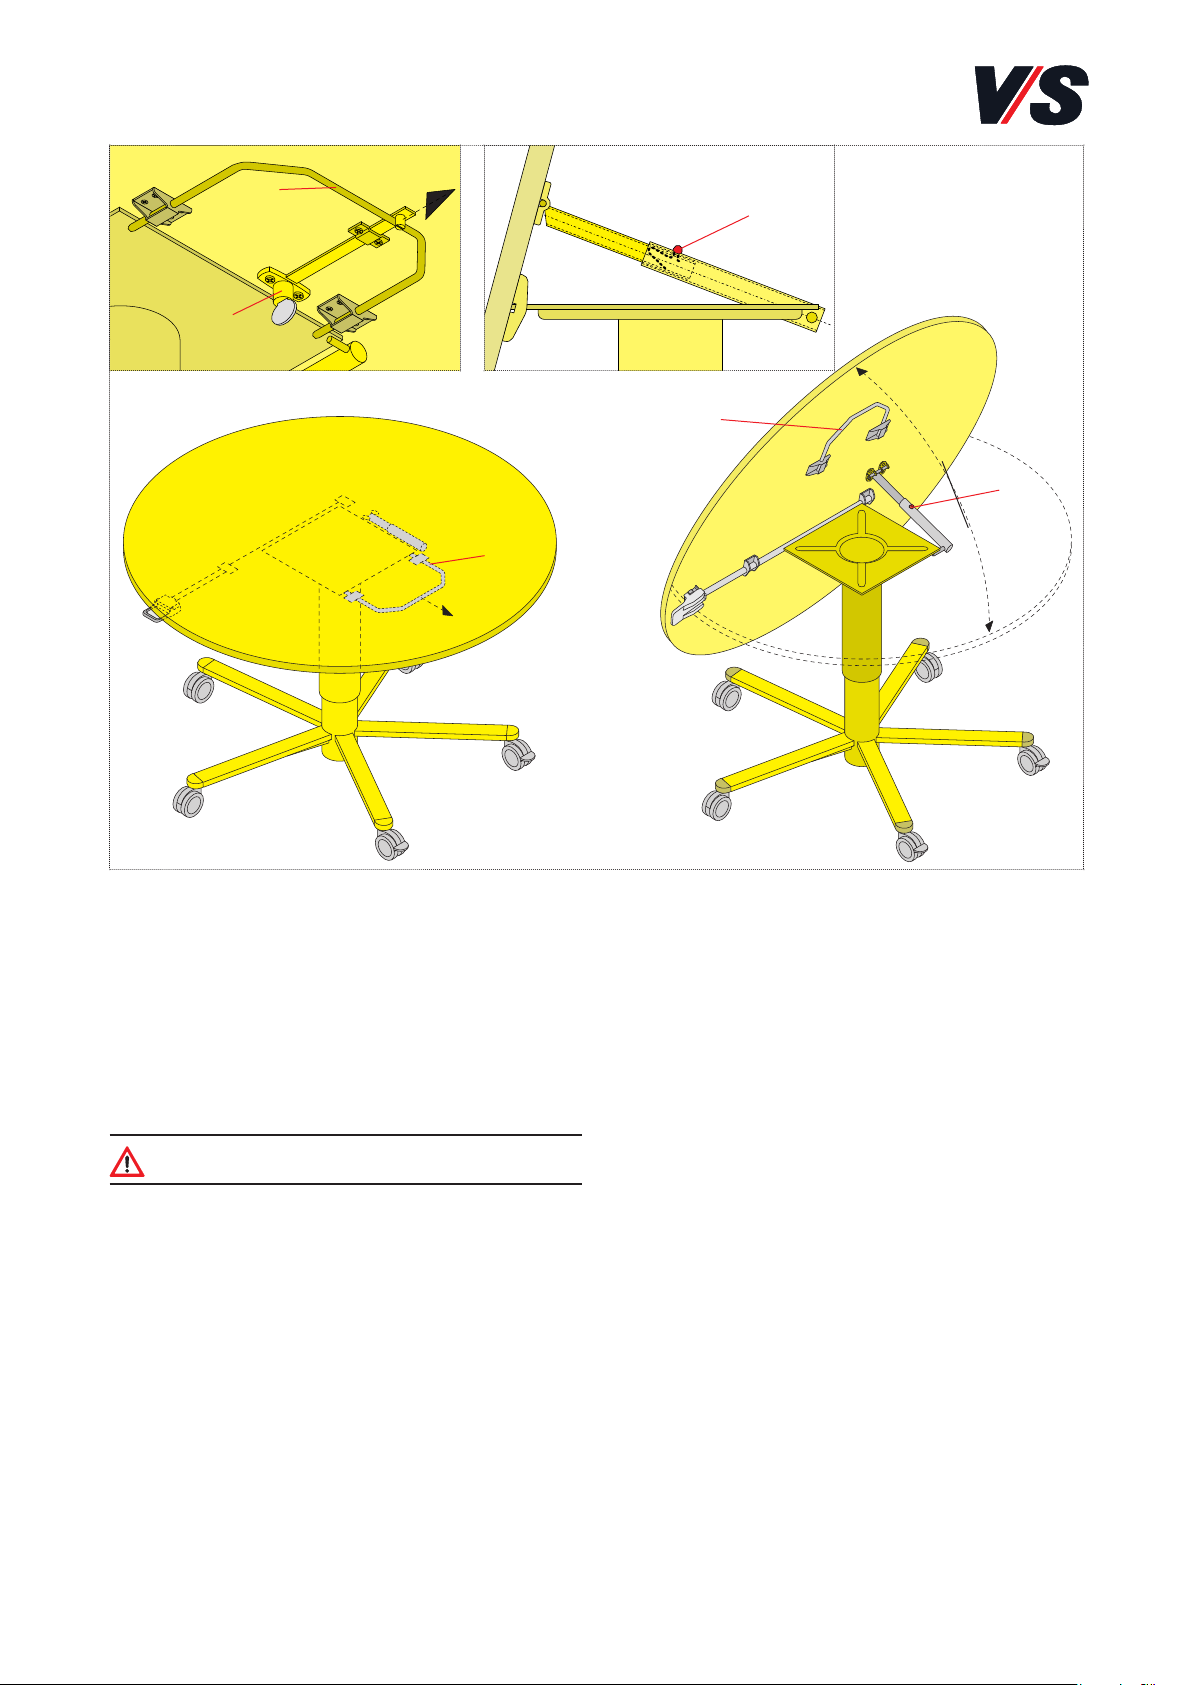
Lieferumfang:
Das Produkt wird fertig montiert ausgeliefert.
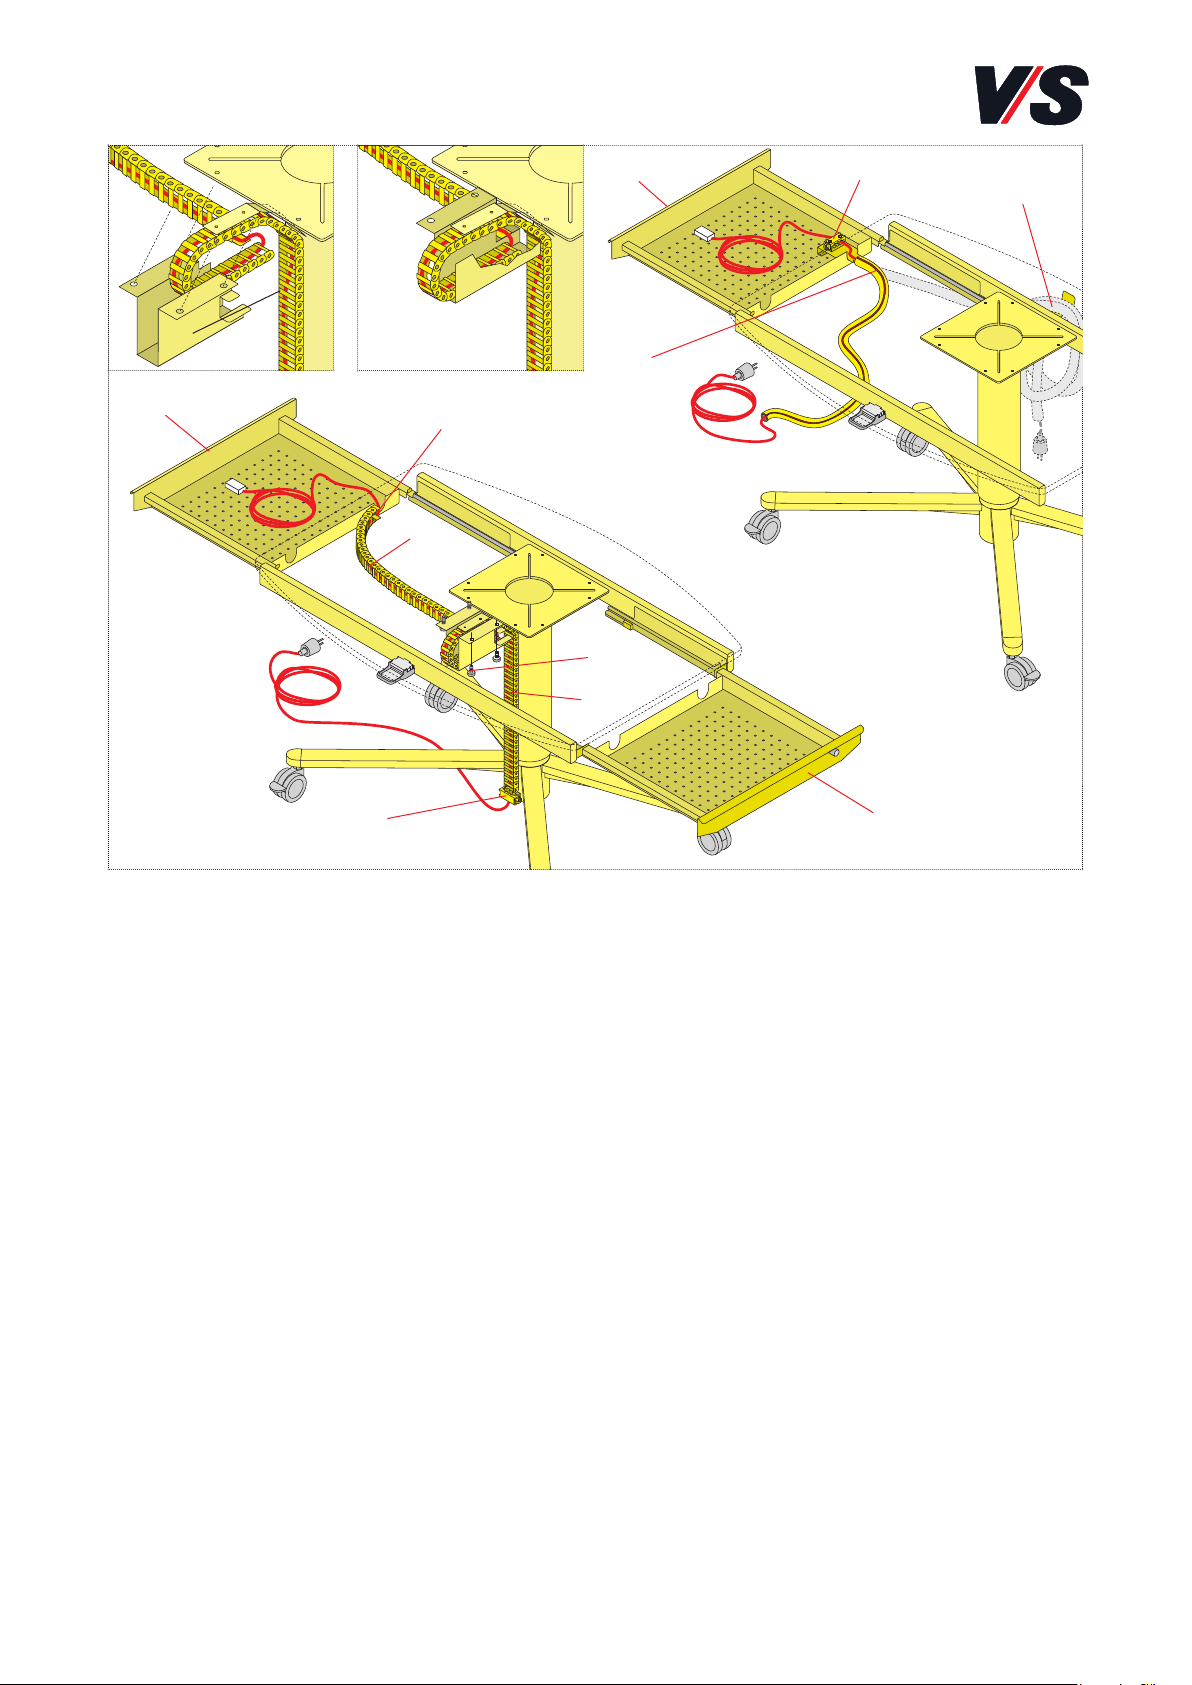
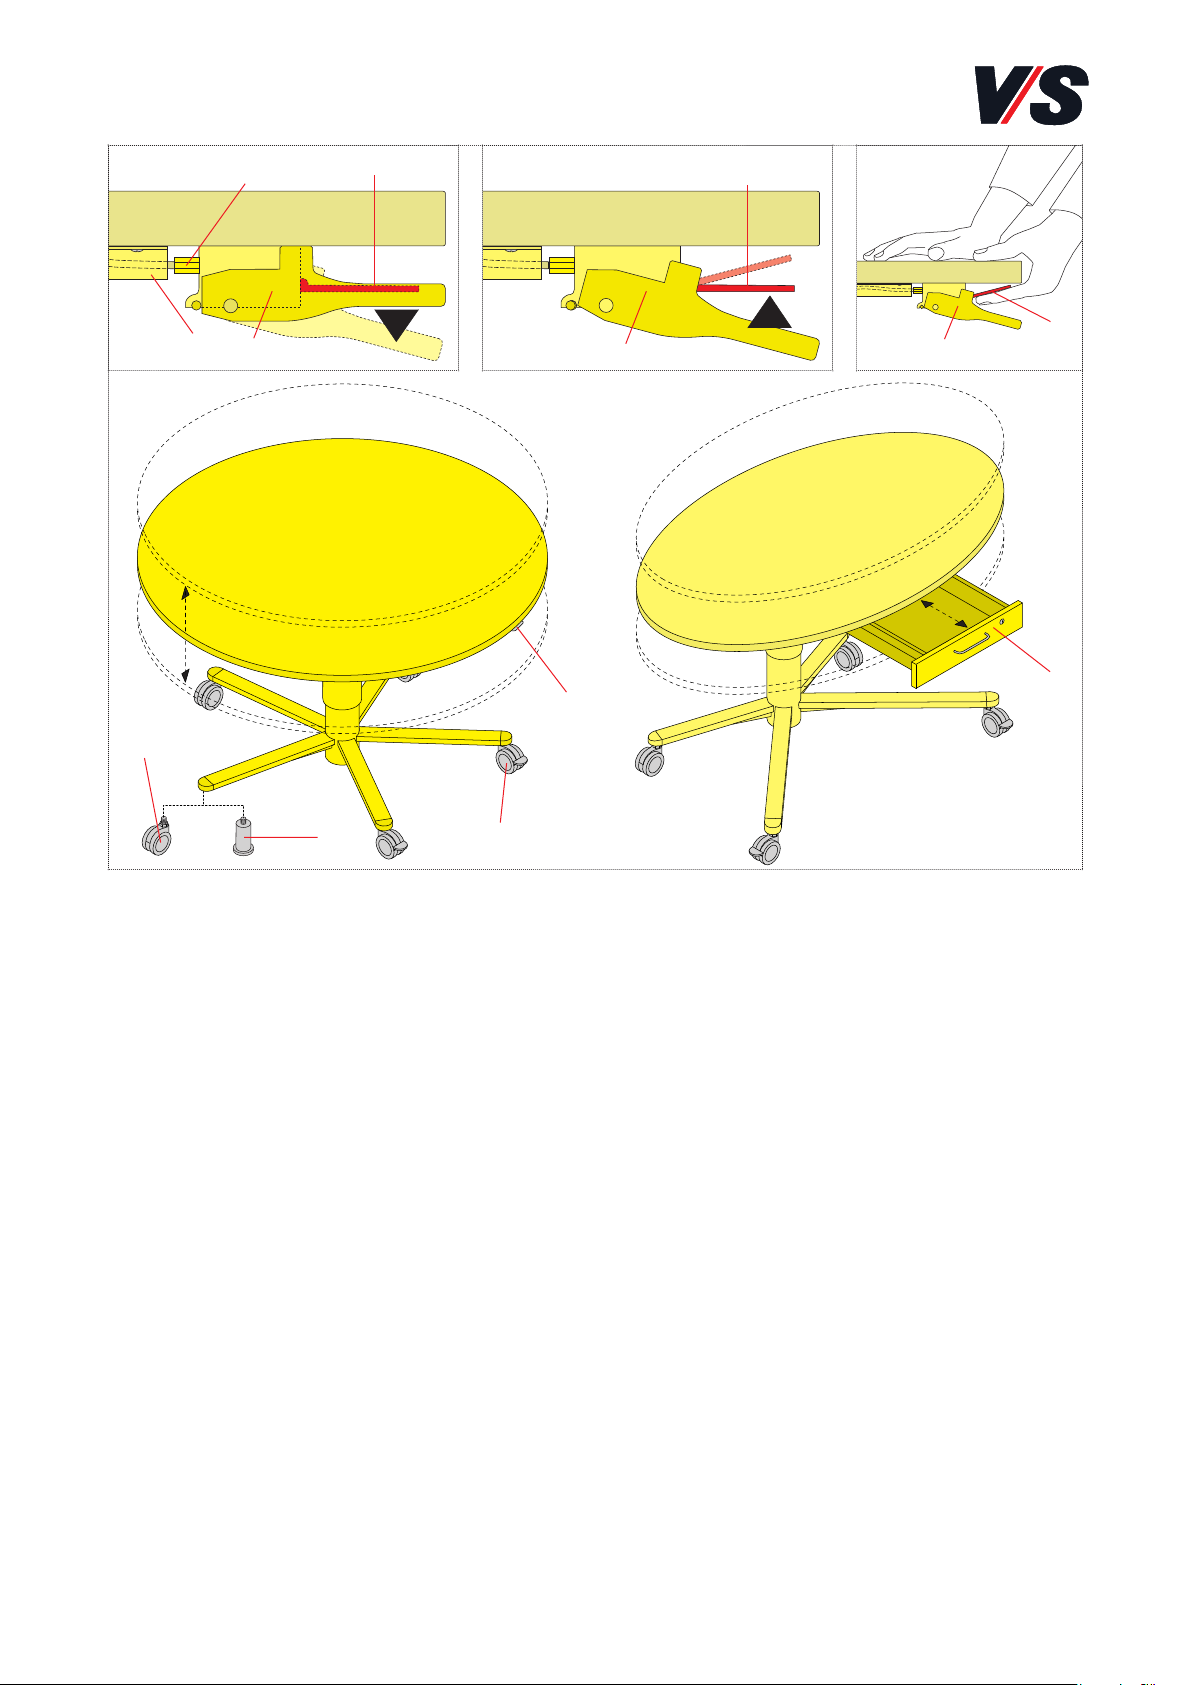
Betrieb:
Beachten Sie die Hinweise auf den folgenden Seiten.
Fehlersuche und Service:
Bei eventuell auftretenden Fehlern, wenden Sie sich bitte an
Wartung und Reinigung:
Im Internet: vs.de/kataloge/reinigung/
Weitergabe und Entsorgung:
Bei der Weitergabe des Produkts an Dritte ist auch diese
Bedienungsanleitung zu übergeben. Für eine umweltfreundliche
Entsorgung informieren Sie sich bitte bei Ihrer zuständigen
Kommune. Die gekennzeichneten E-Komponenten dürfen
nicht über den Hausmüll entsorgt werden.
Sie müssen von dem Möbel getrennt werden, bevor
das Möbel der Entsorgung zugeführt wird.
Die Entsorgung erfolgt an zugelassenen Sammel-
und Rücknahmestellen.
BEDIENUNGSANLEITUNG: 70-144 V09 020720
RondoLift.