VWR 10860-660 User manual

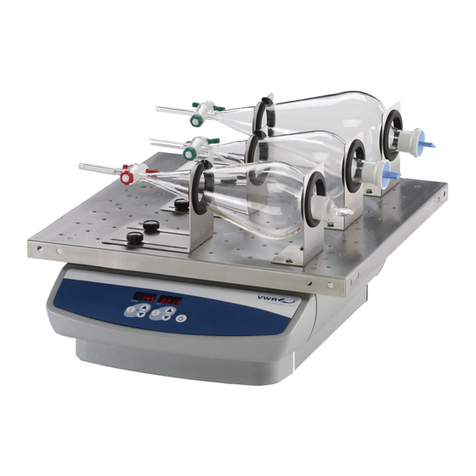
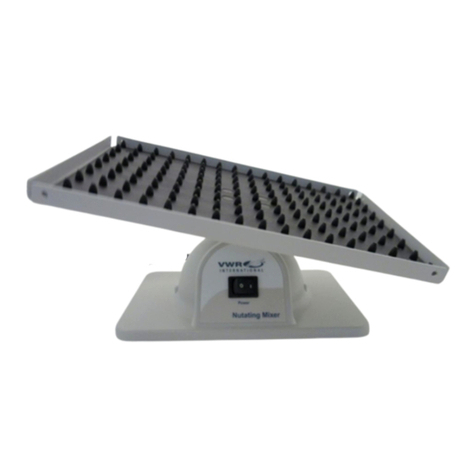
VWR Rocking Platform
INSTRUCTION MANUAL
North American Catalog Number
US Cord: 10860-660 (Single) 115V
10860-662 (Single) 230V
10860-780 (Double) 115V
10860-658 (Double) 230V
Version: 1
Issued: 31, 03, 2016

Legal Address of Manufacturer
United States
VWR International
Radnor Corporate Center, Building One, Suite 200
100 Matsonford Road
Radnor, PA 19087 USA
610-386-1403
http://www.vwr.com
Country of origin
SLOVENIA

Table of Contents
Warning1
Safety information 2
Package Contents 2
Unpacking 2
Installation 3
Intended Use 3
Symbols and conventions 4
Specifications 4
Instructions for use 5
Overview 5
Control Panel 6
Operation 6
Adjusting tilt angle 7
Installation of double platform 7
General maintenance 9
Replacing the fuses 9
Cleaning 9
Troubleshooting 8
Accessories 9
Technical Service 9
Warranty 9
Disposal 9

1
Warning
Configuring and operation VWR Rocking Platform requires knowledge and observance of the
instructions in this manual. Please read this manual thoroughly before using the device. The
equipment is designed only for its intended applications.
This equipment is designed for 115V (50/60Hz) or 230V (50/60Hz).
Make sure it is connected to the correct power supply.
Be careful when you plug the power cord to a grounded wall socket!
Do not touch the plug with wet hands!
Do not pull the plug by the cord!
To avoid electric shock or destroying the device, do not put any electrical conducting
objects into the device or spill any liquids on the equipment!
Disconnect the power cord before carrying out any maintenance or cleaning.
Do not use the device near water sources. Be sure that water doesn't get on the device,
especially during the cleaning procedures.
Do not use the device in aggressive atmosphere.
Do not process inflammable, explosive and other dangerous materials!
Do not put your hands between platform and housing during operation, because your
fingers can get crushed.
If the equipment is used in a manner not specified by the manufacturer, the safety
features of the rocker may be impaired.
Misuse or unauthorized modifications will waive the warranty rights.

2
SafetyInformation
Avoiding Electrical Shock
Ensure that this manual is accessible at all times and has been read and understood by
all operators. Only trained staff may use the equipment.
Please follow the guidelines below, and read this manual in its entirety to ensure safe operation of the
unit.
The equipment must be maintained and operated in accordance with this manual.
The responsibility for operating the equipment lies exclusively with the owner or user, if equipment is
incorrectly serviced, maintained or altered by persons not employed by an authorized dealer, or if the
equipment is used in a manner contrary to its specified purpose.
Follow the safety instructions and guidelines, and also occupational health, safety and accident
prevention regulations.
Wear your personal protective equipment according to the hazard category of the medium to be
processed.
Don't use damaged equipment and accessories.
Load the samples securely and evenly on the platform of the device.
Maximum weight of the load on the platform is 5 kg. Do not exceed this limit.
Do not move the device when it is operating.
Reduce the speed if the medium splashes out of the vessel.
Disconnect the device from the power supply before you remove the cover of tilt angle adjustment
compartment and adjust the tilt angle of the platform. Do not operate the device with the cover open.
Do not expose the equipment to mechanical shocks and impacts.
PackageContents
Single Platform Double Platform
Description Quantity Description Quantity
VWR Rocking Platform 1 VWR Rocking Platform 1
Rubber pad 1 Rubber pad 2
Power cord 1 Power cord 1
Upper platform 1
Posts kit 1
Unpacking
Carefully inspect the unit and accessories thoroughly upon receipt for any damage that may have
occurred during shipping. Severe damage to the packaging container may indicate damage to the unit. If
you suspect damage to the unit, immediately file a claim with the carrier in accordance with their
instructions before contacting VWR. Also verify that all accessories are included and that the unit is in
good working order before discarding the shipping packaging.

3
Installation
When selecting the location for device, please consider the following:
- Put the device on horizontal, leveled and stable place.
- Leave enough space around the device for normal air circulation, easy access and maintenance
(minimum 10 cm).
- Avoid locations with fast temperature and humidity changes.
- Avoid locations with direct sunlight and nearby heating devices, such as radiators, autoclaves, etc.
- Avoid locations subject to shocks and vibrations.
Ensure easy access to the rocker control panel and mains plug in case of emergency.
Check the data label on the back side of the device for voltage, frequency and power consumption
requirements. Voltage should not vary for more than 10% from the data label rating.
Connect the power cord, which is included in the delivery, into the mains socket on the back side of the
device. Then connect the other end of the cord to a grounded wall socket. Avoid lines on which powerful
electric motors, refrigerators and similar devices are connected
Intendeduse
VWR Rocking Platform is a general purpose shaker, intended for shaking (rocking) of samples at speeds
from 10 to 120 rocks Per Minute. It is driven by the asynchronous gear motor, which enables reliable
operation and constant rocking speed, independent of the load or power supply oscillations.
Device mechanism consists of two main parts:
- Motor with eccentric mechanism
- Control electronics
Motor movement causes rocking movement and generates rocking effect.
Electronics controls motor speed (RPM) and time of operation (min).
For research use only. Not intended for any animal or human therapeutic or diagnostic use.
This equipment must be used only for its intended applications. Any alterations or
modifications will void your warranty and may cause injury.

4
Symbolsandconventions
The following chart is an illustrated glossary of the symbols that are used in this manual.
CAUTION
This symbol indicates a potential risk and alerts you to proceed with caution.
CAUTION
This symbol indicates the presence of high voltage and warns the user to proceed with
caution.
CAUTION
This symbol indicates a risk of fingers crush hazard between moving platform and housing.
Product Specifications
The casing of rocker is made of plastic and steel plate varnished with high resistant polyurethane lacquer.
Specifications VWR Rocking Platform 115V VWR Rocking Platform 230V
Electrical 115V ± 10%, 50/60Hz, 0.3A 230V ± 10%, 50/60Hz, 0.15A
Motor power 6 W 6 W
Fuses 2 x 1AT 2 x 1AT
Speed 10 - 120 Rocks Per Minute 10 - 120 Rocks Per Minute
Tilt angle ± 2.5° - 20° from horizontal
(in 2.5° steps) ± 2.5° - 20° from horizontal
(in 2.5° steps)
Timer 10 - 120 min, HOLD function 10 - 120 min, HOLD function
Maximum load 5 kg 5 kg
Dimensions W x D x H 360 x 360 x 170 mm (single platf.)
360 x 360 x 260 mm (double platf.) 360 x 360 x 170 mm (single platf.)
360 x 360 x 260 mm (double platf.)
Platform dimensions W x D 360 x 280 mm 360 x 280 mm
Weight 6.5 kg (single platform)
7.8 kg (double platform) 6.5 kg (single platform)
7.8 kg (double platform)
Ambient conditions -10°C to 70°C, up to 85% RH,
non-condensing -10°C to 70°C, up to 85% RH,
non-condensing

5
Instructions for use
Overview
Complete understanding of this equipment is required for your safety and satisfaction.
Read the instructions thoroughly and be sure all operators are given adequate training
before attempting to put the unit in use.
Main parts of the rocker are designated on the following pictures
Platform with rubber pad
Control panel
Cover (tilt angle adjustment)
Fuse compartment
Mains socket
Data label

6
DescriptionofButtonsandSwitches
Controlpanel
1 POWER switch - to turn the rocker ON (power switch illuminates) or OFF.
2 SPEED knob - to set the rocker speed.
3 TIME knob - to set the time of operation.
4 HOLD yellow signal light - illuminates when the rocker is set to HOLD (continuous operation).
5 START/STOP key - to START or STOP the rocking operation.
6 RUN green signal light - illuminates when the rocker is running.
Operation
1. Turn POWER switch ON (it should illuminate).
2. Set SPEED knob to desired value.
3. Set TIME knob to desired value or to HOLD - continuous operation (yellow signal light HOLD must
illuminate).
4. Press START/STOP key to start the rocking operation.
5. Device automatically stops after the set time passes.
6. If you want to stop the rocking operation before the set time passes, or when TIME knob is set to
HOLD, press START/STOP key.
NOTE: Pressing START/STOP key during operation will reset the timer.
It's possible to change speed during operation, but you cannot change time. If you want
to change time, stop the rocker, set desired time and start it again.
Do not put your hands between platform and housing during operation, because your
fingers can get crushed.
1 2 3 4 5
6

7
GettingStarted
Adjusting tilt angle
Before you adjust the tilt angle, unplug power cord from power supply!
1. Unscrew two wing nuts (A) from the cover (B) on the back side of the rocker and remove the cover (B).
2. Unscrew the screw (C) at the end of the shaft.
3. Find the hole with desired tilt angle inscription on the disk (D) and screw the screw (C) in that hole.
4. Put the cover (B) back on and fix it by screwing back two wing nuts (A).
Now the rocker is ready for operation with new tilt angle.
Installation of double platform
Before the installation of double platform, turn off the POWER switch.
For installation of double platform, prepare upper platform with rubber pad and posts kit, which includes
four posts, four washers, four screws and four nuts.
AA B
A
B
C
D
E
Posts kit
E
A
B
C

8
1. Set four posts (A) above four holes at the corners of the bottom platform.
2. Put the washer (B) on each screw (C) and then screw it into each post from the bottom side of the
platform.
3. Fit upper platform (D) on the top of four posts, so that the threads of the posts are protruding through
four corner holes.
4. Screw four nuts (E) on the threads of four posts, to fix the upper platform.
Replacing the fuses
Cleaningandmaintenance
Prior to any cleaning or maintenance of the device, unplug the power cord from the wall
socket.
The housing of the rocker can be cleaned with a soft, damp cloth or special cleaners for plastic surfaces
(e.g. for car interior - armature). Do not immerse the device or spill liquids on the device.
NOTE: Do not use any aggressive or abrasive cleaners (acetone, nitro, polish etc.), because the
surface can get permanently damaged.
- No routine maintenance or lubrication is required.
- It is recommended that the rocker is kept clean to ensure long trouble-free operation.
Troubleshooting
Review the information in the table below to troubleshoot operating problems.
In case of malfunction, unplug the device from mains power supply and call authorized service
Problem Explanation / Solution
POWER switch doesn't illuminate when
turned ON. Check the connection to mains power supply.
Check fuses.
Call authorized service.
Rocker doesn't start when you press
START/STOP key. Check the connection to mains power supply.
Check fuses.
Call authorized service.
HOLD yellow signal light and RUN green
signal light are blinking. Motor overload - reduce the load on the platform.
Call authorized service.
Fuse
compartment
Mains
socket
The following fuses are required for VWR Rocking Platform:
2 x 1 AT (115V and 230V)
Unplug the mains plug from the mains socket
By pressing the locking devices on two sides of the fuse
compartment, fuse holder is released and you can pull it out.
Replace the fuses.
Insert fuse holder and push it, until it locks.

9
Userreplaceableaccessoriesandspareparts
Description Quantity Cat. No.
Rubber pad 1 75780-066
Upper platform 1 75780-068
Posts kit 1 75780-084
Technicalservice
WebResources
Visit the VWR’s website at www.vwr.com for:
• Complete technical service contact information
• Access to VWR’s Online Catalogue, and information about accessories and related products
• Additional product information and special offers
Contact us For information or technical assistance contact your local VWR representative or visit.
www.vwr.com.
Warranty
VWR International warrants that this product will be free from defects in material and workmanship for
a period of two (2) years from date of purchase. If a defect is present, VWR will, at its option, repair,
replace, or refund the purchase price of this product at no charge to you, provided it is returned during the
warranty period. This warranty does not apply if the product has been damaged by accident, abuse,
misuse, or misapplication, or from ordinary wear and tear.
For your protection, items being returned must be insured against possible damage or loss. This warranty
shall be limited to the replacement of defective products. IT IS EXPRESSLY AGREED THAT THIS
WARRANTY WILL BE IN LIEU OF ALL WARRANTIES OF FITNESS AND IN LIEU OF THE WARRANTY
OF MERCHANTABILITY.
Equipment disposal
This equipment is marked with the crossed out wheeled bin symbol to indicate that this
equipment must not be disposed of with unsorted waste.
Instead it's your responsibility to correctly dispose of your equipment at lifecycle -end
by handling it over to an authorized facility for separate collection and recycling. It's
also your responsibility to decontaminate the equipment in case of biological, chemical
and/or radiological contamination, so as to protect from health hazards the persons
involved in the disposal and recycling of the equipment.
For more information about where you can drop off your waste of equipment, please
contact your local dealer from whom you originally purchased this equipment.
By doing so, you will help to conserve natural and environmental resources and you will ensure that your
equipment is recycled in a manner that protects human health.
Thank you
This manual suits for next models
3
Table of contents
Other VWR Laboratory Equipment manuals
VWR
VWR Clinical 100 User manual

VWR
VWR PCR Workstation User manual

VWR
VWR VWRA613-6688 User manual

VWR
VWR Micro Star 30R User manual
VWR
VWR XT96 User manual

VWR
VWR VWR Mega Star 600R User manual

VWR
VWR avantor UHP User manual

VWR
VWR Analog Vortex Mixer User manual

VWR
VWR Photo Imager Guide

VWR
VWR 613-2891 User manual

VWR
VWR avantor 49893-2000 User manual

VWR
VWR avantor User manual

VWR
VWR ELECTRONIC PIPETTE User manual

VWR
VWR Standard 1000 User manual

VWR
VWR avantor 521-3500 Mega Star 600 User manual

VWR
VWR MEGA STAR 3.0 User manual

VWR
VWR HCO304 User manual

VWR
VWR SAS Super IAQ User manual

VWR
VWR avantor UHP User manual

VWR
VWR Mini Shaker Series User manual