manuals.online logo
Brands
  1. Home
  2. •
  3. Brands
  4. •
  5. WAC Lighting
  6. •
  7. Lighting Equipment
  8. •
  9. WAC Lighting Volta 2" LED Series User manual

WAC Lighting Volta 2" LED Series User manual

1WAC Lighting retains the right to modify the design of our products at any time as part of the company's continuous improvement program. AUGUST, 2017
waclighting.com
Phone (800) 526.2588
Fax (800) 526.2585
Headquarters/Eastern Distribution Center
44 Harbor Park Drive
Port Washington, NY 11050
Central Distribution Center
1600 Distribution Ct
Lithia Springs, GA 30122
Western Distribution Center
1750 Archibald Avenue
Ontario, CA 91760
INSTALLATION INSTRUCTION
Volta 2” LED - New Construction Round Housing
R2RNT, R2RCT, R2RNL, R2RCL
SAFETY INSTRUCTION
IMPORTANT: NEVER attempt any work without shutting o the electricity.
• Read all instructions before installing.
• System is intended for installation by a qualied electrician in accordance with the National Electrical Code and local regulations.
• Go to the main fuse box, or circuit breaker. Place the main power switch in the “OFF”position and unscrew the fuse(s) or switch “OFF” the
circuit breaker switch(es) that control the power to the xture or room that you are working on.
• Place the wall switch in the“OFF” position.
AVERTISSEMENT
IMPORTANT : Coupez l’électricité avant TOUTE manipulation.
• Lisez toutes les instructions avant d’installer.
• Système est destiné à être installé par un électricien qualié en conformité avec le code national de l’électricité et les règlements locaux.
• Accédez au panneau central de disjoncteurs ou de fusibles de votre demeure et placez l’interrupteur principal en position d’arrêt (« OFF »).
• Placez l’interrupteur mural en position d’arrêt (« OFF »).
CAUTION:
All parts must be used as indicated in these instructions. Do not substitute any parts, leave parts out, or use any parts that are worn out or
broken. Failure to follow this instruction could invalidate the ETL/cETL listing of this xture.
OVERVIEW:
Housing is new construction Airtight IC (Refer to table below). Housing requires a trim for a nished look. Refer to specication sheets for
compatible trim options.
OVERALL HOUSING DIMENSION
SPECIFICATIONS
Input: 120-277V; 50/60 Hz
Installation: IC for -22 model (22W)
IC for -15 model (15W)
Dimming: ELV (120V only) / 0-10V
2WAC Lighting retains the right to modify the design of our products at any time as part of the company's continuous improvement program. AUGUST, 2017
waclighting.com
Phone (800) 526.2588
Fax (800) 526.2585
Headquarters/Eastern Distribution Center
44 Harbor Park Drive
Port Washington, NY 11050
Central Distribution Center
1600 Distribution Ct
Lithia Springs, GA 30122
Western Distribution Center
1750 Archibald Avenue
Ontario, CA 91760
INSTALLATION INSTRUCTION
Volta 2” LED - New Construction Round Housing
R2RNT, R2RCT, R2RNL, R2RCL
HANGER BAR ROUND CHANNEL 1/2” CHANNEL 3/4” CHANNEL 1 1/2” CHANNEL
FIG.1
FIG.6
FIG.7
FIG.8
DETAIL. A
DETAIL. B DETAIL. C
FIG.2 FIG.3 FIG.4 FIG.5
Trim Housing Installation
1. Housing features mounting brackets that can be used with hanger bars
or various channel supports (See FIG. 1-5).
Adjust the brackets to proper height by loosening the screws such that
the bottom of housing is ush to top of nished ceiling plane
(See FIG. 6). Retighten screws securely.
2. Slide the male and female hanger bars or other channel supports
through the appropriate holes in the brackets.
3. A. For hanger bar installation on grid:
Hanger bars are notched on the ends to t over “T” bars in the suspended
ceilings supported with tie wires (by others) to upper ceiling structure
(See FIG. 7).
B. For hanger bar installation on joists:
Install the hanger bar and housing assembly such that the lip of the
hanger bar rests on the bottom surface of the joist. Use a screw-driver
or hammer to secure the“screw-nail” into the wood (See FIG.8).
4. Slide the housing along the hanger bars to the desired position
(See Detail. C). Tighten bottom locking screws to secure the
housing in place.
Bottom of Housing
Flush to Top of Ceiling
Loosening Screws
to Adjust Brackets
Locking
Screw
Hanger bar lip to rest on
bottom surface of joist
3WAC Lighting retains the right to modify the design of our products at any time as part of the company's continuous improvement program. AUGUST, 2017
waclighting.com
Phone (800) 526.2588
Fax (800) 526.2585
Headquarters/Eastern Distribution Center
44 Harbor Park Drive
Port Washington, NY 11050
Central Distribution Center
1600 Distribution Ct
Lithia Springs, GA 30122
Western Distribution Center
1750 Archibald Avenue
Ontario, CA 91760
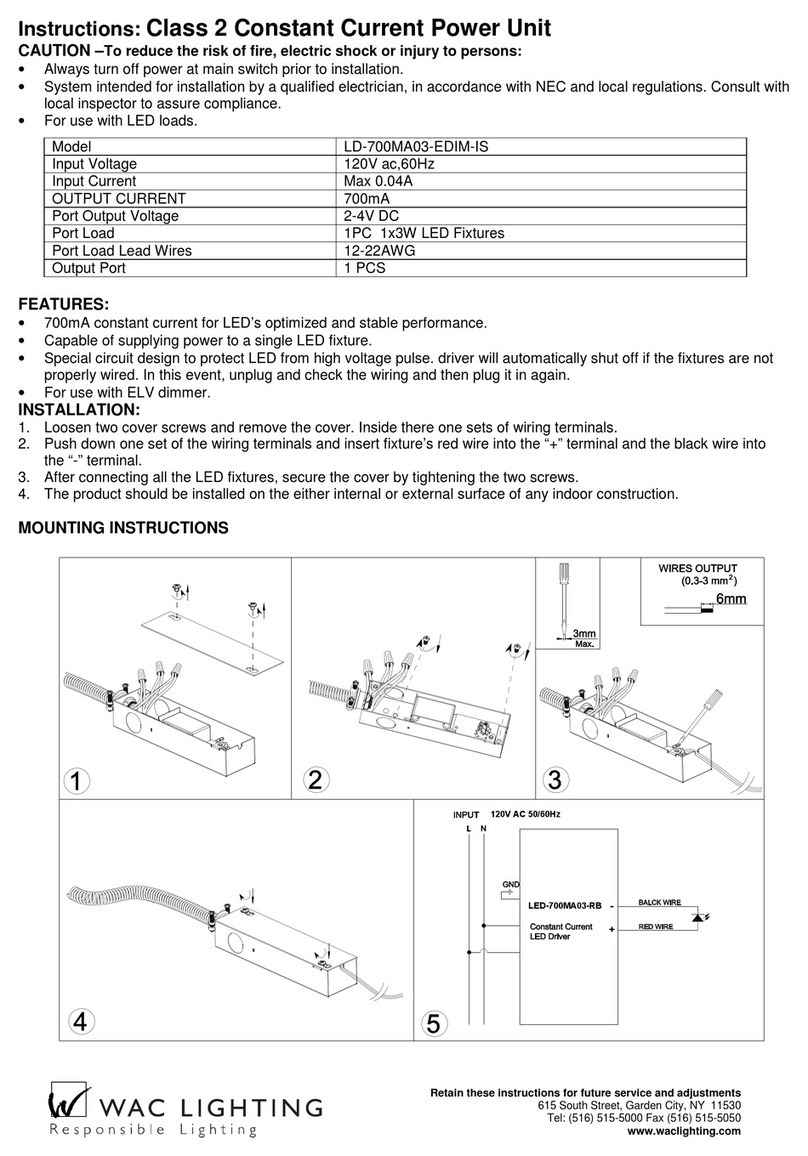
5. Remove xture junction box door and connect xture wires to building
wires: insert each supply wire into appropriate junction box connector.
This xture features electronic low voltage (ELV) or 0-10V dimming
capabilities (See FIG 9).
To utilize ELV, wire black (line hot), white (line neutral) and green
(ground) in accordance to dimmer specications.
To utilize 0-10V dimming, wire purple (dim+), gray (dim-), black (line
hot), white (line neutral) and green (ground) in accordance to dimmer
specications.
When not using a dimmer, connect black xture wire to hot, white xture
wire to neutral and green xture wire to ground. Leave all other wires
capped individually.
Place all wiring and connectors back in junction box and replace the
junction box cover.
6. Cut a 3 9/16”diameter hole in the ceiling at the point of installation and
install ceiling (See FIG. 10). For invisible trims, cut a 4 1/4”diameter hole
in the ceiling (See FIG. 11).
7. Refer to installation instructions for appropriate trims to complete the
installation.
Note: Ceiling thickness table below
INSTALLATION INSTRUCTION
Volta 2” LED - New Construction Round Housing
R2RNT, R2RCT, R2RNL, R2RCL
Housing
Trim
Model Trim Description
Ceiling Thickness
1/2" 1" 1 1/2"
R2RNT, R2RCT,
R2RNL, R2RCL,
New
Construction
R2RD2T Downlight Yes Yes Yes
R2RD1T
Shallow
Regressed
Downlight
Yes Yes Yes
R2RWT Wall Wash Yes Yes No
R2RAT,
R2RPT
Adjustable/
Pin Hole
Yes, to
45°
Yes, to
35°
Yes, to
20°
FIG.9
FIG.10
FIG.11
Invisible Trim Housing
Black: Line Hot
Green: Ground
White: Line Neutral
Purple: 0-10V Dim+
Grey: 0-10V Dim-
3 9/16”
4 1/4”
4WAC Lighting retains the right to modify the design of our products at any time as part of the company's continuous improvement program. AUGUST, 2017
waclighting.com
Phone (800) 526.2588
Fax (800) 526.2585
Headquarters/Eastern Distribution Center
44 Harbor Park Drive
Port Washington, NY 11050
Central Distribution Center
1600 Distribution Ct
Lithia Springs, GA 30122
Western Distribution Center
1750 Archibald Avenue
Ontario, CA 91760
Invisible Trim Housing Installation
1. Repeat the same procedure as above from step 1 to step 6.
2. Raise the invisible trim frame aligning stand to hole, and secure to trim
mounting plate by using the screws supplied. Put plaster shield inside
trim opening (See FIG. 12).
3. Apply plaster or spackle over invisible trim frame and sand surface
when dry for a nished look (See FIG.13).
4. Remove the plaster shield when nishing is complete (See FIG.14).
5. Refer to installation instructions for appropriate trims to complete
the installation.
INSTALLATION INSTRUCTION
Volta 2” LED - New Construction Round Housing
R2RNT, R2RCT, R2RNL, R2RCL
Trim Frame
Shield
Aligning Stand
and Aligning Hole

This manual suits for next models

4

Other WAC Lighting Lighting Equipment manuals
WAC Lighting GATE 12V User manual

WAC Lighting

WAC Lighting GATE 12V User manual

WAC Lighting LD-700MA03-EDIM-IS User manual

WAC Lighting

WAC Lighting LD-700MA03-EDIM-IS User manual

WAC Lighting LD-700MA03-EDIM-IS User manual

WAC Lighting

WAC Lighting LD-700MA03-EDIM-IS User manual

WAC Lighting BA-FT08-WT User manual

WAC Lighting

WAC Lighting BA-FT08-WT User manual

WAC Lighting 6011 User manual

WAC Lighting

WAC Lighting 6011 User manual

WAC Lighting WT-RT User manual

WAC Lighting

WAC Lighting WT-RT User manual

WAC Lighting LED-TC Series User manual

WAC Lighting

WAC Lighting LED-TC Series User manual

WAC Lighting LED-350MA03-RB User manual

WAC Lighting

WAC Lighting LED-350MA03-RB User manual

WAC Lighting dweLED FM-96916 User manual

WAC Lighting

WAC Lighting dweLED FM-96916 User manual

WAC Lighting HR-3LED-H20A User manual

WAC Lighting

WAC Lighting HR-3LED-H20A User manual
WAC Lighting dweLED 299-LED Wall Sconce User manual

WAC Lighting

WAC Lighting dweLED 299-LED Wall Sconce User manual

WAC Lighting WTK-6010 Series User manual

WAC Lighting

WAC Lighting WTK-6010 Series User manual

WAC Lighting Falcon Series User manual

WAC Lighting

WAC Lighting Falcon Series User manual

WAC Lighting Paloma MO-LED512 User manual

WAC Lighting

WAC Lighting Paloma MO-LED512 User manual

WAC Lighting M6000-STAKE User manual

WAC Lighting

WAC Lighting M6000-STAKE User manual

WAC Lighting HTK-793 User manual

WAC Lighting

WAC Lighting HTK-793 User manual
WAC Lighting InvisiLED CCT 100 User manual

WAC Lighting

WAC Lighting InvisiLED CCT 100 User manual

WAC Lighting H-LED160 User manual

WAC Lighting

WAC Lighting H-LED160 User manual

WAC Lighting 5221 User manual

WAC Lighting

WAC Lighting 5221 User manual

WAC Lighting WS-90627 User manual

WAC Lighting

WAC Lighting WS-90627 User manual

WAC Lighting InvisiLED Classic LED-T24 User manual

WAC Lighting

WAC Lighting InvisiLED Classic LED-T24 User manual

WAC Lighting Silo X10 User manual

WAC Lighting

WAC Lighting Silo X10 User manual

WAC Lighting Modern Forms 708-LED User manual
WAC Lighting

WAC Lighting Modern Forms 708-LED User manual

Popular Lighting Equipment manuals by other brands

ETC microVision FX user manual

ETC

ETC microVision FX user manual

Fumagalli LUCIA Series installation instructions

Fumagalli

Fumagalli LUCIA Series installation instructions

Lumio INNOVAPLAS AQUARIUS DECK 5000 manual

Lumio

Lumio INNOVAPLAS AQUARIUS DECK 5000 manual

Revolution Micro Avici 1500 owner's manual

Revolution Micro

Revolution Micro Avici 1500 owner's manual

Silicon Solar PathLight series instruction manual

Silicon Solar

Silicon Solar PathLight series instruction manual

Klus M12 Mounting instructions

Klus

Klus M12 Mounting instructions

Ignition WAL-L Z150 COB RGBW user manual

Ignition

Ignition WAL-L Z150 COB RGBW user manual

Price ACBC Series manual

Price

Price ACBC Series manual

Pool Technologie JUSTPH user manual

Pool Technologie

Pool Technologie JUSTPH user manual

Lighting Technologies ARCTIC.OPL ECO LED TH manual

Lighting Technologies

Lighting Technologies ARCTIC.OPL ECO LED TH manual

EuroLite LED IP PST-10W user manual

EuroLite

EuroLite LED IP PST-10W user manual

Lightolier Calculite IS-PS Assembly and installation

Lightolier

Lightolier Calculite IS-PS Assembly and installation

Godox SL Series instruction manual

Godox

Godox SL Series instruction manual

Barthelme AQUALUC C:URVE WIDE Instructions for installation and operation

Barthelme

Barthelme AQUALUC C:URVE WIDE Instructions for installation and operation

JUNO T271L installation instructions

JUNO

JUNO T271L installation instructions

Ralph Lauren Willoughby XL Assembly instructions

Ralph Lauren

Ralph Lauren Willoughby XL Assembly instructions

Milwaukee L4 TMLED Original instructions

Milwaukee

Milwaukee L4 TMLED Original instructions

STMicroelectronics STEVAL-ILL022V1 user manual

STMicroelectronics

STMicroelectronics STEVAL-ILL022V1 user manual

manuals.online logo
manuals.online logoBrands
  • About & Mission
  • Contact us
  • Privacy Policy
  • Terms and Conditions

Copyright 2025 Manuals.Online. All Rights Reserved.