manuals.online logo
Brands
  1. Home
  2. •
  3. Brands
  4. •
  5. WATSON
  6. •
  7. Indoor Furnishing
  8. •
  9. WATSON Haven HighLow Float Tables User manual

WATSON Haven HighLow Float Tables User manual

Other WATSON Indoor Furnishing manuals
WATSON SEVEN User manual

WATSON

WATSON SEVEN User manual

WATSON Tonic User manual

WATSON

WATSON Tonic User manual

WATSON Haven User manual

WATSON

WATSON Haven User manual

WATSON C9 Height Adjustable Desk User manual

WATSON

WATSON C9 Height Adjustable Desk User manual

WATSON Edison Junior Power Pole User manual
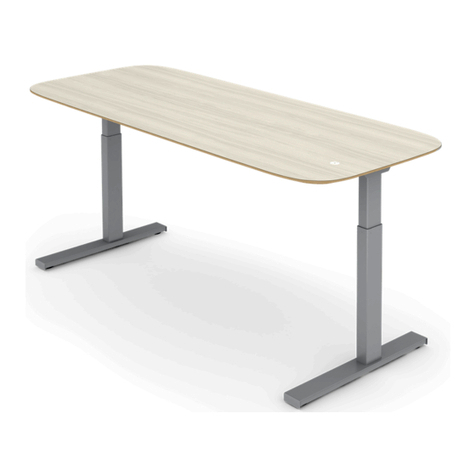
WATSON

WATSON Edison Junior Power Pole User manual

WATSON C9 Height Adjustable Desk User manual

WATSON

WATSON C9 Height Adjustable Desk User manual

WATSON D9 User manual

WATSON

WATSON D9 User manual

WATSON Bahn User manual

WATSON

WATSON Bahn User manual

WATSON Bahn User manual

WATSON

WATSON Bahn User manual

WATSON D9 User manual

WATSON

WATSON D9 User manual

WATSON C9 Height Adjustable Desk User manual

WATSON

WATSON C9 Height Adjustable Desk User manual

WATSON C9 Height Adjustable Desk User manual

WATSON

WATSON C9 Height Adjustable Desk User manual

WATSON C9 Cart & Garage User manual

WATSON

WATSON C9 Cart & Garage User manual

WATSON Edison Rail Accessories User manual

WATSON

WATSON Edison Rail Accessories User manual

WATSON Edison Senior Rail User manual

WATSON

WATSON Edison Senior Rail User manual

WATSON Watson Pin & Tak Deskmount Acrylic Screen User manual

WATSON

WATSON Watson Pin & Tak Deskmount Acrylic Screen User manual

WATSON C9 Height Adjustable Desk User manual

WATSON

WATSON C9 Height Adjustable Desk User manual

WATSON SEVEN DESK User manual

WATSON

WATSON SEVEN DESK User manual

WATSON Bahn User manual

WATSON

WATSON Bahn User manual

WATSON Essential Desk Stand By Power & Mobility Kit User manual

WATSON

WATSON Essential Desk Stand By Power & Mobility Kit User manual

WATSON MIRO Storage Support User manual

WATSON

WATSON MIRO Storage Support User manual

WATSON SEVEN User manual

WATSON

WATSON SEVEN User manual

WATSON C9 Height Adjustable Desk User manual
WATSON

WATSON C9 Height Adjustable Desk User manual

WATSON Haven User manual

WATSON

WATSON Haven User manual

Popular Indoor Furnishing manuals by other brands

Regency LWMS3015 Assembly instructions

Regency

Regency LWMS3015 Assembly instructions

Furniture of America CM7751C Assembly instructions

Furniture of America

Furniture of America CM7751C Assembly instructions

Safavieh Furniture Estella CNS5731 manual

Safavieh Furniture

Safavieh Furniture Estella CNS5731 manual

PLACES OF STYLE Ovalfuss Assembly instruction

PLACES OF STYLE

PLACES OF STYLE Ovalfuss Assembly instruction

Trasman 1138 Bo1 Assembly manual

Trasman

Trasman 1138 Bo1 Assembly manual

Costway JV10856 manual

Costway

Costway JV10856 manual

moss DESIGN Caisson Credenza Assembly instructions

moss DESIGN

moss DESIGN Caisson Credenza Assembly instructions

Aquaglide FULL DECK 15.0 owner's manual

Aquaglide

Aquaglide FULL DECK 15.0 owner's manual

AREBOS AR-HE-SW30 user manual

AREBOS

AREBOS AR-HE-SW30 user manual

Till-Hilft Fulda 87005.330 Assembly instructions

Till-Hilft

Till-Hilft Fulda 87005.330 Assembly instructions

Twoey Outside 2010 quick start guide

Twoey Outside

Twoey Outside 2010 quick start guide

Hettich Easys 200 operating instructions

Hettich

Hettich Easys 200 operating instructions

The bedboss RELAX 404 Series owner's manual

The bedboss

The bedboss RELAX 404 Series owner's manual

Oeseder Möbelindustrie Bern 991 720 Assembly instructions

Oeseder Möbelindustrie

Oeseder Möbelindustrie Bern 991 720 Assembly instructions

Costway HW68469 user manual

Costway

Costway HW68469 user manual

Next ALIX A27743 Assembly instructions

Next

Next ALIX A27743 Assembly instructions

BROSA Hans Assembly guide

BROSA

BROSA Hans Assembly guide

Prodigg MINIKA PBA015T-FUR installation manual

Prodigg

Prodigg MINIKA PBA015T-FUR installation manual

manuals.online logo
manuals.online logoBrands
  • About & Mission
  • Contact us
  • Privacy Policy
  • Terms and Conditions

Copyright 2025 Manuals.Online. All Rights Reserved.

ASSEMBLY
360.394.1300 watsonfurniture.com
V.21.0 12/2021
Haven HighLow & HighLow Float Tables
2 HAVEN HIGHLOW TABLES ASSEMBLY INSTRUCTIONS
Low Surface Legs Low Surface
Bag Hooks
Clamp Assembly
Support Rails
Low Surface
HighLow Table Components - Low Surface
HighLow Table Components - High Surface
High Surface Legs High Surface High Surface Bag Hooks High Surface Post
High Surface Support Rails
HighLow Float Table Components - Floating Surface
Floating Surface Post Floating Surface
3 HAVEN HIGHLOW TABLES ASSEMBLY INSTRUCTIONS
Hardware
#10 X 1” Torx Head
Screw (0002147)
Tools
Electric Drill T25 Torx Bit4mm Hex Bit
M6 X 25mm
Button Head Screw
(0002180)
4 HAVEN HIGHLOW TABLES ASSEMBLY INSTRUCTIONS
1.
a. b.
Low Surface: Attach Legs, Support Rails, and Bag Hooks
Align the top plate of each leg to the corresponding pilot holes in the low surface. Secure the leg with (8) screws each (a.).
Align both support rails to the corresponding pilot holes in the low surface and secure them using (5) screws each (b.).
Attach a bag hook to each leg by aligning the holes on the hook with the square holes in the leg plate. Secure the bracket
in place with (2) screws each (c.).
c.
#10 X 1” Torx Head
Screw (0002147)
5 HAVEN HIGHLOW TABLES ASSEMBLY INSTRUCTIONS
2. Low Surface: Install Clamp Assembly
Create a stack with the circular rings: the two rings with plastic bearings should be in the center of the stack. Align all
the holes with the inserts in the low surface and drive (8) screws through the stacked assembly. Leave the screws loose
enough that the center middle plate can move freely.
M6 X 25mm
Button Head Screw
(0002180)
6 HAVEN HIGHLOW TABLES ASSEMBLY INSTRUCTIONS
3.
a. b.
High Surface: Attach Legs, Support Rails, and Bag Hooks
Align the top plate of each leg to the corresponding pilot holes in the surface. Secure each leg with (8) screws. Attach a
hook to each leg by aligning the holes on the hook with the square holes in the leg plate. Secure the hook bracket in place
with two screws each (a.). Align both support rails to the corresponding pilot holes in the worksurface and secure them
using (5) screws each (b.).
#10 X 1” Torx Head
Screw (0002147)
7 HAVEN HIGHLOW TABLES ASSEMBLY INSTRUCTIONS
4. High Surface: Attach Post
Align the post with the corresponding pilot holes in the
high surface. Drive (6) screws to secure the post in place.
#10 X 1” Torx Head
Screw (0002147)
8 HAVEN HIGHLOW TABLES ASSEMBLY INSTRUCTIONS
5.
a.
b.
High Surface: Attach High Surface to Low Surface
Place the high surface post into the hole in the low surface (a.). Manipulate the oating plate in the clamp assembly until
the screw holes line up with the threaded holes in the post bottom. Once aligned, drive (5) screws to secure the post to
the clamp. Tighten the outer (8) screws of the clamp which were previously left loose to complete the assembly (b.).
M6 X 25mm
Button Head Screw
(0002180)
9 HAVEN HIGHLOW TABLES ASSEMBLY INSTRUCTIONS
6.
a.
b.
Floating Surface: Attach Post
Align the post with the corresponding pilot holes in the oating surface. Drive (10) screws to secure the post in place.
#10 X 1” Torx Head
Screw (0002147)
7. Floating Surface: Attach Floating Surface to Low Surface
Place the oating surface post into the hole in the low surface (a.). From the underside of the table, manipulate the
oating plate in the clamp assembly until the screw holes line up with the threaded holes in the post bottom. Once
aligned, drive (5) screws to secure the post to the clamp. Tighten the outer (8) screws of the clamp which were previously
left loose to complete the assembly (b.).
M6 X 25mm
Button Head Screw
(0002180)