manuals.online logo
Brands
  1. Home
  2. •
  3. Brands
  4. •
  5. WATSON
  6. •
  7. Indoor Furnishing
  8. •
  9. WATSON MIRO Storage Support User manual

WATSON MIRO Storage Support User manual

Riser block
Washer
Joint
connector
nut
Allen
wrench
(notincluded)
Storage Support Installationof 15" Wide
Casegoods
Page 1of 3
800.426.1202 www.watsondesking.com
PRODUCTINSTALLATION:
INS50002
MIRO
WATSONDESKING
Top
View
Top
View
Riser block
studatback
Riser block
studatfront
2
Storage Support Installationof 15" Wide
Casegoods: RiserBlock Orientation
Page 2of 3
800.426.1202 www.watsondesking.com
PRODUCTINSTALLATION:
INS50002
MIRO
WATSONDESKING
Step 4
Flipdeskoverandallignriserblockstudwithslot
intopofpedestalandlowerintoplace.
Rectangularholecoverismosteasilyremoved
bypushingfrombelow.Takecare not to scratch
topof pedestalduringthisstep.
Step 1
Completelyassembledeskusinginstructionsprovided
beforeproceedingwithsupportpedestalattachment.
Step 5
Withdeskrestingonpedestalremoveupperdrawer.
Pressplasticreleasetabsonsidesofdrawerslidesto
disengagedrawer.Frominsideofpedestalthreadon
jointconnectornutandwasher.Aligndeskto
pedestalandtightennut.
Step 3
Whiledeskisstillonitsback,positionriser
blockon centerset ofpilotholesonendof
desk. Secureto desktopwithsix#10 x3/4"
woodscrewsprovided.
Step 2
Determinetheproper orientationof riser see
page2.
3
Storage Support Installationof 15" Wide
Casegoods: withMatching DepthDesk
Page 3of 3
800.426.1202 www.watsondesking.com
PRODUCTINSTALLATION:
INS50002
MIRO
WATSONDESKING
Riser block
Washer
Joint
connector
nut
Allen
wrench
1
30" Wide Storage Support Casegoods
Page 1of 9
800.426.1202 www.watsondesking.com
PRODUCTINSTALLATION:
INS50003
MIRO
WATSONDESKING
Top
View
Top
View
Riser block studatback
Riser block studatfront
30" Wide Storage Support Casegoods
Page 2of 9
800.426.1202 www.watsondesking.com
PRODUCTINSTALLATION:
INS50003
MIRO
WATSONDESKING
Storageunitfully underone endof desk.
See pages 4
Storageunit15"outfromone endof desk.
See page 5
Storageunitfullyundertwodesks.
See page6-7
Storageunitundertwodeskswithspacebetween.
See page8-9
Usefirst setof holes
Uselast setof holes
Usefirst setof holes
Uselast setof holes
30" Wide Storage Support Casegoods
Page 3of 9
800.426.1202 www.watsondesking.com
PRODUCTINSTALLATION:
INS50003
MIRO
WATSONDESKING
Step 2
Flipdeskoverandallignriserblockstudwithslot in
topofpedestalandlowerintoplace.
Rectangular holecover ismost easilyremovedby
pushingfrombelow.Takecare not to scratch top
of pedestalduringthisstep.
Step 1
Completelyassembledeskusing
instructionsprovidedbefore
proceedingwithsupportpedestal
attachment.
Whiledeskisstillonitsback,position
riserblockon Firstset of pilotholes
onendofdesk.
Secureto desktopwithsix#10 x3/4"
woodscrewsprovided.Seepage 2
forproperriserorientation.
Step 4
Frominsideofpedestalthreadon
jointconnectornutandwasher.
Aligndesktopedestalandtighten
nut.
Step 3
Withdeskrestingonpedestalremove
upperdrawer.Pressplasticrelease
tabsonsidesofdrawerslidesto
disengage drawer.
Usersideofdesk
30" Wide Storage Support Casegoods
Page 4of 9
800.426.1202 www.watsondesking.com
PRODUCTINSTALLATION:
INS50003
MIRO
WATSONDESKING
Step 2
Flipdeskoverandallignriserblockstudwithslot in
topofpedestalandlowerintoplace.
Rectangular holecover ismost easilyremovedby
pushingfrombelow.Takecare not to scratch top
of pedestalduringthisstep.
Step 1
Completelyassembledeskusing
instructionsprovidedbefore
proceedingwithsupportpedestal
attachment.
Whiledeskisstillonitsback,position
riserblockon Thirdset of pilotholes
onendofdesk.
Secureto desktopwithsix#10 x3/4"
woodscrewsprovided.Seepage 2
forproperriserorientation.
Step 4
Frominsideofpedestalthreadon
jointconnectornutandwasher.
Aligndesktopedestalandtighten
nut.
Step 3
Withdeskrestingonpedestalremove
upperdrawer.Pressplasticrelease
tabsonsidesofdrawerslidesto
disengage drawer.
Usersideofdesk
30" Wide Storage Support Casegoods:
WithMatchDepthDesk
Page 5of 9
800.426.1202 www.watsondesking.com
PRODUCTINSTALLATION:
INS50003
MIRO
WATSONDESKING
Step 2
Flipfirst deskover
andallignriserblock
studwithslot intop
ofpedestaland
lowerintoplace.
Rectangularhole
cover ismost easily
removedbypushing
frombelow.Take
care not to scratch
topof pedestal
duringthisstep.
Step 1
Completelyassembledesk#1and
#2usinginstructionsprovided
beforeproceedingwithsupport
pedestalattachment.
Whiledesksarestillonthierbacks,
positionriser blockson Thirdset of
pilotholesonendofeachdesk.
Secureto desktopwithsix#10 x3/4"
woodscrewsprovided.Notethat
riser studis offset . Seepage 2for
offsetorientation. Orientationis
dependentonworksurfacedepth.
Usersideofdesk
30" Wide Storage Support Casegoods:
Supporting TwoSurfaces
Page 6of 9
800.426.1202 www.watsondesking.com
PRODUCTINSTALLATION:
INS50003
MIRO
WATSONDESKING
Step 3
Flipsecond deskover
andallignriserblock
studwithremainingslot
intopofpedestaland
lowerintoplace.
Rectangularholecover
ismost easilyremoved
by pushingfrombelow.
Takecare not to scratch
topof pedestalduring
thisstep.
Step 4
Withdesksrestingon
pedestalremove upper
drawer.Pressplastic
releasetabsonsidesof
drawerslidestodisengage
drawer.
Step 5
Frominsideofpedestal
threadonjointconnector
nutsandwashers.Refer
backtopage1.Align
deskstopedestaland
tightennuts.
30" Wide Storage Support Casegoods:
Supporting TwoSurfaces
Page 7of 9
800.426.1202 www.watsondesking.com
PRODUCTINSTALLATION:
INS50003
MIRO
WATSONDESKING
Usersideofdesk
Step 1
Completelyassembledesk#1and
#2usinginstructionsprovided
beforeproceedingwithsupport
pedestalattachment.
Whiledesksarestillonthierbacks,
positionriser blockson firstset of
pilotholesonendofeachdesk.
Secureto desktopwithsix#10 x3/4"
woodscrewsprovided.Notethat
riser studis offset . See page 2for
offsetorientation. Orientationis
dependentonworksurfacedepth.
Step 2
Flipfirst deskover
andallignriserblock
studwithslot intop
ofpedestaland
lowerintoplace.
Rectangularhole
cover ismost easily
removedbypushing
frombelow.Take
care not to scratch
topof pedestal
duringthisstep.
30" Wide Storage Support Casegoods:
Supporting TwoSurfaces
WithGap Between Surfaces
Page 8of 9
800.426.1202 www.watsondesking.com
PRODUCTINSTALLATION:
INS50003
MIRO
WATSONDESKING
Step 3
Flipsecond deskover
andallignriserblock
studwithremainingslot
intopofpedestaland
lowerintoplace.
Rectangularholecover
ismost easilyremoved
by pushingfrombelow.
Takecare not to scratch
topof pedestalduring
thisstep.
Step 4
Withdesksrestingon
pedestalremove upper
drawer.Pressplastic
releasetabsonsidesof
drawerslidestodisengage
drawer.
Step 5
Frominsideofpedestal
threadonjointconnector
nutsandwashers.Refer
backtopage1.Align
deskstopedestaland
tightennuts.
30" Wide Storage Support Casegoods:
Supporting TwoSurfaces
WithGap Between Surfaces
Page 9of 9
800.426.1202 www.watsondesking.com
PRODUCTINSTALLATION:
INS50003
MIRO
WATSONDESKING
Riser block
Washer
Jointconnector
nut
Allen
wrench
(notincluded)
Topviewof pedestalsshown. Notepostioningof boltthroughlocations.
Frontedgeoflefthand
storageunit. Frontedgeofrighthand
storageunit.
Screws
Abovegraphicisanoverview
ofhowthestorageunit
attachestodesk.
Showatleftaretheleft and
andrighthandversionsof the
singledoor storagesupportunit
thatmounts 90 degreesto
worksuface.
Completelyassembledesk
usinginstructionsprovided
beforeproceedingwith
supportpedestalattachment.
90 Degree Storage Support
Page 1of 3
800.426.1202 www.watsondesking.com
PRODUCTINSTALLATION:
INS50004
MIRO
WATSONDESKING
4
4
8 4
8
191
2191
2
31
4
53
4
53
4
31
4
31
4
93
4
271
2271
2271
2
93
4
31
431
4
93
4
133
4133
4
31
4
31
4
351
2
351
2
Step 1
Keepthe completely
assembleddeskonits
back.
Step 2
Useplanviewchart at
rightfor postioning and
orientation ofriserblock
ontoworksurface.
thisisatopdown
see-throughview.
The riserblockwillalign
withthe setof pilotholes
thatareclosesttothe end
of the desk.
Step 3
Positionriserblockon
bottom of deskand
securetodesktopwithsix
#10 x3/4"woodscrews
provided.
20" deep worksurfaces
28" deep worksurfaces
36" deep worksurfaces
90 Degree Storage Support
Page 2of 3
800.426.1202 www.watsondesking.com
PRODUCTINSTALLATION:
INS50004
MIRO
WATSONDESKING
Step 4
Flipdeskoverandallign
riserblockstudwithslotin
topofpedestalandlower
intoplace.
Rectangularholecoveris
mosteasilyremovedby
pushingfrombelow.Take
care not to scratch top
ofpedestalduringthis
step.
Step 5
Opendoor.Frominsideof
pedestalthreadonjoint
connectornutand
washer.Aligndeskto
pedestalandtightennut.
90 Degree Storage Support
Page 3of 3
800.426.1202 www.watsondesking.com
PRODUCTINSTALLATION:
INS50004
MIRO
WATSONDESKING

Other WATSON Indoor Furnishing manuals
WATSON 360.394.1300 User manual

WATSON

WATSON 360.394.1300 User manual

WATSON C9 Height Adjustable Desk User manual

WATSON

WATSON C9 Height Adjustable Desk User manual
WATSON Watson Pin & Tak Deskmount Acrylic Screen User manual

WATSON

WATSON Watson Pin & Tak Deskmount Acrylic Screen User manual

WATSON D9 User manual

WATSON

WATSON D9 User manual

WATSON C9 Height Adjustable Desk User manual

WATSON

WATSON C9 Height Adjustable Desk User manual
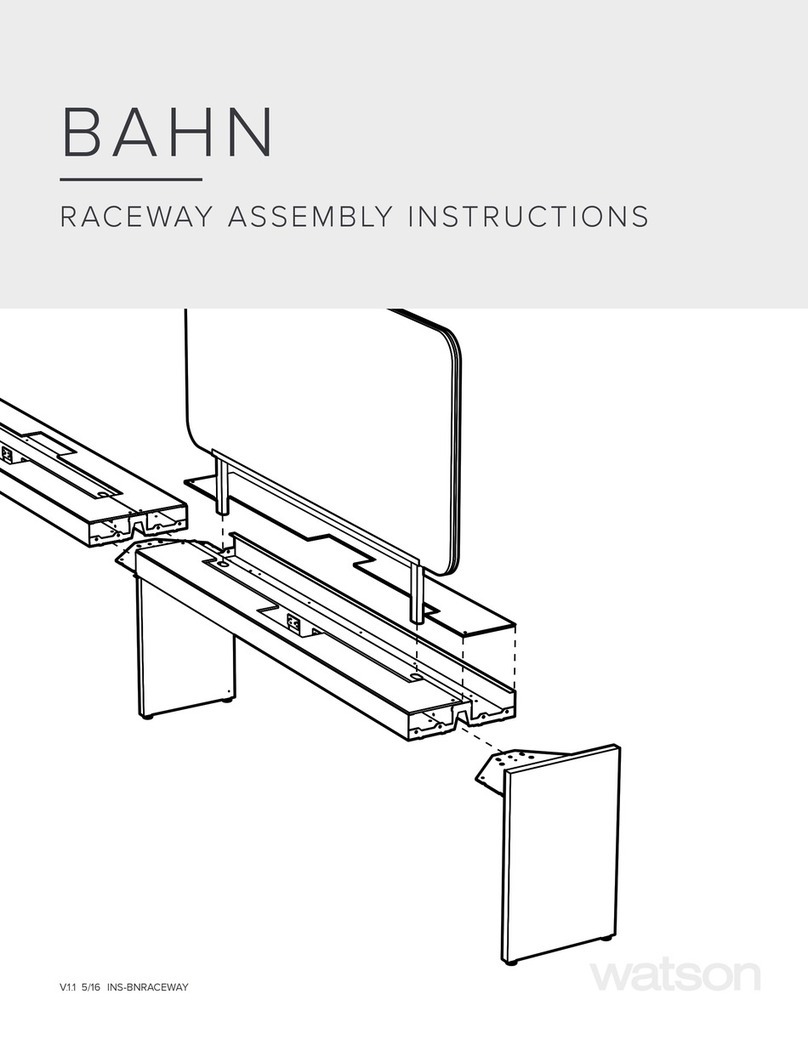
WATSON Essential Desk Stand By Power & Mobility Kit User manual

WATSON

WATSON Essential Desk Stand By Power & Mobility Kit User manual

WATSON Edison Rail Accessories User manual

WATSON

WATSON Edison Rail Accessories User manual

WATSON SEVEN DESK User manual

WATSON

WATSON SEVEN DESK User manual

WATSON Haven User manual

WATSON

WATSON Haven User manual

WATSON Bahn User manual

WATSON

WATSON Bahn User manual
WATSON SEVEN User manual

WATSON

WATSON SEVEN User manual

WATSON Edison Senior Rail User manual

WATSON

WATSON Edison Senior Rail User manual

WATSON Haven User manual

WATSON

WATSON Haven User manual

WATSON 360.394.1300 User manual

WATSON

WATSON 360.394.1300 User manual

WATSON D9 User manual

WATSON

WATSON D9 User manual
WATSON C9 Height Adjustable Desk User manual
WATSON

WATSON C9 Height Adjustable Desk User manual

WATSON Haven Social Tables User manual

WATSON

WATSON Haven Social Tables User manual

WATSON SEVEN User manual

WATSON

WATSON SEVEN User manual

WATSON D9 User manual

WATSON

WATSON D9 User manual

WATSON Edison Junior Power Pole User manual
WATSON

WATSON Edison Junior Power Pole User manual

WATSON Tonic User manual

WATSON

WATSON Tonic User manual
WATSON C9 Height Adjustable Desk User manual

WATSON

WATSON C9 Height Adjustable Desk User manual

WATSON C9 Height Adjustable Desk User manual

WATSON

WATSON C9 Height Adjustable Desk User manual

WATSON Verve User manual

WATSON

WATSON Verve User manual

Popular Indoor Furnishing manuals by other brands

Essem Design Jaxon Assembly and maintenance instructions

Essem Design

Essem Design Jaxon Assembly and maintenance instructions

Cooper Lighting Shaper 664 Series Specification sheet

Cooper Lighting

Cooper Lighting Shaper 664 Series Specification sheet

Stryker stair-pro 6251 Maintenance manual

Stryker

Stryker stair-pro 6251 Maintenance manual

Furniture of America Lila CM6540-SF Assembly instructions

Furniture of America

Furniture of America Lila CM6540-SF Assembly instructions

Dedeman NARBONA 160 Assembly instructions

Dedeman

Dedeman NARBONA 160 Assembly instructions

Sanus SFV265 manual

Sanus

Sanus SFV265 manual

Croydex Norton WS010322 installation instructions

Croydex

Croydex Norton WS010322 installation instructions

modway MOD-5473 quick start guide

modway

modway MOD-5473 quick start guide

THB Wardrobe Absolut Plus 7 Doors Assembly instructions

THB

THB Wardrobe Absolut Plus 7 Doors Assembly instructions

Loll Designs LOLLYGAGGER ROCKER ASSEMBLY INSTRUCTIONS & PRODUCT INFO

Loll Designs

Loll Designs LOLLYGAGGER ROCKER ASSEMBLY INSTRUCTIONS & PRODUCT INFO

Idiya BRISTOL Assembly guide

Idiya

Idiya BRISTOL Assembly guide

Next BOURTON M64219 Assembly instructions

Next

Next BOURTON M64219 Assembly instructions

Forte SNOW SNWB21 Assembling Instruction

Forte

Forte SNOW SNWB21 Assembling Instruction

Big Lots HARLOW 15160-5PK Assembly instructions

Big Lots

Big Lots HARLOW 15160-5PK Assembly instructions

Garden Trading Ashby Assembly instructions

Garden Trading

Garden Trading Ashby Assembly instructions

Whittier Wood Furniture Addison 1242DUET Assembly instructions

Whittier Wood Furniture

Whittier Wood Furniture Addison 1242DUET Assembly instructions

Mocka Scarborough Six Drawer Assembly instructions

Mocka

Mocka Scarborough Six Drawer Assembly instructions

Astonica 50100095 instruction manual

Astonica

Astonica 50100095 instruction manual

manuals.online logo
manuals.online logoBrands
  • About & Mission
  • Contact us
  • Privacy Policy
  • Terms and Conditions

Copyright 2025 Manuals.Online. All Rights Reserved.