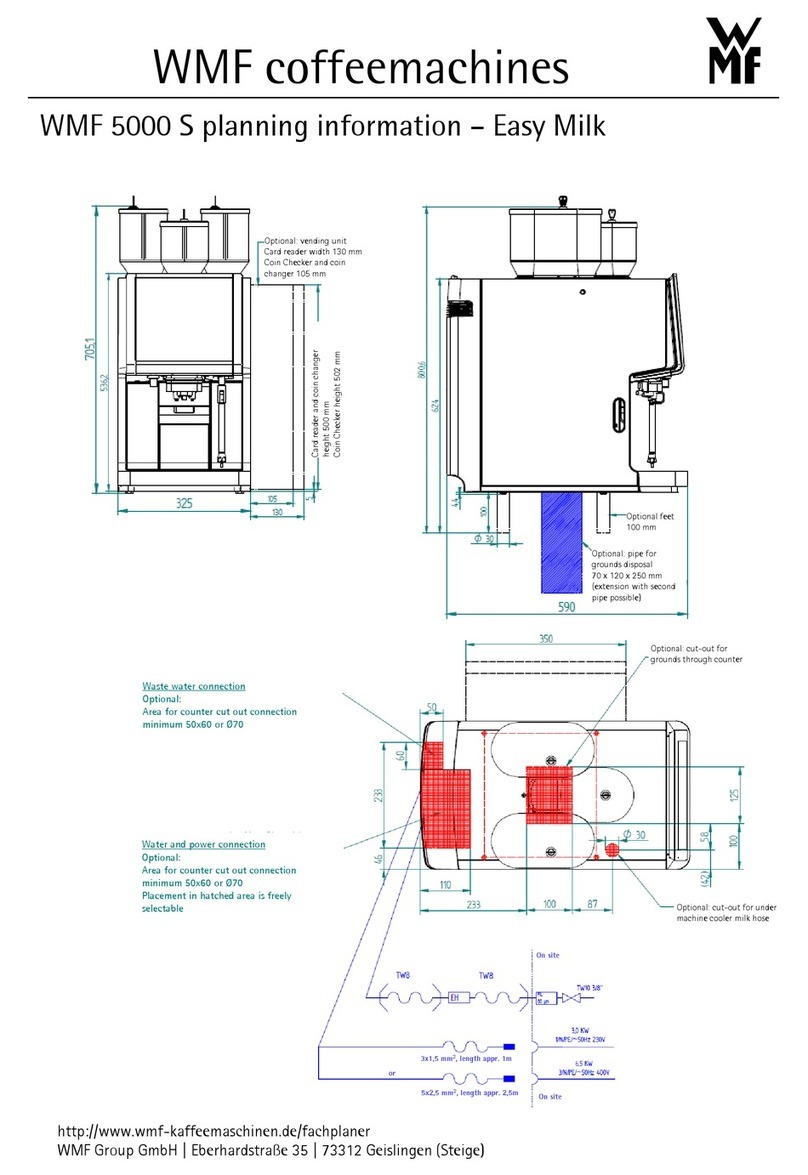
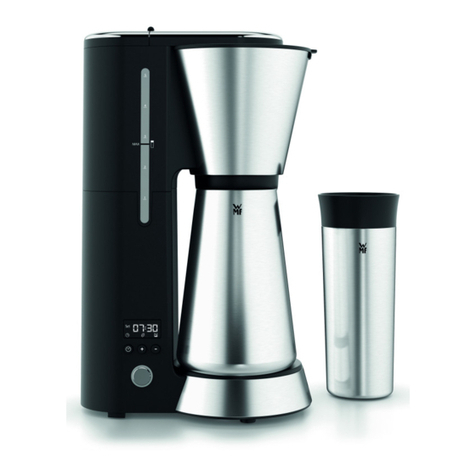
WMF cafemat! User manual

coffee wakes up the world
User Manual
03.00.001
Type 3800 33 2428 8010 08.08
Coffee machine English

2User Manual WMF cafemat!
Introduction and General Information
Congratulations on the purchase of your WMF coffee
machine
You will be impressed by the machine's technical design,
long service life, economy, and especially by the quality of
the coffee it produces.
The WMF cafemat. coffee machine is designed to prepare
up to 0.75 liters of filter coffee per brewing cycle.
Depending on the model, the coffee machine freshly brews
up to two kinds of coffee. The coffee is dispensed directly
through the coffee spout or into the storage urn.
The storage urn keeps the coffee warm, and single cups are
dispensed at the press of a button.
Even with the storage urn, you can still dispense freshly
brewed single cups.
User guidance is provided by a graphical touch-screen
display on the coffee machine. Up to four beverage
buttons are available on the operating panel. The beverage
buttons can be assigned at on different two levels,
and have a text label. Additional function keys can be
assigned different functions, depending on the machine
configuration.
Keep these instructions near the coffee machine as a
reference for you and your staff, so that you can properly
handle any technical problems that may arise.
The maintenance concept for the machine is designed
for the preparation of 60,000 coffee servings or
6,000 chocolate beverages per year. Preventive
maintenance is planned for every six months, in order to
ensure the quality of the coffee and the proper function
of the machine. Alternative maintenance plans for higher
brewing rates can be agreed upon individually.
Please read the user manual prior
to using the coffee machine.
Ensure staff has access to the user
manual.
Important.
Chapter 1 Introduction
Observe the signs and symbols in
the user manual
Observe "Safety" chapter
In the event of failure to comply
with maintenance information (see
Maintenance chapter), no liability is
accepted for any resultant damage.
Similarly, all guarantee/warranty
obligations could cease to apply in
such cases.

3
User Manual WMF cafemat!
Table of Contents
Chapter 1/1 Introduction with SU 6
1/1.1 Parts of the coffee machine with storage urn (SU) 6
Chapter 1/2 Introduction without SU 8
1/2.1 Parts of the coffee machine 8
Signs and symbols used in the user manual ..................................... 10
Glossary and abbreviations ..................................................11
Chapter 2/1 Operation with SU 12
2/1.1 Switch on the coffee machine 12
2/1.2 Beverage dispensing 13
2/1.3 Multiple dispensing 14
2/1.4 Shift button (optional) 14
2/1.5 Dispense hot water 15
2/1.6 Removable coffee spout 15
2/1.7 Ground coffee hopper 16
2/1.8 Open the front door 16
2/1.9 Coffee grounds container 16
2/1.10 Grounds disposal through the counter (optional) 17
2/1.11 Switch off the coffee machine 18
Chapter 2/2 Operation without SU 19
2/2.1 Switch on the coffee machine 19
2/2.2 Beverage dispensing 19
2/2.2.1 Beverage dispensing from the fold away spout ..................................... 20
2/2.2.2 Beverage dispensing from the brew arm . . . . . . . . . . . . . . . . . . . . . . . . . . . . . . . . . . . . . . . . . . 20
2/2.3 Multiple dispensing 21
2/2.4 Shift button (optional) 21
2/2.5 Dispense hot water 22
2/2.6 Fold away spout 23
2/2.7 Ground coffee hopper 24
2/2.8 Open the front door 24
2/2.9 Coffee grounds container 24
2/2.10 Grounds disposal through the counter (optional) 25
2/2.11 Ground coffee manual insert 25
2/2.12 Switch off the coffee machine 26
Chapter 3/1 Software with SU 27
3/1.1 Software overview 27
3/1.2 Ready to operate 29
3/1.2.1 Ready to operate display ...................................................... 29
3/1.2.2 Information ................................................................. 30
3/1.2.3 To main menu . . . . . . . . . . . . . . . . . . . . . . . . . . . . . . . . . . . . . . . . . . . . . . . . . . . . . . . . . . . . . . . 31
3/1.3 Main menu 31
3/1.3.1 Preselection menu for SU . . . . . . . . . . . . . . . . . . . . . . . . . . . . . . . . . . . . . . . . . . . . . . . . . . . . . . 32
Empty
Half full
Full
3/1.3.2 Timer program .............................................................. 33
Timer status .............................................................. 33
Set timer ................................................................. 33
Switching times and events . . . . . . . . . . . . . . . . . . . . . . . . . . . . . . . . . . . . . . . . . . . . . . . . . . 34
Copy day ................................................................ 35
Timer overview . . . . . . . . . . . . . . . . . . . . . . . . . . . . . . . . . . . . . . . . . . . . . . . . . . . . . . . . . . . . 36
Timer delete .............................................................. 36
Timer information ......................................................... 36

4User Manual WMF cafemat!
Table of Contents
3/1.3.3 Care ...................................................................... 37
Cleaning program . . . . . . . . . . . . . . . . . . . . . . . . . . . . . . . . . . . . . . . . . . . . . . . . . . . . . . . . . . 37
Rinse filter (for Version 03.01.001 and higher) .................................. 37
3/1.3.4 Settings . . . . . . . . . . . . . . . . . . . . . . . . . . . . . . . . . . . . . . . . . . . . . . . . . . . . . . . . . . . . . . . . . . . . 38
Selecting the beverage button when setting: . . . . . . . . . . . . . . . . . . . . . . . . . . . . . . . . . . . . 38
Selecting the beverage button on the 2nd Level: ................................ 38
Adjust values ............................................................. 38
Save setting .............................................................. 38
Beverages . . . . . . . . . . . . . . . . . . . . . . . . . . . . . . . . . . . . . . . . . . . . . . . . . . . . . . . . . . . . . . . . 39
Change beverage
Select another beverage for the beverage button
Test beverage
Sample another type of ground coffee
Machine .................................................................40
Language
Operating mode . . . . . . . . . . . . . . . . . . . . . . . . . . . . . . . . . . . . . . . . . . . . . . . . . . . . . . . . . . . 40
Temperature . . . . . . . . . . . . . . . . . . . . . . . . . . . . . . . . . . . . . . . . . . . . . . . . . . . . . . . . . . . . . . 41
Reset . . . . . . . . . . . . . . . . . . . . . . . . . . . . . . . . . . . . . . . . . . . . . . . . . . . . . . . . . . . . . . . . . . . . 41
SU brewing . . . . . . . . . . . . . . . . . . . . . . . . . . . . . . . . . . . . . . . . . . . . . . . . . . . . . . . . . . . . . . . 41
Sample another type of ground coffee
Preinfusion . . . . . . . . . . . . . . . . . . . . . . . . . . . . . . . . . . . . . . . . . . . . . . . . . . . . . . . . . . . . . . . 42
Operating options ......................................................... 42
Time/date ................................................................ 42
Contrast ................................................................. 42
3/1.3.5 Enter PIN . . . . . . . . . . . . . . . . . . . . . . . . . . . . . . . . . . . . . . . . . . . . . . . . . . . . . . . . . . . . . . . . . . . 43
3/1.3.6 PIN rights access control ...................................................... 43
Cleaning level .............................................................43
Setting level . . . . . . . . . . . . . . . . . . . . . . . . . . . . . . . . . . . . . . . . . . . . . . . . . . . . . . . . . . . . . . 43
Accounting level . . . . . . . . . . . . . . . . . . . . . . . . . . . . . . . . . . . . . . . . . . . . . . . . . . . . . . . . . . 44
Delete PIN . . . . . . . . . . . . . . . . . . . . . . . . . . . . . . . . . . . . . . . . . . . . . . . . . . . . . . . . . . . . . . . . 44
3/1.3.7 Accounting numbers of items .................................................. 45
3/1.3.8 Manual dispensing ........................................................... 45
Chapter 3/2 Software without SU 46
3/2.1 Software overview 46
3/2.2 Ready to operate 48
3/2.2.1 Ready to operate display ...................................................... 48
3/2.2.2 Information ................................................................. 49
3/2.2.3 To main menu . . . . . . . . . . . . . . . . . . . . . . . . . . . . . . . . . . . . . . . . . . . . . . . . . . . . . . . . . . . . . . . 50
3/2.3 Main menu 50
3/2.3.1 Timer program .............................................................. 51
Timer status .............................................................. 51
Set timer ................................................................. 51
Switching times and events . . . . . . . . . . . . . . . . . . . . . . . . . . . . . . . . . . . . . . . . . . . . . . . . . . 52
Copy day ................................................................53
Timer overview . . . . . . . . . . . . . . . . . . . . . . . . . . . . . . . . . . . . . . . . . . . . . . . . . . . . . . . . . . . . 54
Timer delete .............................................................. 54
Timer information ......................................................... 54
3/2.3.2 Care . . . . . . . . . . . . . . . . . . . . . . . . . . . . . . . . . . . . . . . . . . . . . . . . . . . . . . . . . . . . . . . . . . . . . . . 55
Cleaning program . . . . . . . . . . . . . . . . . . . . . . . . . . . . . . . . . . . . . . . . . . . . . . . . . . . . . . . . . . 55
Rinse filter (for Version 03.01.001 and higher) .................................. 55
3/2.3.3 Settings . . . . . . . . . . . . . . . . . . . . . . . . . . . . . . . . . . . . . . . . . . . . . . . . . . . . . . . . . . . . . . . . . . . . 56
Selecting the beverage button when setting: . . . . . . . . . . . . . . . . . . . . . . . . . . . . . . . . . . . . 56
Selecting the beverage button on the 2nd Level: ................................ 56
Adjust values ............................................................. 56
Save setting .............................................................. 56
5
User Manual WMF cafemat!
Table of Contents
Beverages . . . . . . . . . . . . . . . . . . . . . . . . . . . . . . . . . . . . . . . . . . . . . . . . . . . . . . . . . . . . . . . . 57
Change beverage
Select another beverage for the beverage button
Test beverage
Sample another type of ground coffee
Machine .................................................................58
Language
Operating mode
Temperature . . . . . . . . . . . . . . . . . . . . . . . . . . . . . . . . . . . . . . . . . . . . . . . . . . . . . . . . . . . . . . 59
Reset . . . . . . . . . . . . . . . . . . . . . . . . . . . . . . . . . . . . . . . . . . . . . . . . . . . . . . . . . . . . . . . . . . . . 59
Brew arm . . . . . . . . . . . . . . . . . . . . . . . . . . . . . . . . . . . . . . . . . . . . . . . . . . . . . . . . . . . . . . . . 59
Sample another type of ground coffee
Preinfusion . . . . . . . . . . . . . . . . . . . . . . . . . . . . . . . . . . . . . . . . . . . . . . . . . . . . . . . . . . . . . . . 60
Operating options .........................................................60
Time/date ................................................................60
Contrast .................................................................60
3/2.3.4 Enter PIN . . . . . . . . . . . . . . . . . . . . . . . . . . . . . . . . . . . . . . . . . . . . . . . . . . . . . . . . . . . . . . . . . . . 61
3/2.3.5 PIN rights access control ...................................................... 61
Cleaning level ............................................................. 61
Setting level . . . . . . . . . . . . . . . . . . . . . . . . . . . . . . . . . . . . . . . . . . . . . . . . . . . . . . . . . . . . . . 61
Accounting level . . . . . . . . . . . . . . . . . . . . . . . . . . . . . . . . . . . . . . . . . . . . . . . . . . . . . . . . . . 62
Delete PIN . . . . . . . . . . . . . . . . . . . . . . . . . . . . . . . . . . . . . . . . . . . . . . . . . . . . . . . . . . . . . . . . 62
3/2.3.6 Accounting numbers of items .................................................. 63
Chapter 4 Other settings 64
4.1 Labelling of beverage buttons 64
Chapter 5 Care 65
5.1 Cleaning program 66
5.2 Drip tray cleaning 66
5.3 Cleaning brewer area 66
5.4 Filter change (for Version 03.01.001 and higher) 66
5.5 General cleaning 67
Chapter 6 HACCP schedule 68
Chapter 7 Maintenance and descaling 69
7.1 Maintenance 69
7.2 WMF Service 69
Chapter 8 Messages and instructions 70
8.1 Messages for operation 70
8.2 Error messages and malfunctions 71
Chapter 9 Safety 75
9.1 Hazards to the operator 75
9.2 Hazards to the coffee machine 76
9.3 Duties of the owner/operator 77
9.4 Warranty claims 78
No warranty is provided: . . . . . . . . . . . . . . . . . . . . . . . . . . . . . . . . . . . . . . . . . . . . . . . . . . . . 79
Appendix A: Brief instruction cleaning 80
Appendix B: Technical Data 81
Technical data for coffee machine 81
Conditions for usage and installation 81
Appendix C: Accessories and spare parts 84
Index 86

6User Manual WMF cafemat!
Display for self-service operation
without SU display
Display for self-service operation
with SU display
10
13
1b
48
10
7
11
13
1a
5
6
3
14
17
15
16
4
18
2
9
9
12
Introduction and General Information with SU
Chapter 1/1 Introduction with SU
1/1.1 Parts of the coffee machine
with storage urn (SU)

7
User Manual WMF cafemat!
Introduction and General Information with SU
1a Ground coffee hopper (GCH)
1b Small ground coffee hopper for 2nd type (optional)
2Storage urn
3Cleaning granulate hopper (optional)
4Touch-screen display
5Beverage buttons
6Removeable coffee spout
7Removable drip tray with drip plate (drip grid)
8ON/OFF button
9Hot water button
10 Shift button/Decaf button
11 Unlocking the front door
12 Hot water spout
13 Coffee grounds container
14 Timer and clock display
15 Messages/error messages
16 Menu pad (opens main menu)
17 Info pad
18 Storage urn preselection menu

8User Manual WMF cafemat!
1
11
3
4
7
14
1
5
6
2
15
16
18
4
8
19
17
8
10
11
9
12
13
10
Display for self-service operation
Display with extended brew arm
Introduction and General Information without SU
Chapter 1/2 Introduction without SU
1/2.1 Parts of the coffee machine

9
User Manual WMF cafemat!
Introduction and General Information without SU
1Ground coffee hopper (GCH)
22nd Ground coffee hopper/Decaf (optional)
3Cleaning granulate container
4Touch-screen display
5Beverage buttons
6Fold away spout
7Removable drip tray with drip plate (drip grid)
8Brew arm
9ON/OFF button
10 Hot water button
11 Shift button/Decaf button
12 Unlocking the front door
13 Hot water spout
14 Coffee grounds container
15 Timer and clock display
16 Messages/error messages
17 Manual insert
18 Menu pad (opens main menu)
19 Info pad

10 User Manual WMF cafemat!
Introduction and General Information
Signs and symbols used in the user manual
For a detailed description of the warnings, see Safety
Caution.
Risk to machine.
Caution.
Risk to user.
Follow the User Manual. Observe the Safety chapter.
Caution.
Hot liquid.
Caution.
Hot surface.
Observe the Safety chapter. Observe the Safety chapter.
Caution.
Bruising or crushing
hazard.
Observe the Safety chapter.
Tip
Instruction Cross reference
Start position
Main menu
Very important.
Must be strictly
observed.
If the menu symbol is shown in this user manual, the
description starts at the start position.
Call up the main menu:
Touch
The main menu is displayed.
There are other display options; see Main menu chapter.
Main menu

11
User Manual WMF cafemat!
Introduction and General Information
Glossary and abbreviations
Term Declaration
• Listings, selection options•
Individual steps
Text in italics Description of coffee machine state and/or explanations of
automatic steps.
sec Seconds
min Minutes
Beverage dispensing Dispensing of coffee or hot water
Capacity For example: performance of the calcium filter in litres of
water it can filter
Carbonate hardness Quoted in °dkH. The water hardness is a measure of the calcium
dissolved in the water.
Decaf Decaffeinated coffee
Dispensing options Start-Stop: Dispensing runs up to the set amount and can be
stopped by pressing on the button again
Free-Flow: Dispensing runs for as long as the button is pressed
Metered: The set amount is dispensed
GCH Ground coffee hopper
Grounds chute See grounds disposal through counter, chapter
2/1.10 and 2/2.10
Main tap Water stop cock, angle valve
O-rings Seals
Preinfusion Prior to brewing, coffee is briefly infused in order to ensure
a more intense release of its aromatic substances.
SU Storage urn

12 User Manual WMF cafemat!
Operation with SU
Chapter 2/1 Operation with SU
2/1.1 Switch on the coffee machine
Press and hold ON/OFF button for longer than
2 seconds
Coffee machine switches on and heats up.
When the machine is ready to dispense beverages, the
ready to operate display appears.
The machine can also be switched on using the timer.
With SU: The storage urn level is selected.
Press the SU symbol
The preselection menu comes up directly
Using the plus and minus pads, select the desired
storage urn level
Time from switching on until ready to operate:
3 kW: approx. 9 minutes
6 kW: approx. 6 minutes
PIN protection:
wSoftware
wSettings
wOperating options
Ready to operate
Timer program
wSoftware from page 27
Hot liquids in the
dispensing area.
Observe the Safety chapter.

13
User Manual WMF cafemat!
Operation with SU
2/1.2 Beverage dispensing
Pressing the beverage button triggers dispensing of the
beverage selected.
Lit up button• =Ready to dispense
Flashing button• =Beverage dispensing
Rapidly flashing button• =Active dispense cycle is
interrupted
Unlit button• = not ready to dispense/button
barred
Place an appropriate drinking vessel under the coffee
spout
Press the desired beverage button
The selected beverage is dispensed.
Name of desired beverage and progress of dispensing
indicated on the display.
The amount can be dispensed multiple times.
See multiple dispensing.
For the fresh brewing option, with the storage urn level
at “empty”, portions are brewed fresh individually.
The optionally available second type of coffee is always
brewed fresh.
Button allocation:
wSettings
wRecipe and beverage buttons

14 User Manual WMF cafemat!
Operation with SU
2/1.3 Multiple dispensing
During beverage dispensing, up to twelve times the
amount of the current dispense can be selected
Preselection for multiple dispensing
Increase the current quantity dispensed:
Touch thepad
Reduce the current quantity dispensed:
Touch thepad
The display shows the current preselection and the number
of beverages begun.
Use multiple dispensing for dispensing larger quantities,
such as for a pot of coffee.
2/1.4 Shift button (optional)
Each beverage button may be assigned to two different
functions.
Level 1 is always active.
Press the Shift button
Level 2 activated
Press desired beverage button
Level 1 is active again after dispensing a beverage at
Level 2.
The shift button can take on the function of a decaf
button, to select the decaf ground coffee hopper prior to
selecting a beverage with the beverage buttons.
Display Multiple Dispensing.
The example shows 6 cups.
Beverage 2 of 6 is currently being
dispensed. Up to 12 times the single
beverage amount can be dispensed.
Shift button (active/inactive):
wSettings
wOperating options

15
User Manual WMF cafemat!
Operation with SU
2/1.5 Dispense hot water
Press the hot water button
Dispensing occurs according to the dispensing option.
For multiple dispensing, select the „metered“ dispensing
option.
2/1.6 Removable coffee spout
The coffee spout can be removed to allow greater
clearance height.
A spout brew arm is available as an accessory, and can be
mounted on the coffee spout. The clearance height is
increased by the height of the drip tray.
Fixed coffee spout:
for cups
Spout detached:
for coffee mugs
With gooseneck installed:
for taller pots
Adjustment height
With coffee spout approx. 124mm
Coffee spout detached approx. 180 mm
With gooseneck installed:
33 9838 3000
33 9885 5000
33 1750 3000
depending on version
approx. 160 mm
approx. 170 mm
approx. 185 mm
Multiple dispensing
wChapter 2/1.3 Multiple
dispensing.
Dispensing options
wButton allocation
Free-Flow, Start-Stop or Metered
Accessories
wAppendix C: Accessories and
spare parts.
Accessories
wAppendix C: Accessories and
spare parts.

16 User Manual WMF cafemat!
Operation with SU
2/1.7 Ground coffee hopper
Fill the hopper with no more than the amount needed for
one day to maintain the freshness of the products.
Remove the lid from the coffee container
Insert coffee grounds
Replace the lid on the ground coffee hopper
2/1.8 Open the front door
Open the front door to manually insert coffee grounds or
cleaner in the brewer, and to access the coffee grounds
container.
Press and hold up the lever, on the right below the
front door
Open front door
2/1.9 Coffee grounds container
The coffee grounds container receives the used coffee
grounds.
It has the capacity to receive coffee grounds from approx.
1200 g ground coffee.
The display shows a message as soon as the coffee grounds
container needs to be emptied.
Beverage dispensing is blocked for as long as the coffee
grounds container is removed.
Open the front door
Pull out coffee grounds container
Empty and replace coffee grounds container
Confirm procedure on the display
If coffee grounds container cannot be inserted, check
chute for coffee residue and remove it.
Always empty coffee grounds container before
reinserting. Replacing without emptying will result
in the coffee grounds container being overfilled. The
coffee machine will be soiled. This may cause subsequent
damage to the machine.
If this is not observed, the warranty is invalidated in the
event of any resultant damage.
Decaf ground coffee on the left
Follow the manual.
Observe the Safety chapter.

17
User Manual WMF cafemat!
Operation with SU
2/1.10 Grounds disposal through the counter
(optional)
The coffee machine can be fitted with a coffee grounds
container that goes through the counter. Both the coffee
grounds container and the coffee machine base have
an opening in them, in this case, which passes through
the counter the machine is placed on. The spent coffee
grounds are collected in a large reservoir under the
counter. “
Clean coffee grounds chute daily.
See “Care” chapter.

18 User Manual WMF cafemat!
Operation with SU
2/1.11 Switch off the coffee machine
The coffee machine must be cleaned daily prior to
switching it off.
Press the ON/OFF button until the coffee machine
switches off
Disconnect mains plug
Turn off mains water supply
If this is not observed, the warranty is invalidated in the
event of any resultant damage.
Storage urn:
Settings for the storage urn level are not reset when
switched off.
The storage urn is not automatically emptied.
If another storage urn level is to be used when switched on
again, then this must be set prior to switching off.
Cleaning/switching off and selection of another storage
urn level can be activated by the timer.
PIN protection:
wSoftware wSettings
wOperating options
Follow the manual.
Observe the Safety chapter.

19
User Manual WMF cafemat!
Operation without SU
Chapter 2/2 Operation without SU
2/2.1 Switch on the coffee machine
Press and hold ON/OFF button for longer than
2 seconds
Coffee machine switches on and heats up.
When the machine is ready to dispense beverages, the
ready to operate display appears.
The machine can also be switched on using the timer.
Time from switching on until ready to operate:
3 kW: approx. 6.5 minutes
6 kW: approx. 3.5 minutes
2/2.2 Beverage dispensing
Pressing the beverage button triggers dispensing of the
beverage selected.
• Lit up button = Ready to dispense
Flashing button• =Beverage dispensing
Rapidly flashing button• = Active dispense cycle
is interrupted
Unlit button• =not ready to dispense/
button barred
PIN protection:
wSoftware
wSettings
wOperating options
Ready to operate
Timer program
wSoftware from page 46
Hot liquids in the
dispensing area.
Observe the Safety chapter.

20 User Manual WMF cafemat!
Operation without SU
2/2.2.1 Beverage dispensing from the fold
away spout
Place an appropriate drinking vessel under the coffee
spout
Press the desired beverage button
The selected beverage is freshly brewed and dispensed.
Name of desired beverage and progress of dispensing
indicated on the display..
The amount can be dispensed multiple times.
See multiple dispensing.
2/2.2.2 Beverage dispensing from the brew arm
Pull out the brew arm
The brew arm menu is displayed, and the beverage buttons
are deactivated, other than the hot water button.
Place a suitable receptacle under the brew arm spout
Touch the desired brewing quantity on the display
Desired brewing quantity and progress of dispensing
indicated on the display.
Dispensing can take several brewing cycles, depending on
the quantity and settings.
With mug table (optional)
Button allocation:
wSettings
wRecipe and beverage buttons
WMF Service can set up to three
amounts for brewing with the brew
arm.
Pull out brew arm
Table of contents
Other WMF Coffee Maker manuals

WMF
WMF 950 S Instructions for use

WMF
WMF Presto 1400 Series Configuration guide

WMF
WMF Presto 1400 Series Configuration guide

WMF
WMF WMF 1000 S User manual

WMF
WMF 1500S User manual

WMF
WMF 2000 S User manual

WMF
WMF 1100S User manual

WMF
WMF 5000S+ User manual

WMF
WMF 9000F Instructions for use

WMF
WMF Presto User manual