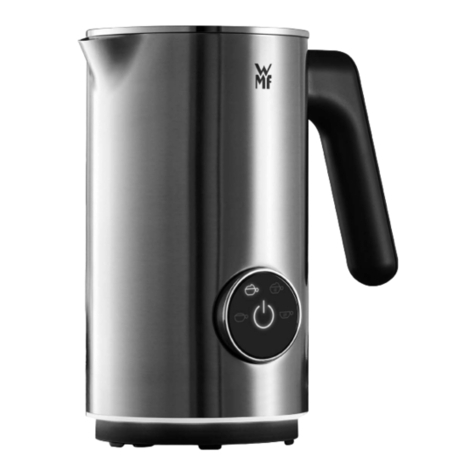
WMF LINEO User manual

LINEO
Gebrauchsanweisung 4
Operating Manual 12
Mode d’emploi 20
Istruzioni per l’uso 28
Instrucciones de uso 36
de
en
fr
it
es
nl
da
sv
no
Gebruiksaanwijzing 44
Brugsanvisning 52
Användarguide 60
Käyttöohje 68
Bruksanvisning 76
Milchaufschäumer

1
2
3
5
4
6

Aufbau Milchaufschäumer
1 - Deckel
2 - Dichtungsring
3 - WMF Milchschaum-DISC
4 - Krug
5 - Start-/Stopptaste mit Kontrollleuchte
6 - Gerätesockel mit Kabelaufwicklung
Milk frother components
1 - Lid
2 - Sealing ring
3 - WMF milk froth DISC
4 - Jug
5 - Start/stop button with control lamp
6 - Appliance base with cable wrap
Montage du moussoir à
lait
1 - Couvercle
2 - Joint d’étanchéité
3 - Disque moussoir à lait WMF
4 - Pot
5 - Touche marche/arrêt avec témoin de contrôle
6 - Socle de l’appareil avec cordon d’alimentation
Componenti schiumatore
1 - Coperchio
2 - Anello guarnizione
3 - DISCO per la formazione di schiuma di latte
WMF
4 - Bricco
5 - Tasto di avvio/arresto con spia
6 - Base del dispositivo con avvolgicavo
Montaje del espumador
de leche
1- Tapa
2 - Anillo de junta
3 - Espumador de leche DISC de WMF
4 - Jarra
5 - Tecla inicio/parada con luz de control
6- Zócalo del aparato con bobinado de cable
Onderdelen
melkopschuimer
1 - Deksel
2 - Afdichtring
3 - WMF melkschuim-DISC
4 - Kan
5 - Start/stop-knop met controlelampje
6 - Apparaatvoet met kabelvak
Opbygning af
mælkeskummer
1 - Låg
2 - Plombering
3 - WMF Mælkeskummer-DISC
4 - Kande
5 - Start-/Stoptast med kontrollampe
6 - Apparatsokkel med kabelopvikling
Mjölkskummarens
konstruktion
1 - Lock
2 - Tätningsring
3 - WMF-mjölkskums-DISC
4 - Kanna
5 - Start- och stoppknapp med kontrollampa
6 - Apparatsockel med sladdförvaring
Maidonvaahdottimen osat
1 - Kansi
2 - Tiivisterengas
3 - WMF-vaahdotuslevy
4 - Kannu
5 - Käynnistys-/pysäytysnäppäin merkkivalolla
6 - Laitteen jalusta, johon laitteen johdon voi
keriä
Oppbygging
melkeskummer
1 - Lokk
2 - Tetningsring
3 - WMF-melkeskum-DISC
4 - Kanne
5 - Start-/stoppknapp med indikatorlampe
6 - Apparatsokkel med kabeloppbevaring

4
Wichtige Sicherheitshinweise
▪ Diese Geräte können von Kindern ab 8 Jahren sowie
von Personen mit reduzierten physischen, sensorischen
oder mentalen Fähigkeiten oder Mangel an Erfahrung
und/oder Wissen benutzt werden, wenn sie beaufsich-
tigt oder bezüglich des sicheren Gebrauchs des Gerätes
unterwiesen wurden und die daraus resultierenden
Gefahren verstanden haben. Kinder dürfen nicht mit
dem Gerät spielen. Reinigung und Benutzer-Wartung
dürfen nicht durch Kinder durchgeführt werden, es sei
denn, sie sind älter als 8 Jahre und beaufsichtigt.
▪ Bewahren Sie das Gerät und seine Zuleitung außerhalb
der Reichweite von Kindern unter 8 Jahren auf.
▪ Den Milchaufschäumer nur mit dem dazugehörigen
Sockel betreiben.
▪ Das Gerät nicht in Wasser tauchen.
▪ Wenn die Anschlussleitung dieses Gerätes beschädigt
wird, muss sie durch den zentralen Kundendienst des
Herstellers oder eine ähnlich qualifizierte Person ersetzt
werden. Durch unsachgemäße Reparaturen können
erhebliche Gefahren für den Benutzer entstehen.
▪ Reinigen Sie nach dem Gebrauch alle Oberflächen, die
mit Lebensmitteln in Kontakt gekommen sind.
Beachten Sie die Hinweise im Kapitel „Reinigung und
Pflege“.
Vor dem Benutzen
Die Gebrauchsanweisung aufmerksam lesen. Sie enthält wichtige Hinweise für
den Gebrauch, die Sicherheit und die Wartung des Gerätes.
Sie soll sorgfältig aufbewahrt und gegebenenfalls an Nachbenutzer weitergege-
ben werden.
Das Gerät darf nur für den vorgesehenen Zweck, gemäß dieser Gebrauchsanwei-
sung, verwendet werden.
Dieses Gerät ist dafür bestimmt, im Haushalt und ähnlichen Anwendungen
verwendet zu werden, wie beispielsweise:
⋅in Küchen für Mitarbeiter in Läden, Büros und anderen
gewerblichen Bereichen;
⋅in landwirtschaftlichen Anwesen;
⋅von Kunden in Hotels, Motels und anderen Wohneinrichtungen;
⋅in Frühstückspensionen.
Gebrauchsanweisung

5
de
de
Das Gerät ist nicht für den rein gewerblichen Gebrauch bestimmt.
Beim Gebrauch die Sicherheitshinweise beachten.
Technische Daten
Nennspannung: 220 - 240 V~ 50/60 Hz
Leistungsaufnahme: 450 W
Schutzklasse: I
Sicherheitshinweise
▪ Gerät nur an eine vorschriftsmäßig installierte Schutzkontaktsteckdose
anschließen. Zuleitung und Stecker müssen trocken sein.
▪ Die Anschlussleitung nicht über scharfe Kanten ziehen oder einklemmen, nicht
herunterhängen lassen sowie vor Hitze und Öl schützen.
▪ Den Netzstecker nicht an der Leitung oder mit nassen Händen aus der Steck-
dose ziehen.
▪ Das Gerät nicht in Betrieb nehmen bzw. sofort Netzstecker ziehen, wenn:
⋅Gerät oder Netzkabel beschädigt ist;
⋅das Gerät undicht ist;
⋅der Verdacht auf einen Defekt nach einem Sturz o. Ä. besteht.
In diesen Fällen das Gerät zur Reparatur geben.
▪ Das Gerät nicht auf heiße Oberflächen z. B. Herdplatten o. Ä. oder in der Nähe
der offenen Gasflamme abstellen, er könnte dabei anschmelzen.
▪ Das Gerät nicht auf wasserempfindliche Oberflächen abstellen. Spritzer
könnten diese beschädigen.
▪ Das Gerät niemals ohne Aufsicht betreiben.
▪ Das Gerät nicht ohne Milch einschalten.
▪ Den Krug zum Füllen vom Sockel nehmen.
▪ Verwenden Sie das Gerät nur zum Erhitzen oder Aufschäumen von Milch.
Verwenden Sie es nicht für andere Zutaten.
▪ Das Gerät während des Betriebes nicht verrücken und nicht am Netzkabel
ziehen.
▪ Die Unterseite des Krugs muss trocken sein, bevor das Gerät genutzt wird.
▪ Vorsicht, das Gerät wird heiß.
▪ Der Netzstecker ist zu ziehen:
⋅bei Störungen während des Betriebes,
⋅vor jeder Reinigung und Pflege,
⋅nach dem Gebrauch.
▪ Bei Zweckentfremdung, falscher Bedienung oder nicht fachgerechter Repara-
tur wird keine Haftung für eventuelle Schäden übernommen.
Ebenso sind Garantieleistungen in solchen Fällen ausgeschlossen.
▪ Verpackungsmaterial, wie z. B. Folienbeutel gehören nicht in Kinderhände.

6
WMF Milchschaum-DISC
Die WMF Milchschaum-DISC (3) kann zur leichteren Reinigung von der Aufnahme
herausgenommen werden. Schieben Sie hierzu die WMF Milchschaum-DISC (3)
seitlich mit leichtem Druck nach unten von der Aufnahme herunter.
Zur Montage gehen Sie wie folgt vor:
Schieben Sie die WMF Milchschaum-DISC (3) einfach seitlich in die Aufnahme,
ein Magnet im Inneren sorgt für den sicheren Halt.
Inbetriebnahme
Reinigen Sie das Gerät vor der ersten Verwendung wie im Kapitel „Reinigung und
Pflege“ beschrieben.
Die nicht benötigte Länge der Anschlussleitung kann am Boden des Gerätesockels
(6) aufgewickelt werden. Schließen Sie den Netzstecker an eine Schutzkontakt-
steckdose an.

7
de
Bedienung und Betrieb
1. Füllen Sie die benötigte Menge Milch in den Krug (4) und verschließen Sie
diesen mit dem Deckel (1).
2. Setzen Sie erst jetzt den Krug (4) auf den Gerätesockel (6).
Achtung:
Setzen Sie immer erst den Deckel (1) auf das Gerät bevor Sie es einschalten.
Nehmen Sie niemals den Deckel (1) ab, während das Gerät eingeschaltet ist.
Ansonsten kann die WMF Milchschaum-DISC (3), auch bei Wiederaufsetzen des
Deckels (1), nicht mehr korrekt arbeiten.
Hinweis:
Die Zubereitung kann jederzeit durch Betätigung der Start-/Stopptaste (5) oder
durch Abheben des Krugs (4) von dem Gerätesockel (6) unterbrochen werden.
Lassen Sie zwischen zwei Verwendungen das Gerät abkühlen.
Beschaffenheit und Volumen des Milchschaums hängen von der jeweiligen
verwendeten Milch (u. a. Fett-, Proteingehalt, Temperatur) ab.
Cremig weicher Milchschaum
Wählen Sie dieses Programm, um warmen, cremigen, feinporigen Milchschaum zu
erhalten. Dieser eignet sich besonders für Cappuccino oder Latte Art.
▪ Füllen Sie den Krug (4) mit 100 bis 150 ml gekühlter Milch.
Die Füllmarkierungen finden Sie im Krug (4):
100 ml MIN
150 ml MAX
Füllen Sie keinesfalls mehr ein, da ansonsten Milchschaum überläuft und das
Gerät verunreinigt wird.
▪ Setzen Sie den Deckel (1) auf den Krug (4) und drücken Sie diesen leicht an,
damit dieser abdichtet.
▪ Drücken Sie nun die Start-/Stopptaste (5) so oft, bis das Leuchtsegment des
Symbols aufleuchtet. Nach ca. 3 Sekunden startet die Zubereitung auto-
matisch, die Kontrollleuchte der Start-/Stopptaste (5) leuchtet.
▪ Nach Programmende schaltet sich das Gerät automatisch ab, die Kontroll-
leuchte erlischt. Öffnen Sie den Deckel (1) und schöpfen Sie den Milchschaum
separat ab oder gießen Sie diesen mit der verbliebenen Milch aus.
Fester Milchschaum
Wählen Sie dieses Programm, um warmen, in der Konsistenz festen Milchschaum
zu erhalten. Dieser eignet sich besonders für Cappuccino oder Latte Macchiatto.
▪ Füllen Sie den Krug (4) mit 100 bis 150 ml gekühlter Milch.
Die Füllmarkierungen finden Sie im Krug (4):
100 ml MIN
150 ml MAX
Füllen Sie keinesfalls mehr ein, da ansonsten Milchschaum überläuft und das
Gerät verunreinigt wird.
▪ Setzen Sie den Deckel (1) auf den Krug (4) und drücken Sie diesen leicht an,
damit dieser abdichtet.
▪ Drücken Sie nun die Start-/Stopptaste (5) so oft, bis das Leuchtsegment des
Symbols aufleuchtet. Nach ca. 3 Sekunden startet die Zubereitung automa-
tisch, die Kontrollleuchte der Start-/Stopptaste (5) leuchtet.
▪ Nach Programmende schaltet sich das Gerät automatisch ab, die Kontroll-
leuchte erlischt. Öffnen Sie den Deckel (1) und schöpfen Sie den Milchschaum
separat ab oder gießen Sie diesen mit der verbliebenen Milch aus.

8
Kalter Milchschaum
Wählen Sie dieses Programm, um kalten, cremigen Milchschaum zu erhalten.
Dieser eignet sich besonders für Frappé, Cocktails, Eiskaffee oder Desserts.
▪ Füllen Sie den Krug (4) mit 100 bis 150 ml gekühlter Milch.
Die Füllmarkierungen finden Sie im Krug (4):
100 ml MIN
150 ml MAX
Füllen Sie keinesfalls mehr ein, da ansonsten Milchschaum überläuft und das
Gerät verunreinigt wird.
▪ Setzen Sie den Deckel (1) auf den Krug (4) und drücken Sie diesen leicht an,
damit dieser abdichtet.
▪ Drücken Sie nun die Start-/Stopptaste (5) so oft, bis das Leuchtsegment des
Symbols aufleuchtet. Nach ca. 3 Sekunden startet die Zubereitung automa-
tisch, die Kontrollleuchte der Start-/Stopptaste (5) leuchtet.
▪ Nach Programmende schaltet sich das Gerät automatisch ab, die Kontroll-
leuchte erlischt. Öffnen Sie den Deckel (1) und schöpfen Sie den Milchschaum
separat ab oder gießen Sie diesen mit der verbliebenen Milch aus.
Heiße Milch
Wählen Sie dieses Programm, um Milch zu erhitzen und diese leicht
aufzuschäumen . Die heiße Milch eignet sich besonders für Milchkaffee, heiße
Schokolade oder Kakao.
▪ Füllen Sie den Krug (4) mit 100 bis 250 ml gekühlter Milch.
Die Füllmarkierungen finden Sie im Krug (4):
100 ml MIN
250 ml MAX
Füllen Sie keinesfalls mehr ein, da ansonsten Milch überläuft und das Gerät
verunreinigt wird.
▪ Setzen Sie den Deckel (1) auf den Krug (4) und drücken Sie diesen leicht an,
damit dieser abdichtet.
▪ Drücken Sie nun die Start-/Stopptaste (5) so oft, bis das Leuchtsegment des
Symbols aufleuchtet. Nach ca. 3 Sekunden startet die Zubereitung auto-
matisch, die Kontrollleuchte der Start-/Stopptaste (5) leuchtet.
▪ Nach Programmende schaltet sich das Gerät automatisch ab, die Kontroll-
leuchte erlischt. Öffnen Sie den Deckel (1) und gießen Sie die Milch aus.

9
de
Reinigung und Pflege
▪ Reinigen Sie das Gerät nach jedem Gebrauch.
▪ Netzstecker ziehen und das Gerät abkühlen lassen.
▪ Deckel (1) und WMF Milchschaum-DISC (3) sind spülmaschinengeeignet. Zur
leichteren Reinigung kann der sich am Deckel (1) befindende Dichtungsring (2)
abgenommen werden.
Hinweis: Krug (4) und Gerätesockel (6) dürfen nicht in Spülmaschine gegeben
werden.
▪ Der Krug (4) kann unter fließendem Wasser abgespült werden.
Der Krug (4) ist innen mit einer Antihaftbeschichtung ausgestattet. Benutzen
Sie keine aggressiven oder scheuernden Reinigungsmittel und Lösungsmittel.
Den Krug (4) mit einem weichem Tuch abtrocknen.
Achtung: Die Unterseite des Krugs (4) muss trocken sein, bevor das Gerät
genutzt wird.
▪ Den Gerätesockel (6) nur mit einem leicht feuchtem Tuch abwischen.
spülmaschinen-
geeignet
unter fließendem
Wasser abspülbar
feucht abwischen
Deckel (1)
Dichtungsring (2)
WMF Milch-
schaum-DISC (3)
Krug (4)
Gerätesockel (6)

10
Hilfe bei Störungen
Die folgenden Hinweise sollen Ihnen helfen, Störungen zu beseitigen. Sollte dies
nicht gelingen, wenden Sie sich an unseren zentralen Kundendienst. Beachten Sie
die Garantiehinweise.
Problem Mögliche Ursache Behebung
Die Kontrollleuchte
leuchtet nicht, das
Gerät startet nicht
Stecker nicht einge-
steckt
Stecker einstecken
Überhitzungsschutz
aktiv
Gerät abkühlen lassen
Milch tritt am Deckel
aus
Füllmenge zu groß Füllmenge reduzieren
Deckel nicht richtig
aufgesetzt
Deckel mit leichtem
Druck aufsetzen
Dichtungsring fehlt
oder ist verschmutz
Dichtungsring reinigen
und einsetzen
Garantie-Information
Für unsere Geräte übernehmen wir gegenüber dem Endkunden eine 24-monatige
Haltbarkeitsgarantie. Sie beginnt mit dem Kauf des Gerätes durch den Endkunden
und gilt im Gebiet der Bundesrepublik Deutschland.
Ansprüche aus dieser Garantie sind unter Vorlage des Kaufbelegs direkt gegen-
über unserem zentralen Kundendienst geltend zu machen.
Von der Garantie ausgeschlossen sind Schäden durch normalen Verschleiß,
unsachgemäßen Gebrauch, Nichteinhaltung der Entkalkungsanweisung sowie
unterbliebene Pflege.
Der Endkunde besitzt zusätzlich zu den Ansprüchen aus dieser Garantie gesetzli-
che Ansprüche wegen Mängeln des Gerätes gegenüber seinem direkten Verkäu-
fer/Händler, die durch diese Garantie nicht eingeschränkt werden.

11
de
Das Gerät entspricht den Europäischen Richtlinien 2006/95/EG, 2004/108/EG und
2009/125/EG.
Dieses Produkt darf am Ende seiner Lebensdauer nicht über den normalen
Haushaltsabfall entsorgt werden, sondern muss an einem Sammelpunkt für das
Recycling von elektrischen und elektronischen Geräten abgegeben werden.
Die Werkstoffe sind gemäß ihrer Kennzeichnung wiederverwertbar. Mit der Wie-
derverwendung, der stofflichen Verwertung oder anderen Formen der Verwertung
von Altgeräten leisten Sie einen wichtigen Beitrag zum Schutze unserer Umwelt.
Bitte erfragen Sie bei der Gemeindeverwaltung die zuständige Entsorgungsstelle.
Änderungen vorbehalten

12
Important safety instructions
▪ These devices can be used by children older than eight
years old as well as by persons with limited physical,
sensory or mental capabilities, persons lacking experi-
ence and/or lacking knowledge if they are supervised
or have received instructions regarding how the device
is to be used safely and have understood the resulting
risks. Children must not play with the device. Children
must not perform the cleaning and user maintenance,
unless they are older than eight years old and are
supervised.
▪ Keep the device and its cable out of the reach of chil-
dren under eight years old.
▪ Only operate the appliance with the appropriate base.
▪ Never immerse the appliance in water.
▪ If the appliance’s connection cable is damaged then
it must be replaced by the manufacturer’s central
customer service department or by a similarly quali-
fied person. Improper repairs may constitute a serious
threat for users.
▪ Clean after use all surfaces, which have got in contact
with food.
Follow the notes in chapter „Cleaning and care“.
Prior to use
Read the operating manual carefully. It contains important information about the
use, safety and maintenance of the appliance.
It should be kept in a safe place and passed on to further users if appropriate.
The device may only be used for the intended purpose according to these opera-
ting instructions.
This device is meant to be used in the household and for similar applications, such
as:
⋅in kitchens, for employees in shops, offices and other
commercial areas;
⋅on agricultural property;
⋅from customers in hotels, motels and other residential facilities;
⋅in bed and breakfasts establishments.
The appliance is not designed for sole commercial use.
Observe the safety instructions during use.
Operating Manual

13
enen
Technical Data
Rated voltage: 220 - 240 V~ 50/60 Hz
Power consumption: 450 W
Protection class: I
Safety instructions
▪ Only connect the device to properly installed earthed sockets. The wire and
plug must be dry.
▪ Do not pull the connecting cable over sharp edges or clamp it. Do not let it
hang down and protect it from heat and oil.
▪ Never disconnect the mains plug from the socket by the cord or with wet
hands.
▪ Stop using the appliance and/or connect it from the mains plug immediately
if:
⋅The appliance or mains cable is damaged;
⋅the device is not leak-proof;
⋅there is any suspicion of a fault after dropping the appliance or similar.
In such cases, send the appliance to be repaired.
▪ Do not place the appliance on hot surfaces, such as hot plates or similar, or
near open flames. It could melt.
▪ Do not place the device on water-sensitive surfaces. Spray may damage them.
▪ Never operate the appliance unattended.
▪ Do not switch on the device without milk.
▪ Take the pot for filling from the base.
▪ Only use the appliance to heat up or froth milk. Do not use it to process any
other ingredients.
▪ Do not move the device during operation and do not pull on the mains cable.
▪ Underside of the jug must be dry before using the appliance.
▪ Caution: the device is hot.
▪ The mains plug is to be pulled:
⋅if malfunctions occur during use,
⋅before cleaning and care,
⋅after use.
▪ No liability is accepted for any damages resulting from misuse, incorrect
operation or improper repairs.
Claims under warranty are likewise excluded in such cases.
▪ Packaging material, such as plastic film bags, do not belong in the hands of
children.

14
WMF milk froth DISC
The WMF milk froth DISC (3) can be removed from the appliance for easy
cleaning. To do this, gently push down the WMF milk froth DISC (3) and slide it to
one side.
To assemble the appliance, proceed as follows:
Simply slide the WMF milk froth DISC (3) sideways into the appliance, an internal
magnet holds the DISC firmly in place.
Using the appliance
Before using for the first time, ensure the appliance is thoroughly cleaned, as
detailed in the “cleaning and care” section.
Any surplus cable can be wound into the bottom of the base unit (6). Connect the
mains plug to an earthed socket.

15
en
Use and operation
1. Fill the jug (4) with the required quantity of milk and then close the lid (1).
2. Now place the jug (4) on the base unit (6).
Caution:
Always put the lid (1) on the gadget first before switching it on.
Never remove the lid (1) while the gadget is switched on.
Otherwise, the WMF milk froth DISC (3) may no longer function correctly even
when the lid (1) is replaced.
Note:
preparation can be stopped at any time by pressing the start/stop button (5) or by
removing the jug (4) from the base unit (6).
Allow the appliance to cool down before using again.
The texture and volume of the milk froth depend on the type of milk used
(including fat content, protein content, temperature).
Soft creamy milk froth
Select this program for warm, creamy, fine-pored milk froth. This is particularly
suitable for cappuccino or latte style coffee.
▪ Fill the jug (4) with 100 to 150ml of cold milk.
The jug (4) is marked with the following measures:
100 ml MIN
150 ml MAX
DO NOT overfill the jug, otherwise the milk froth will overflow and spill over
the appliance.
▪ Place the lid (1) on the jug (4) and push down gently to seal.
▪ Now press the start/stop button (5) repeatedly until the lamp for the
symbol illuminates. After approximately 3 seconds, the appliance starts
automatically, the control lamp for the start/stop button (5) is illuminated.
▪ After the program has finished, the appliance automatically switches itself off,
the control lamp is no longer illuminated. Lift the lid (1) and skim off the milk
froth separately or pour it out with the rest of the milk.
Firm milk froth
Select this program if you require a warm, firmer consistency of milk froth. This is
particularly suitable for cappuccino or latte macchiato style coffee.
▪ Fill the jug (4) with 100 to 150ml of cold milk.
The jug (4) is marked with the following measures:
100 ml MIN
150 ml MAX
DO NOT overfill the jug, otherwise the milk froth will overflow and spill over
the appliance.
▪ Place the lid (1) on the jug (4) and push down gently to seal.
▪ Now press the start/stop button (5) repeatedly until the lamp for the
symbol illuminates. After approximately 3 seconds, the appliance starts
automatically, the control lamp for the start/stop button (5) is illuminated.
▪ After the program has finished, the appliance automatically switches itself off,
the control lamp is no longer illuminated. Lift the lid (1) and skim off the milk
froth separately or pour it out with the rest of the milk.

16
Cold milk froth
Select this program for cold, creamy milk froth. This is ideal for frappés, cocktails,
iced coffee or deserts.
▪ Fill the jug (4) with 100 to 150ml of cold milk.
The jug (4) is marked with the following measures:
100 ml MIN
150 ml MAX
DO NOT overfill the jug, otherwise the milk froth will overflow and spill over
the appliance.
▪ Place the lid (1) on the jug (4) and push down gently to seal.
▪ Now press the start/stop button (5) repeatedly until the lamp for the
symbol illuminates. After approximately 3 seconds, the appliance starts
automatically, the control lamp for the start/stop button (5) is illuminated.
▪ After the program has finished, the appliance automatically switches itself off,
the control lamp is no longer illuminated. Lift the lid (1) and skim off the milk
froth separately or pour it out with the rest of the milk.
Hot milk
Select this program to heat and lightly froth the milk. The hot milk is ideal for
milky coffee, hot chocolate or cocoa.
▪ Fill the jug (4) with 100 to 250 ml of cold milk.
The jug (4) is marked with the following measures:
100 ml MIN
250 ml MAX
DO NOT overfill the jug, otherwise the milk froth will overflow and spill over
the appliance.
▪ Place the lid (1) on the jug (4) and push down gently to seal.
▪ Now press the start/stop button (5) repeatedly until the lamp for the
symbol illuminates. After approximately 3 seconds, the appliance starts
automatically, the control lamp for the start/stop button (5) is illuminated.
▪ After the program has finished, the appliance automatically switches itself off,
the control lamp is no longer illuminated. Lift the lid (1) and pour the milk.

17
en
Cleaning and care
▪ Clean the appliance after each use.
▪ Unplug at the mains and allow the device to cool down.
▪ The lid (1) and WMF milk froth DISC (3) are dishwasher-safe. for easy cleaning,
the sealing ring (2) in the lid (1) can be removed.
Note: the jug (4) and base unit (6) should not be placed in the dishwasher.
▪ The jug (4) can be rinsed under running water.
The inside of the jug (4) is lined with a non-stick coating. Do not use any
harsh or abrasive detergents or solvents. Dry the jug (4) with a soft cloth.
Attention: before using the appliance, ensure that the jug (4) is dry
underneath.
▪ Only use a soft, damp cloth to wipe the base unit (6).
Dishwasher-safe Can be rinsed
under running
water
Wipe with a
damp cloth
Lid (1)
Sealing ring (2)
WMF milk froth
DISC (3)
Jug (4)
Base unit (6)

18
Troubleshooting
The following tips should help you to solve any problems. If the problem persists,
please contact our central customer service department. Please note the warranty
information.
Problem Possible cause Action
The control lamp is not
illuminated, the appli-
ance does not start
The plug is not plugged
in.
Connect the plug
Overheating protection
active
Allow the appliance to
cool
Milk is leaking from
the lid
Too much milk in the
appliance
Pour out some of the
milk
The lid is not fitted
properly
Gently push the lid down
The sealing ring is miss-
ing or is dirty
Clean and insert the
sealing ring

19
en
For UK use only
▪ This product is supplied with a 13 A plug conforming to BS 1363 fitted to the
mains lead. If the plug is unsuitable for your socket outlets or needs to be
replaced, please note the following. If the plug is a non-rewireable one, cut
it from the mains lead and immediately dispose of it. Never insert it into a
socket outlet as there is a very great risk of an electric shock.
▪ The replacement of the plug at the mains lead has to be done according to
the following instructions:
Warning - This appliance must be earthed!
Important: The wires in this mains lead are coloured in accordance with the
following code:
green/yellow Earth
blue Neutral
brown Live
As the colours of the wires in the mains lead of this appliance may not
correspond with the coloured markings identifying the terminals in your plug,
proceed as follows:
⋅the wire which is coloured green and yellow must be connected to the
terminal which is marked with the letter E or by the earth symbol , or
coloured green or green and yellow,
⋅the wire which is coloured blue must be connected to the terminal which
is marked with the letter N or coloured black,
⋅the wire which is coloured brown must be connected to the terminal
which is marked with the letter L or coloured red.
▪ If a 13 A (BS 1363) plug is used it must be fitted with a 3 A fuse conforming
to BS 1362 and be ASTA approved. If any other type of plug is used, the
appliance must be protected by a 5 A fuse either in the plug or adapter or at
the distribution board. If in doubt - consult a qualified electrician.
▪ Never use the plug without closing the fuse cover.
The appliance complies with the European directives 2006/95/EC,2004/108/EC and
2009/125/EC.
This product may not be disposed of with the normal household waste at the
end of its service life but must be delivered to a collecting point for recycling
electrical and electronic appliances. The materials are reusable in accordance with
their identification. You will make an important contribution to the protection of
our environment by recycling used appliances.
Please ask about the responsible disposal point at your community offices.
Subject to change

20
Consignes de sécurité importantes
▪ Des enfants à partir de 8 ans ainsi des personnes ayant
des capacités physiques, sensorielles ou mentales
restreintes ou ayant un manque d’expérience et/ou
de connaissance peuvent utiliser ces appareils, s’ils
sont surveillés et s’ils ont été instruits pour utiliser
cet appareil en toute sécurité et s’ils ont compris les
dangers pouvant résulter de l’usage de l’appareil. Les
enfants n’ont pas le droit de jouer avec cet appareil. Les
enfants n’ont pas le droit d’effectuer le nettoyage et
la maintenance sauf s’ils sont âgés de plus de 8 ans et
sous surveillance.
▪ Conservez l’appareil et son câble d’alimentation en
dehors de la portée des enfants de moins de 8 ans.
▪ Ne faire fonctionner l’appareil qu’uniquement sur le
socle correspondant.
▪ Ne jamais plonger l’appareil dans l’eau.
▪ Si le câble d’alimentation de l’appareil est endommagé,
il doit être remplacé par le SAV central du fabricant
ou par une personne qualifiée. Des réparations non
conformes peuvent engendrer de graves dangers pour
l’utilisateur.
▪ Après utilisation, nettoyez toutes les surfaces qui
sont entrées en contact avec des aliments. Veillez aux
remarques du chapitre «Nettoyage et entretien».
Avant l’utilisation
Lire attentivement le mode d’emploi. Il contient des consignes importants pour
l’utilisation, la sécurité et l’entretien de l’appareil.
Il doit être conservé soigneusement et transmis en cas de remise à une tierce
personne.
L’appareil ne doit être utilisé que pour l’usage prévu conformément à ce mode
d’emploi.
L’appareil est conçu pour un usage domestique ou pour des applications similaires
telles que :
⋅dans des cuisines pour le personnel dans des boutiques, des bureaux ou
d’autres
secteurs professionnels;
⋅dans des exploitations agricoles;
Mode d’emploi
Other manuals for LINEO
6
Table of contents
Languages:
Other WMF Kitchen Appliance manuals

WMF
WMF KULT X User manual

WMF
WMF Insulation mug Assembly instructions

WMF
WMF Lumero User manual

WMF
WMF PERFECTION 600 Series User manual

WMF
WMF KULT X User manual

WMF
WMF STELIO User manual

WMF
WMF LONO User manual

WMF
WMF KULT X User manual

WMF
WMF Fusiontec Assembly instructions

WMF
WMF Kult X Spiralizer User manual

WMF
WMF KULT S User manual

WMF
WMF Cromargan Assembly instructions

WMF
WMF Bueno User manual

WMF
WMF MILKBOX 9159 SERIES User manual

WMF
WMF KUCHENminis 230560 User manual

WMF
WMF Profi Plus Assembly instructions

WMF
WMF Profi Plus User manual

WMF
WMF Kuchenminis series User manual

WMF
WMF LONO User manual

WMF
WMF Lumero User manual