WMF LONO User manual

nl
da
sv
fi
no
de
en
fr
it
es
Sandwich-Toaster
Gebrauchsanweisung 2
Operating Manual 8
Mode d’emploi 14
Istruzioni per l’uso 20
Instrucciones de uso 26
Gebruiksaanwijzing 32
Brugsanvisning 38
Användarguide 42
Käyttöohje 46
Bruksanvisning 50
LONO

2
Gebrauchsanweisung
Wichtige Sicherheitshinweise
▪ Das Gerät kann von Kindern ab 8 Jahren sowie von Personen mit
reduzierten physischen, sensorischen oder mentalen Fähigkeiten
oder Mangel an Erfahrung und/oder Wissen benutzt werden, wenn
sie beaufsichtigt oder bezüglich des sicheren Gebrauchs des Gerätes
unterwiesen wurden und die daraus resultierenden Gefahren
verstanden haben.
▪ Kinder dürfen nicht mit dem Gerät spielen.
▪ Reinigung und Benutzerwartung dürfen nicht durch Kinder
durchgeführt werden, es sei denn, sie sind älter als 8 Jahre und
beaufsichtigt.
▪ Kinder jünger als 8 Jahre sind vom Gerät und der Anschlussleitung
fernzuhalten.
▪ Das Gerät darf nicht über eine externe Zeitschaltuhr oder
Fernbedienung betrieben werden.
▪ Wenn die Netzanschlussleitung dieses Gerätes beschädigt wird,
muss sie durch den Hersteller oder seinen Kundendienst oder eine
ähnlich qualifizierte Person ersetzt werden, um Gefährdungen zu
vermeiden.
▪ Reinigen Sie nach Verwendung des Gerätes alle Flächen/Teile, die
mit Nahrungsmitteln in Berührung gekommen sind. Bitte befolgen
Sie die Hinweise im Kapitel „Reinigung und Pflege“.
▪ Dieses Gerät ist dafür bestimmt, im Haushalt und ähnlichen
Anwendungen verwendet zu werden, wie beispielsweise:
⋅in Küchen für Mitarbeiter in Läden, Büros und anderen
gewerblichen Bereichen;
⋅in landwirtschaftlichen Anwesen;
⋅von Kunden in Hotels, Motels und anderen Wohneinrichtungen;
⋅in Frühstückspensionen.
Das Gerät ist nicht für den rein gewerblichen Gebrauch bestimmt.
▪ Achtung: Die berührbaren Oberflächen können bei eingestecktem
Gerät heiß werden und bleiben auch nach dem Ausstecken heiß!

3
de
de
Vor dem Benutzen
Das Gerät darf nur für den vorgesehenen Zweck gemäß dieser Gebrauchsanweisung verwendet
werden. Lesen Sie die Gebrauchsanweisung deshalb vor der Inbetriebnahme sorgfältig. Sie gibt
Anweisungen für den Gebrauch, die Reinigung und die Pflege des Gerätes. Bei Nichtbeachtung
übernehmen wir keine Haftung für eventuelle Schäden. Bewahren Sie die Gebrauchsanweisung
sorgfältig auf und geben Sie diese gemeinsam mit dem Gerät an Nachbenutzer weiter. Beachten
Sie auch die Garantiehinweise am Ende.
Beim Gebrauch die Sicherheitshinweise beachten.
Technische Daten
Netzspannung: 220-240 V~, 50-60 Hz
Leistungsaufnahme: 730 – 870 Watt
Schutzklasse: I
Weitere Sicherheitshinweise
▪ Gerät nur an eine vorschriftsmäßig installierte Schutzkontaktsteckdose anschließen. Zuleitung und
Stecker müssen trocken sein.
▪ Die Anschlussleitung nicht über scharfe Kanten ziehen oder einklemmen, nicht herunterhängen
lassen sowie vor Hitze und Öl schützen.
▪ Das Gerät nicht auf heiße Oberflächen wie Herdplatten o. Ä. stellen und nicht in der Nähe offener
Flammen betreiben.
▪ Den Netzstecker nicht an der Leitung oder mit nassen Händen aus der Steckdose ziehen.
▪ Das Gerät nicht in Betrieb nehmen bzw. sofort Netzstecker ziehen, wenn:
⋅Gerät oder Netzkabel beschädigt ist
⋅der Verdacht auf einen Defekt nach einem Sturz oder Ähnlichem besteht.
In diesen Fällen das Gerät zur Reparatur geben.
▪ Das Gerät nicht in Wasser tauchen.
▪ Bei Zweckentfremdung, falscher Bedienung oder nicht fachgerechter Reparatur wird keine
Haftung für eventuelle Schäden übernommen. Ebenso sind Garantieleistungen in solchen Fällen
ausgeschlossen.
▪ Das Gerät ist nicht für den gewerblichen Gebrauch bestimmt.
▪ Decken Sie das Gerät nicht ab.
▪ Ziehen Sie nach dem Gebrauch den Netzstecker aus der Steckdose und öffnen Sie das Gerät.
▪ Lassen Sie das Gerät abkühlen, bevor Sie es transportieren oder verstauen.

4
Inbetriebnahme
▪ Reinigen Sie die Toastplatten vor der ersten Verwendung mit einem feuchten
Tuch und etwas Geschirrspülmittel.
▪ Pinseln Sie die Toastplatten nach dem Trocknen mit einigen Tropfen Öl ein.
▪ Schließen Sie den Netzstecker an eine Schutzkontaktsteckdose an.
▪ Schalten Sie das Gerät am Ein/Ausschalter ein um das Gerät aufzuheizen. Die
Kontrollleuchte leuchtet rot.
▪ Die Farbe der Kontrollleuchte wechselt von Rot auf Weiß sobald die optimale
Temperatur erreicht ist.
Hinweis: Bei der ersten Inbetriebnahme des neuen Gerätes kann es zu einer
geringen Rauchentwicklung kommen. Dies ist technisch bedingt und kein
Grund zur Beunruhigung.
Hinweis: Bei der ersten Inbetriebnahme wird empfohlen zwei Scheiben Toast
ohne Zutaten zu toasten, da die erste Sandwiches aus dem neuen Gerät nicht
verzehrt werden sollten.
▪ Drücken Sie die Taste auf der inneren Seite des Griffes um das Gerät zu
öffnen. (Bild)
▪ Legen Sie die Sandwiches auf die untere Toastplatte und schließen Sie das
Gerät.
▪ Nach kurzer Zeit leuchtet die rote Kontrollleuchte erneut auf, das Gerät heizt
nach.
▪ Sobald die Sandwiches dem gewünschten Bräunungsgrad entsprechen, öffnen
Sie das Gerät und entnehmen Sie die Sandwiches.
Tipps zum besseren Gelingen
▪ Bevor Sie mit dem Toasten beginnen, empfiehlt es sich, alle Zutaten bereit zu
legen. Sie können auch eine gewisse Anzahl Toasts bereits belegen, um so die
Wartezeit zu verkürzen.
▪ Alle Toastsorten können verwendet werden, z.B. Roggen- oder Mehrkorntoast,
sofern sie von der Größe in die Toastplatten passen.
▪ Die Toastzeit hängt von der Feuchtigkeit des Brots und der Art des
verwendeten Belags ab.
▪ Kontrollieren Sie das Toastergebnis je nach Geschmack.
▪ Entnehmen Sie die Sandwiches mit einem Holzspachtel um die Beschichtung
zu schützen.
Rezepte:
Schinken-Käse Toast
Zutaten:
4 Scheiben Toastbrot
4 Scheiben Käse
2 Scheiben gekochter Schinken
Pfeffer
Legen Sie je eine Scheibe Käse und eine Scheibe Schinken auf das Toastbrot.
Würzen Sie die Sandwiches mit Pfeffer. Legen Sie eine weitere Scheibe Käse
darauf und schließen Sie die Sandwiches mit einer weiteren Toastscheibe.

5
de
Veggie Toast
Zutaten:
4 Scheiben Vollkorn Toastbrot
4 Scheiben Gurke (dünn geschnitten)
4 Scheiben Zwiebel
4 Scheiben Tomaten
4 Scheiben gekochte Kartoffel
1 Hand voll Baby Spinat
Tomaten Ketchup
Verteilen Sie das geschnittene Gemüse auf den Toastbrot-Scheiben. Geben Sie
etwas Baby Spinat und Tomaten Ketchup dazu. Schließen Sie die Sandwiches mit
einer zweiten Toastscheibe.
Tomaten-Käse Toast
Zutaten:
4 Scheiben Vollkorn Toastbrot
4 Scheiben Gouda-Käse
4 Scheiben Zwiebel
4 Scheiben Tomaten
Belegen Sie das Toastbrot mit je einer Scheibe Gouda-Käse, und verteilen Sie das
Gemüse gleichmäßig auf beiden Sandwiches. Legen Sie eine weitere Scheibe Käse
darauf und schließen Sie mit einer Toastscheibe ab.
Tonno Toast
Zutaten:
4 Scheiben Toastbrot
1/2 Dose Tunfisch
4 Scheiben Tomaten
4 Scheiben Mozzarella
4 Scheiben Zwiebel
Pfeffer
Salz
Belegen Sie das Toastbrot mit Tunfisch, Tomate, Mozzarella und Zwiebeln. Würzen
Sie die Sandwiches mit etwas Pfeffer und Salz. Schließen Sie das Sandwich mit
einer weiteren Toastscheibe.

6
Reinigung und Pflege
Nach Gebrauch Netzstecker ziehen und das Gerät abkühlen lassen.
Das Gerät niemals in Wasser tauchen oder unter fließendem Wasser reinigen.
Das Gehäuse nur mit einem feuchten Tuch abwischen und abtrocknen.
Reinigen Sie die Toastflächen mit einem weichen Pinsel oder einer Bürste.
Die antihaftbeschichteten Toastflächen keinesfalls mit spitzen oder harten
Gegenständen bearbeiten, die Antihaftbeschichtung könnte dadurch beschädigt
werden.
Zur platzsparenden Aufbewahrung kann das Kabel an der Unterseite des Gerätes
aufgewickelt werden. Um das unbeabsichtigte Öffnen des Gerätes zu vermeiden
lässt sich dieses mithilfe der Verriegelungstaste verschließen. (Bild)

7
de
Garantie-Information
Für unsere Geräte übernehmen wir gegenüber dem Endkunden eine 24-monatige
Haltbarkeitsgarantie. Sie beginnt mit dem Kauf des Gerätes durch den Endkunden
und gilt im Gebiet der Bundesrepublik Deutschland.
Ansprüche aus dieser Garantie sind unter Vorlage des Kaufbelegs direkt
gegenüber unserem zentralen Kundendienst geltend zu machen.
Von der Garantie ausgeschlossen sind Schäden durch normalen Verschleiß,
unsachgemäßen Gebrauch sowie unterbliebene Pflege.
Der Endkunde besitzt zusätzlich zu den Ansprüchen aus dieser Garantie
gesetzliche Ansprüche wegen Mängeln des Gerätes gegenüber seinem direkten
Verkäufer/Händler, die durch diese Garantie nicht eingeschränkt werden.
Das Gerät entspricht den Europäischen Richtlinien 2014/35/EG, 2014/30/EG und
2009/125/EG.
Dieses Produkt darf am Ende seiner Lebensdauer nicht über den normalen
Haushaltsabfall entsorgt werden, sondern muss an einem Sammelpunkt für das
Recycling von elektrischen und elektronischen Geräten abgegeben werden.
Die Werkstoffe sind gemäß ihrer Kennzeichnung wiederverwertbar. Mit der
Wiederverwendung, der stofflichen Verwertung oder anderen Formen der
Verwertung von Altgeräten leisten Sie einen wichtigen Beitrag zum Schutze
unserer Umwelt.
Bitte erfragen Sie bei der Gemeindeverwaltung die zuständige Entsorgungsstelle.
Änderungen vorbehalten

8
Operating Manual
Important safety information
▪ The appliance can be used by children older than eight years
of age as well as by people with limited physical, sensory or
mental capabilities and persons lacking experience and/or lacking
knowledge, if they are supervised or have received instructions on
how to use the appliance safely and have understood the resulting
risks.
▪ Children must not play with the appliance.
▪ Children must not clean or maintain the appliance unless they are
older than eight years of age and are supervised.
▪ Keep the appliance and its connection cable out of reach of
children under eight years of age.
▪ The appliance must not be operated via an external timer or remote
control.
▪ If the supply cord is damaged, it must be replaced by the
manufacturer, its service agent or a similarly qualified person in
order to avoid hazards.
▪ After using the appliance, clean all surfaces/parts which have come
into contact with food. Follow the instructions in the “Cleaning and
care” section.
▪ This appliance is designed for use in households and similar
environments such as:
⋅staff kitchen areas in shops, offices and other working
environments;
⋅farm houses;
⋅by clients in hotels, motels and other residential facilities;
⋅bed-and-breakfast establishments.
The appliance is not intended for purely commercial use.
▪ Please note: When the appliance is plugged in, its touchable
surfaces can get very hot and they remain hot even after the
appliance has been unplugged!

9
en
en
Before use
The appliance may only be used for the intended purpose according to these instructions for use.
Therefore, carefully read the instructions for use before operating the appliance. They contain
instructions for using, cleaning and caring for the appliance. We accept no liability for any damages
caused in the event of non-compliance. Keep the instructions for use in a safe place and pass them on
to any subsequent user together with the appliance.
Observe the safety information when using the appliance.
Technical data
Mains voltage: 220 – 240 V~, 50 – 60 Hz
Power consumption: 730 - 870 W
Protection class: I
Additional safety information
▪ Pull the mains plug:
⋅if malfunctions occur during use
⋅before cleaning
⋅after use.
▪ Only connect the appliance to earthed wall sockets that have been installed pursuant to
regulations. The supply cable and plug must be dry.
▪ The connection cable must not come into contact with hot appliance parts.
▪ Only use an extension cable that is in perfect condition. Make sure you use enough cable and that
it is safely routed.
▪ Place the appliance on a flat, solid surface.
▪ Make sure sufficient space is left around the appliance.
▪ To operate the appliance, it must be positioned unobstructed on a table or work surface and not up
against a wall or in a corner.
▪ Attention! Do not use the appliance near or under flammable objects (e.g. curtains, wall cupboards)
and always supervise.
▪ Stop using the appliance and/or pull the mains plug out of the socket immediately if:
⋅The appliance or power cord is damaged.
⋅You suspect that there is a defect after the appliance has fallen or following a similar incident.
In such cases, arrange for the appliance to be repaired.
▪ Caution! The appliance gets hot! Risk of burns! Do not transport the appliance when it is hot.
▪ Make sure that the drip tray is always correctly inserted during grilling.
▪ Fat can spray out when grilling, so protect the table or work surface accordingly.
▪ Do not leave the appliance unattended.
▪ Do not immerse the appliance in water to clean it.
▪ Do not leave the appliance half-open; only open it briefly to add or remove food.
▪ Allow the appliance to cool down fully before you remove the plates, clean the appliance and put
it away.
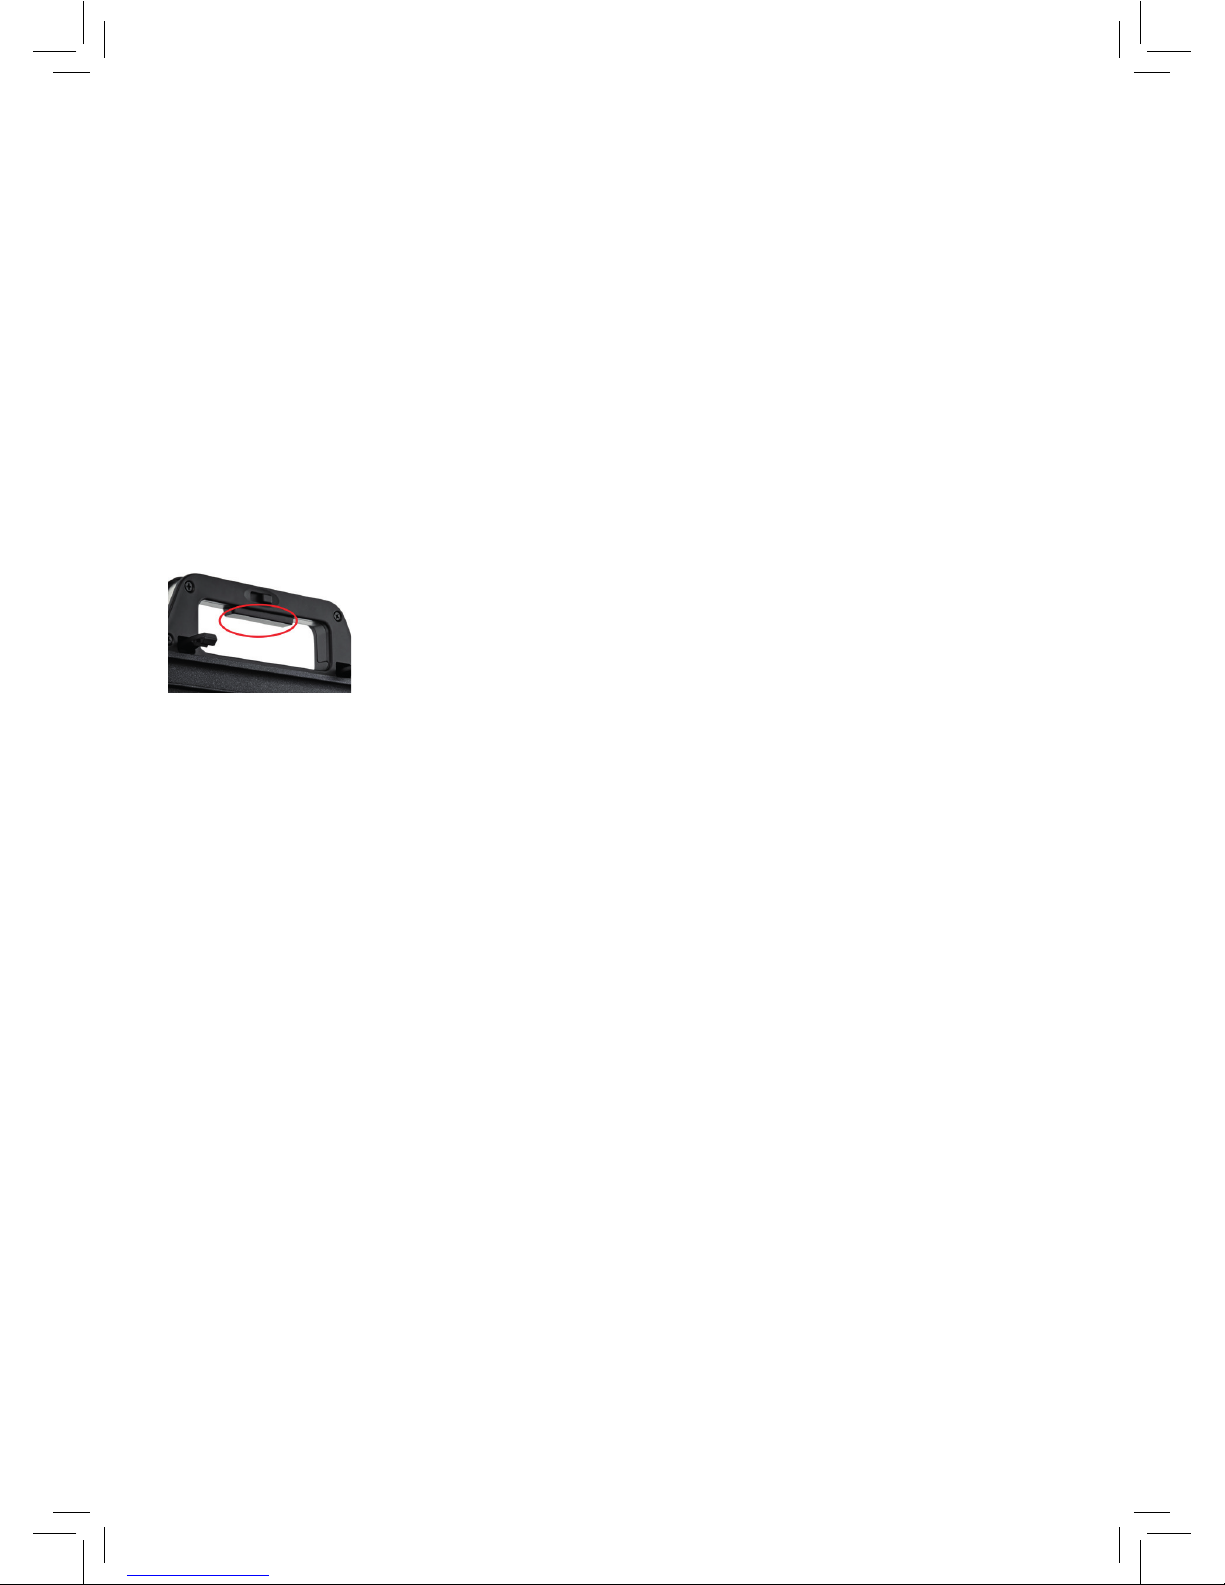
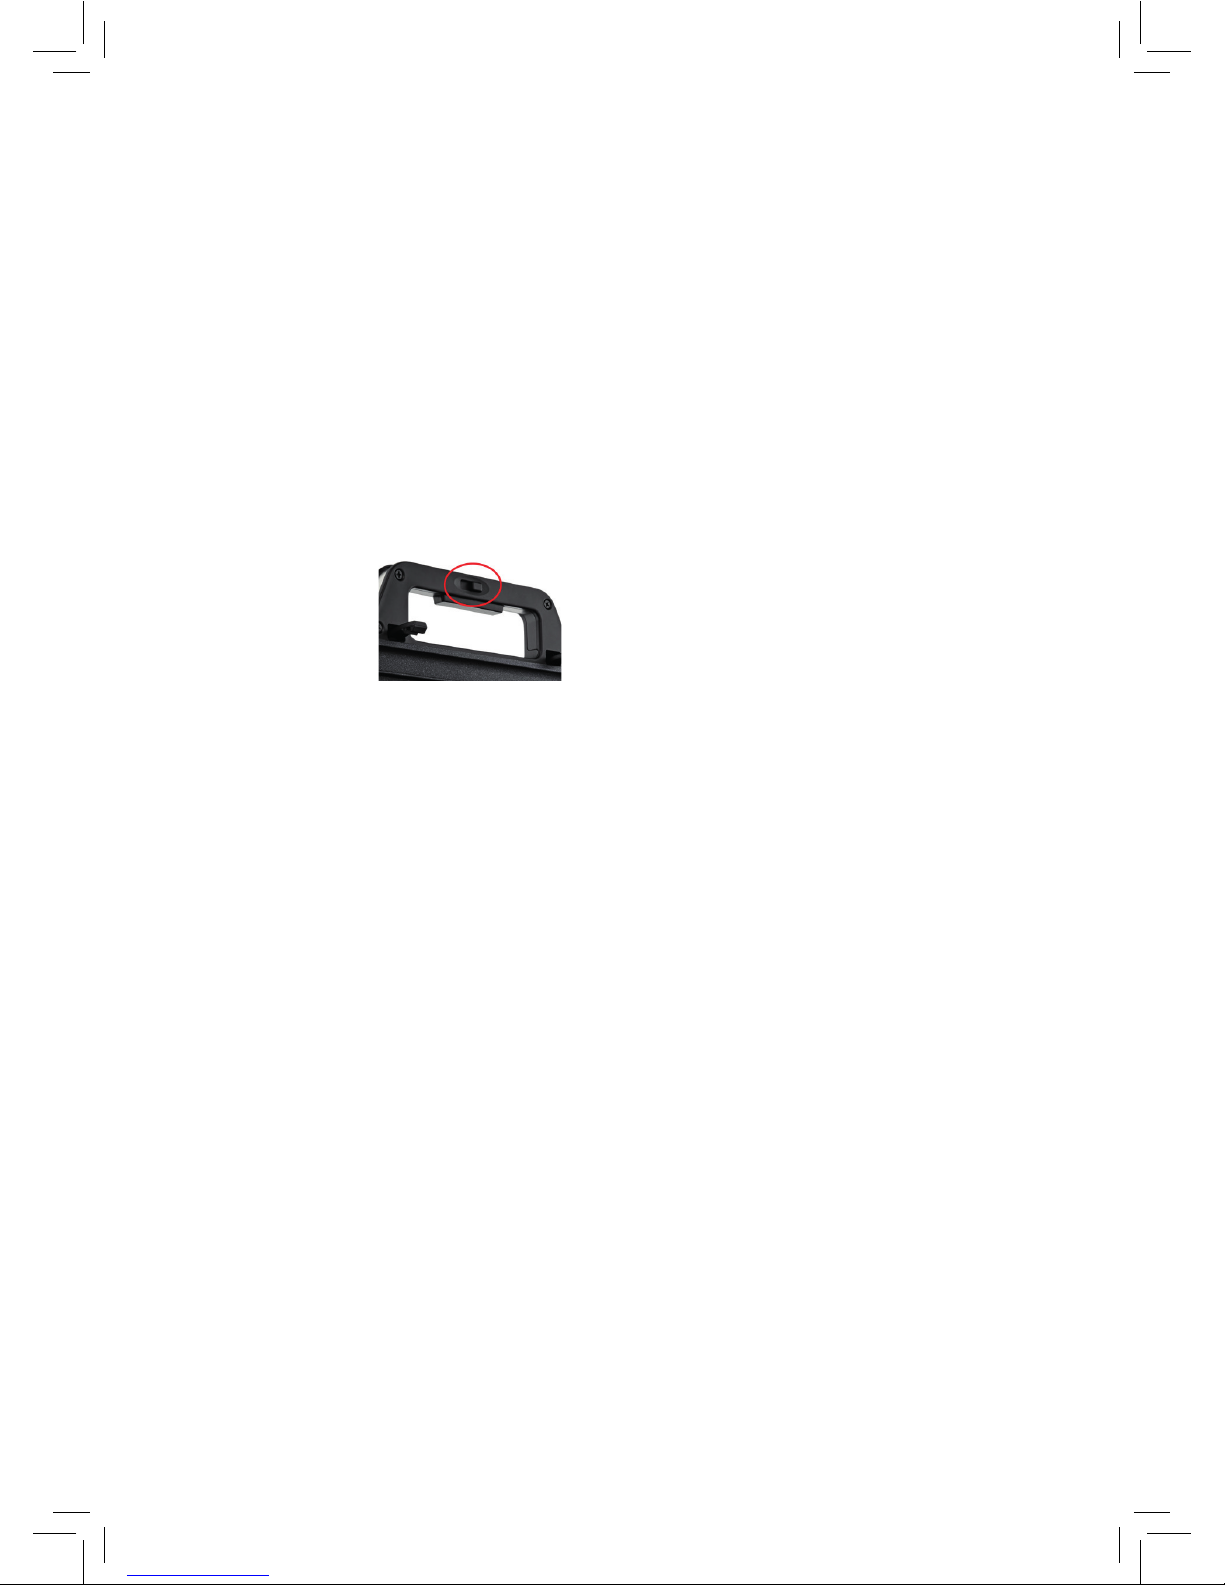
▪ Make sure that the grill plates are always repositioned correctly after they have been removed.

10
Getting started
▪ Clean the toast plates with a damp cloth and some washing-up liquid before
using the appliance for the first time.
▪ Once the toast plates have dried, brush them with a few drops of oil.
▪ Connect the mains plug to an earthed wall socket.
▪ Switch the appliance on at the on/off switch to heat it up. The indicator light
glows red. (Image)
▪ The indicator light changes colour from red to white as soon as the optimum
temperature is reached.
Note: There may be a slight odour the first time you use your new appliance.
This is for technical reasons and is perfectly normal.
Note: When using the appliance for the first time, it is advisable to toast two
slices of bread without any ingredients, because the first sandwiches toasted
in the new appliance should not be eaten.
▪ Press the button on the inside of the handle to open the appliance.
(Image)
▪ Place the sandwiches on the bottom toast plate and close the appliance.
▪ After a short time, the red indicator light comes on again to show that the
appliance is heating up.
▪ Open the appliance and remove the sandwiches as soon as they reach the
desired browning level.
Tips for a better outcome
▪ It is advisable to have all the ingredients ready before you begin toasting. You
can also add your desired filling to your sandwiches while you wait on the
appliance heating up.
▪ All types of bread, e.g. rye bread or multi-grain bread, can be used as long as
it fits on the toast plates.
▪ The toasting time depends on the moisture content of the bread and the type
of filling used.
▪ Check that the sandwiches are toasting according to your taste.
▪ Remove the sandwiches using a wooden spatula to protect the coating.
Recipes:
Ham and cheese toastie
Ingredients:
4 slices toasting bread
4 slices cheese
2 slices cooked ham
Pepper
Place a slice of cheese and a slice of ham on the toasting bread. Season the
sandwiches with pepper. Place another slice of cheese on top and then another
slice of toasting bread to form a sandwich.

11
en
Veggie toastie
Ingredients:
4 slices whole-grain toasting bread
4 slices cucumber (thinly sliced)
4 slices onion
4 slices tomato
4 slices boiled potato
1 handful baby spinach
Tomato ketchup
Spread the chopped vegetables over the slices of toasting bread. Add a little baby
spinach and tomato ketchup. Add a second slice of toasting bread to form a
sandwich.
Cheese and tomato toastie
Ingredients:
4 slices whole-grain toasting bread
4 slices Gouda cheese
4 slices onion
4 slices tomato
Cover the toasting bread with a slice of Gouda cheese and spread the vegetables
evenly over both sandwiches. Place another slice of cheese on top and then
another slice of toasting bread to form a sandwich.
Tuna toastie
Ingredients:
4 slices toasting bread
1/2 tin tuna
4 slices tomato
4 slices mozzarella
4 slices onion
Pepper
Salt
Cover the toasting bread with tuna, mozzarella and onions. Season the
sandwiches with some pepper and salt. Add a second slice of toasting bread to
form a sandwich.

12
Cleaning and care
After use, remove the mains plug and allow the appliance to cool down.
Never immerse the appliance in water or clean it under running water.
Only wipe the casing with a damp cloth and then dry it.
Clean the toasting surfaces with a soft brush or a scrubber.
Under no circumstances should you use sharp or hard objects on the toasting
surfaces with a non-stick coating, as these could damage the coating.
The cable can be wound on the underside of the appliance to save space during
storage. To stop the appliance from being opened inadvertently, it can be sealed
using the lock button. (Image)
For UK use only
▪ This product is supplied with a 13 A plug conforming to BS 1363 fitted to the
mains lead. If the plug is unsuitable for your socket outlets or needs to be
replaced, please note the following. If the plug is a non-rewireable one, cut
it from the mains lead and immediately dispose of it. Never insert it into a
socket outlet as there is a very great risk of an electric shock.
▪ The replacement of the plug at the mains lead has to be done according to the
following instructions:
Warning - This appliance must be earthed
Important: The wires in this mains lead are coloured in accordance with the
following code:
green/yellow Earth
blue Neutral
brown Live
As the colours of the wires in the mains lead of this appliance may not
correspond with the coloured markings identifying the terminals in your plug,
proceed as follows:As the colours of the wires in the mains lead of this appliance
may not correspond with the coloured markings identifying the terminals in your
plug, proceed as follows:
⋅the wire which is coloured green and yellow must be connected to the
terminal which is marked with the letter E or by the earth symbol or
coloured green or green and yellow,
⋅the wire which is coloured blue must be connected to the terminal which
is marked the letter N or coloured black,
⋅the wire which is coloured brown must be connected to the terminal
which is marked with the letter L or coloured red.
▪ If a 13 A (BS 1363) plug is used it must be fitted with a 13 A fuse conforming
to BS 1362 and be ASTA approved. If any other type of plug is used, the
appliance must be protected by a 10 A fuse either in the plug or adapter or at
the distribution board.
If in doubt - consult a qualified electrician.
▪ Never use the plug without closing the fuse cover.

13
en
The appliance complies with European directives 2014/35/EC, 2014/30/EC and
2009/125/EC.
At the end of its life, this product must not be disposed of in normal household
waste but must instead be delivered to a collection point for recycling electric
and electronic appliances.
The materials are recyclable in accordance with their labelling. The reuse,
recycling or other use of old appliances makes an important contribution to
protecting our environment.
Please ask your local administration for the appropriate disposal point.
Subject to alterations

14
Mode d’emploi
Consignes de sécurité importantes
▪ Les enfants à partir de 8 ans ainsi que les personnes ayant des
capacités physiques, sensorielles ou mentales restreintes ou ayant
un manque d’expérience et/ou de connaissances peuvent utiliser
cet appareil sous surveillance ou s’ils ont été formés pour utiliser
cet appareil en toute sécurité et ont compris les dangers pouvant
résulter de son utilisation.
▪ Ne pas laisser les enfants jouer avec cet appareil.
▪ Ne pas laisser les enfants effectuer le nettoyage et la maintenance
sauf s’ils sont âgés de plus de 8 ans et sous surveillance.
▪ Les enfants de moins de 8 ans doivent être maintenus à l’écart de
l’appareil et de son câble de raccordement.
▪ L’appareil ne doit pas être mis en service à l’aide d’une minuterie
externe ou d’une commande à distance.
▪ Si le câble d’alimentation de l’appareil est endommagé, il doit être
remplacé par le fabricant ou son SAV ou par une personne qualifiée,
afin d’éviter toute mise en danger.
▪ Après avoir utilisé l’appareil, nettoyez toutes les surfaces/pièces
qui sont entrées en contact avec les aliments. Veuillez suivre les
instructions du chapitre «Nettoyage et entretien».
▪ L’appareil est conçu pour un usage domestique ou pour des
applications similaires telles que:
⋅dans des cuisines pour le personnel dans des boutiques, des
bureaux ou d’autres secteurs professionnels;
⋅dans des exploitations agricoles;
⋅par des clients dans des hôtels, des motels et autres établissements
résidentiels;
⋅dans des chambres d’hôtes.
L’appareil n’est pas conçu pour un usage purement commercial.
▪ Attention: Les surfaces accessibles peuvent devenir très chaudes
lorsque l’appareil est branché et gardent leur chaleur lorsque
l’appareil est éteint.

15
fr
fr
Avant l’utilisation
L’appareil ne doit être utilisé que pour l’usage prévu conformément à ce mode d’emploi. En
conséquence, veuillez lire attentivement le manuel d’utilisation avant la mise en service. Il contient des
consignes importantes pour l’utilisation, le nettoyage et l’entretien de l’appareil. Nous déclinons toute
responsabilité en cas de dommage découlant du non-respect des consignes. Conservez soigneusement
ce mode d’emploi et transmettez-le avec l’appareil en cas de remise à une tierce personne.
Respectez les consignes de sécurité lors de l’utilisation.
Caractéristiques techniques
Tension nominale: 220 – 240 V~ 50-60 Hz
Puissance: 730 - 870W
Catégorie de protection: I
Consignes de sécurité
▪ Brancher l’appareil uniquement dans une prise de courant de sécurité, installée conformément aux
prescriptions. Le câble d’alimentation et la prise doivent être secs.
▪ Ne pas tirer le câble d’alimentation sur des bords tranchants, ne pas le coincer, ne pas le laisser
pendre et le protéger de la chaleur et de l’huile.
▪ Ne pas poser l’appareil sur des surfaces chaudes telles que des plaques de cuisson ou équivalent et
ne pas l’utiliser à proximité d’une flamme nue.
▪ Ne pas débrancher l’appareil en tirant sur le câble ou avec les mains mouillées.
▪ Ne pas mettre l’appareil en marche ou le débrancher immédiatement si:
⋅l’appareil ou le câble d’alimentation sont endommagés;
⋅l’appareil a été endommagé suite à une chute ou équivalent.
Dans ces cas, porter l’appareil en réparation.
▪ Ne plongez pas l’appareil dans l’eau.
▪ Nous déclinons toute responsabilité en cas de dommage découlant de l’utilisation détournée,
de la mauvaise utilisation ou de la réparation inappropriée de l’appareil. Pour de tels cas, toute
intervention sous garantie est exclue.
▪ L’appareil ne doit pas faire l’objet d’un usage professionnel.
▪ Ne pas recouvrir l’appareil.
▪ Débranchez la fiche de l’appareil de la prise de courant après l’utilisation puis ouvrez-le.
▪ Laissez l’appareil refroidir avant de le transporter ou de le ranger.

16
Mise en service
▪ Avant la première utilisation, nettoyer les plaques de gril avec un chiffon
humide et un peu de liquide vaisselle.
▪ Après séchage, étaler quelques gouttes d'huile sur les plaques de gril à l'aide
d'un pinceau.
▪ Brancher l'appareil dans une prise de courant de sécurité.
▪ Allumer l’appareil à l’aide de l’interrupteur marche/arrêt pour le faire
préchauffer. Le témoin de contrôle s'allume en rouge. (Image)
▪ La couleur du témoin de contrôle passe du rouge au blanc dès que la
température optimale est atteinte.
Remarque : lors de la première mise en service d’un nouvel appareil, de légères
fumées peuvent apparaître. Celles-ci sont d’origine technique, vous ne devez
pas vous en soucier.
Remarque : lors de la première mise en service, il est recommandé de griller
deux tranches de pain sans ingrédients, car les premiers sandwichs sortant de
l'appareil neuf ne peuvent pas être consommés.
▪ Appuyer sur la touche située à l'intérieur de la poignée pour ouvrir l'appareil.
(Image)
▪ Placer les sandwichs sur la plaque de gril inférieure et fermer l'appareil.
▪ Peu après, le témoin de contrôle rouge s’allume de nouveau, l’appareil
continue à chauffer.
▪ Dès que les sandwichs correspondent au degré de brunissage souhaité, ouvrir
l'appareil pour les retirer.
Astuces pour mieux réussir vos sandwichs
▪ Avant de commencer les toasts, il est recommandé de préparer tous les
ingrédients. Il est également possible de préparer un certain nombre de toasts
afin de raccourcir le temps d'attente.
▪ Il est possible d'utiliser tous les types de pain, par ex. du pain de seigle ou
complet, tant qu'il est adapté à la taille des plaques du gril.
▪ La durée de cuisson dépend de l'humidité du pain et du type de garniture
utilisée.
▪ Contrôler le résultat de cuisson selon les goûts.
▪ Retirer les sandwichs avec une spatule en bois afin de protéger le revêtement.
Recettes :
Toast jambon-fromage
Ingrédients :
4 Tranches de pain à griller
4 Tranches de fromage
2 Tranches de jambon cuit Poivre
Placer une tranche de fromage et une tranche de jambon sur le pain à griller.
Assaisonner les sandwichs avec du poivre. Placer une autre tranche de fromage
par-dessus et fermer les sandwichs avec une autre tranche de pain à griller.

17
fr
Toast végétarien
Ingrédients :
4 Tranches de pain complet à griller
4 Tranches de concombre (fines)
4 Tranches d'oignon
4 Tranches de tomates
4 Tranches de pomme de terre cuite
1 Poignée de jeunes pousses d'épinard
Ketchup
Répartir les légumes coupés sur les tranches de pain à griller. Recouvrir de
jeunes pousses d'épinard et de ketchup. Fermer les sandwichs avec une deuxième
tranche de pain à griller.
Toast tomate-fromage
Ingrédients :
4 Tranches de pain complet à griller
4 Tranches de Gouda
4 Tranches d'oignon
4 Tranches de tomates
Placer sur le pain à griller une tranche de gouda et répartir les légumes de
manière égale sur les deux sandwichs. Placer une autre tranche de fromage par-
dessus et fermer avec une tranche de pain à griller.
Toast au thon
Ingrédients :
4 Tranches de pain à griller
1/2 Boîte de thon
4 Tranches de tomates
4 Tranches de mozzarella
4 Tranches d'oignon
Poivre
Sel
Placer le thon, les tomates, la mozzarella et les oignons sur le pain à griller.
Assaisonner les sandwichs avec un peu de poivre et de sel. Fermer le sandwich
avec une autre tranche de pain à griller.

18
Nettoyage et entretien
Après utilisation, débrancher l’appareil et le laisser refroidir. Ne jamais plonger
l’appareil dans l’eau et ne jamais le nettoyer sous l’eau courante. Essuyer
simplement l’appareil avec un chiffon humide avant de le sécher. Nettoyer
les surfaces de gril avec une brosse ou un pinceau souples. Ne jamais traiter
les surfaces de gril antiadhésives avec des objets pointus ou durs, sous peine
d’endommager le revêtement antiadhésif.
Pour un rangement compact, le câble peut être enroulé en dessous de l'appareil.
Pour éviter l'ouverture involontaire de l'appareil, celui-ci se ferme à l'aide de la
touche de verrouillage. Insérer l'image

19
fr
L’appareil est conforme aux Directives européennes 2014/35/CE, 2014/30/CE et
2009/125/CE.
Au terme de son utilisation, ce produit ne doit pas être éliminé avec les déchets
ménagers habituels, mais il doit être déposé dans un point de collecte pour le
recyclage d’appareils électriques et électroniques.
Les matériaux sont recyclables conformément à leur marquage. Grâce à la
réutilisation, au recyclage de matériaux ou à d’autres formes de recyclage des
vieux appareils, vous contribuez de manière significative à la protection de notre
environnement.
Veuillez contacter votre municipalité pour connaître le centre de traitement
compétent.
Sous réserve de modifications

20
Istruzioni per l’uso
Importanti indicazioni per la sicurezza
▪ Questo apparecchio può essere utilizzato da bambini a partire dagli
8 anni di età e da persone con ridotte capacità fisiche, sensoriali
o mentali o che mancano di esperienza e/o di conoscenza, solo se
sono sorvegliate o se sono state istruite riguardo all’utilizzo sicuro
dell’apparecchio e se ne hanno compreso i pericoli risultanti.
▪ I bambini non devono giocare con l’apparecchio.
▪ La pulizia e la manutenzione a carico dell’utente non devono essere
eseguite da bambini, eccetto nel caso in cui essi abbiano più di 8
anni e siano sorvegliati.
▪ Tenere l’apparecchio e il cavo di collegamento lontani dalla portata
dei bambini con meno di 8 anni.
▪ Il dispositivo non deve essere azionato da un timer esterno o da un
telecomando.
▪ Se il cavo di allacciamento alla rete è guasto, è necessario
richiederne la sostituzione al produttore, al suo servizio clienti o a
un’altra persona competente del settore, onde evitare pericoli.
▪ Terminato l’utilizzo dell’apparecchio, pulire tutte le superfici/parti
che sono state a contatto con gli alimenti. Seguire le indicazioni
contenute nel capitolo “Pulizia e manutenzione”.
▪ Questo apparecchio può essere utilizzato solo in ambito domestico e
in applicazioni simili, come ad esempio:
⋅in cucine per i dipendenti di negozi, uffici e altri settori commer-
ciali;
⋅in tenute agricole;
⋅da clienti in hotel, motel e altri impianti di soggiorno;
⋅in bed & breakfast.
Questo apparecchio non è destinato ad un uso puramente commer-
ciale.
▪ Attenzione: le superfici che si possono toccare possono essere calde
quando la spina dell’apparecchio è collegata e rimangono calde
anche dopo lo scollegamento!
Other manuals for LONO
21
Table of contents
Languages:
Other WMF Kitchen Appliance manuals

WMF
WMF LONO User manual

WMF
WMF KULT X User manual

WMF
WMF LINEO User manual

WMF
WMF SmarTea User manual

WMF
WMF Lumero User manual

WMF
WMF SELECTit! MultiPot Assembly instructions

WMF
WMF Fusiontec Assembly instructions

WMF
WMF Profi Plus Citrus press User manual

WMF
WMF Kuchenminis series User manual

WMF
WMF Fusiontec Assembly instructions