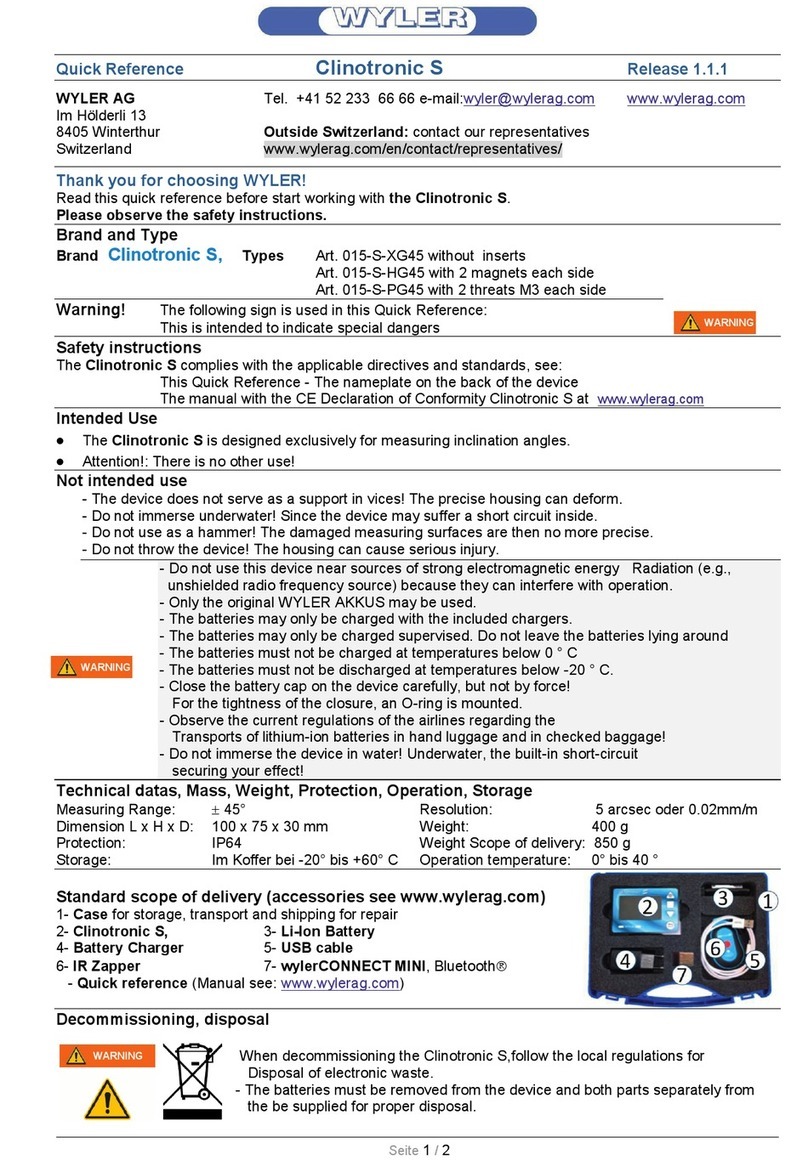
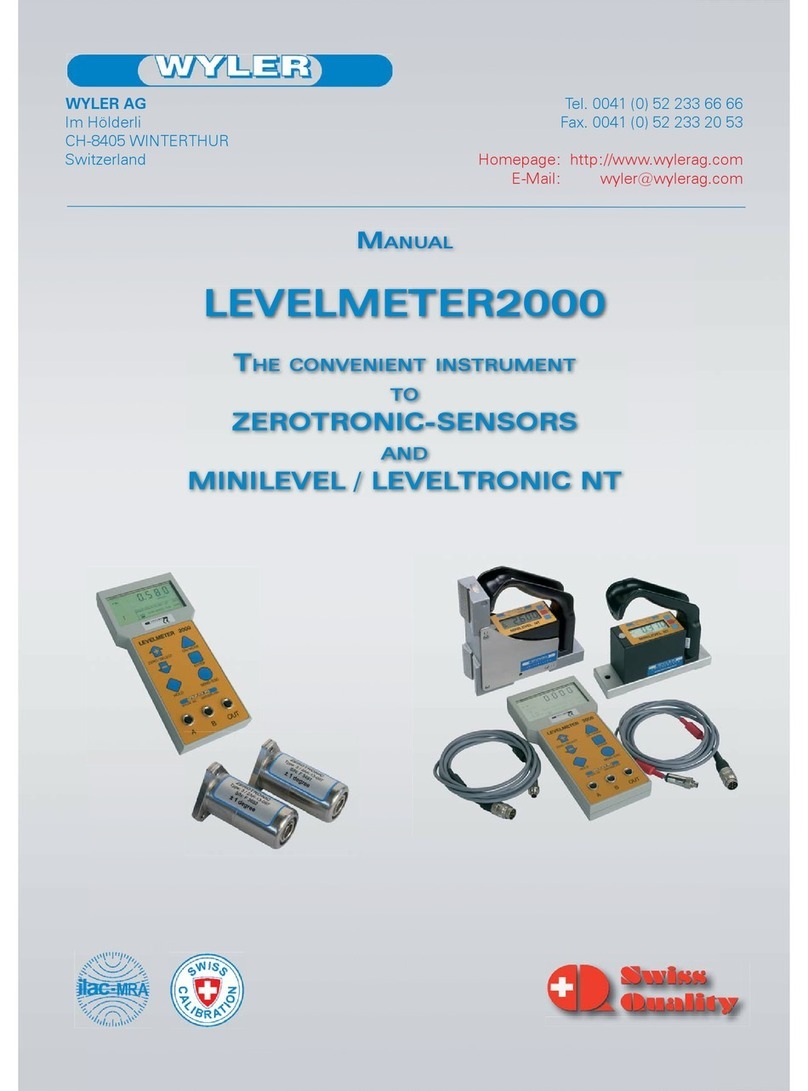
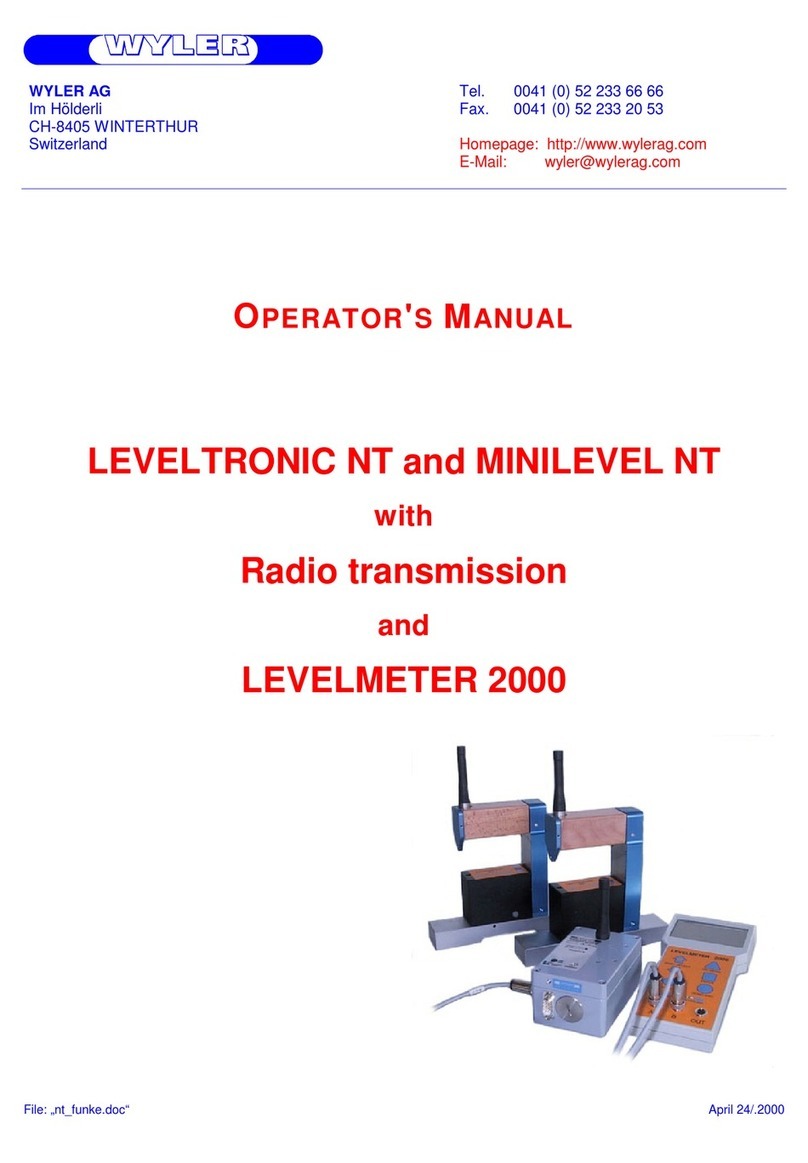
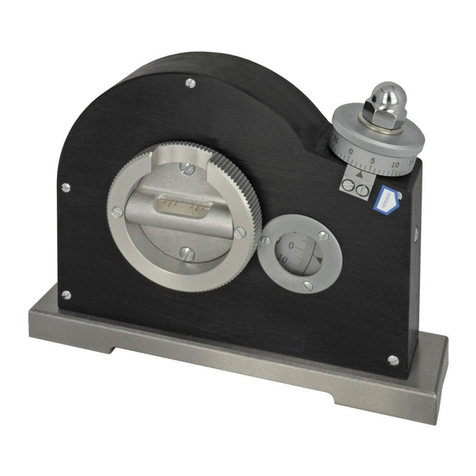
WYLER BlueCLINO User manual

WYLER AG
Im Hölderli
CH-8405 WINTERTHUR
Switzerland
Tel. 0041 (0) 52 233 66 66
Fax. 0041 (0) 52 233 20 53
Homepage: http://www.wylerag.com
E-Mail: w[email protected]
O
OP
PE
ER
RA
AT
TO
OR
R’
’S
S
M
MA
AN
NU
UA
AL
L
B
Bl
lu
ue
eC
CL
LI
IN
NO
O
File: „BlueCLINO_eng.doc“

page 3 of 84 pages
CONTENT
SUBJECT PAGE
1. INTRODUCTION 7
1.1. DESCRIPTION OF THE BLUECLINO 7
1.2 PREPARATION AND START-UP 7
1.2.1 BATTERIES 7
1.2.2 POSSIBLE CONFIGURATIONS 8
2. STARTING 9
2.1 OPERATION/SHORT DESCRIPTION 9
2.1.1 OVERVIEW KEYBOARD AND DISPLAY 9
2.1.2 HOW TO SWITCH THE INSTRUMENT ON AND OFF 10
2.1.3 KEYS /FUNCTIONS /SHORT DESCRIPTIONS OF EACH SINGLE KEY 10
2.2 DISPLAY 13
2.2.1 SCALING THE DISPLAY 13
2.2.2 DISPLAY OPTIONS 13
2.2.3 BACKGROUND COLOR 15
2.2.4 BRIGHTNESS 17
2.3 SHORT DESCRIPTION OF THE VARIOUS PARTS OF THE DISPLAY 18
3 HOW TO USE THE BLUECLINO 19
3.1 ZERO-SETTING /ABSOLUTE ZERO 19
3.1.1 ABSOLUTE ZERO (REVERSAL MEASUREMENT) 19
3.2 MEASURING UNITS 21
3.2.1 STANDARD-UNITS 21
3.2.2 UNITS WITH RELATIVE BASE LENGTH 21
3.3 HOLD-FUNCTION 22
3.4 CHOOSING THE RIGHT FILTER /FILTER 23
3.5 ABSOLUTE MEASUREMENT /RELATIVE MEASUREMENT 23
3.5.1 ABSOLUTE MEASUREMENT 23
3.5.2 RELATIVE MEASUREMENT /REL ZERO 24
3.6 MEASUREMENT WITH LIMITS /LIMITS 26
3.7 GROUPING OF INSTRUMENTS FOR WIRELESS MEASUREMENT 28
3.7.1 GROUPING OF INSTRUMENTS VIA CABLES /JOIN 28
3.7.2 GROUPING OF INSTRUMENTS VIA BLUETOOTH /JOIN 28
3.7.3 GROUPING OF INSTRUMENTS SPECIAL CASE /„JOIN“ 29
3.7.4 TO UNHINGE AN INSTRUMENT WITH THE FUNCTION „LEAVE“ /LEAVE 29
3.8 QUICK CALIBRATION /Q.CALIB 30
3.9 TEACH IN OF THE IR ZAPPER 32
4 OPTIONS 33
4.1 SET PIN-CODE 34
4.2 DISPLAY SETTINGS 34
4.3 LOGSCALE 35
4.4 PROGRAMMABLE KEYS 36
4.5 FUNCTIONS ON/OFF 37
4.6 HIDE DISABLED FUNCTIONS ON/OFF 37
4.7 RADIO ON/OFF 38
4.8 GRAVITATION 38
4.9 VERSION 39
4.10 RESET QUICK CALIBRATION (ONLY POSSIBLE WITH QUICK
CALIBRATION OPTION) 39
4.11 FACTORY RESET 40
4.12 FUNCTION CHECK 41
ATTACHMENTS 42
A FLOW CHARTS GENERAL 42
A1 HOW TO SWITCH THE INSTRUMENT ON AND OFF 42
A2 KEY REL.ZERO 43
A3 KEY HOLD, TO HOLD A MEASURING VALUE /HOLD 44
A4 MENU SELECTION 45
A5 SETTING THE DISPLAY /DISPLAY 45
A6 ABSOLUTE MEASUREMENT /MODE ABSOLUTE 46

page 4 of 84 pages
A7 ABSOLUTE MEASURMENT WITH COMPENSATION OF ZERO OFFSET
(REVERSAL MEASUREMENT)/ABSOLUTE ZERO MODE 47
A8 RELATIVE MEASUREMENT /REL ZERO MODE 48
A9 SETTING OF THE MEASURING UNIT /UNIT 49
A10 SETTING OF LIMITS /LIMITS 50
A11 SETTING THE FILTER TYPES /FILTER 51
A12 GROUPING OF INSTRUMENT WITH WIRELESS TRANSMISSION /JOIN 52
A13 LEAVING A GROUP OF INSTRUMETNS /LEAVE 53
A14 QUICK CALIBRATION /QUICK CALIBRATION WITH PINS (IF AVAILABLE) 54
B FLOW CHART OPTIONS 55
B1 PIN-CODE-QUERY FOR ACCESS TO THE OPTIONS 55
B2 ENABLING /DISABLING AND SETTING THE PIN CODE FOR THE
ACCESS TO THE OPTIONS 56
B3 DISPLAY SETTINGS 57
B4 SWITCHING THE LOGARITHMIC SCALING ON OR OFF /LOGSCALE ON/OFF 58
B5 PROGRAMMING OF THE KEYS "REL ZERO" AND "ZERO/SELECT" /
PROGRAMMABLE KEYS 59
B6 SWITCHING FUNCTIONS ON OR OFF /FUNCTIONS ON/OFF 60
B7 SWITCHING THE HIDING OF DISABLED FUNCTIONS ON OR OFF /
HIDE DISABLED FUNCTIONS ON/OFF 61
B8 SWITCH THE WIRELESS TRANSMISSION ON OR OFF /RADIO ON/OFF 62
B9 SWITCH THE COMPENSATION OF GRAVITY ON OR OFF /
GRAVITATION COMPENSATION 63
B10 DISPLAY THE FIRMWARE-VERSION /VERSION FIRMWARE 64
B11 LOAD THE FACTORY SET VALUES OF THE QUICK CALIBRATION /
RESET QUICK CALIBRATION 65
B12 FACTORY RESET 66
B13 DEVICE /FUNCTION CHECK 67
C READING MEASURING VALUES WITH HYPERTERMINAL UNDER WINDOWS XP 68
D ERROR MESSAGES 70
E MAINTENANCE 70
E.1 GENERAL 70
E.2 STORAGE/CARE AND HANDLING OF THE BATTERIES 70
E.3 SPARE PARTS /ACCESSORIES 71
E.4 DIRECTIVE ON WASTE ELECTRICAL &ELECTRONIC EQUIPMENT (WEEE) 72
F DECLARATION OF CONFORMITY AND APPROVALS 74
F.1 DECLARATION OF CONFORMITY (DOC) 74
F.2 DECLARATION OF CONFORMITY OF MANUFACTURER OF THE
BLUETOOTH MODULE 75
F.3 FCC COMPLIANCE 76
F.4 COUNTRY SPECIFIC INFORMATION FOR BLUETOOTH RADIO LINK
(>10MWRF-POWER) 77
G TECHNICAL DATA 79
H PIN-DEFINITION FOR BLUECLINO 80
I SERVICE AND REPAIR 81
I.1 REPAIR OF MEASURING INSTRUMENTS AND DISPLAY UNITS 81
I.2 MAINTENANCE CONTRACT 82
Modifications / Änderungen:
Datum /
Date Geändert durch /
Modified by Beschreibung der Änderung /
Description of the modification

page 5 of 84 pages
INDEX
Key word Chapter Page
A
ABSOLUTE MEASURMENT /RELATIVE MEASUREMENT 3.5 23
ABSOLUTE ZERO /ZERO-SETTING 3.1 19
ABSOLUTE ZERO /ZERO-SETTING 3.1.1 19
APPENDICES 42
B
BACKGROUND COLOUR 2.2.3 15
BATTERIES 1.2.1 7
BLUEMETER 1.2.2 8
BLUETOOTH 1.2.2 8
BRIGHTNESS 2.2.4 17
C
CARE AND HANDLING OF THE BATTERIES /STORAGE E2 70
CONFIGURATIONS 1.2.2 8
CONTENT 3
COUNTRY SPECIFIC INFORMATION FOR BLUETOOTH RADIO LINK (>10MWRF-
POWER) F4 77
D
DATA FORMAT AT THE RS 485 INTERFACE 3.6 27
DECLARATION OF CONFORMITY OF THE MANUFACTURER OF THE BLUETOOTH
MODULE F2 75
DECLARATIONS OF CONFORMITY AND APPROVALS F 74
DESCRIPTION OF BLUECLINO 1.1 7
DESCRIPTION OF THE INDIVIDUAL DISPLAY AREAS 2.3 18
DIRECTIVE ON WASTE ELECTRICAL &ELECTRONIC EQUIPMENT (WEEE) E4 72
DISPLAY 2.2 13
DISPLAY /KEYBOARD 2.1.1 9
DISPLAY SETTINGS 4.2 34
DISPLAY TYPES 2.2.2 13
E
ERROR MESSAGES D 70
EXAMPLE USING THE HYPER TERMINAL OF WINDOWS OR WINDOWS TERMINAL
PROGRAM C 68
F
FACTORY RESET 4.11 40
FCC COMPLIANCE F3 76
FILTER 3.4 23
FIRMWARE-VERSION 4.9 39
FLOAT CHARTS GENERAL A 42
FLOAT CHARTS OPTIONS B 55
FUNCTION CHECK 4.12 41
FUNCTIONS ON/OFF 4.5 37
G
GRAVITATION 4.8 38
GROUPING IN THE WIRELESS MODE 3.7.2 28
GROUPING OF INSTRUMENTS TO A MEASURING GROUP IN THE WIRELESS MODE 3.7 28
GROUPING VIA CABLE CONNECTION 3.7.1 28
H
HIDE DISABLED FUNCTIONS ON/OFF 4.6 37
HOLD /FUNCTION HOLD 3.3 22
I/J
INTRODUCTION 1 7
JOIN 3.7.1 28
K
KEYBOARD AND DISPLAY 2.1.1 9
KEYS /FUNCTIONS /SHORT DESCRIPTIONS OF EACH SINGLE KEY 2.1.3 10
L
LIMITS 3.6 26
LOGSCALE 4.3 35
M
MAINTENANCE E 70

page 6 of 84 pages
MANUFACTURERS DECLARATION OF CONFORMITY (DOC) F1 74
MEASURING UNIT 3.2 21
O
ON/OFF 4.5 37
OPERATING INSTRUCTIONS BLUECLINO 3 19
OPERATION/SHORT DESCRIPTION 2.1 9
OPTIONS 4 33
OVERVIEW KEYBOARD AND DISPLAY 2.1.1 9
P
PIN-CODE 4.1 34
PIN-DEFINITION FOR BLUECLINO H 80
POSSIBLE CONFIGURATIONS 1.2.2 8
PREPARATION AND START-UP 1.2 7
PROGRAMMABLE KEYS 4.4 36
Q
QUICK CALIBRATION 3.8 30
QUICK CALIBRATION /RESET QUICK CALIBRATION 4.10 39
R
RADIO ON/OFF 4.7 38
REL ZERO 3.5.2 24
RELATIVE MEASUREMENT /ABSOLUTE MEASUREMENT 3.5 23
REPAIR OF MEASURING INSTRUMENTS AND DISPLAY UNITS I1 81
S
SCALING OF THE DISPLAY 2.2.1 13
SERVICE -AND MAINTENANCE CONTRACTS I2 82
SERVICE AND REPAIR I 81
SHORT DESCRIPTION /OPERATION 2.1 9
SPARE PARTS /ACCESSORIES E3 71
STANDARD-UNITS 3.2.1 21
STARTING 2 9
START-UP /PREPARATION 1.2 7
STORAGE/CARE AND HANDLING OF THE BATTERIES E2 70
SWITCH THE INSTRUMENT ON AND OFF 2.1.2 10
T
TEACH-IN OF THE IR-TRIGGER (ZAPPER) 3.9 32
TECHNICAL DATA G 79
U
UNHINGE AN INSTRUMENT FROM A GROUP USING THE FUNTION LEAVE 3.7.4 29
UNITS WITH RELATIVE BASE LENGTH 3.2.2 21
V
VERSION FIRMWARE 4.9 39
Z
ZAPPER /TEACH-IN OF THE IR-TRIGGER 3.9 32
ZERO-SETTING /ABSOLUTE ZERO 3.1 19
ZERO-SETTING /ABSOLUTE ZERO 3.1.1 19

page 7 of 84 pages
1 INTRODUCTION
1.1 DESCRIPTION OF BLUECLINO
BlueCLINO is a high precision measuring instrument developed by WYLER AG in Switzerland.
BlueCLINO can be used
- as measuring instrument
Various parameters can be set and changed in the BlueCLINO like
- Measuring units
- Measuring mode
- Relative base length a.s.o. .
An RS 232 interface allows sending measuring values to a printer or a PC / Laptop.
BlueCLINO contains a ZEROTRONIC Sensor Type C. The measuring principle of the ZEROTRONIC Type
C Sensor is based on measuring a differential capacity with a pendulum which is moving between
2 electrodes. Inclining the sensor respectively the measuring instrument moves the pendulum which
changes the 2 capacities. This change of capacities is used as the primary signal for the calculation of the
inclination angle. In the BlueCLINO this primary signal is transformed into an inclination value basing on a
curve of reference points and displayed.
The system is unsusceptible to external electromagnetic influences
1.2 PREPARATION AND START-UP
PRIOR TO STARTING
Please read this manual prior to working with the BlueCLINO. You will get an overview on all the functions
and possibilities of this instrument. At the same time you get familiar with the handling of the instrument and
wrong handling and specifically the unintentional erasing of the calibration data can be avoided.
1.2.1 BATTERIES
The batteries are not inserted in the instrument during shipment. It is strongly recommended to remove the
batteries during transport.
The battery voltage is shown in the display e.g. 27(2.7 Volt)
Lowest possible battery voltage is 1.7 Volt. If the voltage drops below this value a blinking battery symbol is
shown: The batteries should then be exchanged rather soon.
2 pieces 1.5V, Size “C” ALKALINE
As an end user you are forced by law to return all used batteries and accumulators, a disposal through
household waste is prohibited.
Batteries/accumulators containing contaminants are marked with the symbol shown, which clearly indicates
the prohibition of disposal through household waste.
You can dispose of your used batteries/accumulators free of charge at the collecting points of your
community, our distribution partners or at each location selling batteries/accumulators. You thus fulfil your
legal obligation and contribute to the protection of the environment.

page 8 of 84 pages
1.2.2 POSSIBLE CONFIGURATIONS
Stand-alone instrument
BlueCLINO connected to the RS232 port of a PC
BlueCLINO connected to a BlueMETER or BlueTC via Bluetooth and then connected to a the RS232
port of a PC
BlueCLINO connected to a BlueMETER via cable
BlueCLINO connected to a BlueMETER via Bluetooth
Please check the respective manuals and data sheets for details on the other products shown above.

page 9 of 84 pages
2 STARTING
2.1 OPERATION/SHORT DESCRIPTION
2.1.1 OVERVIEW KEYBOARD AND DISPLAY
Hauptanzeige
Main display
Affichage principale Masseinheiten
Measuring units
Unités de mesure
Batterieanzeige
Battery display
Indicateur batterie
Funktionsanzeige und Anzeige Infrarot
Function indicator and infrared indicator
Indication de function et infrarouge
Taste REL ZERO
Key REL ZERO
Touches REL ZERO
Querlibelle
Setting vial
Fiole transversale
ExternerAnschluss
External connection
Connexion externe
Tasten
Keys
Touches
Seriennummer
Serial Number
Numéro de Série
M1234 2 mm/m
7
0.400
+
Colour-display <ZOOM OUT>
or
<previous option>
<ZOOM IN>
or
<next option>
<ON/OFF>
or
<select menu>
<accept selection>
or
<save entry>
<to print measuring value>
or
<unfreeze and print / transmit
HOLD - inclination value>
or
<escape from the menu>
To use current inclination as
<relative Zero><Freeze>

page 10 of 84 pages
2.1.2 HOW TO SWITCH THE INSTRUMENT ON AND OFF
The BlueCLINO features an automatic shut off. In normal mode the instrument is automatically switched off
60 minutes after the last key operation. This automatic shut OFF function can be deactivated with a special
ON sequence or when using an external power supply
To switch ON
Keep the key pressed until the display and all LEDs are
lit and release the key. The instrument will automatically shut off
60 minutes after the last key operation.
If you keep the key pressed for more than 10 seconds
the automatic OFF function is deactivated. This is indicated by blinking
LEDs.
The instrument carries out a short function test and establishes
connections to other instruments, if any had been available before
switching off the instrument.
The instrument changes into measuring mode. The settings, which were
used prior to switching the instrument off, are reloaded.
To switch OFF
Keep the key pressed until the display disappears (about
3 seconds). All settings are kept and will be reloaded again next time the
instrument is switched on.
2.1.3 KEYS /FUNCTIONS /SHORT DESCRIPTIONS OF EACH SINGLE KEY
ON/MODE - Key
Function - 1 -
To switch the BlueCLINO ON. When for starting the key is pressed,
a grey picture will appear on the screen and all LEDs will be illuminated. After
releasing the key the BlueCLINO is switching to the measuring mode. The current
inclination is displayed in the mode and unit which was used before switching the
instrument OFF. In case of an error the respective error message is shown in the
display. The instrument will automatically shut of 60 minutes after the last key
operation.
If the key is pressed for more than 10 seconds the LEDs start
blinking and the automatic OFF function is deactivated.
Exception: If the BlueCLINO is powered an from external power supply, the
automatic OFF function is deactivated and the instrument will remain ON.
Function - 2 - To switch OFF, press the key more than 3 seconds, until the
display disappears.
Function - 3 - With the key you open the menu. Pressing the key repeatedly will
move you through the menu which is indicated by the cursor moving down to the
required function.
Function - 4 - While setting a value with the key the default value can be recalled.

page 11 of 84 pages
ENTER – key
Function - 1 -
The key is used to confirm a chosen function or to save a value
entered
Function - 2 - While in the function "REL ZERO" or "ABS ZERO" the measuring can be started
or an ongoing measuring can be finished by pressing the key
SEND/ESC- key
Function - 1 -
The key is used to send / transmit a measuring value to a PC or to
a printer or similar output device through the RS485 port
Data format OUT port:
[sss xxxxxx sn.nnnnnn<cr>]
sss = 0 ... 255 – Continuous number
x xxxxxx = Sensor Serial Number and Type
(example: N2673L BlueCLINO )
sn.nn sn.nnnnnn = inclination in rad, e.g. +0.226349
+9.999999 -> Positive Overrange
-9.999999 -> Negative Overrange
Format of transmission:
asynchron, 7Bit, 2 Stopbits, no parity, 9600 Baud
Function - 2 - Unfreeze of the "HOLD"- function to return to the measuring mode.
At the same time the “frozen” value is sent to the RS 485 port to any connected
device
Function - 3 - Escape function from the menu

page 12 of 84 pages
ZERO/SELECT "+/-" - key
Function - 1 - The key is used to
changing the scale in the display
increase / decrease the display range
This function can, however, be disabled in the instrument settings.
Function - 2 - The key is used to select possible adjustments, such as
menu selection
modification of a figure in the menu
HOLD - key
Function - 1 - The key serves for "freezing" a measuring value. The value is
displayed until the BlueCLINO returns to the measuring mode by pressing the
key.
Function - 2 - In the functions "REL.ZERO" and "ABS.ZERO" the key is used
for reading in the actual measuring value again during the manual entering.
REL ZERO - key
Function - 1 - The key serves for setting the actual inclination as the relative
Zero.
Mirroring the
display
With the two middle keys and
ZERO/SELECT
the display can be
turned by 180 deg.
First press then
ZERO/SELECT
. This function can be disabled
in "options".
With this function the values displayed can be perfectly seen from all possible
angles. This function can be executed at all times, even when the instrument is
remotely controlled by a BlueMETER.
Left:
Display "standard"
Right:
Display turned by 180°

page 13 of 84 pages
2.2 DISPLAY
The BlueCLINO features various graphic displays which can be scaled according to the requirements of the
measuring task. Also the background colour and the brightness of the display can be adjusted.
2.2.1 SCALING OF THE DISPLAY
For an optimal use of the graphic display, you have various options for scaling.
With the linear scaling the display precision remains constant over the full range. With the keys
the resolution can be changed. Thus also the range being displayed will be changed.
The following ranges can be selected, whereas certain restrictions may be possible depending on the
display type: 60°, 45°, 20°, 10°, 5°, 2°, 1°, 30', 12'. The range of 12' in the bar graph is the highest possible
resolution of the instrument, i.e. 5" for each pixel.
With the logarithmic scaling the display precision around Zero is the highest and it is reduced continuously
with higher inclination values. Around Zero the resolution corresponds to the unit selected.
In the adjustments of the instrument you can switch between linear and logarithmic scaling.
Using the key select the menu point [Optionen] and
confirm with . Select now [Logscale] and confirm with
Switch the logarithmic scaling ON or OFF using the keys
. The display will show the requested state of the
instrument. Confirm with the key .
The instrument will return to the measuring mode. If the logarithmic
scaling is enabled, the symbol "LOG" will appear below the graph.
2.2.2 DISPLAY TYPES
The display type can be selected in the menu "display".
Using the key select the menu point [Display] and
confirm this selection with .
Select the required display type using the keys
and confirm your selection with the key .
The instrument will return to the measuring mode.

page 14 of 84 pages
The following display types are available in the BlueCLINO:
Numeric display
Numeric display plus bar
graph
Display ranges:
60°, 45°, 20°, 10°, 5°, 2°,
1°, 30', 12'
Numeric display plus 3
bars, each with a 10
times higher resolution
Display ranges:
60°, 45°, 20°, 10°, 5°, 2°,
1°, 30', 12'
Numeric display plus vial
(spirit level)
Display ranges:
60°, 45°, 20°, 10°, 5°, 2°,
1°, 30', 12'
Numeric display plus
simple vial (spirit level)
Display ranges:
60°, 45°, 20°, 10°, 5°, 2°,
1°, 30', 12'
Numeric display plus
LED-display
Display ranges:
60°, 45°, 20°, 10°, 5°, 2°,
1°, 30', 12'

page 15 of 84 pages
Numeric display plus pin
Display ranges:
60°, 45°, 20°, 10°, 5°, 2°,
1°, 30', 12'
2.2.3 BACKGROUND COLOUR
In the adjustments of the instrument the background colour can be selected. Depending on the brightness
of the colour selected the colour of the fonts and the symbols will change between black and white.
Using the key select the menu point [Optionen] and
confirm with . Select now [Display Settings] and confirm
with
With the keys select the display colour and
confirm the selection with the key .
The instrument will return to the measuring mode.

page 16 of 84 pages
The following background colours are available in the BlueCLINO:
Background colour blue
Background colour
black
Background colour
beige
Background colour
orange

page 17 of 84 pages
2.2.4 BRIGHTNESS
Adjustment of the brightness of the display. Difference between battery operation and the use of an
external power supply.
In the adjustments of the instrument the brightness of the display can be adjusted in order to adapt it to the
environmental conditions and to optimise the battery life time. Thus two different values can be set for the
battery operation and the operation with an external power supply
Using the key on mode select the menu point [Optionen]
and confirm with . Select now [Display Settings] and
confirm with .
Using the keys select [Brightness] for the
adjustment when using an external power supply and [Brightness
Powersave] for the adjustment in battery operation. Confirm this
selection with .
With the keys you can adjust the brightness
required. The display will show the power consumption in a range from
10% to 100% of the maximum brightness. Only steps of 10% are
possible. Confirm the adjustment with the key .
With the key the default value of 50% will be recalled.
The instrument will return to the measuring mode.

page 18 of 84 pages
2.3 SHORT DESCRIPTION OF THE INDIVIDUAL DISPLAY AREAS
Main
display In the main display the actual measuring value will be displayed.
Display of the
direction of the
inclination
A symbol indicates the direction of the inclination of the value
displayed.
inclined to the right
(positive inclination)
declined to the right
(negative inclination)
on hold The HOLD function is activated, i.e. the measuring value is
"freezed".
ABS Absolute measurement is activated.
REL Relative measurement is activated, i.e. the measuring value is the
difference between the current and the reference plane, i.e. the
relative base.
displaying range
60°
Shows the selected displaying range. The displaying range can
be adjusted using the keys provided that
this function is enabled in the options.
scale division
5° Angle between two tick marks.
Scale division
LOG Indicates that the logarithmic scale is in use. If this sign is
missing, the linear scale is in use.
Serial number Shows the serial number of the instrument
Battery voltage
26
Display of the current battery voltage (example 2.6 V). The lowest
possible voltage is 1.7 Volt. After a further voltage drop a blinking
battery symbol will appear. The batteries must then be exchanged
immediately. A plug symbol will appear when the instrument is
powered by an external source.
Measuring unit
Display of the measuring unit in use. There are 10 basic units
available, whereas for each setting various options can be
selected. Depending on the unit set, the last digit of the display
will be rounded to 5" or to the next lower integer value.
(e.g. 20 µm/m)

page 19 of 84 pages
3 OPERATING INSTRUCTIONS BLUECLINO
The BlueCLINO offers a wide range of functions and adjustment possibilities. The list of functions appears
when the key is pressed. With the keys the desired function can be
selected and with it will be started. If during 10 seconds no further key is operated, the
function list will be left. With the key a function selected can be abandoned. Already
entered changes of parameters will be rejected and the BlueCLINO will return to the previously used
display mode.
Here after the single functions will be described.
3.1 "ZERO-SETTING"/ABSOLUTE ZERO
Absolute ZERO means that the instrument shows the measuring value "0" if the measuring surface of the
instrument is aligned exactly according to gravity (true horizontal or true vertical).
3.1.1 SET ABSOLUTE ZERO (WITH A REVERSAL MEASUREMENT)
The absolute zero is used as the base for absolute inclination measurements. In order to achieve the best
possible precision please observe that the measuring object (support) and the BlueCLINO have the same
temperature and that the instrument is in operation for several minutes before starting a measurement.
Mark the precise position and particularly the direction of the BlueCLINO in order to be able to turn the
instrument by 180 degrees and to put it in opposite direction at the very same spot.
The absolute zero will be determined from a reversal
measurement (two measurements in opposite direction
but at the same spot). Use fort his procedure an adequate
surface (rigid and stable support, as flat as possible and
as horizontal as possible), where you put the BlueCLINO.
Mark the position and the direction of the BlueCLINO
precisely and turn it on the same spot by 180 degrees.
The "ZERO-OFFSET" will be stored in the BlueCLINO
EXAMPLE:
With the key select the menu item [Abs ZERO] and
confirm this selection with .
In the display the position of the instrument for the first measurement
will be shown.
Put the BlueCLINO to the first position and press the key
for reading the first measuring value. Alternatively the
first measuring value can also be entered with the zapper.

page 20 of 84 pages
During the measurement the display will graphically show the current
measurement.
Confirm the first measurement with the key or with the
zapper. After 15 seconds the value will automatically be read.
After a successful reading of the first measuring value the position of
the instrument for the second measurement will appear in the display.
Put the BlueCLINO now to the second position (turn the instrument by
180 degrees in the horizontal) and press the key again
for reading the second measuring value. Alternatively the second
measuring value can also be entered with the zapper.
During the measurement the display will graphically show the current
measurement.
Confirm the second measurement with the key or with
the zapper. After 15 seconds the value will automatically be read.
After termination of the reversal measurement the display for the actual
measurement under consideration of the ZERO OFFSET will appear
on the screen.
Notice:
The value of the "ZERO OFFSET" determined by a reversal measurement corresponds to the deviation of
the zero point of the BlueCLINO compared to the absolute Zero (gravity). The displayed measuring value
corresponds to
VALUE displayed =
Value of the BlueCLINO minus "ZERO OFFSET"
The reversal measurement described above should be repeated periodically in order to achieve a high
measuring precision, particularly when the BlueCLINO has not been in use for a longer period.

page 21 of 84 pages
3.2 SELECTION OF THE MEASURING UNIT /UNIT
3.2.1 STANDARD-UNITS
You can change the measuring unit of the inclination values displayed. If you start the function [UNIT] the
list of the available measuring units will appear. With the keys you can now select
the measuring unit preferred. For memorizing the measuring unit selected you press now the
key . The measuring unit will remain active until you change it again according to the above
procedure.
The following measuring units can be chosen.
xxxx.xx mm/m mm per m / 2 decimals
xxx.xxx mm/m mm per m / 3 decimals *
xx.xxxx "/10" inch per 10 inches / 4 decimals
xx.xxxx "/12" inch per 12 inches / 4 decimals
xxxx.xx mRad Milliradian / 2 decimals
xxxx.xx mm/REL mm in relation to the relative base / 2 decimals
xxx.xxx mm/REL mm in relation to the relative base / 3 decimals *
xx.xxxx "/REL inches in relation to the relative base / 4 decimals
xxxx.xx A %oartillerie-permille
xxxx.xx %opermille
xxx.xxx° DEG degrees / 3 decimals
xxx° xx' DEG degrees / minutes
xx° xx' xx" DEG degrees / minutes / seconds
xxxx' xx" DEG minutes / seconds
xxxxxx" DEG seconds
xxxxx.x" DEG seconds *
xxx.xxx GON gon / 3 decimals
* only for BlueCLINO HP instruments with a measuring range of 1° or 5°
Depending on the unit selected the last digit will be rounded to 5" or to the nearest lower integer
(e.g.20 µmm/m). For the BlueCLINO HP 1° the rounding will be to 0.2" for the BlueCLINO HP 5° to 1".
3.2.2 UNITS WITH RELATIVE BASE LENGTH
The units mm/REL and "/REL are related to a relative, this means selectable, base length. After selecting
one of these units, the relative base length must be entered.
Example: mm/REL / mm in relation to a relative base / 2 decimals.
After the selection of the measuring unit in our example the stored
base length of 1000 mm will appear.
1000
Unit
mm/REL
With the keys the proposed base length can be
modified. The newly entered value can finally be confirmed with the
key.
With the key the default value 1000 mm will be
recalled.
The following measurements are now related to a base length of
1250 mm.
1250
Unit
mm/REL
Table of contents
Other WYLER Measuring Instrument manuals

WYLER
WYLER ML NT 11 User manual

WYLER
WYLER CLINOMETER 80 User manual

WYLER
WYLER Clinotronic PLUS User manual

WYLER
WYLER BlueLEVEL-2D User manual

WYLER
WYLER CLINOMETER 80 User manual

WYLER
WYLER BlueSYSTEM User manual

WYLER
WYLER Clinotronic S User manual

WYLER
WYLER wylerLEVEL User manual

WYLER
WYLER Levelmeter 2000 User manual

WYLER
WYLER Clinotronic S User manual