Xplova E7 User manual

Xplova E7 Smart Cycling Computer
User’s Manual

© Copyright 2015, Xplova Incorporated. This publication, including all
photographs, illustrations and software, is protected under international
copyright laws, with all rights reserved. Neither this User’s Manual, nor any of the
material contained herein, may be reproduced without written consent of the
manufacturer. Download the latest version of this document at www.xplova.com.
Visit http://tour.xplova.com/
Create group biking events, plan routes, upload activities and workout
summary cloud service
Manufactured by:
Xplova Inc.
www.xplova.com
5F-1A, No. 128, Xinhu 2nd Road, Neihu District,
Taipei City 11494, Taiwan (R.O.C.)
Tel: 886-2-77207928
Fax: 886-2-77207938
http://www.xplova.com/en/support/
Email: sales @xplova.com
Version: 1.20!
2

Getting Started 5
Features of the Xplova E7 5
Getting to Know the Xplova E7 7
Accessories 8
ANT+ Accessories 8
Charging the Xplova E7 9
Installing Xplova E7 on bike 10
Using Xplova E7 11
Acquiring GPS Signal 12
The LCD Screen 12
Selecting Data Display 15
Adjusting the Backlight 16
Selecting Bike Profile 16
Marking Lap / Location 17
Restarting Recording 18
Idle Mode 18
Changing the Settings 19
Menu Button Controls Description 19
The Menu Tree 20
1.ALT (Altitude) Menu 21
2. RECORD Menu 25
WARNING Menu 28
4. GPS Menu 29
5. SOUND Menu 31
6. S-PAUSE (Smart Pause) Menu 32
7. Bike Menu 33
8. HRM (Heart Rate Monitor) Men 39
9. USER Menu 40
10. INFO (Information) Menu 41
11. TIME Menu 42
12. UNIT Menu 43
3

13. LANGUAGE Menu 44
14. F-RESET (Factory Reset) Menu 44
The Accessories 46
Heart Rate Monitor (Optional accessory from Xplova) 46
Combo Cadence Sensor (optional accessory from Xplova) 48
Appendix 51
Xplova E7 Specifications 51
Wheel Size Table 52
Declarations of Conformity 53
4

Getting Started
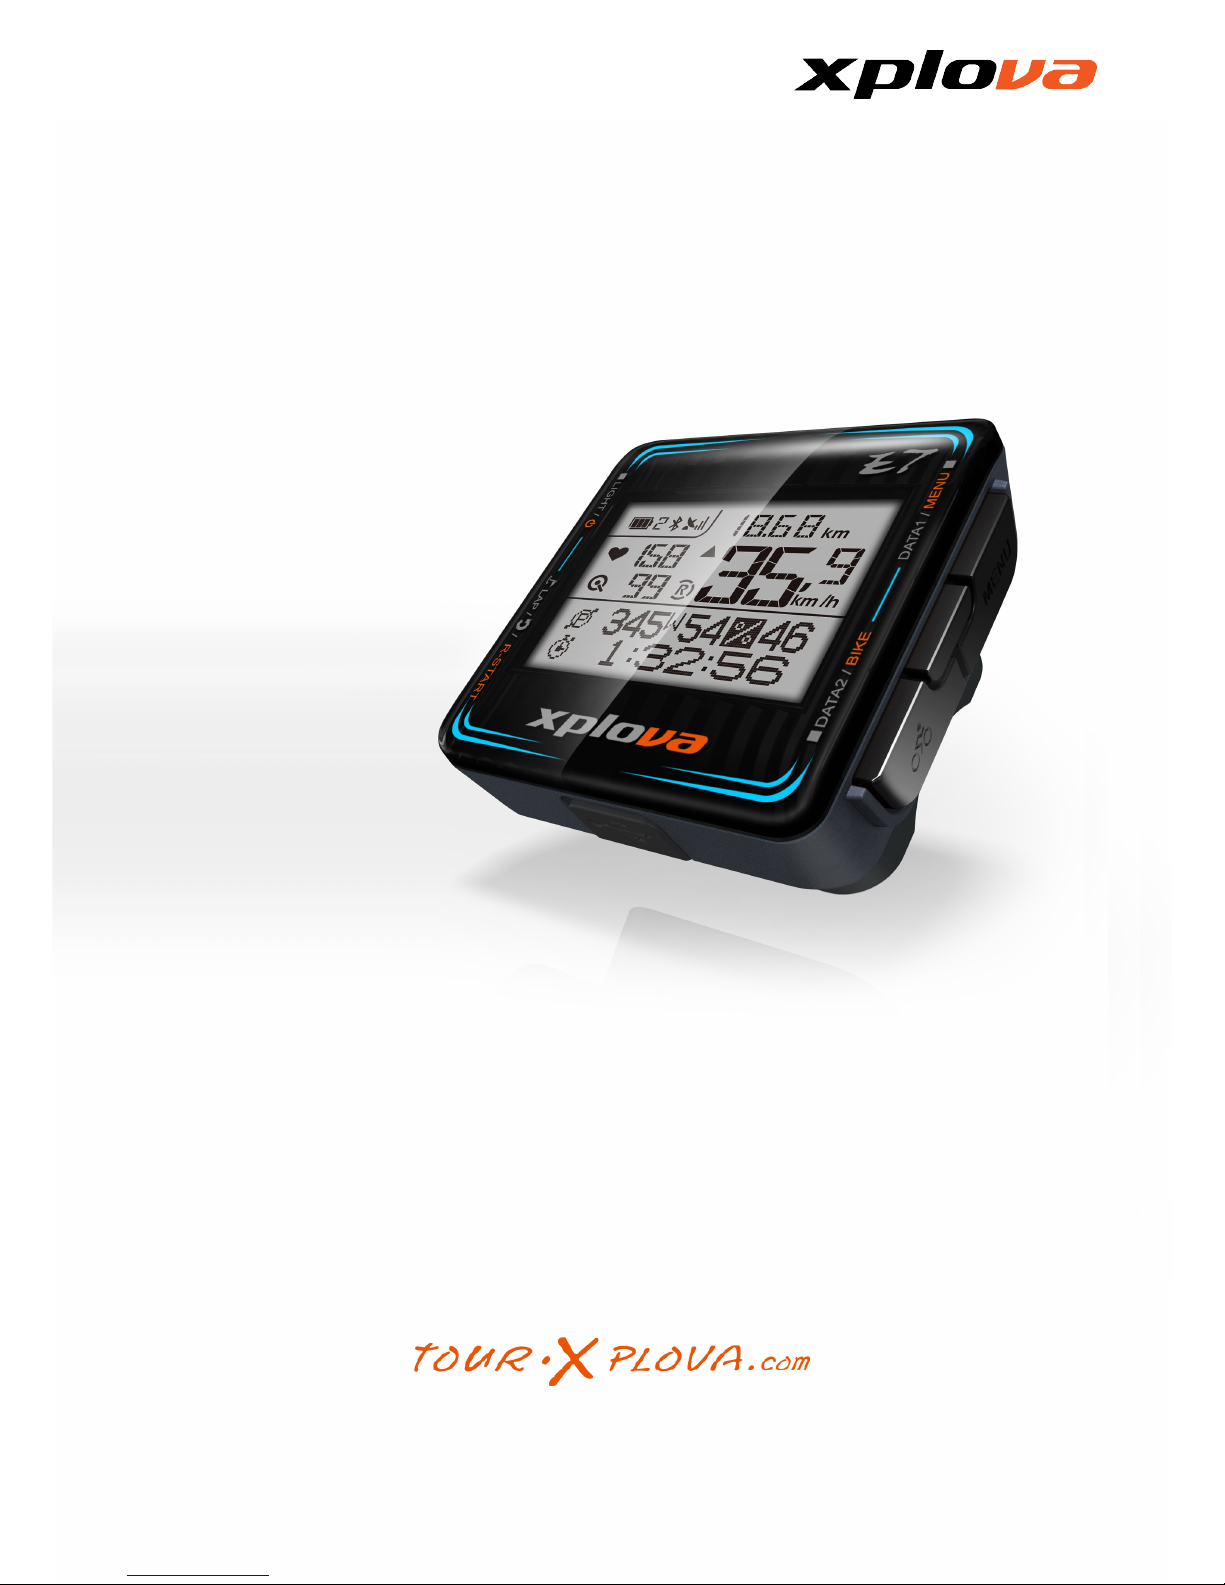
Congratulations on having purchased the Xplova E7 Smart Cycling Computer.
In this chapter, you will discover key features and understand how to set up your
device and use the basic features of the user interface.
Features of the Xplova E7
The Xplova E7 is a light-weight and stylish GPS Cycling Computer for
performance driven cyclists and those who are keen to share their cycling
journeys with friends. With Xplova Smart Dynamic Logging Technology, Xplova E7
automatically tracks speed, distance, location, elevation, slope using a high
sensitivity GPS and barometer.
Xplova E7 equips the latest Bluetooth Low Energy technology, when connects
with Xplova Meetup APP in smartphones, the real time cycling data including geo
coordinates are transferred from Xplova E7 to tour.xplova.com event channel
which allows riders to do the live-tracking of group members in the Xplova
Meetup APP.By adding an ANT+ compatible Heart Rate Monitor, Speed/Cadence
Combo Sensor or compatible Power Meter, Xplova E7 becomes a training
companion which dutifully records every detail of your ride. All these recorded
activities can be uploaded to http://tour.xplova.com/ community portal for
performance analysis, off-line competition, mapping and sharing.
State of the art Smart Cycling Computer
•High performance and low power consumption 32-bit processor
•Large-screen display, Shows up to 7 cycling data simultaneously
•Bluetooth Low Energy, connects with Xplova Meetup for Live-Tracking
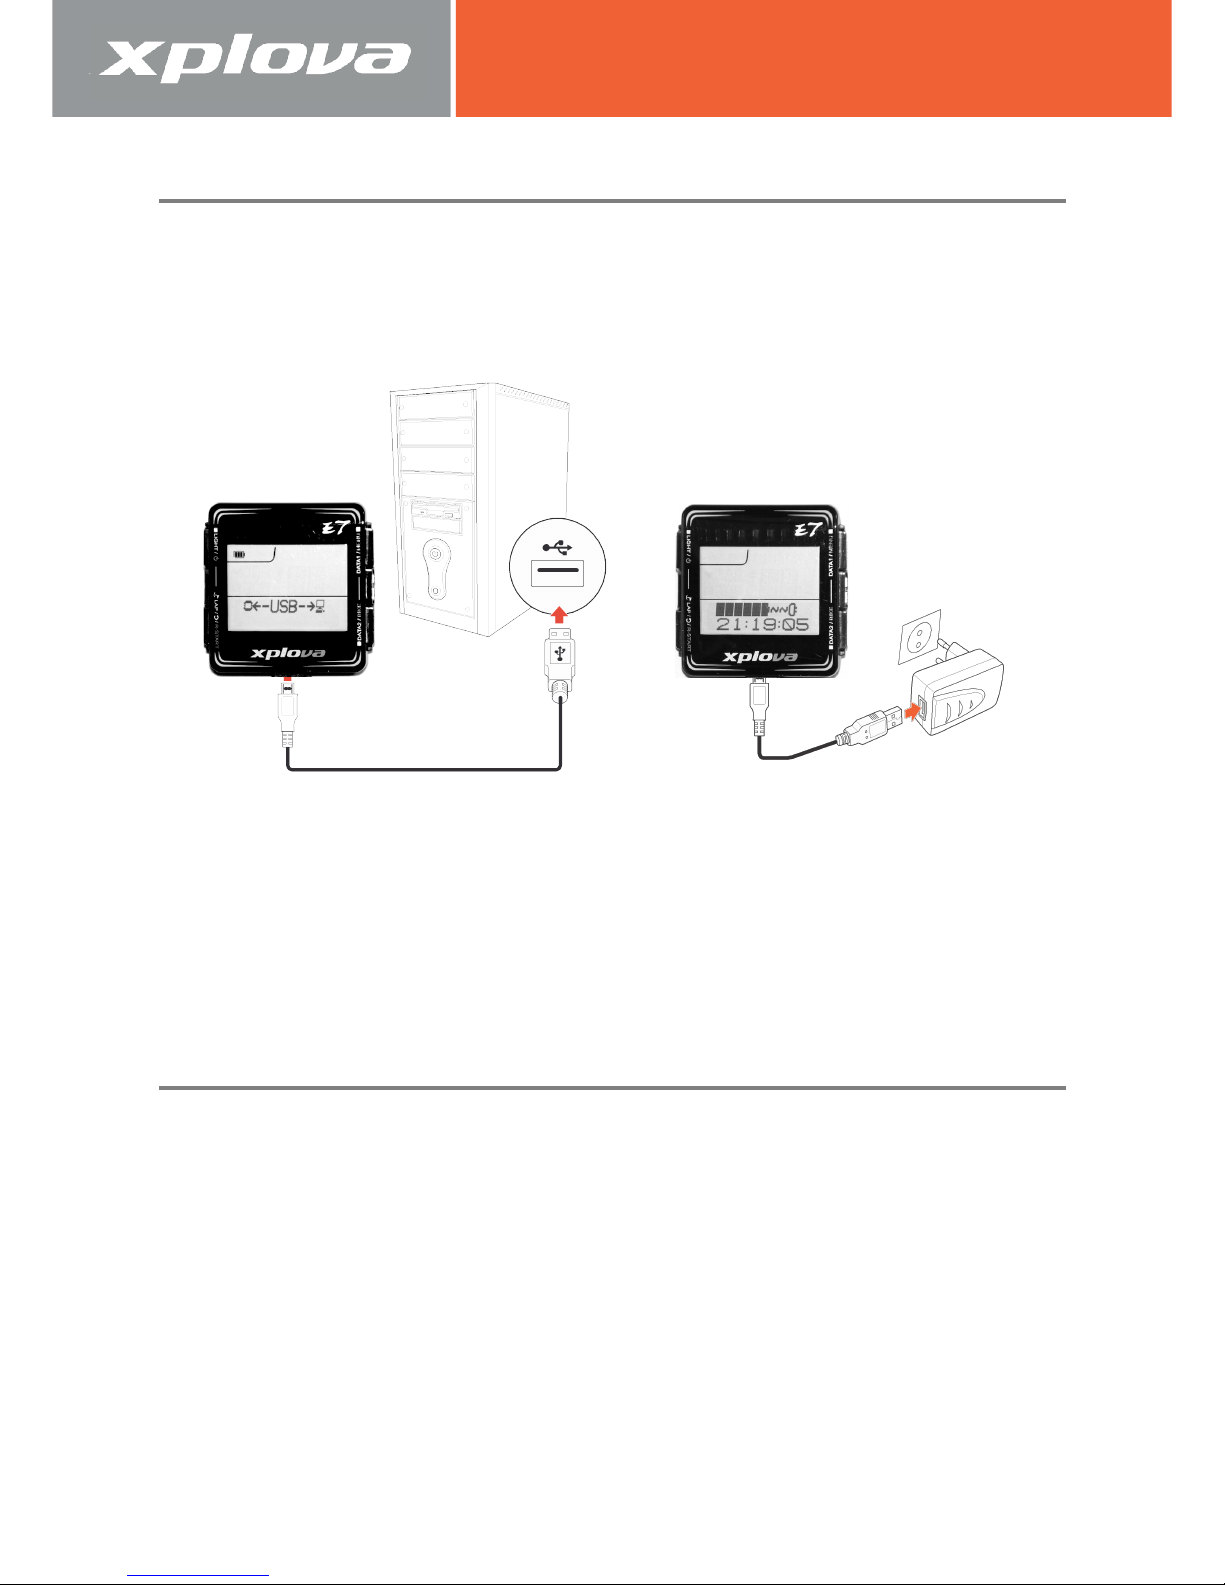
•Built-in rechargeable battery, typical operation for 16 hours
•120 hours of data logging, 220 hours if no ANT+ accessories connected
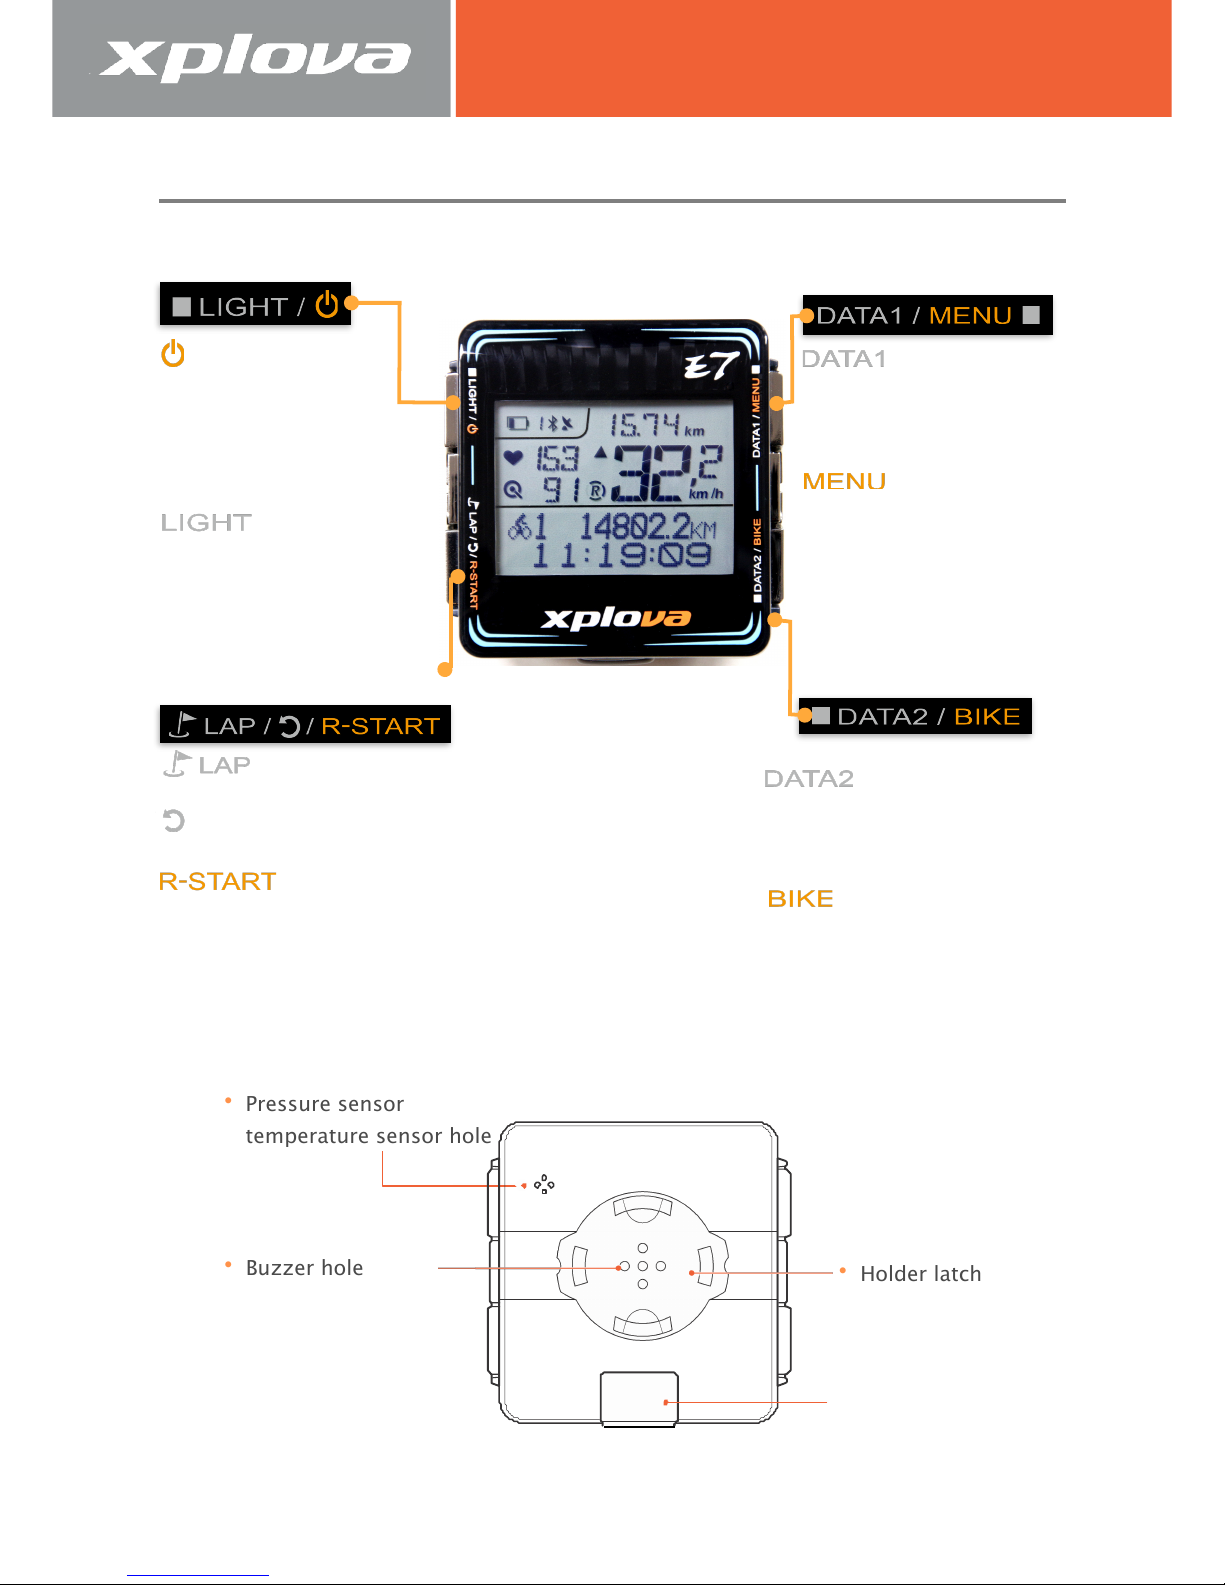
•Intuitive data select buttons
•High sensitive GPS receiver, flexible to turn on/off GPS
5

•High precision Barometric altimeter for altitude and slope calculation
•Low power digital wireless sensors support (ANT+) for Combo cadence
sensor, Heart Rate Monitor, Power Meter, Speed sensor, Cadence sensor,
etc.
Xplova Smart Dynamic Logging Technology
•Automatically tracks all cycling data
•No more Start/Stop key to record an activity
6

Getting to Know the Xplova E7
Xplova E7 Front View
Xplova E7 Rear View
7
•Short press to mark lap and position.
•In Settings short press to return
•Long press to save current record
and start a new record.
•USB cover
•Buzzer hole
•Holder latch
•Pressure sensor
temperature sensor hole
microUSB連接埠
(在防蓋下)
•Short press to switch
the data displayed on
the upper screen
•Long press to enter or
exit the menu.
Power
•Short press to turn the
power on
•Long press to turn the
power off
•Short press to change
the backlight level
•Short press to switch
the data displayed on
the lower screen
•Long press to select a
bike profile

Accessories
The Xplova E7 comes with the accessories shown below. Check to make sure
all items are included in the package; if anything is missing, contact your Xplova
retailer.
Standart Accessories
Optional Accessories
The Xplova E7 can be paired with optional accessories to provide a complete
solution for cycling and outdoor activities. Follow the instructions on “Using the
Accessories” to pair and install the following devices:
•Heart Rate Monitor (HRM)
•Speed / Cadence Combo Sensor
•USB Charger
ANT+ Accessories
The Xplova E7 is built-in 2.4GHz ANT+ Digital Wireless Receiver, which
supports standard ANT+ accessories including Combo cadence sensor, Heart Rate
Monitor, Power Meter, Speed sensor, Cadence sensor, etc. In additions, Xplova E7
supports the Power Meter with Left/Right output percentage display. The
compatible Power Meters are:
iCranks, InfoCrank, xpedo, SRAM/Quarq, SRM, Power2Max, etc. for more
8
•Micro USB Cable
•Bike Mount with
•Rubber Bands

Charging the Xplova E7
Before using your Xplova E7, make sure it is properly charged and ready to
go. Charge the Xplova E7 for at least 3 hours before first use to make sure the
built-in battery is fully charged. Xplova E7 can be charged using the supplied USB
cable to connect to any standard USB port or USB power adapter.
9
!
ひ
!

Installing Xplova E7 on bike
1. Align the mount pad to the bike handle bar and
the bike mount to the mount pad.
2. Loop a rubber band from one corner of the bike
mount, passing through the bottom side, to the
other corner.
3. Loop a rubber band from another corner,
passing through the bottom side, to the other
corner to secure the bike mount in place.
4. Align the mounting guide to the bike mount.
5. Install and then turn the Xplova E7 clockwise to
lock it in place.
10

Using Xplova E7
This chapter provides instructions on how to power up your device and use
the button controls and full features and functions of your Xplova E7.
Powering Up the Xplova E7
After charging the Xplova E7, you are now ready to begin using your device.
Short press . The LCD screen briefly displays the device firmware
version.
NOTE: During charging long press 3 sec. to power on.
NOTE: The firmware version may appear differently from the above
illustration.
Powering Off the Xplova E7
To turn the power off, long press 3 sec. A POWER OFF
message is displayed on screen.
11

Acquiring GPS Signal
The Xplova E7 comes fully equipped with X-Navi technology designed to
maximize your cycling experience. Once turned on, the Xplova E7 automatically
searches for satellite signals. Go outside to an area free from tall obstructions.
The greater the exposure, the faster the Xplova E7 will be able to acquire a signal.
Signal acquisitions can take 5 to 15 minutes to complete under open skies. The
GPS icon indicates the signal strength when GPS is fixed.
The LCD Screen
•Status Bar:
Displays status icons:Battery Status, Selected Bike, Bluetooth Connected,
GPS Signal Status.
•DATA1: Upper data display main data area
Displays speed, heart rate, cadence, distance, recording status, speed
status.
•DATA2:Lower data display dot matrix data area
Displays the clock, altitude, slope, trip time, calories, temperature, and
power information.
Status bar icon description
Battery Status:
Shows the battery capacity and charging status
12
Status Bar
DATA2
Lower Data Display
DATA1
Upper Data display

DATA1: Upper Data Display Icon
Selected Bike:
Shows the current selected bike profile
Bike 1 is selected with its connected accessories
settings
Bike 2 is selected with its connected accessories
settings
Customized settings for running, walking, driving or
Bike 3
Bluetooth
Connected
Shows when connected with Xplova Meetup APP
GPS Signal
Status
Shows the GPS signal strength
Good GPS signal reception, 3D fixed
Fair GPS signal reception, 2D fixed
Poor GPS signal reception, not fixed
Searching GPS signal, not fixed
No GPS signal
strength icon
GPS is turned off
Heart Rate Status
Display Heart Rate Monitor status
Heart Rate Monitor receiver is on
Heart Rate Monitor receiver is on but no signal
received
No Heart Rate
icon
Heart Rate Monitor receiver is off
Cadence Status
Display Cadence Sensor status
(Note: Xplova E7 supports standard ANT+ COMBO
Cadence Sensor, Standalone Cadence Sensor and
Cadence Sensor built-in Power Meter)
Cadence Sensor receiver is on
13

Cadence Sensor receiver is on but no signal received
No Cadence
Sensor icon
Cadence Sensor receiver is off
Speed Status
Display the current speed is above or under average
trip speed
Current speed is above average trip speed
Current speed is under average trip speed
Recording Status
Display the recording status
In recording
Pause recording: When current speed is lower than the
Smart-Pause speed setting, Xplova E7 data recording
will be paused.
14

Selecting Data Display
The LCD display shows different types of data
DATA1: Upper Screen Data, Main data display area
Short press repeatedly to toggle the upper data display for Current
data, Average data and Maximum data.
DATA2: Lower Screen Data, Dot matrix display area
Short press repeatedly to toggle the lower data display for:
1. Bike1 ODO、Clock.
2. Altitude + Slope、Trip Time
3. Total Climb、Trip Time
4. Calories + Temperature、Trip Time
5. Current Power + Left % Right Power、Trip Time.
15
Current data
Average data
Current
distance
Current speed
Current heart
rate
Current
cadence
Maximum data
。
Short press
AVG (Average)
Average heart
rate、Average
cadence、Average
speed
MAX(Maximum)Maxi
mum heart rate、
Maximum cadence、
Maximum speed
。
Short press
Short press
。

Adjusting the Backlight
To adjust the brightness setting, short press repeatedly to scroll
through the brightness options. Options are: HIGH, LOW, OFF.
Selecting Bike Profile
You can configure up to three bike profiles on Xplova E7: (Bike1),
(Bike2), and CUST (Custom.)
1. Long press 3 seconds to enter Bike profile selection.
2. Short press to scroll through bike profile options.
16
Bike1 ODO, Clock.
Altitude + Slope, Trip Time
Total Climb, Trip
Time.
Current Power + Left % Right Power, Trip
Time
Calories + Temperature, Trip
Time.
。
。
。
。
。
Short
press
Short
press
Short
press
Short
press
Short
press

3. Short press to confirm selection.
Operation note:
•The appears on the upper right scree for Bike profile selection,
short press to scroll the options.
•The appears on the lower left screen for confirmation, short press
to confirm selection.
Marking Lap / Location
During recording, press to mark a new LAP or mark the current
location to the current recording session. the Xplova E7 will display the latest LAP
data for 5 seconds."
•Upper Screen Data:
LAP caption、LAP average heart rate、LAP average cadence、LAP average
speed
•Lower Screen Data:
LAP number、LAP distance、LAP time
17
Gear selection
Main display page
short press save
and return
Long press 3
Sec.
Short
press

Restarting Recording
During recording, long press to start a new recording.
"
The Xplova E7 starts recording when it is powered on, if you want to reset the
time and distance from zero, you can long press for 3 seconds, the
Xplova E7 starts countdown, stores the current record and displays the current
record number, e.g. R01 and then starts a new record, e.g. R02 immediately after
emitting the continuous beep sound.
Note: Xplova E7 may not start a new record after long pressing
for 3 seconds, if the current speed is lower than the Smart-Pause speed limit.
However, once the Xplova E7 finds the current speed is higher than the Smart-
Pause speed limit, it resumes recording automatically.
Idle Mode
When no movement nor sensors are detected in 30 minutes, the Xplova E7
goes to idle mode to save power. In idle mode, only the battery icon and clock are
displayed. Press any buttons to return to normal mode or when speed is detected.
After being idle for 2 hours, the Xplova E7 automatically turns off.
18
Starts the new record R02
Countdown to store the
record R01
Long Press 3
sec.
In recording
New record R02
New record starts
New record number

Changing the Settings
The Xplova E7 has a number of customizable settings available so you can
control functionality and personalize your device.
To bring up the menu, long press .
Menu Button Controls Description
button
Short press button to scroll to the next Menu.
Short press button to scroll through other Options.
button
Short press button to enter the [setting of option]
Short press button to repeat the current [setting of option]
19
Indicate the function of
DATA1 button
Indicate the function of
DATA2 button
Confirm the Option
and return to previous
screen
Name of Menu or
Option
Setting of Options
Main screen
Enter the Menu
Long Press 3
sec.

Indicate the [setting of option] is selectable when it is blinking
A blinking field is the current data field. Short press
button to select the value, short press button to scroll to
the next field.
Return button
Indicate short press to confirm and save the option and return to
previous screen.
The Menu Tree
1. ALT (Altitude) : Altitude calibration, allows you to pre-set up to three altitude
settings.
2. RECORD: Allows you to view your activity records.
3. WARNING: Allows you to configure the Xplova E7 to notify you when you
exceed a specified time, distance, calories burnt, heart rate value or auto LAP
count.
4. GPS:Allows you to view GPS signals and reset or turn off the GPS receiver.
5. SOUND :Allows you to enable or disable beep sound.
6. S-PAUSE :(SMART PAUSE): Allows you to specify the minimum speed limit by
which the Xplova E7 will automatically pause when the device goes below that
limit.
7. BIKE: Allows you to configure the wheel size and set the current bike to pair
with combo, cadence and speed sensors or a power meter.
8. HRM (Heart Rate Monitor) :Allows you to pair your device with a heart rate
monitor.
9. USER: Allows you to set your profile.
10.INFO: Allows you to configure the Xplova E7 device name and check the serial
number and firmware version.
11.TIME: Allows you to configure the Xplova E7 clock."
12.UNIT: Allows you to set the default unit of measurement.
13.LANGUAGE: Allows you to set the default language
14.F-RESET: (Factory Reset) Allows you to reset the device to its factory default
settings.
NOTE: Some settings can be changed and backup via http://tour.xplova.com/.
20
Table of contents
Other Xplova Bicycle Accessories manuals
Popular Bicycle Accessories manuals by other brands

Bosch
Bosch Active Line BDU310 Original operating instructions

Sigma
Sigma ROX 5.0 user guide

NuVinci
NuVinci N360 Technical manual

Specialized
Specialized Command Post Adjustable Height Seat Post installation guide

Buddyrider
Buddyrider Pet Seat installation instructions

Fidlock
Fidlock VACUUM quick start guide