manuals.online logo
Brands
  1. Home
  2. •
  3. Brands
  4. •
  5. Yealink
  6. •
  7. IP Phone
  8. •
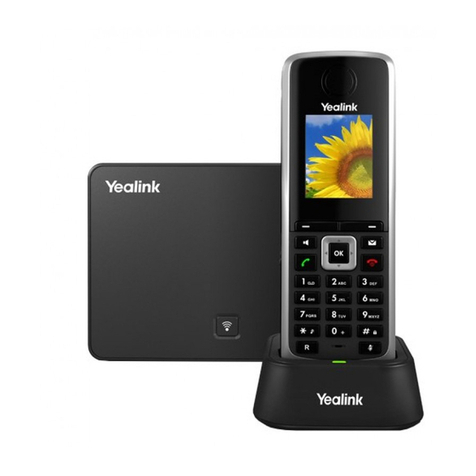
  9. Yealink W56H User manual

Yealink W56H User manual

Start Cloud Phone Handset Features - W56H Quick Start Guide
Sales & Support:
1300 475 155
Basic Call Features
Transfer Call
1. While on an active call, press the Options soft key, then
select Transfer and the active call will be placed on hold.
2. Now dial the destination party’s internal extension or external
number and wait for them to pick up.
3. When the destination party answers give them any important
information and confirm that they’d like to take the call.
4. When they are ready, press the Transfer soft key again to
transfer the call.
Call Hold/Resume
1. While on an active call, Options soft key during a call, and
then select Hold.
2. Press the Resume soft key to retrieve the call.
3. If there are two calls on hold, press the Resume soft key to
resume the current call. Press the Swap soft key to swap
between calls.
Call Conference
1. Press the Options soft key during an active call, then select
Conference.
2. Enter the number of the second party, and then press the
Conf. soft key to dial out.
3. Press the Conf. again when the second party answers. All
parties are now joined in the conference.
4. Press the End key to disconnect all parties.
Speed Dial
To configure a speed dial key:
1. Press the OK button to enter the main menu. Select Settings
→ Telephony → Speed Dial.
2. Press the Up or Down keys to highlight the desired speed
dial key.
3. Press the Options soft key to add, change or delete the
assigned speed dial number.
4. Press the Save soft key to accept the changes.
To use the speed dial key:
1. Press the speed dial key to dial the preset number.
Voice Message
Message waiting indicator on the idle screen indicates that one
or more voice messages are waiting at the message centre.
1. Press the OK button to enter the main menu. Select Voice
Mail → Play Message.
Press the Up or Down keys to highlight the desired line, and
then press Select soft key.
Enable/Disable call Forwarding
1. Dial *71, followed by the 10-digit phone number (including
area code) that you want to forward calls to, followed by #. (For
example: *71 1300 475 155 #)
2. You will hear the hear confirmation message, “Call forward
enabled.”
3. Dial *72 to disable call forwarding.
Enable/disable after-hours IVR recoding
Enable/Disable the after-hours IVR recording. When enabled, all
calls will be diverted to the “after-hours/out of office” recording.
1. To enable dial *401
2. To disable dial *402
Customising Your Phone
Call History
1. Press the History soft key when the phone is idle, press the
Up or Down keys button to scroll through the list.
2. Select an entry from the list, you can do the following:
•Press the Dial key to call the entry.
•Press the Delete soft key to delete the entry from the list.
If you press the Option soft key, you can also do the following:
•Select Detail to view detailed information about the entry.
•Select Add to Local to add the entry to the local directory.
•Select Add to Blacklist to add the entry to the blacklist.
•Select Delete All to delete all entries from the list.
Contacts
To add a contact:
1. Press the OK button to enter the main menu. Select
Directory.
2. Press the Options soft key, and then select New Contact.
3. Enter a unique contact name in the Name field and contact
numbers in the corresponding fields.
4. Press the Save soft key to accept the change.
To edit a contact:
1. Press the OK button to enter the main menu. Select
Directory.
2. Press the Up or Down keys to select the desired contact,
press the Option soft key and then select Edit from the prompt
list.
3. Edit the contact information.
4. Press the Save soft key to accept the change.
Page 1 of 2
Sales & Support:
1300 475 155
To delete a contact:
1. Press the OK button to enter the main menu. Select
Directory.
2. Press the Up or Down keys to select the desired contact,
press the Option soft key and then select Delete from the
prompt list.
3. Press the Yes soft key when the LCD screen prompts “Delete
selected contact?”
Ring Tones
1. Press the OK button to enter the main menu. Select
Settings → Audio → Ring Tones → Melodies.
2. Press the Up or Down keys to select the desired line.
3. Press the Left or Right keys to select the desired ring tone.
4. Press the Save soft key to accept the change.
Making Changes to Your Start Cloud Phone
Service
To make changes or updates to your Start Business Phone
service (including IVR recordings) please go to:
https://www.startbroadband.com.au/business-solutions/cloud-p
bx-changes/
Page 2 of 2

Other manuals for W56H

17

Other Yealink IP Phone manuals

Yealink T33G User manual

Yealink

Yealink T33G User manual

Yealink Telkom W52P User manual

Yealink

Yealink Telkom W52P User manual

Yealink SIP-T58V User manual

Yealink

Yealink SIP-T58V User manual

Yealink SIP-T32G User manual

Yealink

Yealink SIP-T32G User manual

Yealink T42G Troubleshooting guide

Yealink

Yealink T42G Troubleshooting guide

Yealink W56P Telesystem User manual

Yealink

Yealink W56P Telesystem User manual

Yealink T43U Troubleshooting guide

Yealink

Yealink T43U Troubleshooting guide

Yealink Yealink SIP-T48G User manual

Yealink

Yealink Yealink SIP-T48G User manual

Yealink VP530 User manual

Yealink

Yealink VP530 User manual

Yealink Yealink SIP-T42G User manual

Yealink

Yealink Yealink SIP-T42G User manual

Yealink VP530 User manual

Yealink

Yealink VP530 User manual

Yealink Telkom W52P User manual

Yealink

Yealink Telkom W52P User manual

Yealink T31P User manual

Yealink

Yealink T31P User manual

Yealink IP Phone & Starface PBX User manual

Yealink

Yealink IP Phone & Starface PBX User manual

Yealink W60P Telesystem User manual

Yealink

Yealink W60P Telesystem User manual

Yealink Yealink SIP-T42G User manual

Yealink

Yealink Yealink SIP-T42G User manual

Yealink DD Phone User manual

Yealink

Yealink DD Phone User manual

Yealink SIP-T46U User manual

Yealink

Yealink SIP-T46U User manual

Yealink W60 Series Manual

Yealink

Yealink W60 Series Manual

Yealink Yealink SIP-T48G Service manual

Yealink

Yealink Yealink SIP-T48G Service manual

Yealink SIP-T38G User manual

Yealink

Yealink SIP-T38G User manual

Yealink T48 Guide

Yealink

Yealink T48 Guide

Yealink T46G Skype For Business Edition User manual

Yealink

Yealink T46G Skype For Business Edition User manual

Yealink SIP-T30 User manual

Yealink

Yealink SIP-T30 User manual

Popular IP Phone manuals by other brands

ADTRAN IP 712 Quick reference manual

ADTRAN

ADTRAN IP 712 Quick reference manual

AGFEO ST 25 manual

AGFEO

AGFEO ST 25 manual

Polycom SoundPoint IP 550 user guide

Polycom

Polycom SoundPoint IP 550 user guide

Auerswald COMfortel D-100 instructions

Auerswald

Auerswald COMfortel D-100 instructions

iPECS 1080i Quick installation guide

iPECS

iPECS 1080i Quick installation guide

Cisco Unified 7912G user guide

Cisco

Cisco Unified 7912G user guide

Panasonic KX-NT546 Quick reference guide

Panasonic

Panasonic KX-NT546 Quick reference guide

ATL Berkshire SD14 user guide

ATL

ATL Berkshire SD14 user guide

Snom 220 Specifications

Snom

Snom 220 Specifications

Digium D70 Admin guide

Digium

Digium D70 Admin guide

Avaya one-X 9670G user guide

Avaya

Avaya one-X 9670G user guide

D-Link DPH-70 user guide

D-Link

D-Link DPH-70 user guide

Panasonic KX-TDE100 installation manual

Panasonic

Panasonic KX-TDE100 installation manual

Polycom VVX 400 Series Quick reference guide

Polycom

Polycom VVX 400 Series Quick reference guide

Mitel 6768i quick start guide

Mitel

Mitel 6768i quick start guide

Yamaha FLX UC 1500 quick start guide

Yamaha

Yamaha FLX UC 1500 quick start guide

NEC XEN IPK DIGITAL TELEPHONE manual

NEC

NEC XEN IPK DIGITAL TELEPHONE manual

Aastra Dialog 5446 IP Premium Quick reference guide

Aastra

Aastra Dialog 5446 IP Premium Quick reference guide

manuals.online logo
manuals.online logoBrands
  • About & Mission
  • Contact us
  • Privacy Policy
  • Terms and Conditions

Copyright 2025 Manuals.Online. All Rights Reserved.