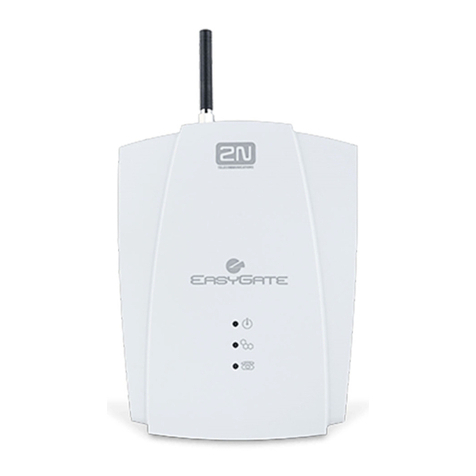
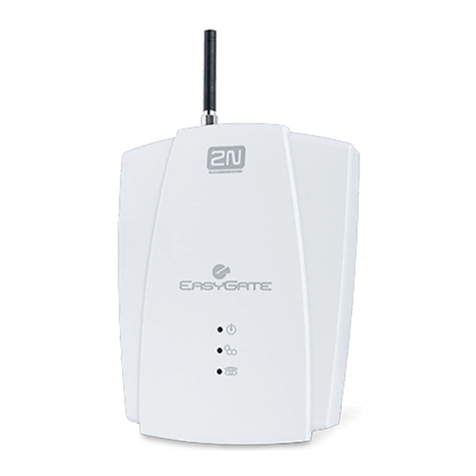
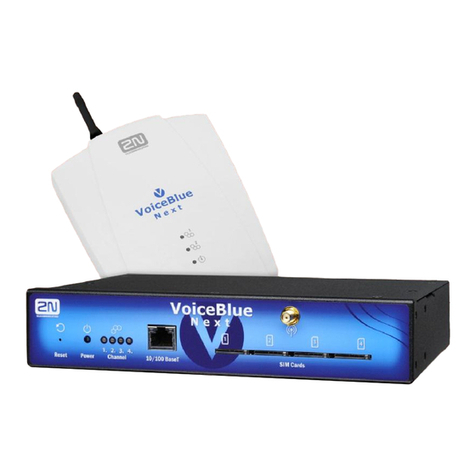
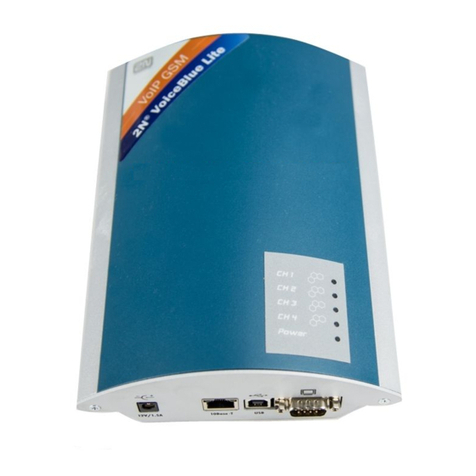
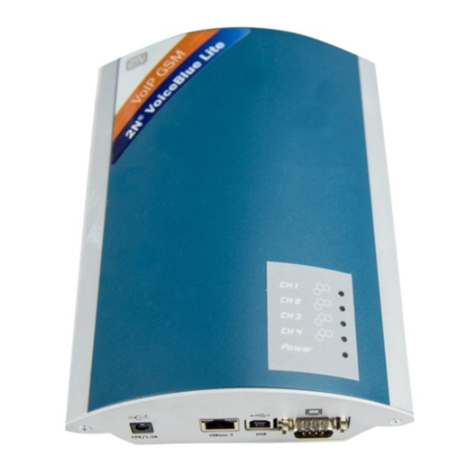
2N VoiceBlue Lite User manual

2N - VoiceBlue Lite
User Manual
Version: 2.3

Dear customer,
let us congratulate you on having purchased the 2N
– VoiceBlue
Lite system. This new product has been developed and produced in
order to provide the maximum utility value, quality and reliability
to the user. We hope you will be fully satisfied with our
2N
– VoiceBlue Lite.
The manufacturer constantly improves the software
contained in the product (the so-called firmware).
The technology used therein helps you download the
latest firmware version to the 2N
– VoiceBlue Lite
VoIP GSM gateway using a common PC anytime.
For the latest firmware version see www.2n.cz.For
necessary instructions refer to Section 7.2 hereof.
We recommend you to apply the latest version to
avoid problems that have already been eliminated.
Grey marked text of this User Guide specifies
functions of VoiceBlue Lite, which will be
supported in newer versions of firmware. You also
find the latest version of the User Manual at
www.2n.cz.
Check your delivery for completeness according to
the packing list and study this manual carefully
b
efore installing this product. The manufacturer
shall not be responsible for damage caused by any
use of this product in contradiction with the User
Manual. The warranty terms and conditions do not
apply to damage incurred as a result of gross
handling and/or undue storing of the product or
violation of the technical parameters included
herein.
This manual is very much detailed and includes
subsections that are irrelevant for the basic
installation purposes as well as subsections referring
to other VoIP GSM gateway models.

Packing List
Please check your 2N
®
- VoiceBlue Lite delivery for compliance
with the following packing list.
Item Pieces
2N - VoiceBlue Lite – check the model type according
to the order number, see the type label on the gateway
back side 1
Mains adapter according to type 1
Serial laplink cable 1
Ethernet cable (4-wire) 1
USB cable A – B 1
Antenna with a SMA connector 1
Wall mounting holder 1
Dowels 2
Screws 2
Warranty certificate 1
Compliance certificate 1
2N product CD 1


Contents
SECTION1–PRODUCT PRESENTATION..............................................3
1.1. Purpose.......................................................................................................4
1.2. How to Cut Telephone Costs.....................................................................4
1.3. Other Advantages and Applications..........................................................5
1.4. RF Radiation Safety Precautions...............................................................6
SECTION2–INSTALLATION......................................................................7
2.1. Get Started .................................................................................................8
2.2. Brief Installation Guide .............................................................................9
2.3. Proper Mounting......................................................................................11
2.4. PC or LAN Connection............................................................................12
2.5. Antenna Connection ................................................................................15
2.6. Gateway Power Supply............................................................................15
2.7. SIM Card Installation/Removal...............................................................16
2.8. PIN Entering Disable (Optional) .............................................................17
2.9. Status Indicators.......................................................................................17
Power Indicator...................................................................................18
GSM Indicators....................................................................................18
2.10. Lithium Battery Replacement..................................................................20
2.11. Fuse Replacement....................................................................................22
2.12. Antenna Splitter.......................................................................................22
SECTION3–2N - VOICEBLUE LITE INSTALLATION .................23
3.1. Proper Installation Conditions.................................................................24
3.2. VoiceBlue Lite Installation......................................................................24
3.3. Potential GSM Network Problems ..........................................................25
SECTION4–VOICEBLUE LITE CONNECTION TO VOIP...........27
4.1. SIP and H.323 Network Interconnection.................................................28
4.2. Point-to-Point Configuration ...................................................................28
4.3. Point-to-Multipoint Configuration...........................................................30
SECTION5–IP VOICE TRANSMISSION..............................................31
5.1. Speech Coding Methods..........................................................................32
5.2. SIP Components ......................................................................................34
5.3. SIP Reports..............................................................................................34

SECTION6–2N - VOICEBLUE LITE ROUTING RULES..............37
6.1. Functions Supported by 2N – VoiceBlue Lite ........................................38
6.2. Call Routing Rules ..................................................................................38
6.3. LCR table.................................................................................................38
6.4. Call Routing to GSM via VoiceBlue Lite...............................................39
6.5. Incoming Calls from GSM to VoIP network ..........................................41
6.6. DISA Message.........................................................................................44
DISA Message Recording Using Terminal and GSM Phone.............44
SECTION7INTRODUCTION OF CONFIGURATION PROGRAM45
7.1. VoiceBlue Lite Configuration Program Installation ...............................46
7.2. VoiceBlue Lite Configuration Program Running....................................46
7.3. Configuration Program Main Panel.........................................................50
SECTION8CONFIGURATION..................................................................51
8.1. Establishing Communication with VoiceBlue Lite.................................52
Gateway selection...............................................................................52
Communication setting.......................................................................52
8.2. Firmware Identification and Upgrade .....................................................53
Firmware uploading............................................................................54
8.3. Gateway Unlocking.................................................................................54
8.4. On-Line Configuration Items..................................................................55
Login account .....................................................................................55
Date/Time ...........................................................................................56
Firmware / Lock key...........................................................................56
Tracing................................................................................................57
Terminal..............................................................................................57
LOG file..............................................................................................58
Record on calls ...................................................................................58
Voice message ....................................................................................58
Statistics..............................................................................................59
8.5. Configuration Parameters........................................................................59
Upload / Download all parameters.....................................................60
System parameters..............................................................................60
Ethernet parameters ............................................................................61
Basic GSM parameters.......................................................................64
GSM groups assignment.....................................................................65
GSM outgoing groups.........................................................................66
GSM incoming groups........................................................................69
Network list ........................................................................................72
LCR table............................................................................................73
Autorouting Table...............................................................................74
8.6. On-line Information on GSM Modules ...................................................76
Diagnostics..........................................................................................76
Actual calls..........................................................................................78
8.7. Reset.........................................................................................................78
8.8. Select Gateway ........................................................................................78
8.9. Communication Setting ...........................................................................78
SECTION9–CONFIGURATION OF EXTERNAL CALLBACK....80
9.1. Introduction to the External Routing Software........................................81
9.2. Installation and configuration of XAPI server.........................................81
9.3. Entering licenses to XAPI server.............................................................84
9.4. Registering of users .................................................................................85
9.5. Installing and configuration of Callback Centre......................................86
SECTION 10– CONFIGURATION USING TERMINAL.....................90
10.1. Serial Communication Setting.................................................................91
10.2. USB Communication Setting...................................................................91
10.3. TCP/IP Communication Setting ..............................................................91
10.4. Terminal Communication........................................................................92
10.5. GSM Gateway Behaviour........................................................................92
10.6. List of Terminal AT Commands..............................................................92
Basic AT commands...........................................................................92
Extended user commands....................................................................93
Ethernet parameters:............................................................................94
Group parameters:...............................................................................94
Pseudotarif params:.............................................................................95
Network params:.................................................................................96
Routing params:..................................................................................96
Totals...................................................................................................96
Service AT commands:.......................................................................97
Special GSM commands:....................................................................97
Work with SMS ..................................................................................99
10.7. Records on Operation (LOG) ................................................................100
10.8. Records on Calls (example)...................................................................101
10.9. Statistics – Description ..........................................................................102
SECTION11–TECHNICAL PARAMETERS.......................................104
3


Figures
Fig. 1 – Bottom View...............................................................................................8
Fig. 2 – Top View....................................................................................................9
Fig. 3 – Gateway Holder Wall-Mounting..............................................................11
Fig. 4 – Gateway Hanging .....................................................................................11
Fig. 5 – Direct PC Connection Using USB............................................................13
Fig. 6 – Direct PC Connection Using RS232 ........................................................14
Fig. 7 – LAN Connection.......................................................................................14
Fig. 8 – RJ-45 Wiring for LAN Connection..........................................................14
Fig. 9 – Antenna Connection .................................................................................15
Fig. 10 – Supply Adapter Connection....................................................................16
Fig. 11 – SIM Card Inserting Procedure................................................................17
Fig. 12 – Signalling LEDs .....................................................................................18
Fig. 13 – Motherboard Diagram ............................................................................21
Fig. 14 – SIP – H.323 Network Interconnection....................................................28
Fig. 15 – Point-to-Point Configuration with SIP VoIP Telephone........................29
Fig. 16 – Point-to-Point Configuration with VoIP Gateway .................................29
Fig. 17 – Point-to-Multipoint Configuration..........................................................30
Fig. 18 – SIP Message Sending while Connection Establishing and Terminating36
Fig. 19 – Routing of Outgoing GSM Calls............................................................40
Fig. 20 – Incoming Call Processing Procedure......................................................43
Fig. 21 – Gateway Selecting Window ...................................................................47
Fig. 22 – Gateway Editing Window.......................................................................47
Fig. 23 – GSM Program Basic Menu.....................................................................49
Fig. 24 – Communication Setting Window ...........................................................52
Fig. 25 – Firmware Window..................................................................................53
Fig. 26 – Key Finding and Loading Window ........................................................55
Fig. 27 – Login Account Window .........................................................................55
Fig. 28 – Date and Time Setting Window .............................................................56
Fig. 29 – Tracing Window.....................................................................................57
Fig. 30 – Window of Terminal Integrated in Configuration Program...................58
Fig. 31 – Voice Message Recording Guide ...........................................................59
Fig. 32 – Configuration File Loading and Saving Window...................................60
Fig. 33 – System Parameters Window...................................................................60
Fig. 34 – Ethernet Parameter Configuring Window..............................................62
Fig. 35 – Basic GSM Parameter Setting Window .................................................64
Fig. 36 – Group Assigning Window......................................................................65

Fig. 37 – Outgoing Group Setting Window...........................................................66
Fig. 38 – Incoming Group Setting Window..........................................................69
Fig. 39 – GSM Calling Group Defining Window.................................................72
Fig. 40 – LCR table ...............................................................................................73
Fig. 41 – LCR table Completion............................................................................73
Fig. 42 - Autorouting table ....................................................................................75
Fig. 43 – Add/edit autorouting numbers...............................................................75
Fig. 44 – Diagnostics.............................................................................................77
Fig. 45 – Call Information Displaying Window....................................................78
Fig. 46 – Scheme of external Routing system.......................................................81
Fig. 47 – Main XAPI server window ....................................................................82
Fig. 48 - Communication configuration ................................................................82
Fig. 49 - SMS setup window .................................................................................83
Fig. 50 - Status of GSM modules ..........................................................................83
Fig. 51 - Entering the licence................................................................................84
Fig. 52 - New user window ...................................................................................85
Fig. 53 - New user account properties...................................................................86
Fig. 54 - Voice Callback centre settings................................................................87
Fig. 55 - Communication LOG..............................................................................87
Fig. 56 - New user .................................................................................................88
Fig. 57 - User Groups ............................................................................................88


2N - VoiceBlue Lite
1
SECTION 1 –
Product Presentation
Here is a survey of what you will find in this section:
•Purpose
•How to Cut Telephone Costs
•Other Advantages and Applications
•RF Radiation Safety Precautions
3

1.1. Purpose
•The 2N - VoiceBlue Lite gateways help interconnect SIP based
VoIP networks directly with GSM networks. They can also be
used for a direct connection with a VoIP telephone set.
•The voice mode, i.e. an outgoing or incoming call, is the basic
function of the system. The gateway is equipped with all
functions necessary for such use and provides a very high
comfort in this mode.
•In addition to voice transmission, the 2N - VoiceBlue Lite
gateways enable to send and receive SMS messages.
•No extra equipment (an external GSM telephone, etc.) is
needed for normal operation. To set the basic parameters use
the configuration software included in the product CD. All
programmable parameters are default-preset in such a manner
that you can commence your telephone traffic the moment you
connect the Ethernet and supply cables, antenna and SIM card
and set the GSM and VoIP parameters.
1.2. How to Cut Telephone Costs
•Once you connect the 2N – VoiceBlue Lite gateway to your
VoIP PBX, you can make all outgoing calls to a mobile
network directly. Thus, you cut your PSTN - mobile network
call costs. All mobile telephone calls from your personnel in
the field are cheaper too.
•You are advised to use the most advantageous rate of your
GSM provider for your GSM gateway because all gateway
user call accounts are added up for billing purposes.
•You can bar selected numbers or groups of numbers in your
gateway. You shall pay nothing for the calls you have
barred.
•2N - VoiceBlue Lite keeps detailed records on all calls. This
helps you find out easily why your bill is higher than it
should be.
•The Least Cost Router is flexible enough to help you set rules
for GSM calling at the lowest possible operation costs.
4

2N - VoiceBlue Lite
•The intelligent Callback function enables your personnel to
call at the cost of your GSM gateway SIM cards.
1.3. Other Advantages and Applications
•2N - VoiceBlue Lite integrates the best of the GSM and VoIP
communication technologies.
•The GSM gateway keeps detailed statistics on incoming and
outgoing calls.
•With the Compact Flash memory you get an almost unlimited
depository for your call records.
•The Intelligent Routing of Incoming Calls function
accelerates the incoming call establishing and provides a higher
calling comfort.
•The DISA function with the option to record easily a welcome
note is available.
•You can use the conditioned or unconditioned call forwarding
function.
•You can disable the CLIP function on your GSM telephone set.
•Unlike mobile telephones, this system does not expose you to
the RF electromagnetic field while making calls.
•All functions may be configured through the Ethernet, USB
and serial interfaces.
•With the aid of external software, you can implement your
VoiceBlue Lite gateway into the Unified Messaging system of
your company.
5

1.4. RF Radiation Safety Precautions
It is prohibited to use any transmitters, including
VoiceBlue Lite, in areas where explosives are used,
such as quarries.
It is forbidden to use mobile phones and thus
VoiceBlue Lite too at refuelling points.
A GSM gateway may affect sensitive life-saving
devices in medical centres. So it is prohibited to use
mobile phones and thus VoiceBlue Lite here.
In general, any restriction regarding mobile phones
b
ased on RF energy radiation applies to GSM
gateways.
Where necessary, VoiceBlue Lite may be installed
at a safe distance (in the neighbouring building, e.g.)
and an Ethernet cable may be carried from the GSM
gateway to the original building.
Although GSM gateways are not intended for
aircraft or cars, all relevant restrictions and
regulations regarding mobile phones apply to them
here.
6

2N - VoiceBlue Lite
2
SECTION 2 –
Installation
This section deals mainly with the proper mounting of the 2N -
VoiceBlue Lite and its connectors. One subsection is devoted to
the lithium battery replacement.
Here is a survey of what you will can in this section:
•Get Started
•Brief Installation Guide
•Proper Mounting
•PC or LAN Connection
•Antenna Connection
•Gateway Power Supply
•SIM Card Installation/Removal
•PIN Entering Disable (Optional)
•Status Indicators
7

•Lithium Battery Replacement
•Fuse Replacement
•Antenna Splitter
2.1. Get Started
Before you start installing your VoiceBlue Lite gateway, get
familiar with its physical structure, arrangement of connectors and
status indicators; see Fig. 1, Fig. 2, and Fig. 12.
Fig. 1 – Bottom View
8

2N - VoiceBlue Lite
Fig. 2 – Top View
2.2. Brief Installation Guide
•Proper mounting – 2N – VoiceBlue Lite is designed for
suspension on a vertical surface. Fit the holder included in the
delivery on a wall and hang the gateway on it. For details on
the prescribed working position and other recommendations
refer to Subs. 2.3.
•Cable connection – connect the gateway using an Ethernet
cable to your VoIP PBX (or any other VoIP terminals). For
more details on proper wiring refer to Subs. 2.4.
•Antenna connection – connect an external antenna cable into
the SMA antenna connector. Place the antenna on a place with
a good GSM signal (refer to Subs. 2.5).
•Gateway power supply – the delivery includes a mains
adapter. Make sure that an antenna has been attached to the
antenna connector before supplying voltage. Plug in the
adapter connector into the GSM gateway and the power
adapter into a wall socket. The gateway turns on immediately
(see Subs. 2.6).
9

•SIM card insertion – SIM cards are inserted in holders on the
gateway top. The SIM card holder is of the push/pull type,
which means that all you have to do is insert a SIM card and
press the holder gently until it snaps into position (see Subs.
2.7). Secure the SIM card with a latch to avoid incidental
removal. !CAUTION! If you use PIN-asking SIM cards, first
set an identical PIN code for all SIM cards used in the GSM
gateway, save it into the GSM gateway configuration and only
then insert the SIM cards in the GSM gateway.
•PC connection – the gateway parameters are normally set
using the configuration software available on the CD included
in the delivery. To interconnect your PC with 2N - VoiceBlue
Lite use the USB cable
*
or laplink RS 232 cable
**
included in
the delivery.
•Configuration program installations - run the installation
file from the installation CD on a PC connected to the
gateway and install the VoiceBlue Lite configuration software
(refer to Subs. 0).
•Configuration program - run the VoiceBlue Lite program and
set the serial port communication for your PC - gateway
connection. Establish communication between your PC and the
gateway (refer to Subs. ).
•2N - VoiceBlue Lite configuration - now use the
configuration software to set all necessary gateway parameters
- VoIP parameters basic GSM parameters and tariff
metering/pricing parameters, routing, restrictions, system
parameters, and input and switch properties. Having set the
required parameters, upload the configuration data to the
gateway via a serial link. For more details on the configuration
software see Section 8.
*
Be sure to install the drivers available on the CD included when you use a USB cable.
**of the same type as used for direct PC-PC connection.
10
Other manuals for VoiceBlue Lite
2
Table of contents
Other 2N Gateway manuals
Popular Gateway manuals by other brands

Multitech
Multitech MultiVOIP 800 MVP800 quick start guide

Multitech
Multitech Conduit 300 Series Hardware guide

Intempco
Intempco CX5000 manual

Paradox
Paradox R885S Installation and operating instructions

Peripheral Electronics
Peripheral Electronics SIMPLE PGHGM3 owner's manual

Peripheral Electronics
Peripheral Electronics PGHTY1 owner's manual