1 Juwel-200624-Rev010-UM-en
CONTENT
0.
FIGURES ...................................................................................................................................................2
1.
FOREWORD..............................................................................................................................................4
2.
INTENDED USE ........................................................................................................................................4
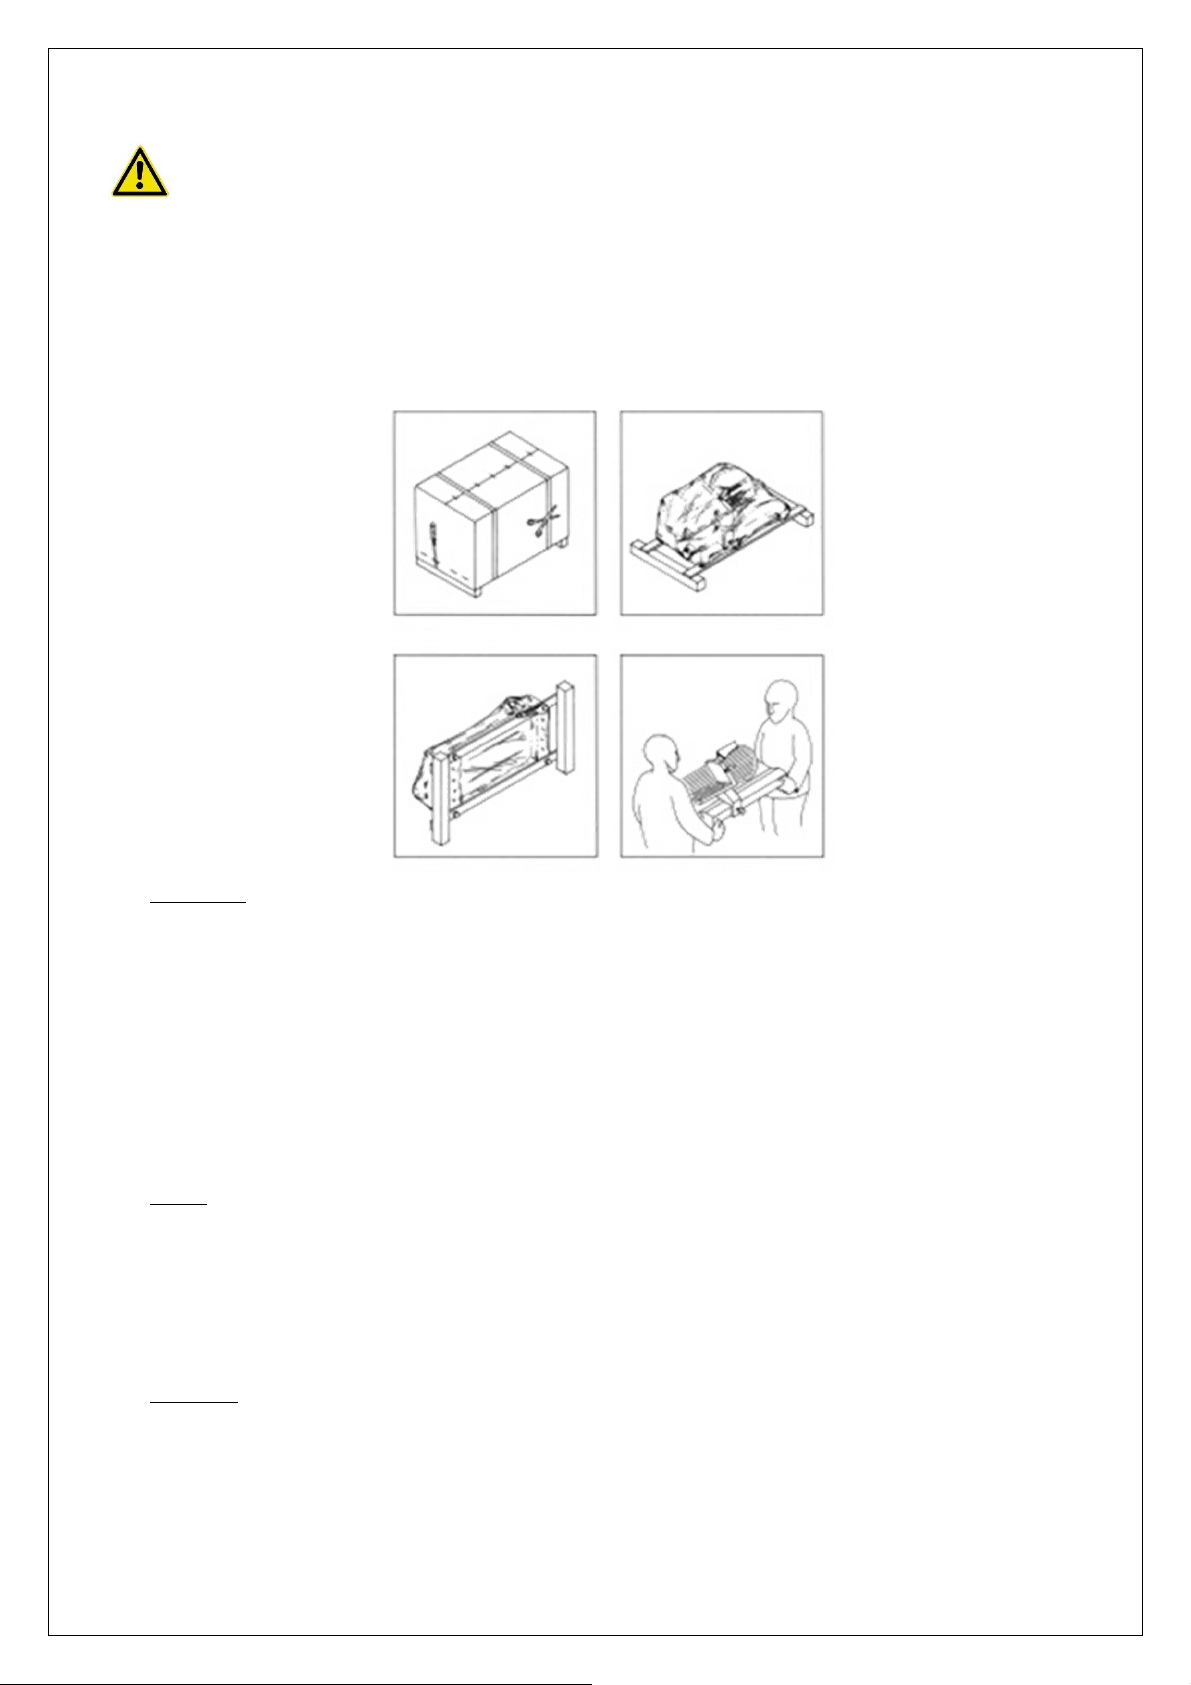
3.
PREPARATION AND OPERATION ..........................................................................................................4
3.1
Opening the packaging ..............................................................................................................................4
3.2
Installation ..................................................................................................................................................5
3.3
Wiring .........................................................................................................................................................5
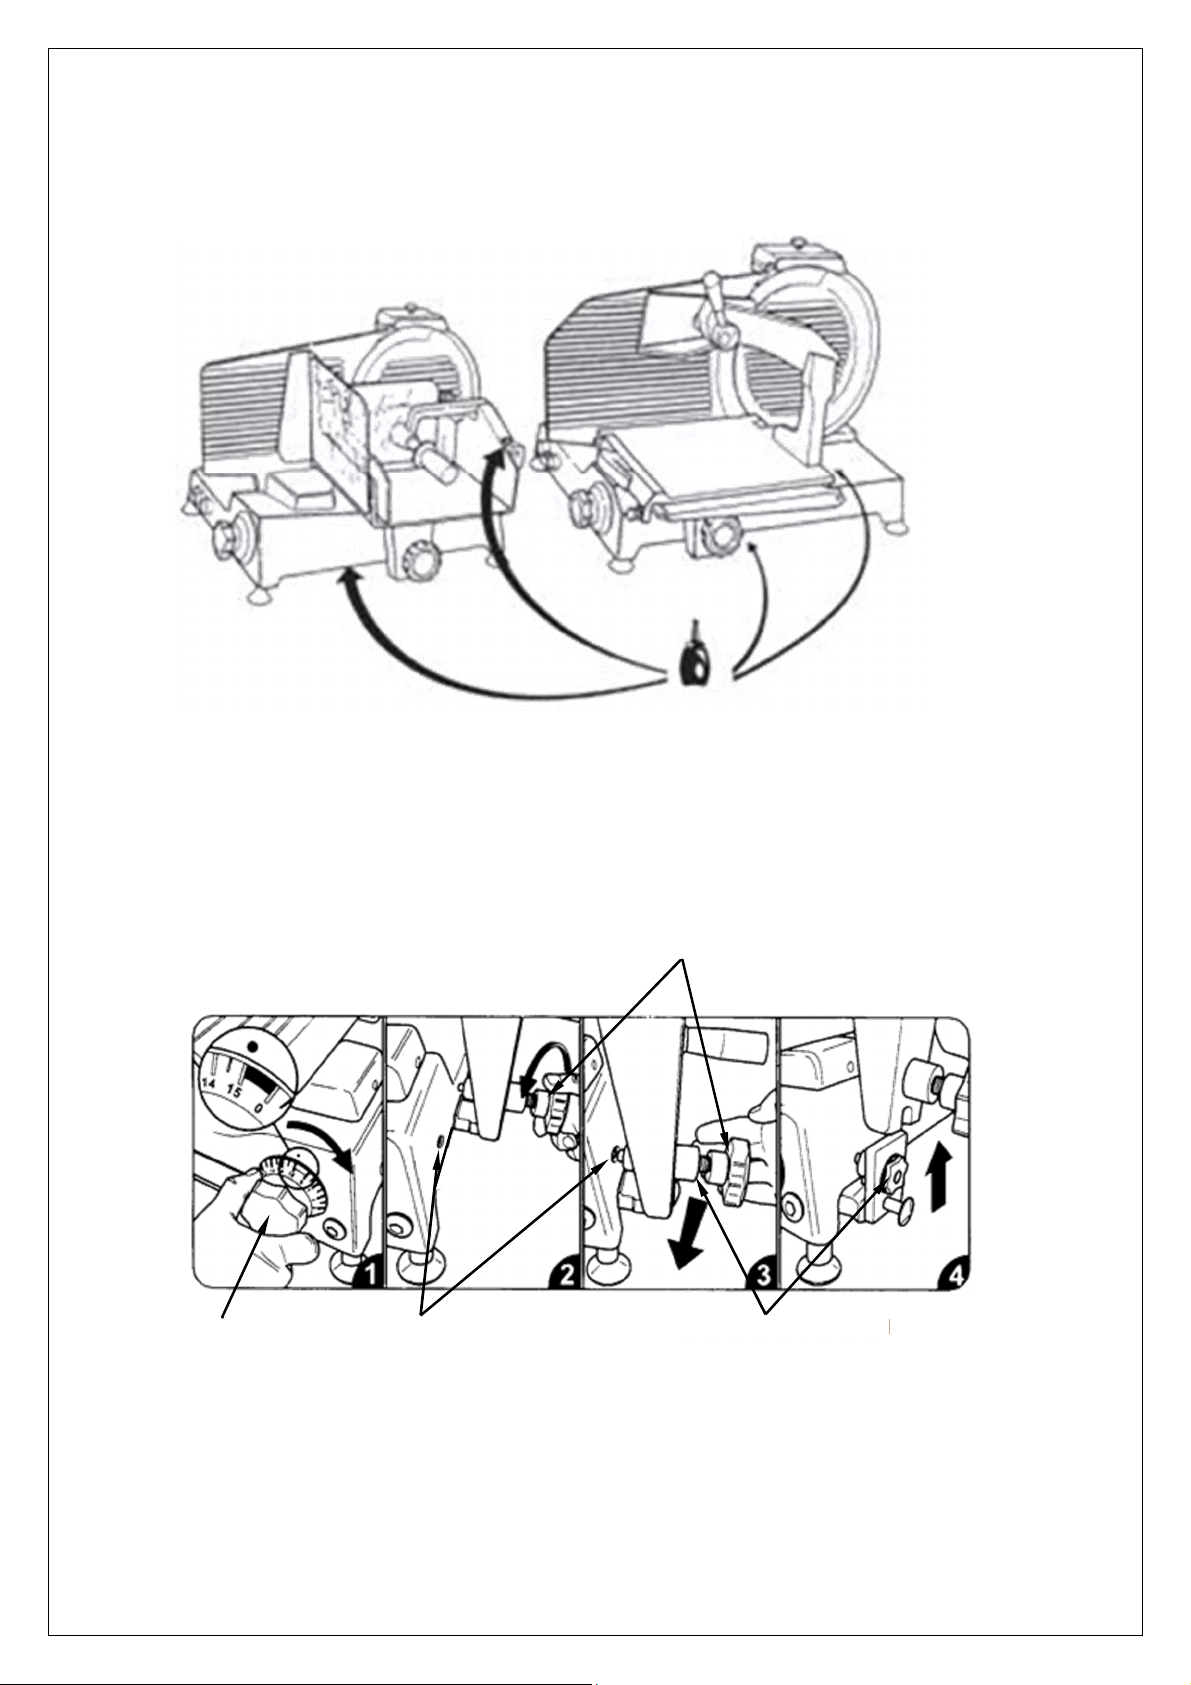
3.4
Operation ...................................................................................................................................................5
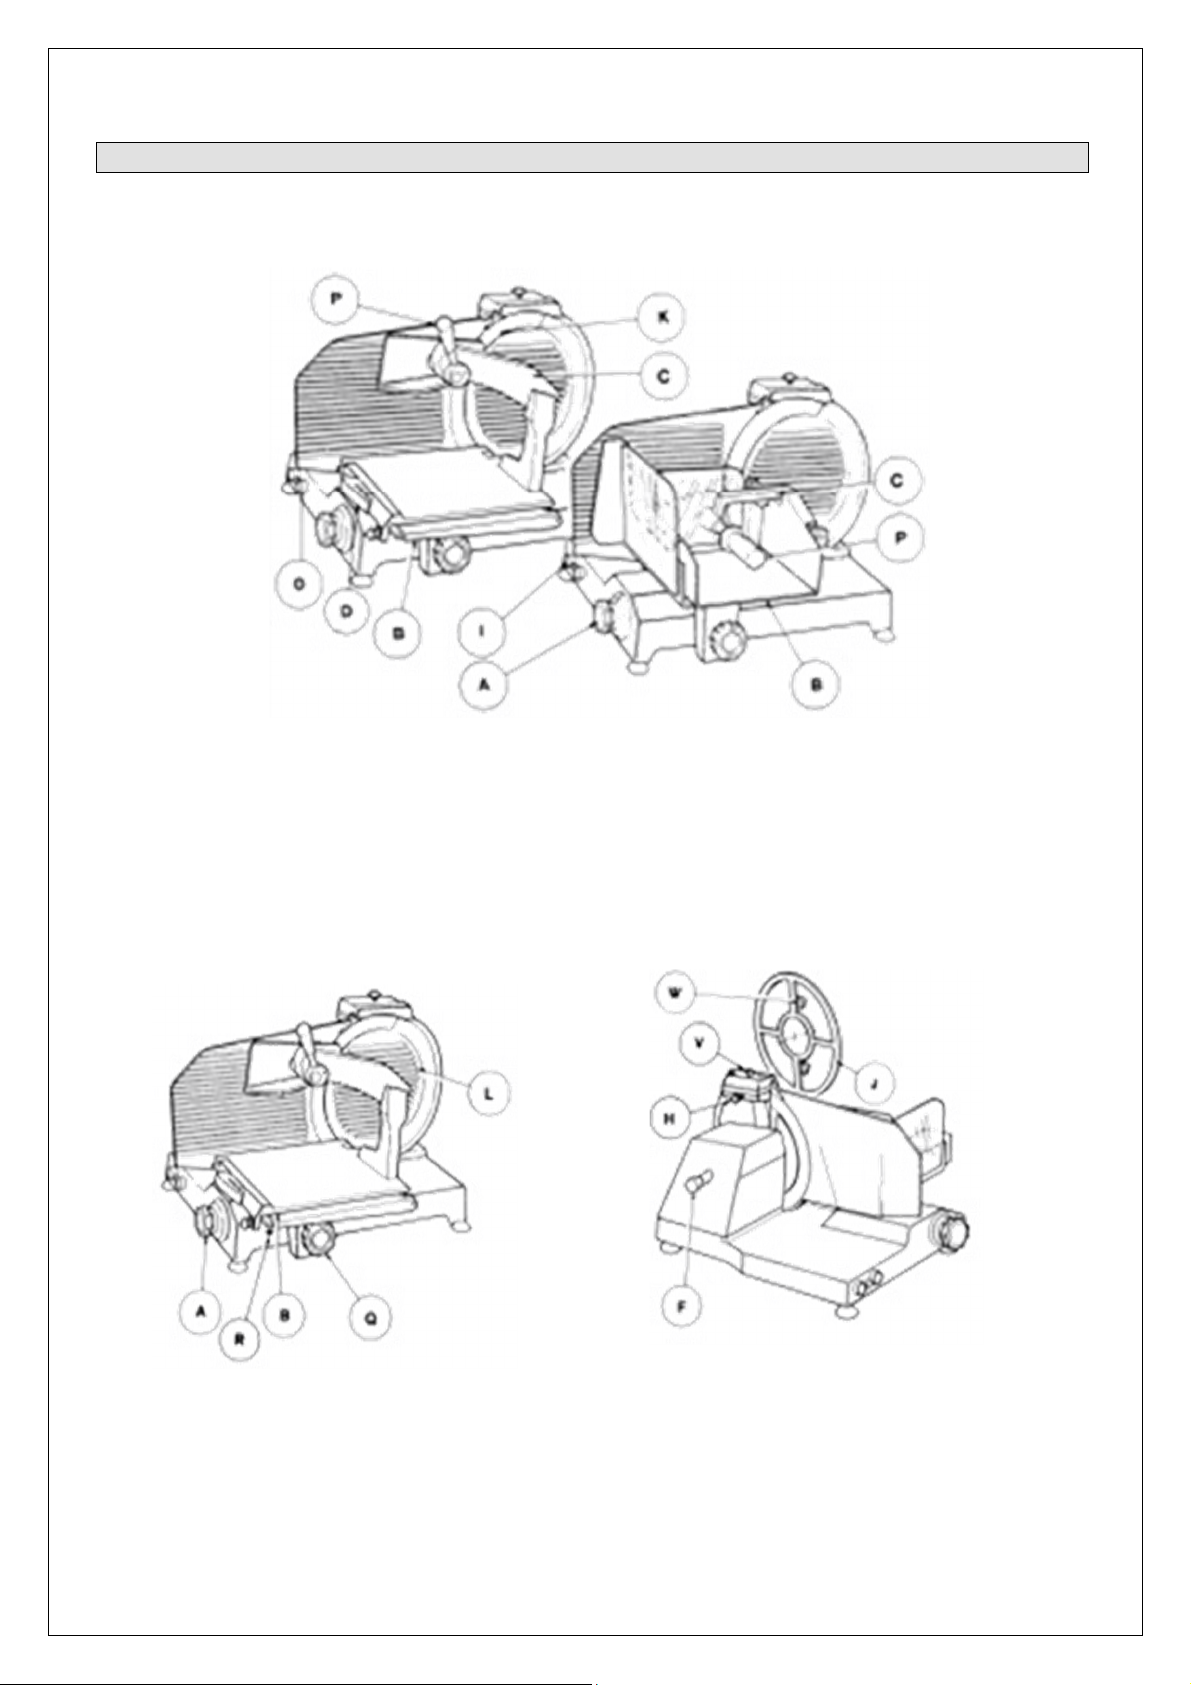
4.
CONTROLS AND SAFETY DEVICES ......................................................................................................6
4.1
Controls......................................................................................................................................................6
4.2
Mechanical safety devices .........................................................................................................................6
4.3
Testing .......................................................................................................................................................6
5.
USING THE SLICER .................................................................................................................................7
5.1
Operating procedure ..................................................................................................................................7
6.
MAINTENANCE AND CARE OF THE SLICER.........................................................................................7
6.1
Cleaning .....................................................................................................................................................7
6.2
Lubricating..................................................................................................................................................8
7.
SHARPENING OPERATIONS...................................................................................................................8
7.1
Sharpening blade.......................................................................................................................................8
8.
CLEANING AND MAINTENANCE.............................................................................................................9
9.
TRAINING ................................................................................................................................................10
10.
WARRANTY.............................................................................................................................................10
11.
TECHNICAL FEATURES ........................................................................................................................11
12.
CE – Declartion of conformity ..................................................................................................................11
13.
WIRING DIAGRAMS ...............................................................................................................................12
14.
EXPLODED VIEWS.................................................................................................................................13
15.
SPARE PARTS SERIES JUWEL ............................................................................................................19