Do not drag the assembled unit across any surface.•
This product requires only periodic cleaning with a sponge and a solution of mild detergent and water to•
remove surface dirt. Do not clean with a solvent or petroleum based products.
Furniture must not be used other than for its intended purpose and should be inspected regularly for loose,•
missing, or broken hardware, and general instability.
Furniture that is damaged or appears to be unstable must be removed from service and be repaired or replaced.•
Repairs must be made using only factory authorized parts and methods.•
WARNING
CARE AND
MAINTENANCE
211 North Lindbergh Blvd.
St. Louis, MO 63141
tel: 888.535.5005
web: anovafurnishings.com
10/2012
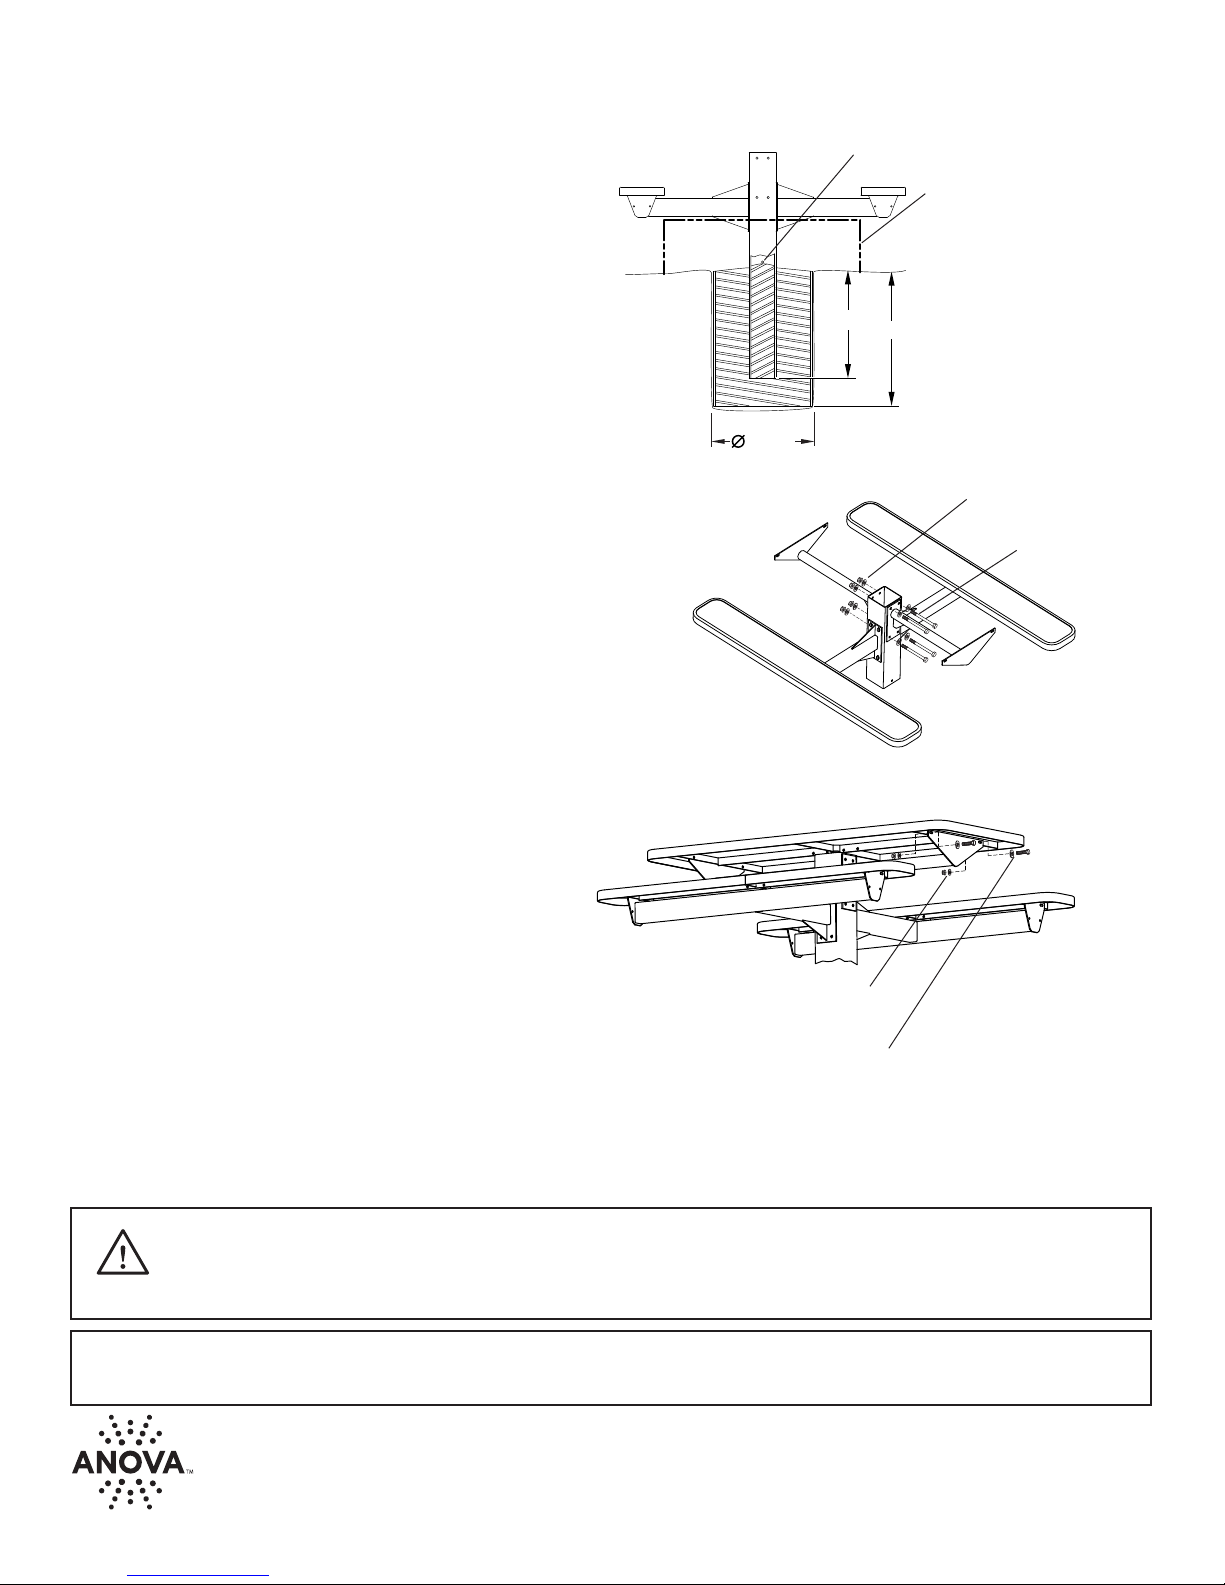
Ground Level
24.00”
24.00”
30.00” MIN
Temporary Structure to hold
the assembly vertical, level,
and at the correct height
Drain Hole
1/2” Washer
1/2” Flanged Nut
7.5” Long Bolt
1/2” Washer
5/16” Washer
5/16” Flanged Nut
1.25” Long Bolt
5/16” Washer
6. The walls of the concrete base should be vertical and smooth
to minimize the eects of frost upheaval. This can be achieved
with the use of concrete forms, such as Sonotube. Consider
extending the concrete base below the frost line. Consult a
professional for loose or unusual soil conditions.
7. Create a Temporary Structure that will be used to support the
Inground Support Assembly, at the desired height and level,
while the concrete is curing.
8. Fill the form with concrete and insert the Inground Support
Assembly, centered in the concrete, until the Seat Supports
are supported by the Temporary Structure. Allow the interior
of the Inground Support to ll with concrete up to the Drain
Hole. Crown the concrete cap to optimize drainage. Allow the
concrete to cure before attaching the Table Top Supports.
9.
Aer the concrete has cured, the installation hole is backlled,
and the Temporary Structure is removed, use the
Ratchet with
1/2” Socket and the 1/2” Open or Box End Wrench to tighten
the Seat hardware.
Check with a Level and adjust the Seats as
needed while tightening.
10. L
ocate the Table Top Supports and position them on opposite sides of
the Inground Support, in the proper orientation. Align the mounting
holes in the Table Top Supports with those in the Inground Support.
Place one of the 1/2” Washers on one of the 7.5” long Bolts and insert
the Bolt through both Table Top Supports and the Inground Support
mounting holes. Apply a 1/2” Washer and 1/2” Flanged Nut to the
end of the Bolt and tighten nger tight. Repeat for the other three
mounting holes. Aer all Bolts are installed, use the Ratchet with 3/4”
Socket and the 3/4” Open or Box End Wrench to tighten the Nuts.
11. Locate the Table Top and carefully place it on top of the
Table Top Supports. Place one of the 5/16” Washers on
one of the 1.25” long Bolts and insert the Bolt through
the mounting holes in the Table Top Support and Table
Top frame. Add one of the 5/16” Washers and 5/16”
Flanged Nuts to the end of the Bolt and tighten nger
tight.
Repeat for the other mounting hole in that end of the
Table Top. Fasten the other end of the Table Top to the
other Table Top Support in the same manner.
Aer all bolts are installed,
use the Ratchet with 1/2”
Socket and the 1/2” Open or Box End Wrench to tighten
the Nuts.
Check with a Level and adjust the Table Top as
needed while tightening.
12. Retighten all hardware two weeks aer initial assembly.
5. Determine the location for the Table.
IMPORTANT: Locate underground utilities and avoid them while digging the hole for the concrete base.


