manuals.online logo
Brands
  1. Home
  2. •
  3. Brands
  4. •
  5. ARB
  6. •
  7. Automobile Accessories
  8. •
  9. ARB SA290AA290 User manual

ARB SA290AA290 User manual

Congratulations on your purchase of a StealthBar.
Additional Kits:
-SA290CRK (Camera Housing/Radar Kit) 30 min. -SA290ALK (Aerial Mount Left Kit) 5 min.
-SA290RHK (Radar Housing Kit) 15 min. -SA290ARK (Aerial Mount Right Kit) 5 min.
-SA290FLK (Fog Light Kit) 30 min. -SAHLJ1 (High Lift Jack Point) N/A
FITTING INSTRUCTIONS
CAUTION A torque specification is required for the bolts into the StealthBar nutserts.
THESE MUST NOT BE OVERTIGHTENED.
!
SmartBar - Fitting Instructions FI-290-I © Copyright W. www.smartbar.com.au E. [email protected] P. +61 8 8384 0292 - 481
SRS
AIRBAG
AS
4876.1 ADR
PROUDLY
AUSTRALIAN MADE
Warning:
• Do not attach VFPS to the vehicle using anchorages not intended for this purpose (e.g.
engine mounting bolts).
• Do not use this product for any vehicle make or model, other than those specified by the VFPS
manufacturer.
• Do not remove the plaque or label from the VFPS (StealthBar).
• Do not modify the structure of the VFPS in any way.
Note:
• Left and Right hand sides of the vehicle and StealthBar are from the view of being in the
drivers seat looking forward.
• Please take the time to read the instructions thoroughly before proceeding with fitment of the
StealthBar.
• Ensure all components, as listed in the bill of materials on the back page, are received prior to
commencing the fitment. Please retain all hardware until fit-up is complete.
• All wiring should be completed by a qualified auto electrician. SmartBar bears no
responsibility for any electrical failure caused by the incorrect fitment of the lamps.
• Ensure these fitting instructions are passed onto the vehicle owner and/or operator.
• We recommend the use of anti-seize on all threaded fittings.
Document Title:
FI-290
Application:
Ford Ranger MY22
Ford Everest MY22
Model Number:
StealthBar
SA290AA290 Standard / Non-Parking Sensor
SA290AA291 Winch / Non-Parking Sensor
SA292AA290 Standard / Parking Sensor
SA292AA291 Winch / Parking sensor
Fitting Time:
Minimum 4.5 Hours
Revision:
I (08 December 2022)
Tools Required
SmartBar and Mounting Brackets Overview - SA290BK/SA291BK
Bolt Size Torque (Nm) Torque (lb/ft)
M10 28 20
M12 55 40
Bolt Size Torque (Nm) Torque (lb/ft)
M10 44 32
M12 78 57
Torque Specs (into SmartBar Nutserts) Torque Specs (Metal to Metal Mounts)
SmartBar - Fitting Instructions FI-290-I © Copyright W. www.smartbar.com.au E. [email protected] P. +61 8 8384 0292 - 482
Drill and Phillips
Head Drill Bit
Tape Measure
or Ruler
Phillips Head
Screw Driver
Socket 8, 10, 12,
14, 15, 16, 18mm
Socket Drive
Torque Wrench
(20-80Nm)
Masking
Tape
Ring Spanner 16mm
Rachet Spanner 16mm
Rachet Spanner 18mm
13mm Drill Bit
Small Flat Head
Screw Driver
Marker
Socket Extension
T20 & T40
Torx Head
Multi-Tool to Trim the
Bumper
290-MC
Vehicle Chassis Rails
290-BL
290-CR
290-CL
290-CT
290-UL
290-HL
290-HR
290-UR
290-LR
290-UM
290-LL
290-TL
290-GL
290-OR
291-WB
290-GR
290-OL
290-UM
290-TR
Winch Only
SA290 or
SA292
291-AB
290-AML
Standard Only
290-SB
290-UC
290-BR
190-ABS
290-GB
SmartBar - Fitting Instructions FI-290-I © Copyright W. www.smartbar.com.au E. [email protected] P. +61 8 8384 0292 - 483
Note: Do not discard removed hardware and components until the installation is complete.
1.1 Remove Scrivets shown to remove the top cover from the vehicle.
1.2 Remove number plate and number
plate retainer from the vehicle.
Note: Keep the number plate in a safe
and secure place for re-installation.
1.2
Step 1: Vehicle Disassembly
1.1
1.3 Remove bolt under the bumper.
Repeat on the other side.
1.3
Ranger RHS Shown
Remove OE Bolt
on both sides
Everest RHS Shown
Remove OE Bolt
on both sides
Remove
Remove
SmartBar - Fitting Instructions FI-290-I © Copyright W. www.smartbar.com.au E. [email protected] P. +61 8 8384 0292 - 484
Everest Shown for reference
1.4
1.4 Remove front skid pan by removing
bolts shown.
1.5
1.5 Remove the top 2 bolts that secure the
grille to the vehicle.
Repeat on other side.
1.6
1.6 Gently unclip and remove Grille from
vehicle.
Note: Set grille aside on a soft surface to
avoid damage.
1.7
1.7 If present, disconnect main grey
connector plug on top of the grille & unclip
harness from vehicle.
Main grey connector
RHS Shown
LHS Shown
Top of the grille shown
SmartBar - Fitting Instructions FI-290-I © Copyright W. www.smartbar.com.au E. [email protected] P. +61 8 8384 0292 - 485
1.9 Check if the scale on the trim template
is correct. If not, contact your nearest ARB
store.
Cut the bumper trim template out.
1.9
1.10 Cover area with masking tape. Align
the bumper trim template to the vehicle.
Mark trim line as shown.
Cut along marked line, and with side cutters,
to cut the remaining bumper, 10mm next to
light.
Repeat on the other side.
Do not damage the headlights.
1.10
Mark trim line
RHS Shown
Top of the grille shown
1.8
1.8 If vehicle is equipped with front
camera, disconnect the coax camera cable,
and camera washer hose from the car. Washer hose
Coax camera cable
1.11 Removelowerwheelareocutsto
access scrivets underneath and remove.
Repeat on right hand side.
1.11
RHS Shown
Wheelarch Liner
!
SmartBar - Fitting Instructions FI-290-I © Copyright W. www.smartbar.com.au E. [email protected] P. +61 8 8384 0292 - 486
1.12
1.12 Remove the lower part of the trimmed
bumper from the vehicle.
Note: Ensure that all wiring and hardware
has been disconnected from the vehicle.
1.13
1.13 Label and remove parking sensor/fog
light harness from the vehicle.
Note: Sensors must be labelled correctly to
successfully re-install later.
1.14
1.14 Remove foam impact absorber from
chassis.
Remove
1.15 Remove Tape from previous steps.
Pullwheelarcharebackfromthebumper
trim and cut 10mm up from the trimmed
edge as shown
1.15
RHS Shown
Bumper Trim
Flare
Cut from trimmed edge.
10mm
SmartBar - Fitting Instructions FI-290-I © Copyright W. www.smartbar.com.au E. [email protected] P. +61 8 8384 0292 - 487
Pinch
Weld
Outside of
Bumper
Retaining
barb on
inside of
bumper
1.16 Applypinchweldtobumperandare.
Trim away excess pinch weld as shown.
Note: Recomended to cut 2cm section on the
back of the pinch weld, as shown.
Repeat on right hand side.
1.16
2cm
LHS Shown
Inside edge of pinch weld.
Trimmed pinch weld
1.18
1.18 Remove scrivets and black plastic cover
from radar module.
1.17 Locate the radar wiring loom near the
Left hand side of the vehicle’s intercooler
and unclip the christmas tree clips.
Thiswillallowtheslackrequiredtotthe
sensor to the Bar.
Remove
1.17
1.19
1.19 Disconnect radar wiring.
Disconnect
SmartBar - Fitting Instructions FI-290-I © Copyright W. www.smartbar.com.au E. [email protected] P. +61 8 8384 0292 - 488
1.20
1.20 Remove radar from bracket by gently
unclipping radar from ball point mounts as
shown.
DO NOT DAMAGE THE RADAR
Note: Store radar in a safe and safe place for
re-installation.
!
1.22a Cut the OE radar bracket as shown.
Front LHS Shown
1.22a
Cut Line
1.21 Remove from crash beam from the
vehicle.
1.21
OE Bolts X6
1.22b Cut the OE radar bracket as shown.
Discard the crash beam
Back RHS Shown
Cut Line
1.22b
SmartBar - Fitting Instructions FI-290-I © Copyright W. www.smartbar.com.au E. [email protected] P. +61 8 8384 0292 - 489
1.23 The cut radar bracket should now
appear as shown.
Touch up the cut surface with rust
preventative paint (not supplied).
Put the cut bracket aside for re-installation
in later steps.
1.23
Apply rust preventative paint to cut surface
1.24
Remove
Finished Cut
1.28
Ford Ranger MY22 Only
1.25a Measure, mark and drill a 6mm
diameter hole in the lower intercooler
brackets, 8mm above the original hole.
1.25a
Cut Line
RHS Towpoint Shown
Winch Kit Only
1.24 Trim the front of the centre grille
support mount.
⌀6mm
8mm
1.25
1.22c CuttheOEradarbracketothecrash
beam along the cut lines shown. 1.22c
Cutushedto
this edge
Cut Line
Behind crash beam
SmartBar - Fitting Instructions FI-290-I © Copyright W. www.smartbar.com.au E. [email protected] P. +61 8 8384 0292 - 4810
1.26
1.26 Cut Airdam as shown and repeat on
left hand side.
Cut Line
Remove
RHS Shown
Winch Kit Only
1.27 Trim front of radiator air dam.
1.27
Cut Line
Remove
1.28
Ford Ranger MY22 Only
1.28 Loosen the horn retaining brackets and
relocate to clear the wing brackets as shown.
Re-tighten to 9Nm.
RHS shown
Relocate here
Ford Everest MY22 Only
1.25b Measure, mark and drill a hole in the
lower slot of the intercooler cover as shown.
1.25b
LHS Towpoint Shown
Before After
⌀8mm
4mm
SmartBar - Fitting Instructions FI-290-I © Copyright W. www.smartbar.com.au E. [email protected] P. +61 8 8384 0292 - 4811
1.30
If installing recovery point skip this step
and refer to step 2.5.
1.30 If not installing an ARB Recovery Point,
remove original rubber grommets from the
base of the intercooler.
Repeat on the left hand side.
RHS shown
OE Remove
OE Rubber Grommet
1.31
1.31 Replace the removed grommets with
the grommets supplied with the bar kit.
Note: When pushing the intercooler up,
ensure to align the top rubber grommet in
its hole.
RHS shown
Supplied
Supplied Rubber Grommet
Bumper retainer bracket
1.32 Remove lower bumper retainer bracket
and hardware.
Repeat on right hand side.
1.32
LHS Shown
1.29 Remove Tow Points from vehicle.
Repeat on right hand side.
Note: Using a transmission jack or similar,
support the intercooler.
1.29
Underside LHS chassis shown
OE TOW POINT
Remove Bolts X2
SmartBar - Fitting Instructions FI-290-I © Copyright W. www.smartbar.com.au E. [email protected] P. +61 8 8384 0292 - 4812
Step 2: Bracket Installation
290BK
291BK
Standard Kit (Non-Winch)
Winch Kit
2.2
Winch Kit Only
2.2 Slide 290-CL over the chassis using the
hardwareshown.Onlyngertighten.
Repeat on right hand side.
LHS shown
290-CL
M8X20 Bolt X3
M8 Round Washer X3
M8X50 Bolt X2
M8 Round Washer X2
Chassis
M8 Lock Nut X2
2.1
Standard Kit Only.
Leaveallhardwarelooseuntilspecied
2.1 Slide 290-CL over the chassis using the
hardwareshown.Onlyngertighten.
Repeat on right hand side.
LHS shown
M8X20 Bolt X5
M8 Round Washer X5
M8 Lock Nut X2
290-CL
Chassis
SmartBar - Fitting Instructions FI-290-I © Copyright W. www.smartbar.com.au E. [email protected] P. +61 8 8384 0292 - 4813
2.4 If not installing a recovery point,
re-install the OE tow point under the 290-CL
bracket as shown.
Repeat on right hand side.
OE TOW POINT
M12X50MM BOLT X2
2.4
LHS shown
2.3 Install a cage nut to both 290-UM
brackets provided.
Note: Cage nut must face upwards for
installation.
2.3
290-CL 290-UM
Cage Nut on top
M10 SQUARE CAGE NUT
290-UM (LHS)
290-UM (RHS)
Recovery Point Install Only
2.5 If installing an ARB Recovery Point,
install over the top of the 290-CL (Left) or
290-CR (Right)
LHS shown
2.5
Locate between
290-CL and
Recovery Point
LH ARB RECOVERY POINT
290-UM
M8X50 Bolt X5
M8 Round Washer X5
290-CL
M12 X 50MM BOLT X2
2.6 Fasten intercooler to OE tow points or
ARB recovery points as shown.
NOTE:IfnotttingtoARBrecoverypoints,
attach to OE tow points instead.
2.6
ARB Recovery Points shown for reference only
M6x20 X2
M6 Washer
M6 Lock Nut X2
SmartBar - Fitting Instructions FI-290-I © Copyright W. www.smartbar.com.au E. [email protected] P. +61 8 8384 0292 - 4814
LHS rear chassis shown
M8 Lock Nut X2
290-CL
2.7
Winch Kit Only
2.7 Slide the 290-OL into place. Using
hardware shown, secure the 290-OL
bracket to the chassis.
Repeat on the other side.
Note: 290-OL and 290-OR are not mirrored
parts, locate Land Ron brackets for correct
side.
290-OL
Slide in
2.8
LHS shown
290-CL
2.8 Tighten all hardware from 2.1 to 2.7
Repeat on the other side.
Ensure bracket is aligned to both front
and base of the chassis, then tighten all
fastenersaspertorquespecication.
NOTE: Recovery point shown for reference
only.
Recovery point shown for reference only
!
290-UM, locate
between 290-CL
and Recovery Point
2.10
2.10 Install the 290-TL to the top of the
290-CL using the hardware shown.
Repeat on right hand side.
NOTE: 290-OR & 290-OL not required for
standard kit
290-TL
LHS rear shown
290-OL
M10X30 Bolt X2
M10 Round Washer X2
M10 Lock Nut X1
290-CL
2.9
2.9 Insert 290-CT (Crush tube) into chassis.
Winch Kit: fasten 290-LL to the 290-OL
through chassis using the hardware shown.
Standard Kit: fasten 290-LL through to
chassis directly using the hardware shown.
Leave hardware loose.
Repeat on right hand side. LHS rear shown
290-LL290-OL
M10X100 Bolt X1
M10 Round Washer X2
290-CL
290-CT
(Crush tube)
M10 Lock Nut X1
Through chassis
SmartBar - Fitting Instructions FI-290-I © Copyright W. www.smartbar.com.au E. [email protected] P. +61 8 8384 0292 - 4815
2.12
290-SB
Standard Kit only.
2.12 Install 290-SB using hardware shown.
Repeat on the other side.
Tighten both sides to 44 Nm.
M10 WASHER X3
M10X30 BOLT X3
LHS shown
290-CL
LHS rear shown
M10X30 Bolt X2
M10 Round Washer X2
290-TL
290-LL
2.11 Using hardware shown, install the
290-TL to 290-LL.
Leave hardware loose.
Repeat on right hand side.
NOTE: Ensure bolt heads are facing down for
tightening later.
2.11 M10 Lock Nut X2
M10 Lock Nut X3
2.14 If the control box did not come
attached to the winch, attach control box
above the winch.
NOTE: If control box cannot be attached
abovewinch,ndanalternativelocationto
install.
2.14
BUSHRANGER REVO Shown Warn VR EVO Shown
3.5
2.13
Winch Kit Only
2.13 Install hardware shown through
290-CL and 290-OL.
Repeat on the other side.
Tighten both sides to 44 Nm.
LHS rear shown
Chassis
M10X30 Bolt X1
M10 Round Washer X1
M10 Lock Nut X1
SmartBar - Fitting Instructions FI-290-I © Copyright W. www.smartbar.com.au E. [email protected] P. +61 8 8384 0292 - 4816
2.16 If possible, rotate clutch handle to face
outward from the vehicle as shown.
Note: Otherwinchesmayhavedierent
handle rotation.
Always consult the winch supplier
instruction manual for correct handle
rotation procedure.
!
Rotate clutch handle on
spindle to face outwards
2.16
Winch Kit Only
2.15 Rotate winch handle to forward facing
position of the vehicle.
NOTE: Otherwinchesmayhavedierent
gearbox rotation.
Always consult the winch supplier
instruction manual for correct handle
rotation procedure.
2.15
!
Front of
vehicle
Warn winch shown
for reference only
Clutch end of winch shown
Rotate winch handle to
front of vehicle
Winch Handle
Other
winches
Warn
winch
Warn winch shown
for reference only
2.18 Install winch to 291-WB bracket using
the hardware supplied with the winch. 2.18
291-WB
Winch shown for reference only
2.17 Install fairlead to 291-WB using the
hardware supplied with the winch as shown.
Note: Check if winch wiring will reach the
speciedconnectionpointbeforeinstalling.
Some winches may require wiring extensions,
depending on control box location.
Ensure the bolts do not hit the winch.
Maximum bolt protrusion: 15mm
2.17
!
Fairlead shown for reference only
291-WB
Install fairlead to the
bottom holes on the
291-WB bracket
MAX Bolt protrusion 15mm
Winch
Fairlead
SmartBar - Fitting Instructions FI-290-I © Copyright W. www.smartbar.com.au E. [email protected] P. +61 8 8384 0292 - 4817
LHS shown
M10X30 Bolt X1
M10 Round Washer X1
2.21 Install 290-BL to 290-CL using the
hardware shown.
Leave hardware loose.
Repeat on right hand side.
2.21 X1 M10X100 Bolt
X1 M10 Round Washer
M10 Lock Nut X1
290-CL
M10X30 Bolt X1
M10 Round Washer X1
290-BL
LHS shown
291-WB
Winch Kit Only
2.19 Install 291-WB using hardware to the
290-CL as shown.
Repeat on right hand side.
Tighten Bolts to 78 Nm.
M12X30 BOLT X3
M12 WASHER X3
M12 Lock Nut X3
2.19
1.22 Cut the supplied double-sided tape by
20mm.
Clean both 290-RR and 290-RL with alcohol
swap, and apply 3M primer and apply
double-sided tape as shown.
1.22
RHS behind bumper trim
1.23 Install 290-RR onto the car behind the
trimmed bumper using the OE Bolt as shown.
Clean inner surface of the bumper trim with
alcohol swap and apply 3M primer.
Removethetapelm,pressbumpertrim
rmlytothe290-RRbracket.
Repeat on the other side.
OE Bolt
290-RR
1.23
Bumper not shown
forclarication
290-RL
290-RR
Double-sided tape
Clean the bumper surface
prior to taping down
20mm
2.20 Wire winch to the vehicle per winch
supplier’s installation manual.
Note: The winch wires must be secured to
the vehicle in maximum of 250mm spacing
intervals.
SmartBar - Fitting Instructions FI-290-I © Copyright W. www.smartbar.com.au E. [email protected] P. +61 8 8384 0292 - 4818
Route parking sensor connectors through the bar
Back of StealthBar
3.3a
3.3 Route each connector through the back
of the bar (shown on 3.3a) and out the front
holes in the correct position.
3.3b
RHS Shown
3.2 Connect the parking sensor extensions
provided to the two inner parking sensor
connectors.
3.2
Connect parking sensor extensions here
Parking Sensor Extension
3.1
Parking Sensor vehicles only.
Note: Ensure that Parking Sensors have
been labelled correct as per table in step
1.13
3.1 Rest harness on the back of the bar in
the correct orientation as shown.
Step 3: Parking Sensor Installation
Non-Parking Sensor, skip to Step 4: Wiring
Main connector resting on LHS of Stealth bar
SmartBar - Fitting Instructions FI-290-I © Copyright W. www.smartbar.com.au E. [email protected] P. +61 8 8384 0292 - 4819
3.7 Re-connect the parking sensors to the
wire connectors.
Ensure that all sensors are re-connected
correctly as shown.
3.7
Parking sensor
and bezel
assembly
Connector
Push locking clip in
3.6
IncorrectassealisnotushwithbezelfaceCorrect
3.6 Check that parking sensors are
positioned properly in the bezel and have not
caught the seal.
Note: Make sure the bezel is facing the
correct way. Locating dot on the same side as
the bezel connector.
Align dot with sensor connector
3.5 Clip the parking sensors into the
parking sensor bezels provided. Be sure to
orientate the sensors as shown.
3.5
Parking Sensor Vehicles Only.
3.4 On the inner 2 parking sensors, ensure
that the extension connectors are protruding
through the rear of the bar, this will allow
enoughslacktottheparkingsensors.
3.4
Align notch in
parking sensor
with bezel
SmartBar - Fitting Instructions FI-290-I © Copyright W. www.smartbar.com.au E. [email protected] P. +61 8 8384 0292 - 4820
Vehicles with 4 parking sensors only
3.9 Fit parking sensor hole plugs on the
outer two holes, as shown.
Repeat on right hand side.
3.9
LHS shown
3.8c
Dot facing upwards
LHS shown
3.8c Left Outer parking sensor shown,
repeat on the right hand side.
Note: Skip this step if vehicle only has 4
parking sensors
Outer Parking Sensor
Dot facing outwards
Middle Parking Sensor
LHS shown
3.8b
3.8b Left Middle parking sensor shown,
repeat on right hand side.
Parking Sensor Vehicles Only.
3.8a Clip the parking sensor and bezel into
the bar. Ensure that sensors are orientated
as shown.
Dot facing outwards
Inner Parking Sensor
LHS shown
3.8a
Install Plug

This manual suits for next models
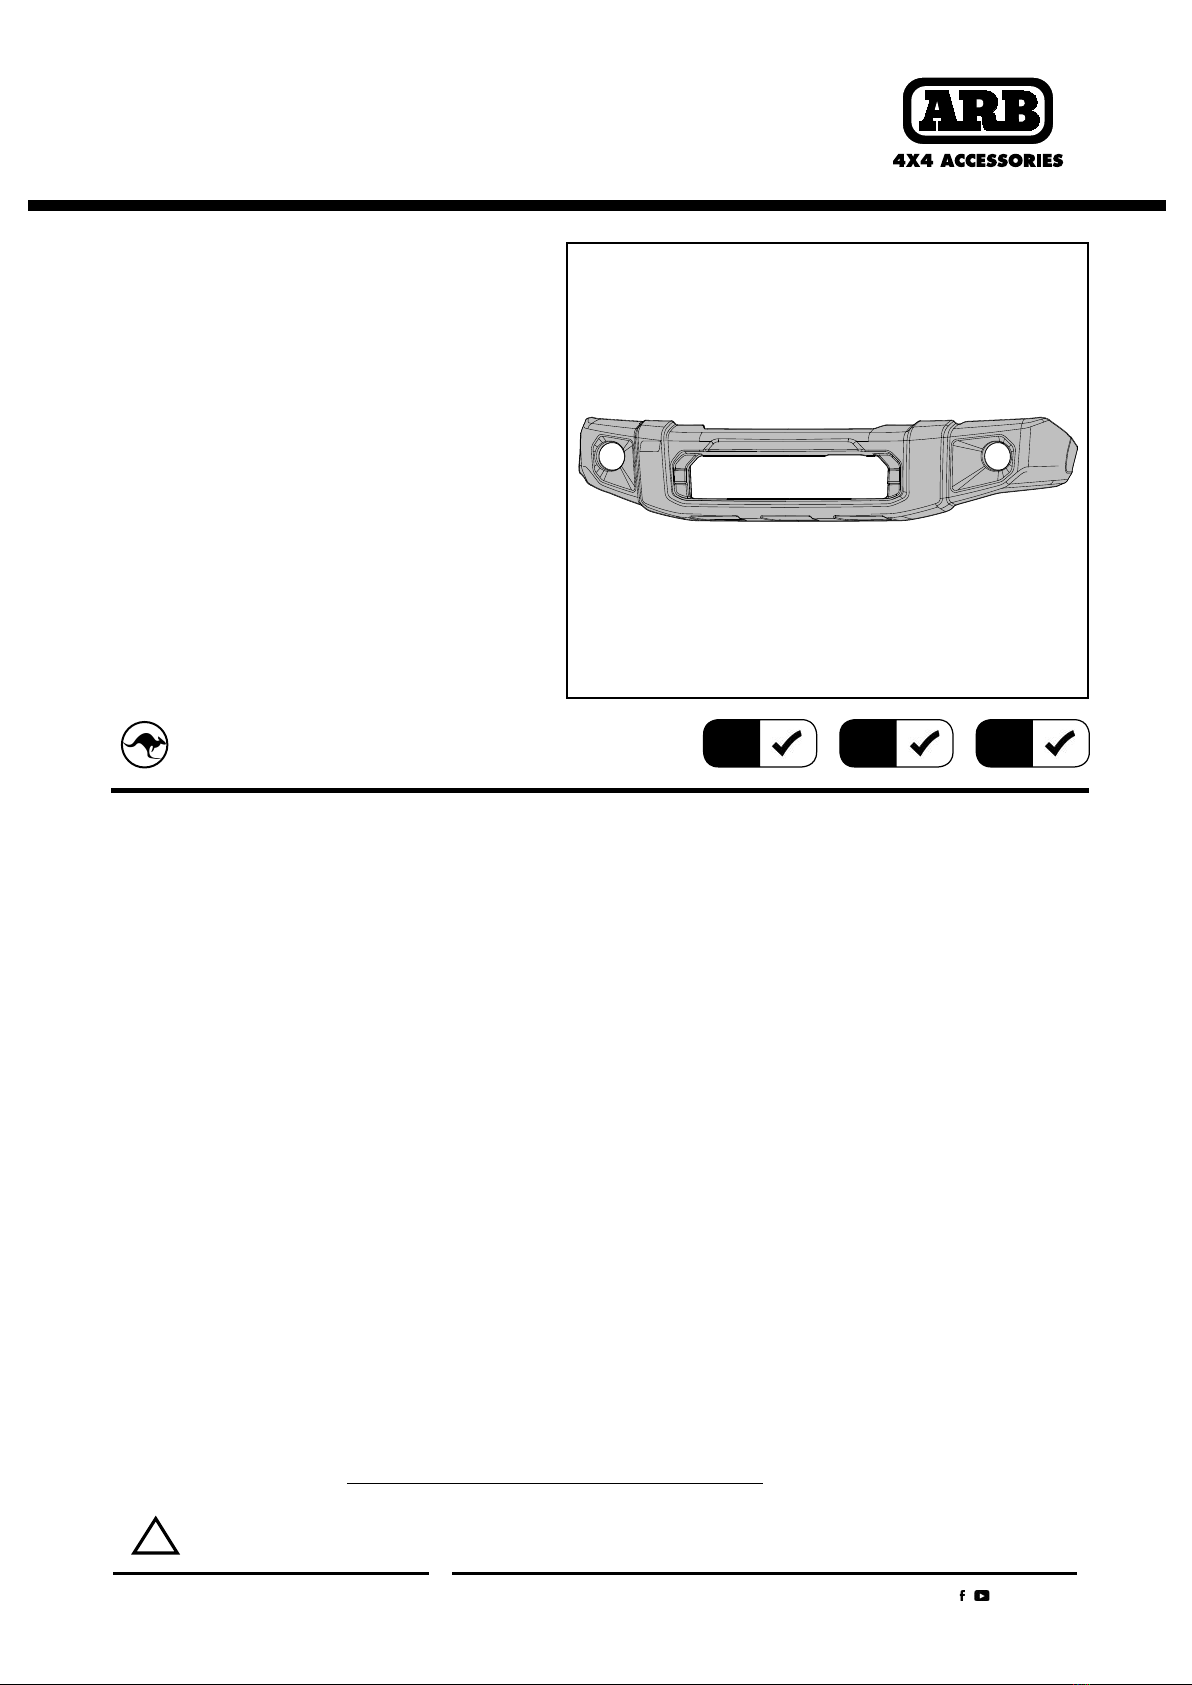
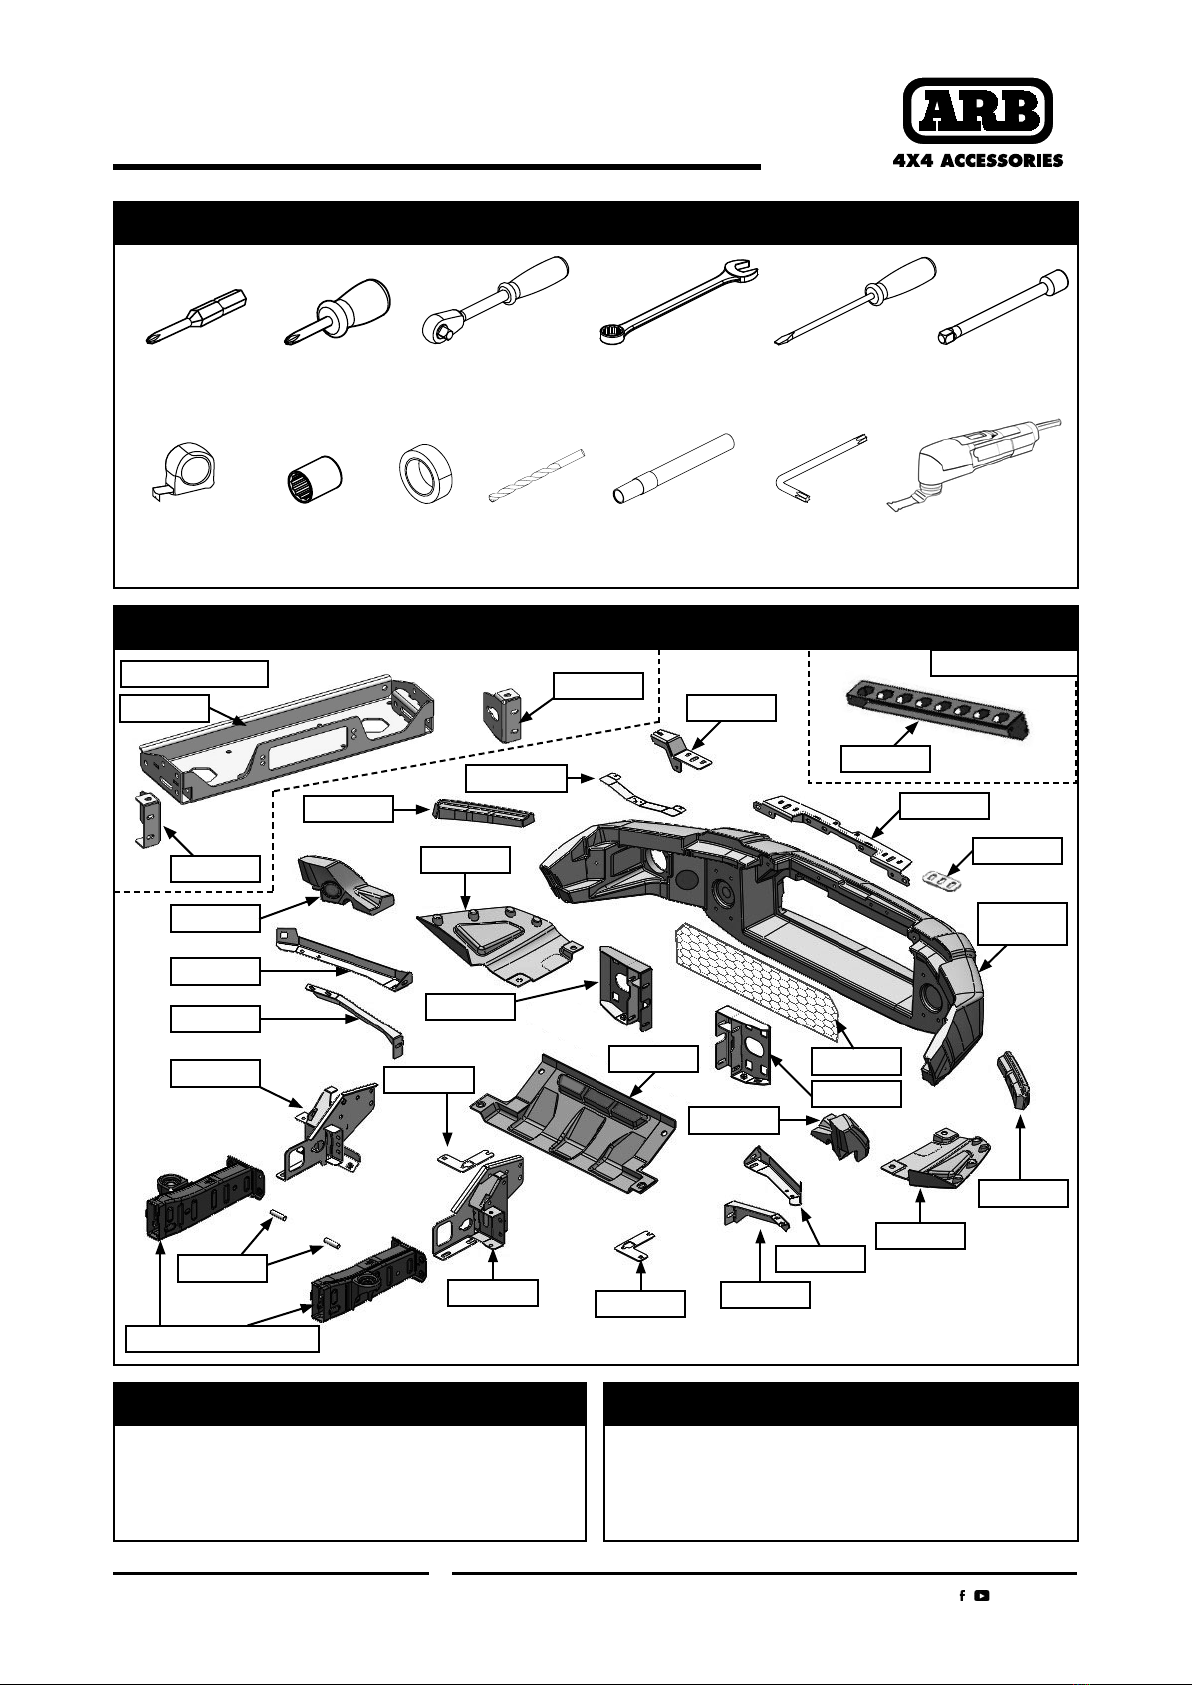
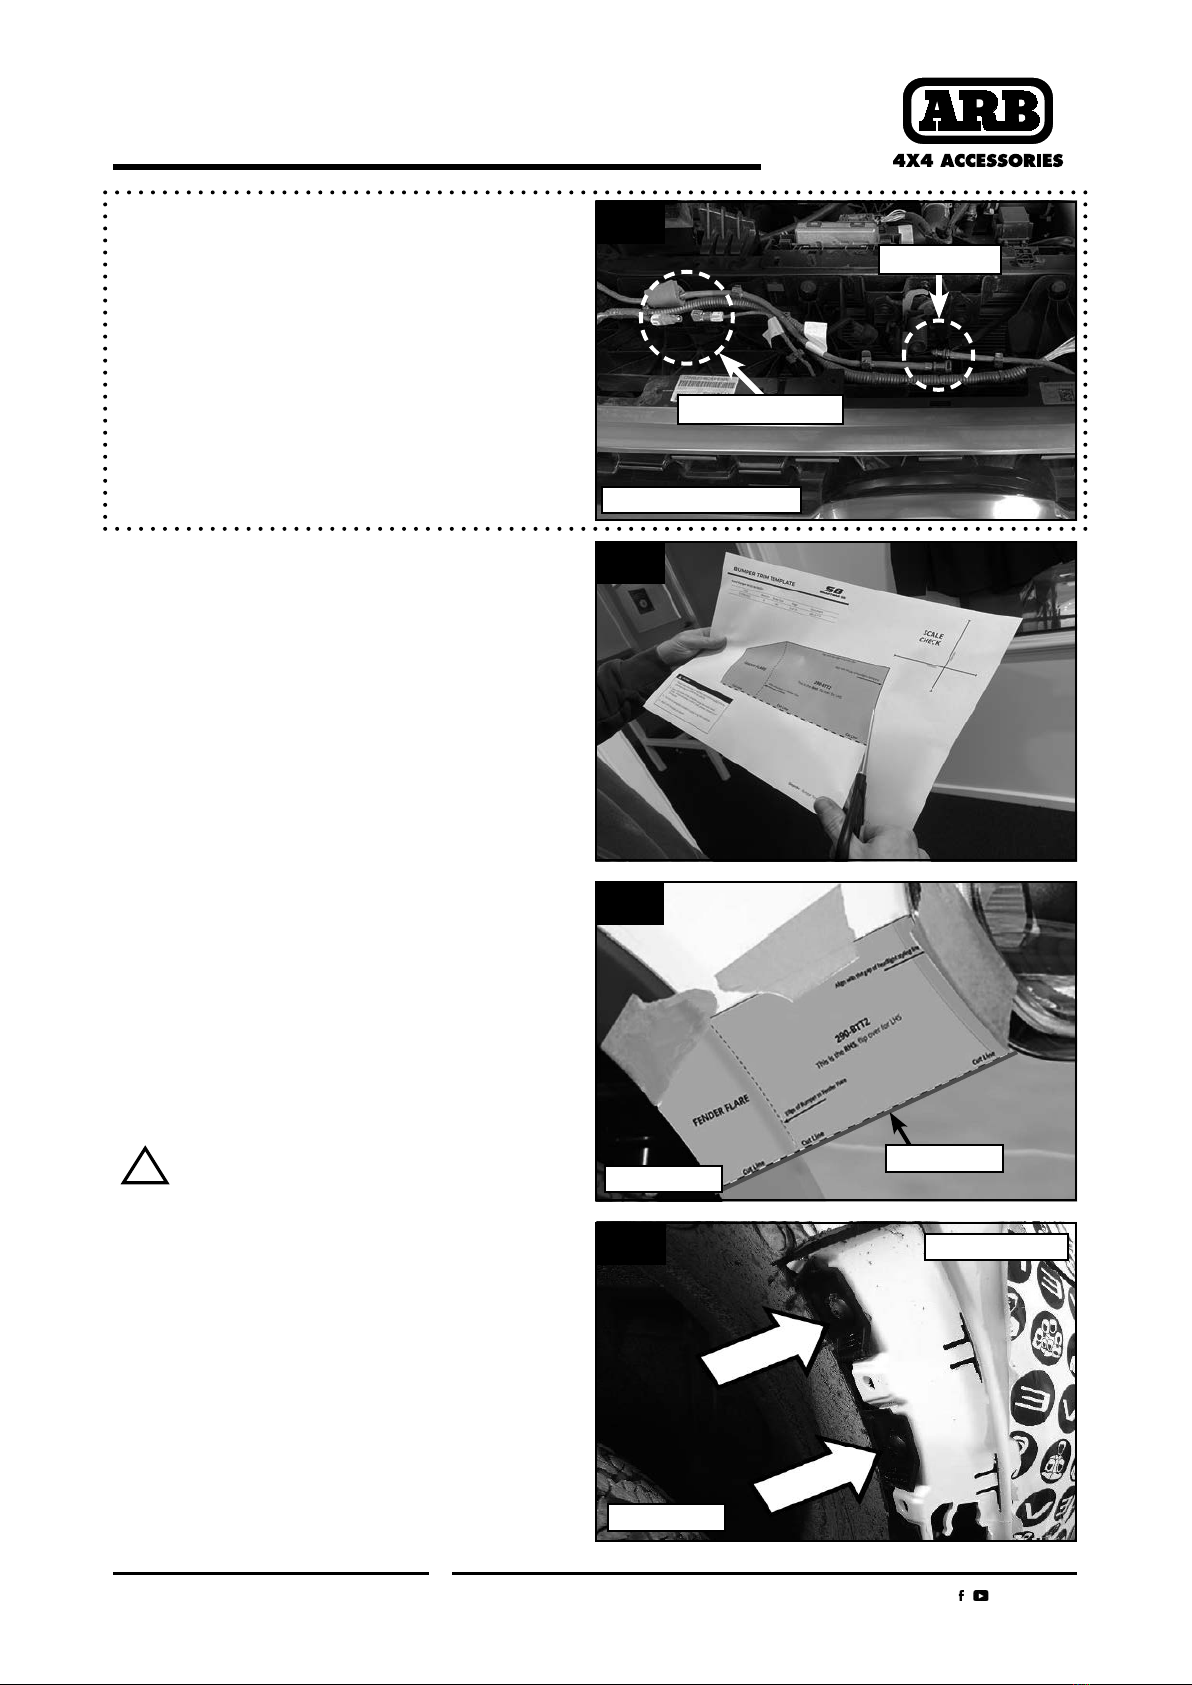
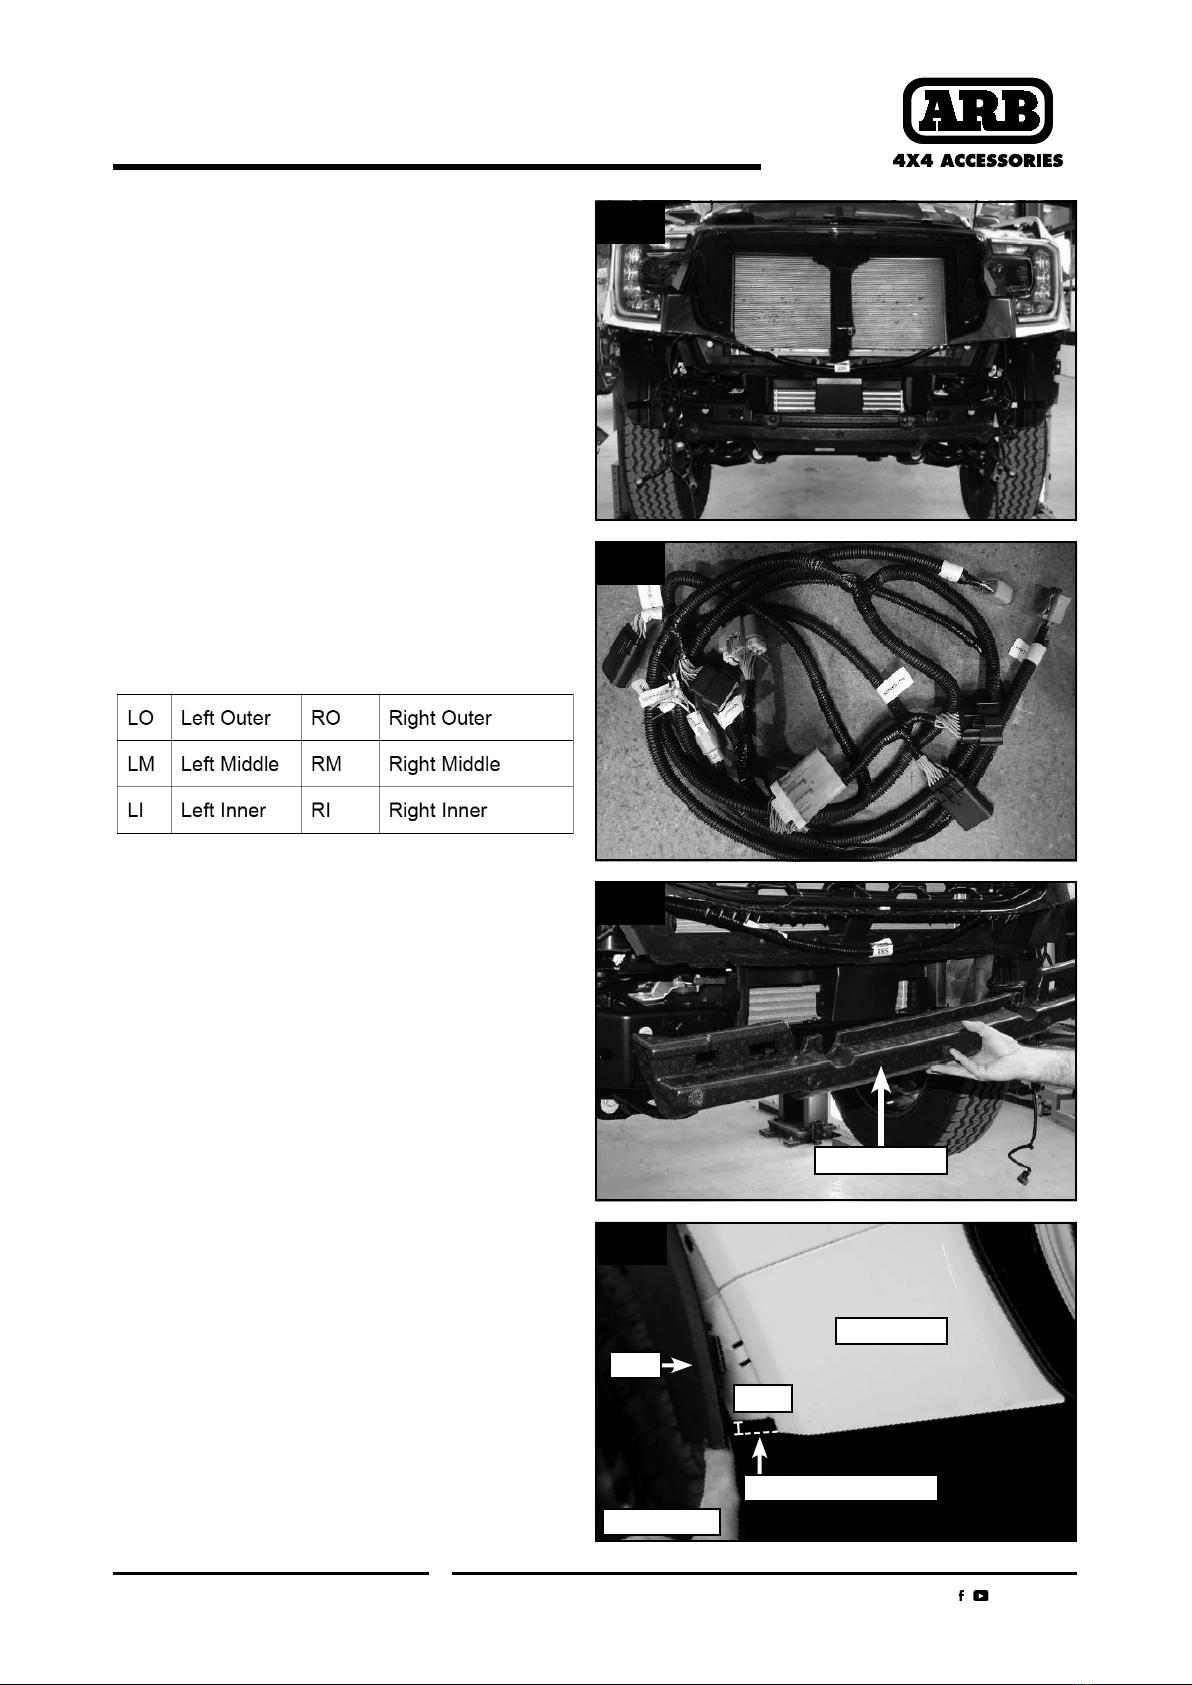
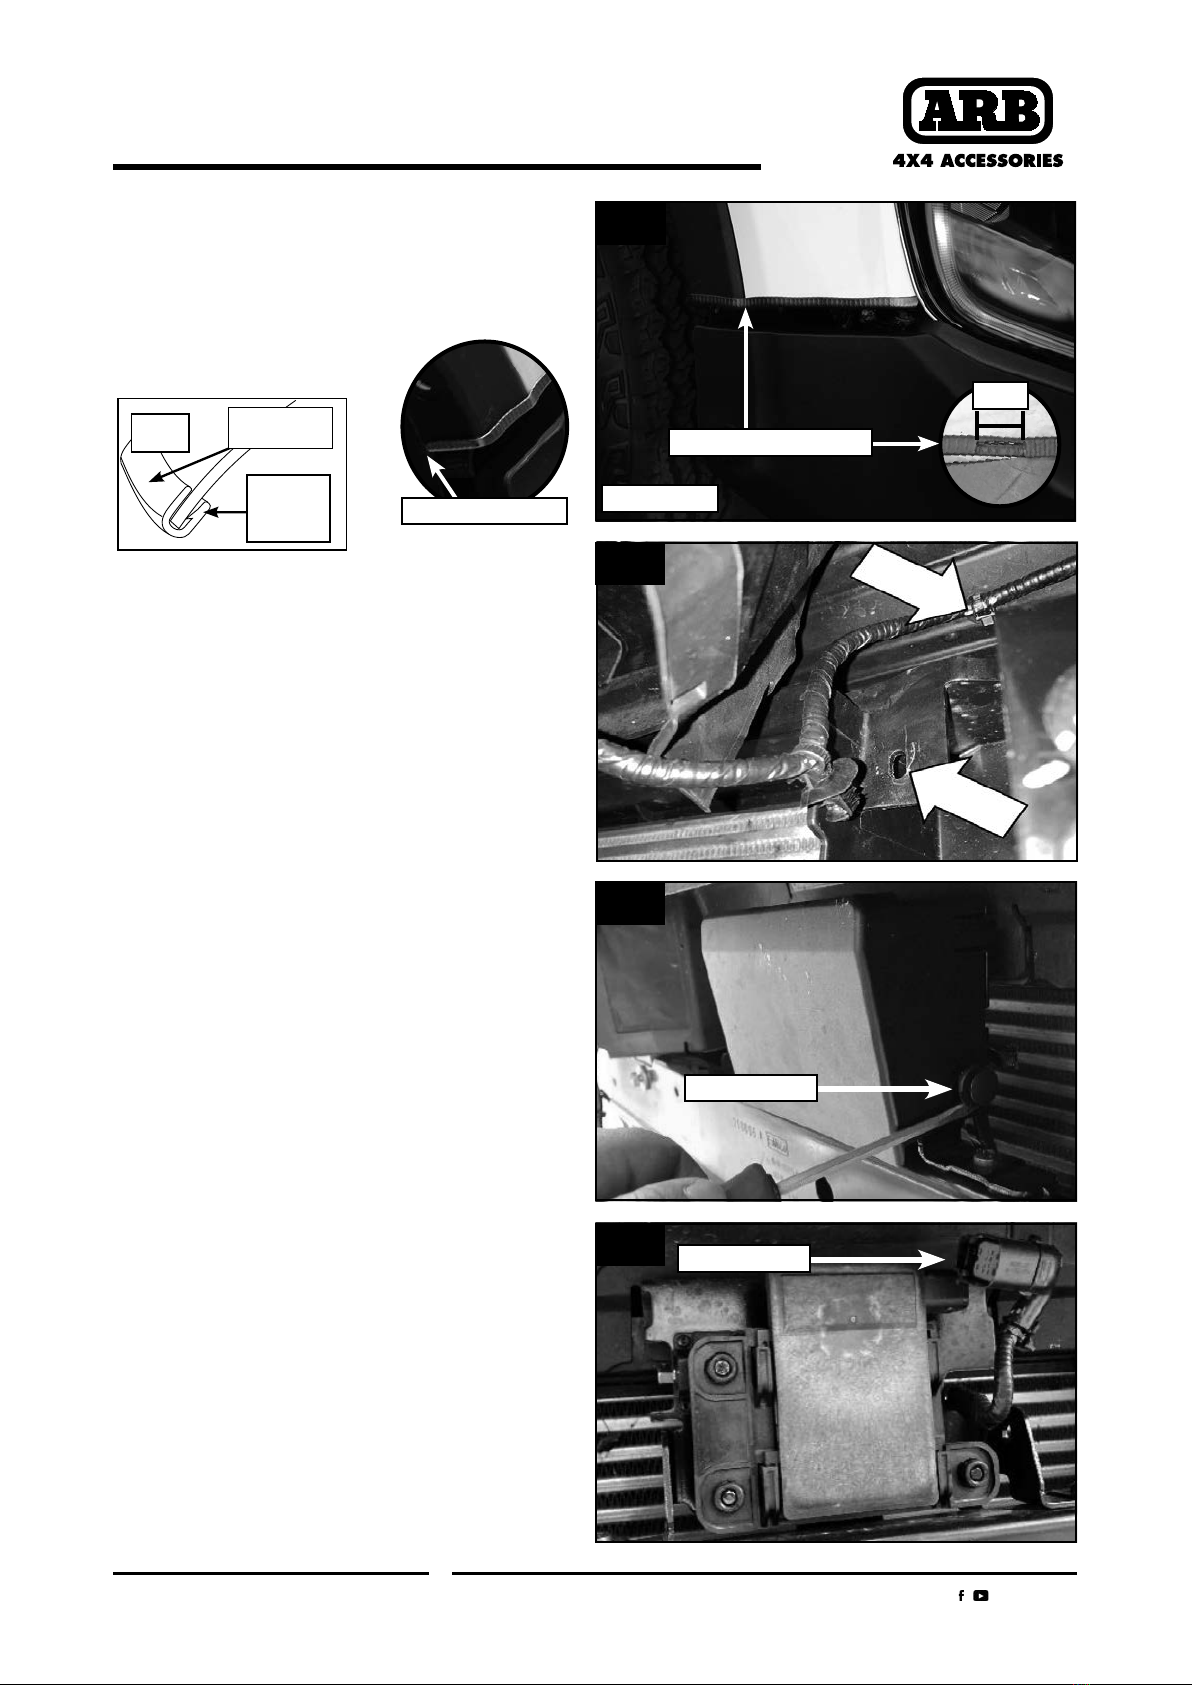
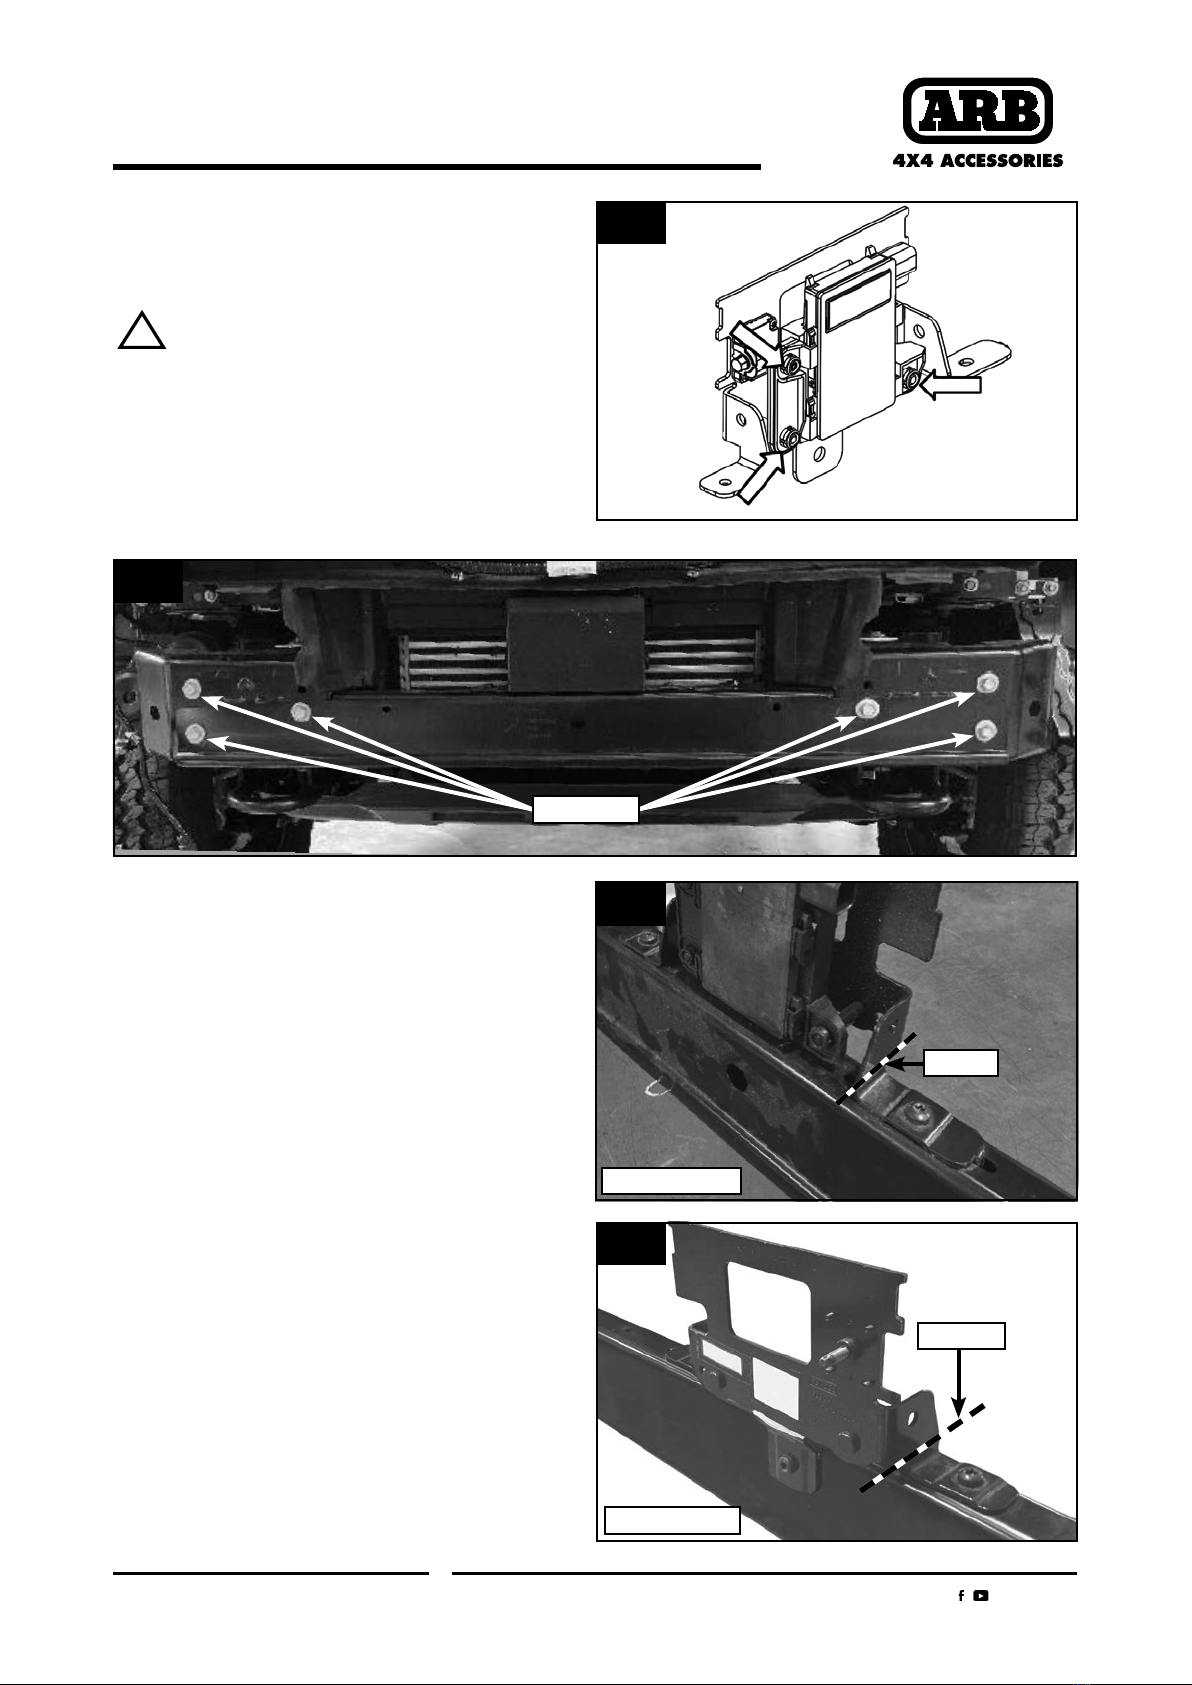
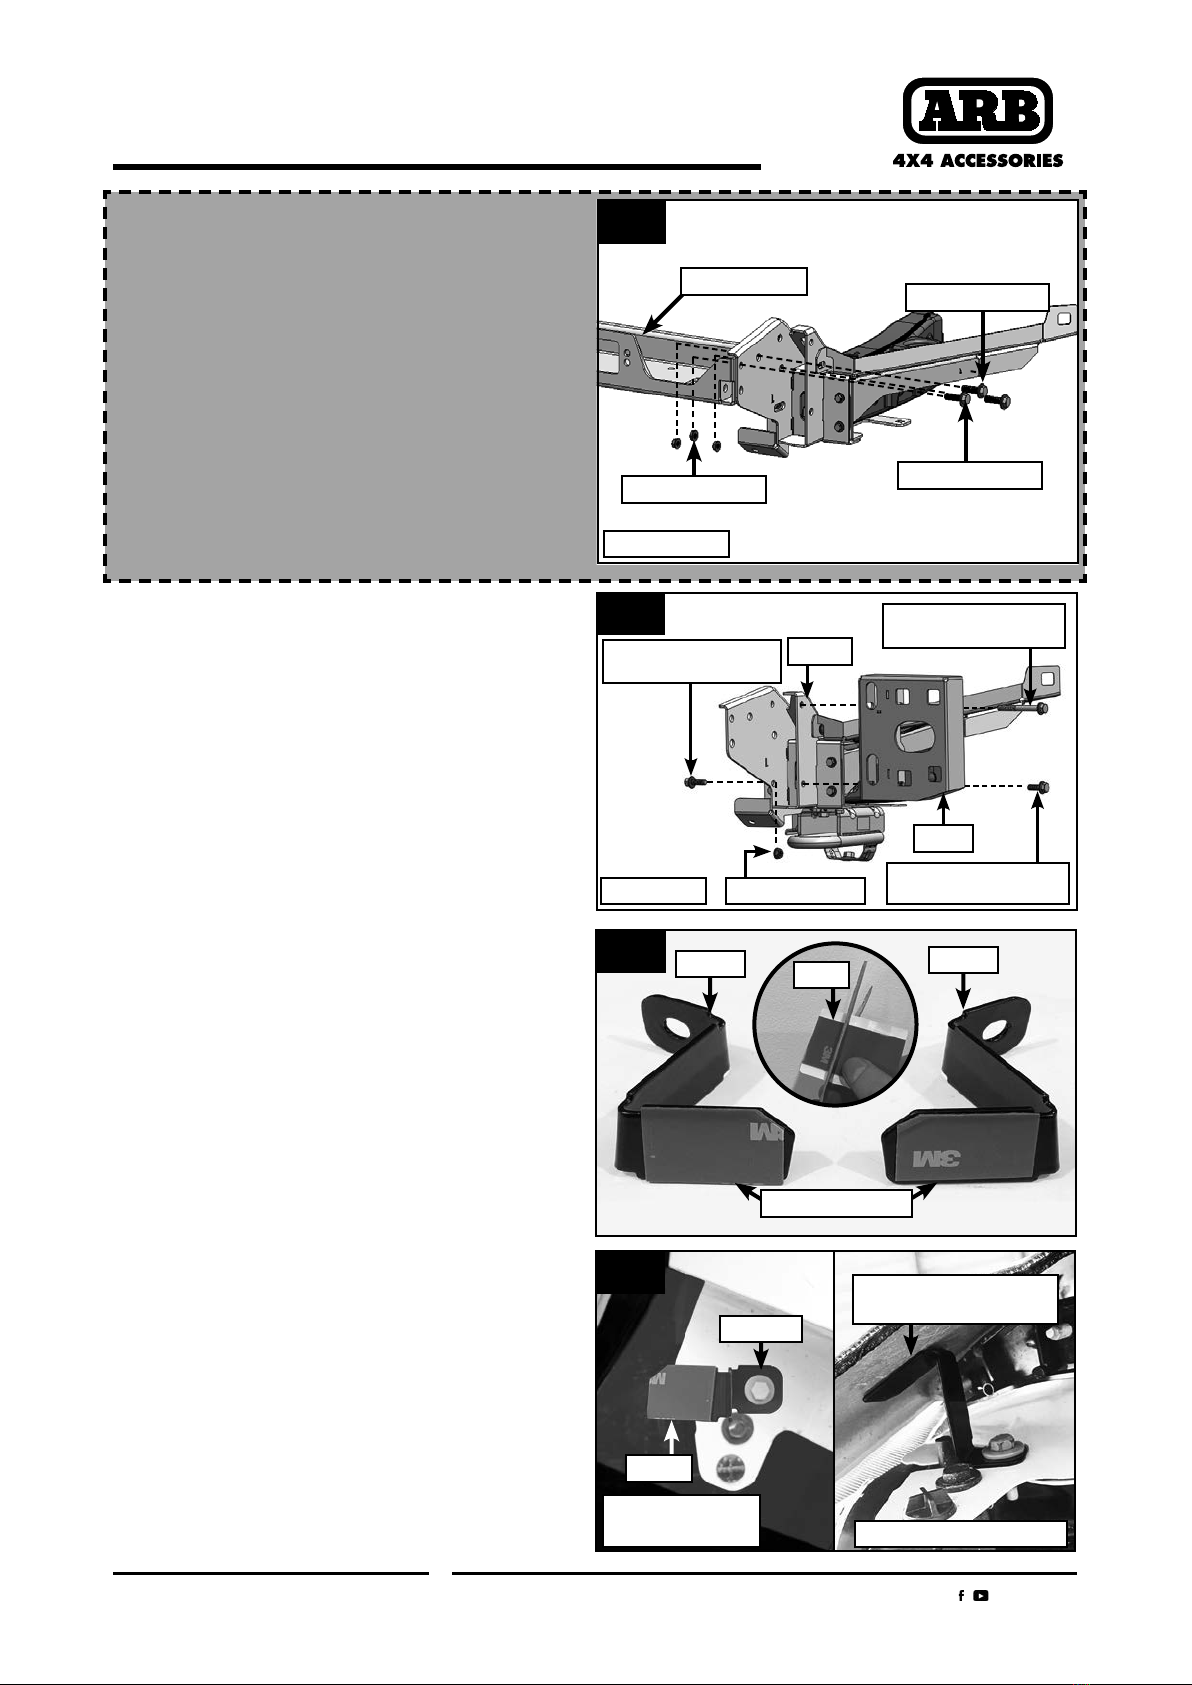
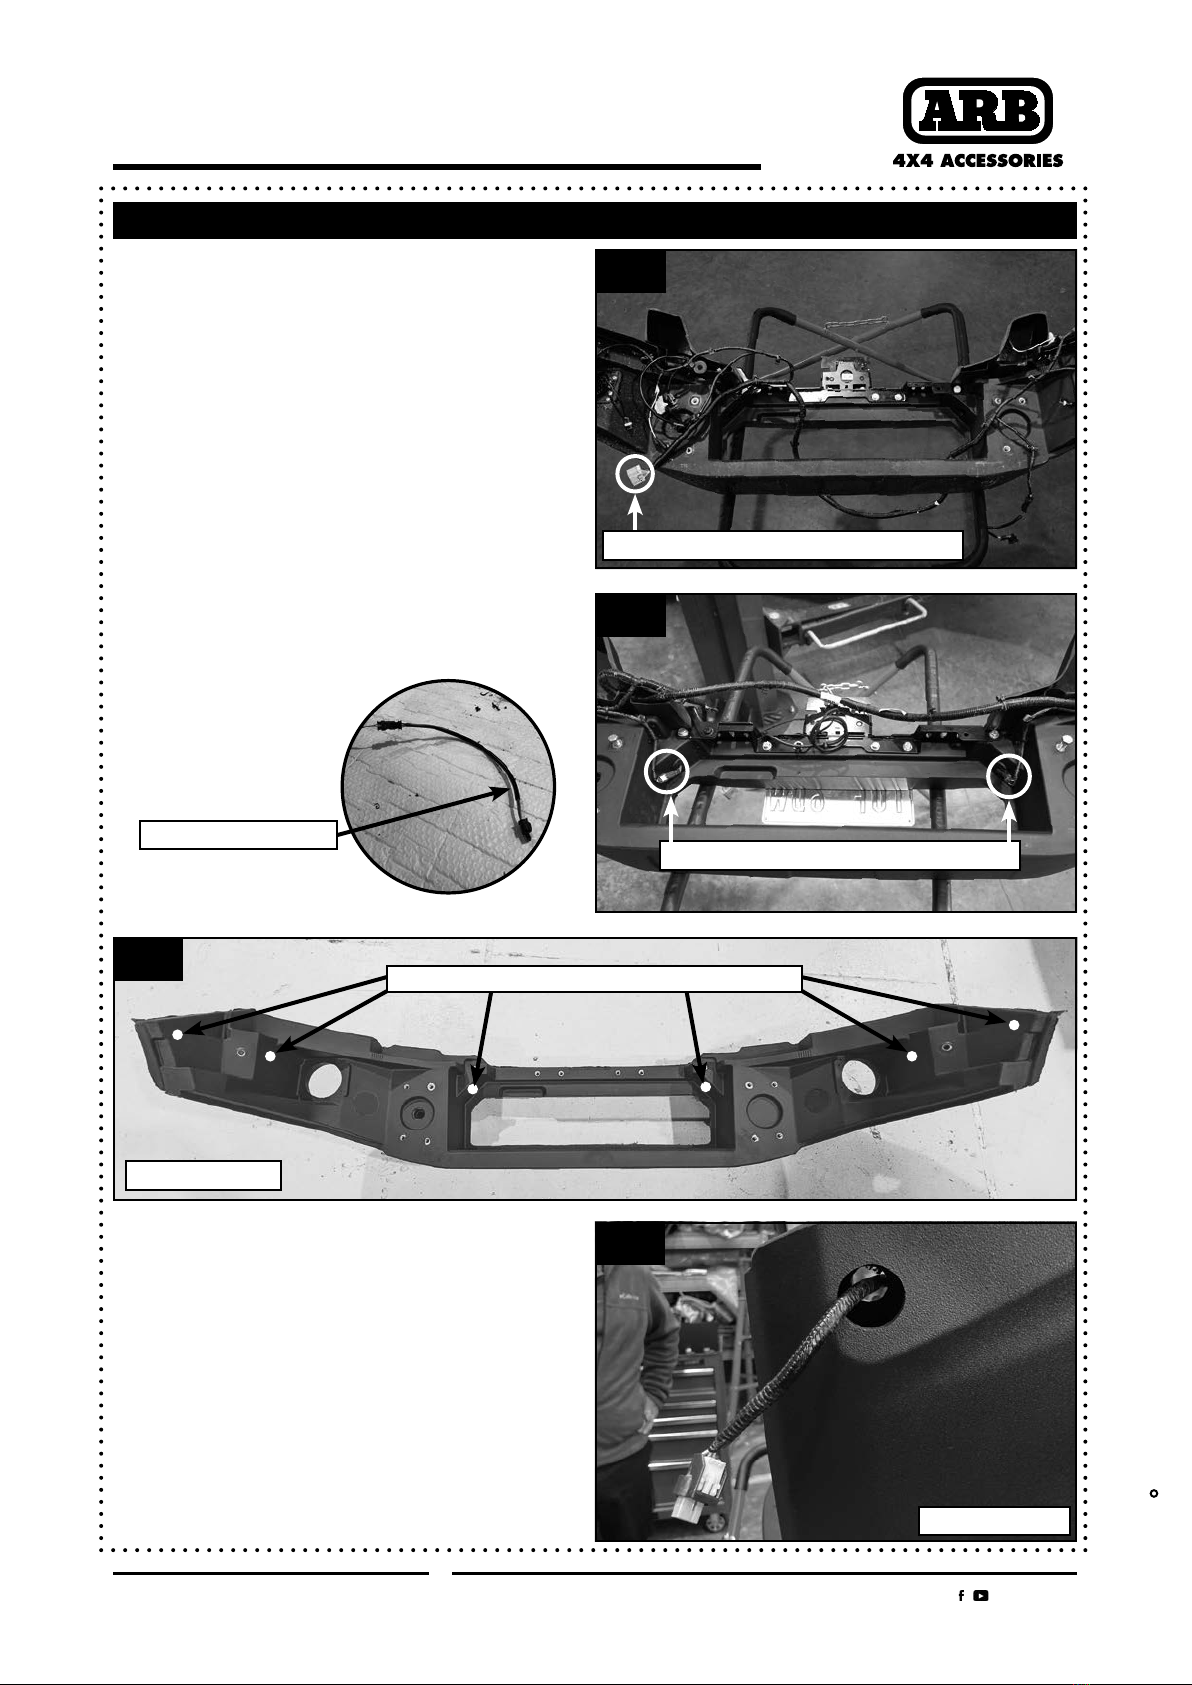
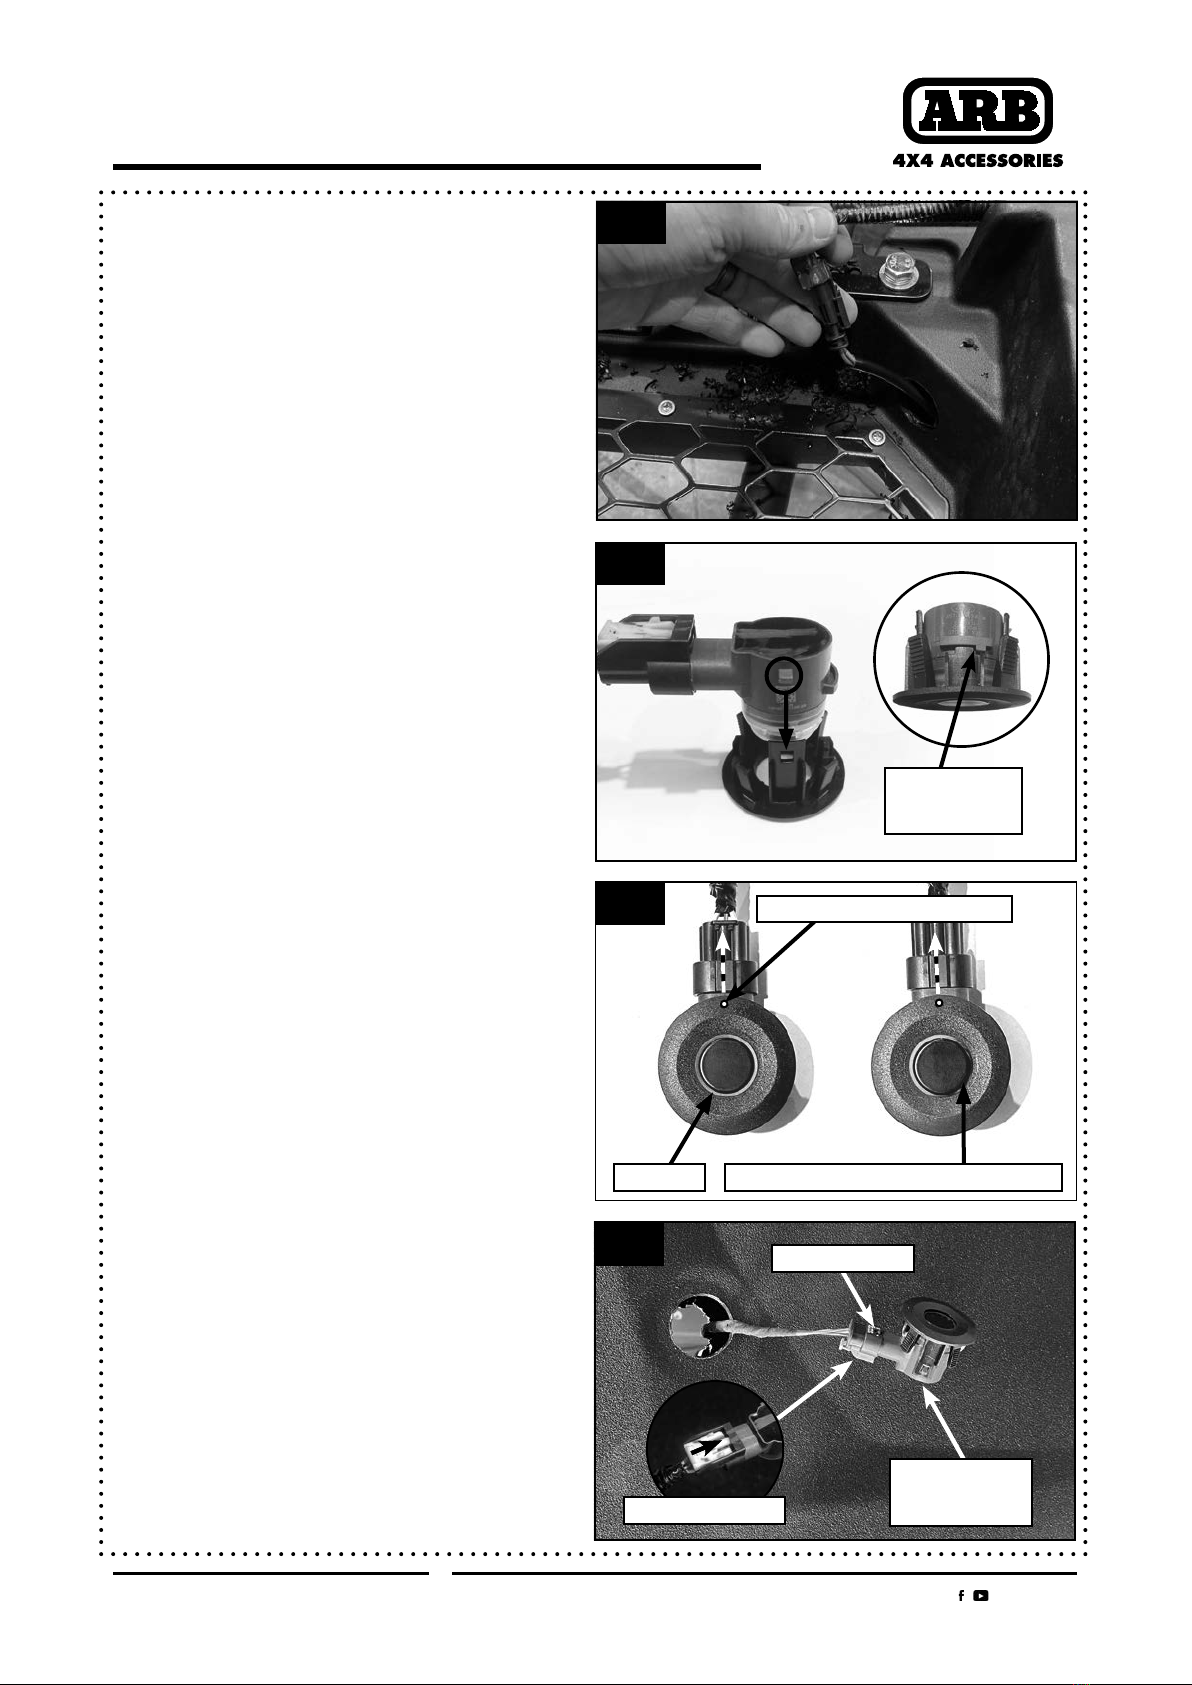
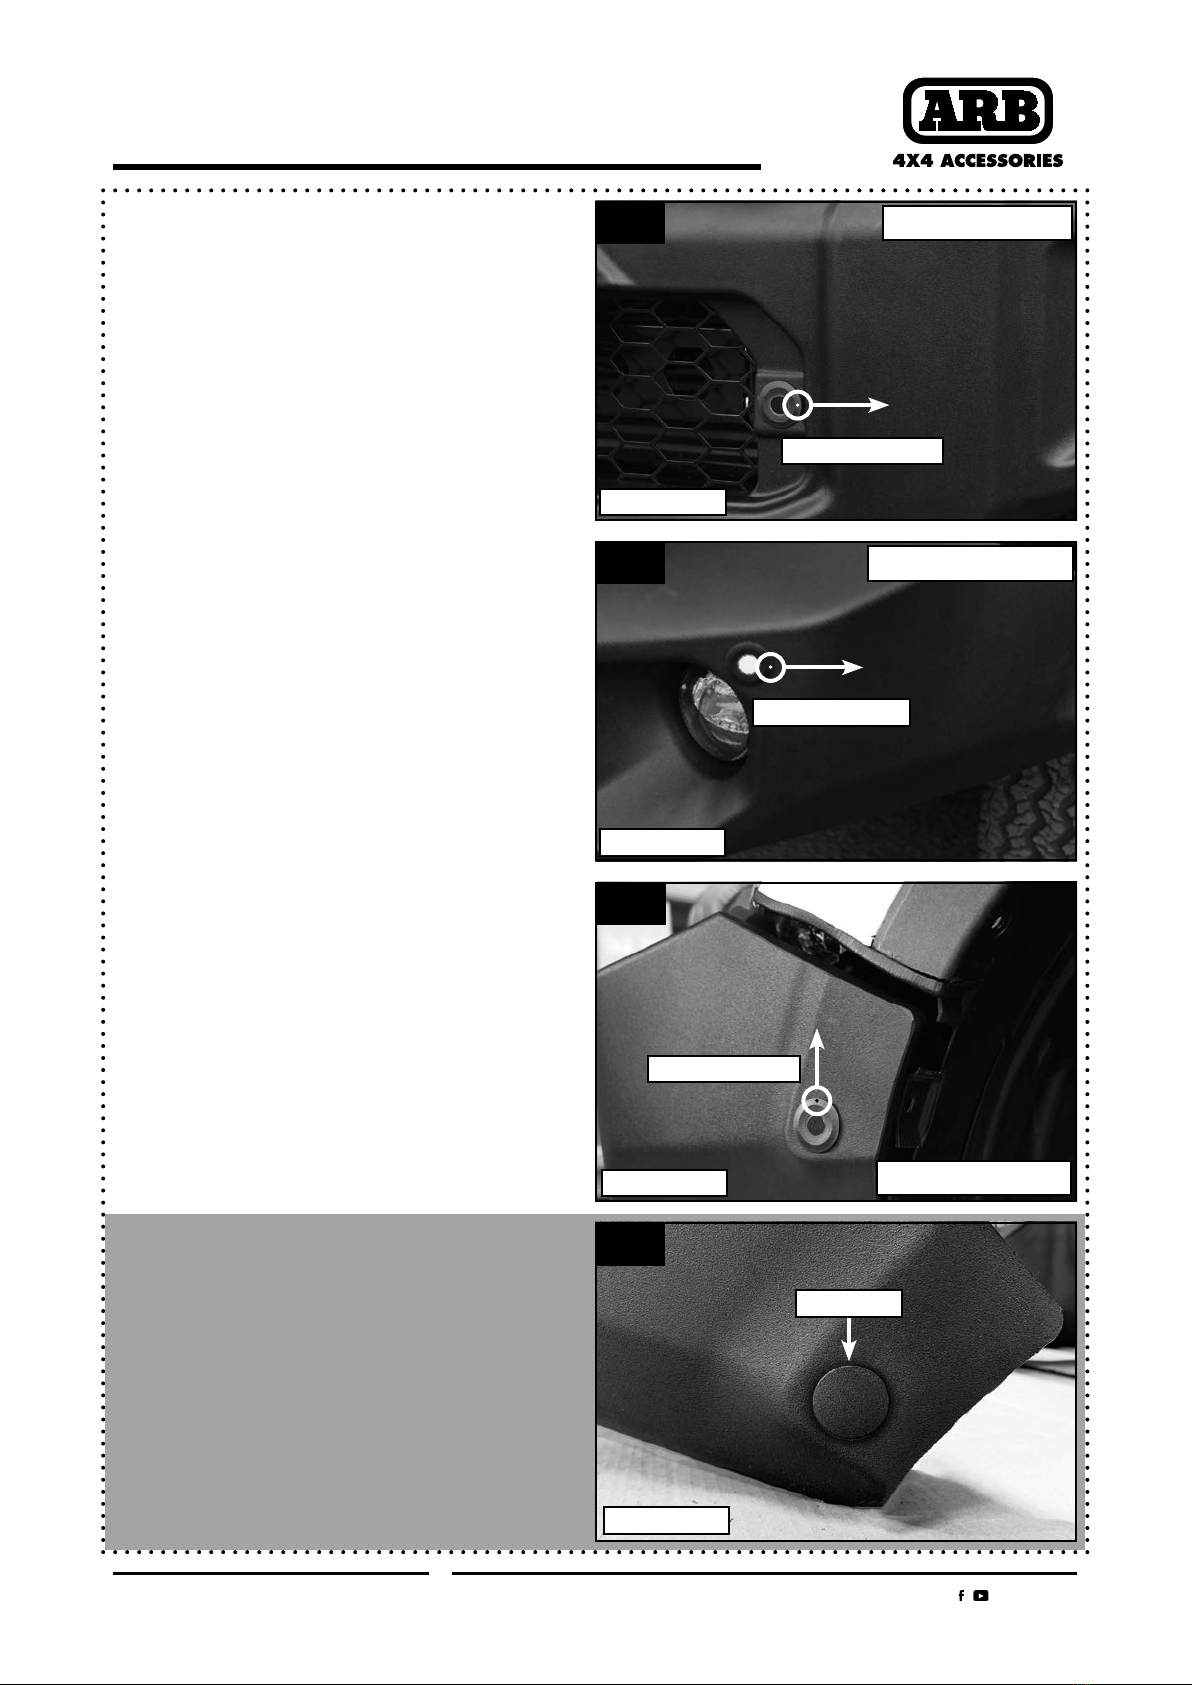
3

Other ARB Automobile Accessories manuals

ARB AIRLOCKER RD142 User manual

ARB

ARB AIRLOCKER RD142 User manual

ARB Airlocker RD259 User manual

ARB

ARB Airlocker RD259 User manual

ARB 3540320 User manual

ARB

ARB 3540320 User manual

ARB Airlocker RD232 User manual

ARB

ARB Airlocker RD232 User manual

ARB 10900013 User manual

ARB

ARB 10900013 User manual

ARB AIRLOCKER RD109 User manual

ARB

ARB AIRLOCKER RD109 User manual

ARB 341 4460 User manual

ARB

ARB 341 4460 User manual

ARB Air Locker RD111 User manual

ARB

ARB Air Locker RD111 User manual

ARB 3432050 User manual

ARB

ARB 3432050 User manual

ARB Airlocker RD214 User manual

ARB

ARB Airlocker RD214 User manual

ARB RD121 Operating and maintenance instructions

ARB

ARB RD121 Operating and maintenance instructions

ARB 3921120 User manual

ARB

ARB 3921120 User manual

ARB AIRLOCKER RD168 User manual

ARB

ARB AIRLOCKER RD168 User manual

ARB Airlocker RD162 User manual

ARB

ARB Airlocker RD162 User manual

ARB 6174921 User manual

ARB

ARB 6174921 User manual

ARB Airlocker RD137 User manual

ARB

ARB Airlocker RD137 User manual

ARB AC08C User manual

ARB

ARB AC08C User manual

ARB Airlocker RD140 User manual

ARB

ARB Airlocker RD140 User manual

ARB LINX LX100 User manual

ARB

ARB LINX LX100 User manual

ARB AIRLOCKER RD145 User manual

ARB

ARB AIRLOCKER RD145 User manual

ARB AIRLOCKER RD231 User manual

ARB

ARB AIRLOCKER RD231 User manual

ARB 1780500 User manual

ARB

ARB 1780500 User manual

ARB LINX LX100 User manual

ARB

ARB LINX LX100 User manual

ARB 3432200 User manual

ARB

ARB 3432200 User manual

Popular Automobile Accessories manuals by other brands

QA1 MU1RCA Install instructions

QA1

QA1 MU1RCA Install instructions

HUSKY LINERS 2358 Care and use instructions

HUSKY LINERS

HUSKY LINERS 2358 Care and use instructions

GARO TWIN+ Assembly instructions / End User Instruction

GARO

GARO TWIN+ Assembly instructions / End User Instruction

Gewiss JOINON I-CON EVO User and installation manual

Gewiss

Gewiss JOINON I-CON EVO User and installation manual

Rockford Fosgate Connecting Punch CPC05-03 Installation&Application Manual

Rockford Fosgate

Rockford Fosgate Connecting Punch CPC05-03 Installation&Application Manual

Parrot PS7100 quick start guide

Parrot

Parrot PS7100 quick start guide

Aussie Tonneaus ATR01159 FITTING INSTRUCTION

Aussie Tonneaus

Aussie Tonneaus ATR01159 FITTING INSTRUCTION

Brink 4602 Fitting instructions

Brink

Brink 4602 Fitting instructions

WeatherTech No-Drill MudFlap installation instructions

WeatherTech

WeatherTech No-Drill MudFlap installation instructions

Fiamma Carry-Bike Caravan Active E-Bike Installation and usage instructions

Fiamma

Fiamma Carry-Bike Caravan Active E-Bike Installation and usage instructions

Safe Fleet Prime Design FEA-0022 Assembly instructions

Safe Fleet

Safe Fleet Prime Design FEA-0022 Assembly instructions

Thule 1478 instructions

Thule

Thule 1478 instructions

WeatherTech No-Drill MudFlap installation instructions

WeatherTech

WeatherTech No-Drill MudFlap installation instructions

Cartek Battery Isolator XR USER GUIDE AND INSTRUCTIONS

Cartek

Cartek Battery Isolator XR USER GUIDE AND INSTRUCTIONS

CCM 040-1192-0 instruction manual

CCM

CCM 040-1192-0 instruction manual

Nav TV AVBMW quick guide

Nav TV

Nav TV AVBMW quick guide

ACV Inbay 241114-50-3 installation instructions

ACV

ACV Inbay 241114-50-3 installation instructions

Mercedes-Benz Command Operator's manual

Mercedes-Benz

Mercedes-Benz Command Operator's manual

manuals.online logo
manuals.online logoBrands
  • About & Mission
  • Contact us
  • Privacy Policy
  • Terms and Conditions

Copyright 2025 Manuals.Online. All Rights Reserved.