manuals.online logo
Brands
  1. Home
  2. •
  3. Brands
  4. •
  5. Argos
  6. •
  7. Indoor Furnishing
  8. •
  9. Argos Monk’s Bench Style Linen Bin 832/5299 User manual

Argos Monk’s Bench Style Linen Bin 832/5299 User manual

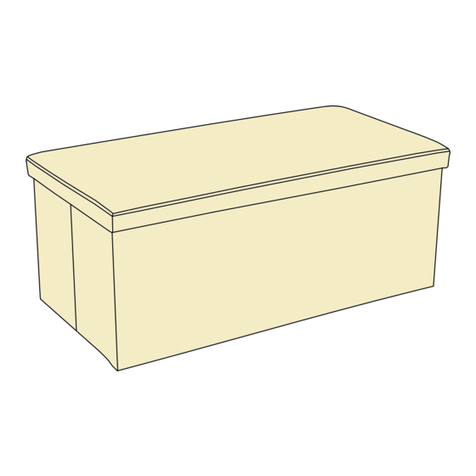
Monk’s Bench Style Linen Bin
Dimensions
Width - 55cm
Depth - 35cm
Height - 58cm
Important – Please read these instructions fully before starting assembly
THIS PRODUCT IS NOT
DESIGNED OR INTENDED
AS A TOY STORAGE CONTAINER
If you need help or have damaged or missing parts, call the Customer Helpline: 0845 640 0800
Assembly Instructions- please keep for future reference
Issue 3 - 24/08/10
LP 255.96.774
If you need help or have damaged or missing parts, call the Customer Helpline: 0845 640 0800
Assembly Instructions
Step 12
Screw the right side
panel 6 the ends of
the rails using 5 x 40mm
screw B as shown.
Ensure that the right-
hand hinge of the lid is
properly located in its
hole in the right side
panel.
Step 13
Drop the base panel 9
onto the bottom rails
inside the unit.
Step 14
Lift the lid and connect
the hinge F to the lid
and the top back rail as
shown using 4 x 12mm
screw G.
Important:
The hinge
must must be
attached the
correct way up.
Please pay attention to
diagram a: for correct
installation.
Assembly complete.
9
6
B
FG
832/5299
a:
spring
Safety and Care Advice
Important – Please read these instructions fully before starting assembly
Care and maintenance
• Check you have all the
components and tools listed on
pages 1 and 2.
• Remove all ttings from the
plastic bags and separate them
into their groups.
• Keep children and animals
away from the work area, small
parts could choke if swallowed.
• Make sure you have enough
space to layout the parts before
starting.
• Do not stand or put weight on
the product, this could cause
damage.
• Assemble the item as close
to its nal position (in the same
room) as possible.
• Assemble on a soft level
surface to avoid damaging the
unit or your oor.
• Parts of the assembly will be
easier with 2 people.
• We do not
recommend the
use of power
drill/drivers for
inserting screws,
as this could damage the unit.
Only use hand screwdrivers.
• Dispose of all packaging
carefully and responsibly.
• Only clean using a damp
cloth and mild detergent, do
no use bleach or abrasive
cleaners.
• From time to time check that
there are no loose screws on
this unit.
• This product should not be
discarded with household
waste. Take to your local
authority waste disposal
centre.
Components - Panels
Please check you have all the panels listed below
1 Top front rail x 1
(5(h)cm x 52(w)cm)
2 Bottom back rail x 1
(5(h)cm x 52(w)cm)
3 Bottom front rail x 1
(5(h)cm x 52(w)cm)
Note: this part can be distinguished
from part 2 by the wider groove.
4 Top back rail x 1
(18.5(h)cm x 52(w)cm)
5 Left side x 1
(58(h)cm x 35(d)cm)
6 Right side x 1
(58(h)cm x 35(d)cm)
7 Back panel x 1
(31(h)cm x 53(w)cm)
8 Front panel x 1
(32(h)cm x 53(w)cm)
9 Base panel x 1
(51.7(w)cm x 30(d)cm)
10 Lid x 1
(51.7(w)cm x 32.4(d)cm)
1
Components - Fittings If you have damaged or missing components,
call the Customer Helpline: 0845 640 0800
Please check you have all the ttings listed below
Note: The quantities below are the correct amount to complete the assembly. In some cases more ttings
may be supplied than are required.
A B C D
Connector x 10 40mm Screw x 10 30mm Wooden dowel x 8 Hinge x 2
E F G
3x12mm Screw x 4 Spring hinge x 1 4x12mm Screw x 4
Tools required
Phillips screwdriver
(medium & large)
Ruler – Use this ruler to help correctly identify the screws
0 5 10 15 20 25 30 35 40 45 50 55 60 65 70 75 80 85 90 95 100 110 115 120 125 130 135 140 145 150 155 160 165 170
105
Assembly Instructions
2 3
Step 1
Insert 2 x connector A
into the holes in the front
top rail 1 as shown.
Step 2
Insert 2 x connector
A into the holes in the
bottom back rail 2 as
shown.
Assembly Instructions
Step 3
Insert 2 x connector
A into the holes in the
bottom front rail 3 as
shown.
Step 4
Insert 4 x connector A
into the holes in the top
back rail 4 as shown.
Step 5
Insert 4 x 30mm dowel
C into the left side panel
5 and right side panel
6 as shown.
A
A
A
A
1
2
3
4
C
5 6
4 5
Assembly Instructions Assembly Instructions
Step 6
Screw both the hinges
D to the lid 10 using 4
x 12mm screw E.
Important: the hinge
must t ush to the edge
of the lid (a:).
If the hinge post
protrudes from the lid as
shown (b:), the lid will not
t the linen bin.
Important: when tting
metal hinges to lid, t
both screws E before
tightening either of them.
Step 7
Screw the top back
rail 4 and the bottom
back rail 2 to the left
side panel 5 using 3 x
40mm screw B.
Step 8
Slide the back panel 7
into the slots of the two
back rails.
4
2
5
B
7
1
3
5
B
Step 9
Screw the top front rail
1 and the bottom
front rail 3 to the left
side panel 5 using 2 x
40mm screw B.
Step 10
Slide the front panel 8
into the slots of the two
front rails.
Step 11
Slot the left-hand hinge
of the lid 10 into the
hole provided on the
inside of the left side
panel.
8
10
E
D
D
10
a:
b:

Other Argos Indoor Furnishing manuals

Argos Alto hygena 404/3733 Datasheet

Argos

Argos Alto hygena 404/3733 Datasheet

Argos CANVAS 214/6601 User manual

Argos

Argos CANVAS 214/6601 User manual

Argos 609/1886 User manual

Argos

Argos 609/1886 User manual

Argos Iceland 279721 User manual

Argos

Argos Iceland 279721 User manual

Argos Verona 609/5033 User manual

Argos

Argos Verona 609/5033 User manual

Argos Zest 245/7558 User manual

Argos

Argos Zest 245/7558 User manual

Argos Nordic 1475902 User manual

Argos

Argos Nordic 1475902 User manual

Argos 642/0110 User manual

Argos

Argos 642/0110 User manual

Argos Merrick 183/8587 User manual

Argos

Argos Merrick 183/8587 User manual

Argos HOME New Pagnell Deep 3+2 Chest 610/8793 User manual

Argos

Argos HOME New Pagnell Deep 3+2 Chest 610/8793 User manual

Argos 7592573 User manual

Argos

Argos 7592573 User manual

Argos ASHWELL 806/3922 User manual

Argos

Argos ASHWELL 806/3922 User manual

Argos RONDA 8 SEATER CORNER DINING SET 7473441 User manual

Argos

Argos RONDA 8 SEATER CORNER DINING SET 7473441 User manual

Argos 496/1932 User manual

Argos

Argos 496/1932 User manual

Argos Caspian 365/6499 User manual

Argos

Argos Caspian 365/6499 User manual

Argos 355/3932 D User manual

Argos

Argos 355/3932 D User manual

Argos Dalton Metal 3ft Frame 656/9624 User manual

Argos

Argos Dalton Metal 3ft Frame 656/9624 User manual

Argos 548/5259 User manual

Argos

Argos 548/5259 User manual

Argos Seville 147/4556 User manual

Argos

Argos Seville 147/4556 User manual

Argos Hallingford 305/2323 User manual

Argos

Argos Hallingford 305/2323 User manual

Argos 392/ 2068 User manual

Argos

Argos 392/ 2068 User manual

Argos BALI TV UNIT OMO User manual

Argos

Argos BALI TV UNIT OMO User manual

Argos 482/4495 User manual

Argos

Argos 482/4495 User manual

Argos Fairfield 852/5800 User manual

Argos

Argos Fairfield 852/5800 User manual

Popular Indoor Furnishing manuals by other brands

burgbad Cala M1057 Fitting instructions

burgbad

burgbad Cala M1057 Fitting instructions

Habitat Eleonora 801472 manual

Habitat

Habitat Eleonora 801472 manual

Ofs LeanTo Assembly instructions

Ofs

Ofs LeanTo Assembly instructions

Furniture of America CM5913-PC Assembly instructions

Furniture of America

Furniture of America CM5913-PC Assembly instructions

Lightolier Calculite CACEX specification

Lightolier

Lightolier Calculite CACEX specification

Hillsdale Furniture OCALA 4838-810P quick start guide

Hillsdale Furniture

Hillsdale Furniture OCALA 4838-810P quick start guide

Wren Kitchens BASE UNIT 600 Built Under Oven Housing Assembly guide

Wren Kitchens

Wren Kitchens BASE UNIT 600 Built Under Oven Housing Assembly guide

Vivo DESK-V201B instruction manual

Vivo

Vivo DESK-V201B instruction manual

MIX St-60 Assembly instructions

MIX

MIX St-60 Assembly instructions

Songmics Vasagle LWD54 manual

Songmics

Songmics Vasagle LWD54 manual

Rauch M2803 Assembly instructions

Rauch

Rauch M2803 Assembly instructions

modway MOD 6095 quick start guide

modway

modway MOD 6095 quick start guide

Alaterre Furniture Monterey Assembly instruction

Alaterre Furniture

Alaterre Furniture Monterey Assembly instruction

Ballard Designs Taylor Media Tower MQ131 Assembly instructions

Ballard Designs

Ballard Designs Taylor Media Tower MQ131 Assembly instructions

KI 700 Series Assembly instructions

KI

KI 700 Series Assembly instructions

Lightolier Lytespan PLD120 specification

Lightolier

Lightolier Lytespan PLD120 specification

American Standard COLONY 4175.200 installation instructions

American Standard

American Standard COLONY 4175.200 installation instructions

Lane 7584-43 Assembly instructions

Lane

Lane 7584-43 Assembly instructions

manuals.online logo
manuals.online logoBrands
  • About & Mission
  • Contact us
  • Privacy Policy
  • Terms and Conditions

Copyright 2025 Manuals.Online. All Rights Reserved.