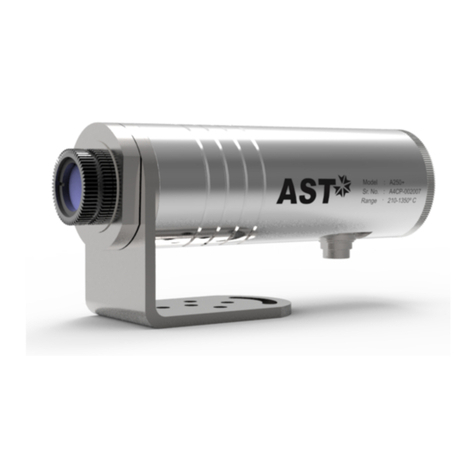
AST TI-1800 User manual

AST TI1800
USER MANUAL
Accurate Sensors Technologies
Non-contact Infrared Pyrometer
We measure accurate temperature in extreme conditions
AST - Accurate Sensing Technologies
188A, B-169 (Part), B-188 & B-189 (A) Road No.-5, M.I.A., Madri,
Udaipur (Rajasthan.) INDIA 313 003
Phone : +91-294-3507736 | Fax : +91-294-3507731
E-mail: [email protected]

Index
1. Chapter - 1
General information
2. Chapter - 2 ....................................................................................................................... 2
Introduction
2.1 Application, range and working principle
2.2 Technical specification
2.3 Optical Data
2.4 Standard Item Supplied with AST P250/P450
3. Chapter - 3 ....................................................................................................................... 5
Operation of the pyrometer
3.1 Parameters
3.2 Installation of pyrometer
3.2.1 Battery Insertion
3.2.2 Switching On
3.2.3 Display Function
3.2.4 Bluetooth Communication
....................................................................................................................... 1

Congratulations on choosing this high quality and highly efficient AST pyrometer for non contact temperature
measurement. Please read this user manual carefully, step by step, including all notes of security, operation and
maintenance before installing the pyrometer. This manual contains all the necessary instructions for set up and
operation of the pyrometer. This section provides an overview about important safety regulations.
Some Important Safety Regulations Given Below:
1. Safety Precaution :
Each person working with pyrometer must read the user manual before operation. The pyrometer has only to be
used for the purpose described in manual. The pyrometer works only with a potential free low voltage. This voltage is
not harmful for user. The pyrometer may contain harmful material and hence it should not be disposed of with
normal waste.
2. Packaging and Storage :
Always use a shock proof package for shipment of pyrometer. It should be sealed to protect it against humidity. Also
protect the lens of pyrometer with cover. They should be stored at the temperature range from -20°c to 55°C.
3. Limit of Liability and Warranty
All general information and notes for handling, maintenance and cleaning of this instrument are offered according to
the best of our knowledge and experience.
AST reserves the right to revise this document and to make change from time to time in the content hereof without
obligation to notify any person or persons of such revisions or changes. AST instruments have a warranty of two year
from the invoice date. This warranty covers manufacturing defects and faults which arise during operation only if
they are the results of defects caused by AST.
AST does not accept liability for any damages or losses which might occur, including consequential damages and
financial losses, as a result of use of the instrument.
4. Copyright :
All rights reserved. This document may contain proprietary information and shall be respected as a proprietary
document to AST with permission for review and usage given only to the rightful owner of the instrument with which
this document is associated.
Chapter - 1
General Information
1

Chapter - 2
Introduction
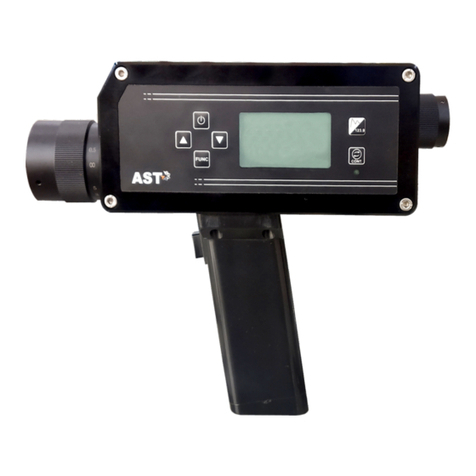
TI-1800 portable digital pyrometer are specially designed for both non contact infrared and probe contact (K type
thermocouple) temperature measurement. This instrument has a LCD display, Bluetooth digital interface, Small Spot
Size. This instrument is equipped with inbuilt laser to simplify the alignment of the pyrometer .
ØInduction Heating
ØCasting
ØAnnealing
ØWelding
ØForging
ØSintering
ØMelting
ØRolling
ØHardening
2.1 Application, Range and Working Principle
TI-1800 are specially designed portable IR pyrometer for non contact temperature measurement between 250°C to
1800°C in demanding industrial environments. The back light a LCD display provides temperature, indication of status
and configuration of pyrometer together with measurement mode. The measuring result is shown and can be
analyzed directly on site.
The portable pyrometer provides fast, simple data logging with bluetooth connectivity to download this data to
android mobile for analysis. The data storage (data store up to 1000 values) of measurement offers the best possibility
for analyzing the data.
The applications in which AST pyrometers can be used are:
2

2.2 Technical Specifications
3
Model
TI-1800
Temperature Range
250°C to 1800°C (Non Contact IR mode)
-40°C to 1372°C (Thermocouple Type K Probe mode)
Emissivity
0.1 to 1.0
Spectral Range
1.6um
Distance to Spot Ratio
100:1
Response time
100msec
Battery life
30hrs (without laser)
Accuracy
0.5% of measured value
0.2% of full scale (Thermocouple Type K Probe mode)
(Non Contact IR mode)
Resolution
0.1°C below 1000°C
0.1°C above 1000°C
Temperature Unit
°C/°F
Operating Temperature
0°C to 50°C
Power Supply
2xAAA battery, 1.5V
Laser Sighting
Single laser pointer
Data Logging
1000 measured values of temperature with emissivity, date
and time
RTC
Yes
Buzzer
Yes
Digital Interface
Bluetooth
Weight
370g
Dimensions (mm)
181 x 66 x 195
Tripod Thread
UNC¼”

4
2.3 Optical Data
1) Sighting :- TI1800 equipped with in-built pilot laser to
focus on target to measure temperature.
2) Spot Size Table :- The objective can be focused to adjust
within distances between 0.5m to 3.0m.
TI-1800
FOV 100 : 1 30mm@3000mm
20mm@2000mm
A=7mm
Measuring Distances MD
(mm)
with standard focusable optics
500
1000
2000
3000
TI1800
250°C - 1800°C
(100:1)
5
10
20
30
2.4 Standard Item supplied with AST TI-1800.
þ
þ
þ
þ
Calibration certificate.
Software CD and Operation manual.
Carry Box
2xAAA 1.5V batteries

5
Chapter - 3
3.1 Parameters
Name
Scrolling Display
Parameter Description
Value
Default
LLLL
Low temperature
Measured temperature is not within the selected
range.
temperature below 250°C
(Probe mode OFF)
temperature below -40°C
(Probe mode ON)
LLLL
EMI
Emissivity
Select the Emissivity as per target
0.1 to 1.00
1
UNT
Temeprature Unit
Select Suitable measurement Unit
°C
F
°F
PRB
Probe selection
Select Probe for contact type temperature
measurment i.e Thermocouple
ON
oFF
Select Probe for non contact type temperature
measurement i.e Pyrometer
oFF
OPEn
Open
Probe is selected ON but Thermocouple sensor is
not connected.
OPEn
OPEn
ALR
Alarm
To set Alarm for Thermocouple & Pyrometer Mode
selection
For Probe oFF : Pyrometer
250°C/482°F to 1800
°C/3272°F.
For Probe on:
Thermocouple -40°C/-40°F
to 1372°C /2501°F
oFF
MAX
Maximum Temperature
To Capture & Display measured maximum
temperature
on
oFF
oFF
MIN
Minimum Temperature
To Capture & Display measured minimum
temperature
on
oFF
oFF
CLR
Clear
To clear all the logged temperature data
YES
NO
NO
LOG
Data Logging
To log the Temperature data
YES
NO
NO
BT
Bluetooth
To select Bluetooth Mode to communicate with
Mobile
on
oFF
oFF
RCd
Number of records
To record 1000 Temperature Data
1-1000
0
S T
Set time
Set the Real time Clock
on
oFF
oFF
HRS
Hours
To set hours timing
24 hrs Format
0
MNT
Minuts
To set Minuts timing
0 to59
0
SEC
Seconds
To set Seconds timing
0 to 59
0
YER
Year
To set the Year number
0
MON
Month
To set the Months number
1 to 12
0
dAT
Date
To set the Date number
0-31
0
SCAN
SCAN
when trigger Pressed, in SCAN mode to measure
the target temperature
SCAN
/
HOLD
HOLD
When Trigger not pressed, in HOLD Mode
HOLD
HOLD

6
3.2 Installation of Pyrometer
For operating the pyrometer 2 batteries are required (Note :-
Alkaline- manganese batteries should not be used). They must be
inserted into the battery holder (Note:- polarity of battery should
be correct). And installed afterward into the pyrometer handle
(Note :- position and direction of battery should be correct). After
closing the battery case cover the pyrometer is ready for use. The
direction of battery holder shown in figure.
3.2.1 Battery Insertion
Insert
Direction
3.2.2 Switching ON
The pyrometer can be switched ON/OFF by pressing trigger key.
Trigger key can be long pressed for 3 sec. to switching ON
pyrometer.
(A) Triggering Point/Single Value Storage :- User will trigger the
key on handle to scan the value, the value will automatically save
into the pyrometer if data logging mode ON.
Battery Holder
Battery Case
cum Handle
Trigger Key

7
Do This
Display
Additional Notes
Press Trigger for 3 sec
Display while powering ON
After Power ON, It will show existing
paramters Battery Indication, UNIT,
HOLD, Desh etc…
After Power On Display
If Trigger is Pressed pyrometer will be in
SCAN mode.
Pyrometer will measure & display
temperature value until trigger key
released.
Press "MENU" Key to Set "EMI”
Press "UP" & "DOWN" Key to
"Increment" or "Decrement"
emmissivity value.
*Press MENU key to confirm changes.
Press "MENU" Key to Set "UNT”
Press "UP" & "DOWN" Key to change
measurement Unit °C or °F.
*Press MENU key to confirm changes.
Press "MENU" Key to Set "PRB”
Press "UP" & "DOWN" Key to ON & OFF.
PRB ON: Thermocouple Mode
PRB OFF: Pyrometer Mode
*Press MENU key to confirm changes.
MENU
°C
SCAN
MAX 550.0
550.0
MENU
EMI
----
°C
1.00
MENU
UNT
----
°F
F
MENU
PR8
----
°C
oFF
3.2.3 Display Functions

8
Do This
Display
Additional Notes
Press "MENU" Key to Set "ALR”
As per UNIT "°C" & "°F" selection &
Probe "ON" & "OFF" selection below
Alarm max value will display.
For Pyrometer: 250°C/482°F to 1800°C
/3272°F.
For Thermocouple: -40°C/-40°F to
1372°C/2501°F.
Press "UP" & "DOWN" key increment &
decrement value of Alarm. User can set
value of temperature range at that
value buzzer operate.
*Press MENU key to confirm changes.
Press "MENU" Key to Set "MAX”
Press "UP" & "DOWN" Key to "ON" or
"OFF".
IF MAX is "ON", It will show maximum
measured temperature on the screen
until next MAX temperature measures.
*Press MENU key to confirm changes.
Press "MENU" Key to Set "MIN”
Press "UP" & "DOWN" Key to "ON" or
"OFF".
IF MIN is "ON", It will show minimum
measured temperature on the screen
until next MIN temperature measures.
*Press MENU key to confirm changes.
Press "MENU" Key to Set "CLR”
Press "UP" & "DOWN" Key to "YES" or
"NO".
IF CLR is YES and confirmed then it will
clear all saved Logged Temperature
Data.
*Press MENU key to confirm changes.
Press "MENU" Key to Set "LOG”
Press "UP" & "DOWN" Key to "YES" or
"NO".
If LOG is YES then only it will store the
Temperature data.
*Press MENU key to confirm changes.
Press "MENU" Key to Set "BT”
For data analaysis communication with
mobile appliction
Press "UP" & "DOWN" Key to "ON" or
"OFF".
*Press MENU key to confirm changes.
MENU
ALR
----
°C
1368
MENU
°C
MAX oFF
----
MENU
°C
MIN oFF
----
MENU
°C
CLR No
----
MENU
°C
LOG YES
----
MENU
°C
8 T oFF
----

9
Do This
Display
Additional Notes
Press "MENU" Key to view "RCD”
Press "UP" & "DOWN" Key to view all
the saved records from 1-1000 values
*Press MENU key to confirm changes.
Press "MENU" Key to Set "ST”
Press "UP" & "DOWN" Key to "ON" or
"OFF".
*Press MENU key to confirm changes.
IF "ST" is ON then Press "MENU" you
will see Time & Date parameter then
select "HRS”
Press "UP" & "DOWN" Key to set 1 to 23
Hrs.
*Press MENU key to confirm changes.
IF "ST" is ON then Press "MENU" you
will see Time & Date parameter then
select "MNT”
Press "UP" & "DOWN" Key to set 1 to 59
Mins.
*Press MENU key to confirm changes.
IF "ST" is ON then Press "MENU" you
will see Time & Date parameter then
select "SEC”
Press "UP" & "DOWN" Key to set 1 to 59
Sec.
*Press MENU key to confirm changes.
IF "ST" is ON then Press "MENU" you
will see Time & Date parameter then
select "YER”
Press "UP" & "DOWN" Key to set
current Year.
Press long time for Fast Incremental
value.
Year will display in 2 digit.
*Press MENU key to confirm changes.
MENU
RCD
----
°C
––
MENU
ST
----
°C
oFF
MENU
HRS
----
°C
23
MENU
MNT
----
°C
59
MENU
SEC
----
°C
59
MENU
YER
----
°C
21

10
Do This
Display
Additional Notes
IF "ST" is ON then Press "MENU" you
will see Time & Date parameter then
select "MON”
Press "UP" & "DOWN" Key to set 1 to 12
months.
*Press MENU key to confirm changes.
IF "ST" is ON then Press "MENU" you
will see Time & Date parameter then
select "DAT”
Press "UP" & "DOWN" Key to set 1 to 31
date.
*Press MENU key to confirm changes.
If temperature reading shows "OPEn”
If you have selected "PRB" as "ON" and
no thermocouple is connected then
"OPEn" will Show. Please connect
Thermocouple properly & try again.
If temperature reading shows "LLLL”
Temperature below 250°C (Probe mode
OFF)
Temperature below -40°C (Probe mode
ON)
If "DOWN" key Press & Hold for 5 Sec
Press DOWN key for 5 sec. : Laser ON
Press DOWN key for 5 sec. : Laser OFF.
If "UP" Key Press & Hold for 5 Sec
Press UP key for 5 sec. : LCD back light
Intensity High
Press UP key for 5 sec. : LCD back light
Intensity Low
NOTE :
1. For PRB "ON" mode only UNIT, ALR is Enable.
2. For PRB "ON" mode there is no bluetooth communication and data storage available.
2. Portable pyrometer display "Auto OFF" after 1 Min if not in Operation.
3. Portable pyrometer display "Auto OFF" after 10 Min if not in Operation and Bluetooth mode ON.
4. RTC will reset after every removal of Batteries and need to reconfigure "ST".
5. When the ‘Low battery’ icon indicates the battery is low : The battery should be replaced immediately (Battery ‘OK’ temp.
measurement and saving are possible, if battery ‘Exhausted’ temperature measurement and saving are not possible)
MENU
MON
----
°C
12
MENU
DAT
----
°C
31
MENU
OPEn
°C
MENU
LLLL
°C
SCAN
MENU
----
HOLD
°C
MENU
LLLL
°C
SCAN

11
3.2.4 Bluetooth Communication
In TI 1800, for PRB “OFF” i.e Pyrometer mode selection we have Bluetooth Communication option to retrieve the
data from the pyrometer. To retrieve data we need to install “INFRASMART TI” App in to the android mobile. In
Pyrometer press “BT” menu “ON” then switch on the Bluetooth discoverable from Mobile. User will receive
Bluetooth name (e.g. TI-1002) select the Bluetooth name & initiate the pairing. (For pairing it will ask the password
and password will reverse order of the Pyrometer Sr. No. i.e 2001) then establish the communication between
Mobile & Portable Pyrometer as shown in fig 1.
Once pyrometer and mobile bluetooth paired successfully it will display “show data”. User have to press show data
option to view saved temperature values in pyrometer. as shown in fig 2.
To save or clear the data from mobile you can see right side top
menu. Either you can Save or Clear the temperature value.
If you have chosen “save” option, it will be saved in mobile in the
form of .txt file.
If you have chosen “CLEAR DATA” option then it will clear all saved
data from mobile & Pyrometer.
Path of the saved file will be File Manage →Phone Storage →
Download → .txt file.
File name will be saved in the format of TI----data_YMDHMS.txt
TI---- : Sr. No
Y : Year
M : Month
D : Date
H : Hours
M : Minutes
S : Seconds
Fig 1 Fig 2
Fig 3
Note : Temperature data will be stored in °C format only irrespective of unit selection in pyrometer.

12
Information
Maintenance
The pyrometer has no internal parts, which have to be cleaned. The lens can be cleaned with compressed air,
which is dry and free of oil. If the protection glass requires more thorough cleaning, use a soft, dry cloth such as that
used to clean camera lenses.
Packing instructions
To transport or store the instrument, please use the original box or a box padded with sufficient shock
absorbing material. For storage in humid areas or shipment overseas, the device should be placed in welded foil
(ideally along with silicone gel) to protect it from humidity.
Warranty
AST TI1800 instruments have a warranty of one years from the invoice date. This warranty covers
manufacturing defects. User-induced faults are not covered under this warranty.
Limit of liability
AST not liable for any damages that arise from the use of any examples or processes mentioned in this manual.
Specifications are subject to change without notice

Copyright: 2009, AST. All rights reserved.
This document may contain proprietary information and shall be respected as a proprietary document to
AST with permission for review and usage given only to the rightful owner of the equipment with which this
document is associated.
AST reserves the right to make changes, without further notice, to any products herein to improve
reliability, function, or design. AST does not assume any liability arising out of the application or use of any product
described herein, neither does it convey any license under its patent rights nor the rights of others.
Copyright: © 2009
©

www.accuratesensors.com
ABOUT US
AST - Accurate Sensors Technologies
Accurate Sensors Technologies along with 3T - True Temperature Technologies established in 1994 focusing on
the development and commercialization of non-contact temperature measurement technologies.
Based on these technologies, AST/3T has bought to the market a line of pyrometers for the remote
measurement of target temperatures using no physical contact. AST/3T pyrometers use a totally new approach for
remote temperature measurement achieving high accuracy.
The following products are available from AST/3T
v Single color pyrometer
v Ratio (2 color) pyrometer
v Fiber optics with single color and two color pyrometer
v Multi wavelength pyrometer specially for Aluminum & other Non - ferrous application
v Black Body calibration sources
v Special system for automatic Isothermal Extrusion (MOMAS)
v Parameter setting Devices
Misgav Industrial Park,
Misgav 20174, Israel
Ph. : +972-4-9990025, Fax. : +972-4-9990031
E-mail: [email protected]
AST - Accurate Sensors Technologies
AST - Accurate Sensing Technologies
188A, B-169 (Part), B-188 & B-189 (A)
Road No.-5, M.I.A., Madri, Udaipur
(Rajasthan.) INDIA 313 003
Ph.: +91-294-3290271
E-mail: [email protected]
Table of contents
Other AST Measuring Instrument manuals

AST
AST A250 FO-PL User manual

AST
AST A250C+ FO PL User manual

AST
AST A250+ PL/TL/Video BT User manual

AST
AST IR-CAST 2C User manual

AST
AST Embedded System Products TSA6000-USB User manual

AST
AST A150 User manual

AST
AST A450C PL/TL BT User manual

AST
AST A250+ FO PL User manual

AST
AST P390 User manual

AST
AST A250C FO-PL User manual