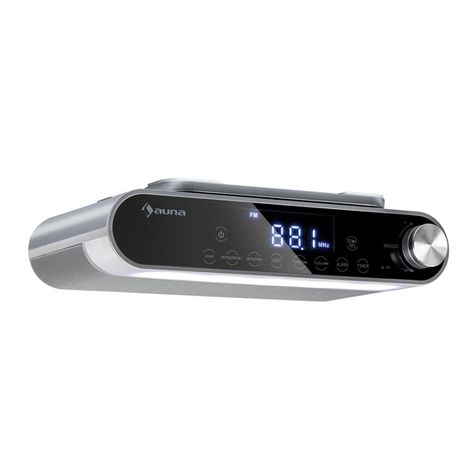
auna Virginia User manual

www.auna-multimedia.com10027102 10027104
DAB-Radio + USB + SD + AUX
Virginia

2
Bedienungsanleitung 3
Instruction manual 10
Mode d‘emploi 17
Manual de instrucciones 24
Istruzioni per l‘uso 31

3
Sehr geehrter Kunde,
zunächst möchten wir Ihnen zum Erwerb Ihres Gerätes gratulieren.
Bitte lesen Sie die folgenden Anschluss- und Anwendungshinweise sorgfältig durch und befolgen Sie diese
um möglichen technischen Schäden vorzubeugen.
Technische Daten
Artikelnummer 10027102, 10027104
Radiofrequenz FM 88-108 MHz
Frequenzganz 20Hz - 20 KHz
Stromversorgung Netzteil (Eingang: 220-240V AC; Ausgang: 14V DC)
Maße / Gewicht
Warnung
Zur Reduzierung der Gefahr von Brand, elektrischem Schlag und Beschädigung:
• Setzen Sie dieses Gerät nicht dem Regen aus.
• Stellen Sie keine mit Flüssigkeiten gefüllten Gefäße, wie Vasen, auf dieses Gerät.
• Ausschließlich das empfohlene Zubehör verwenden.
• Reparieren Sie dieses Gerät nicht selbst.
• Wenden Sie sich zur Wartung an qualiziertes Kundendienstpersonal.
• Lassen Sie keine Gegenstände aus Metall in dieses Gerät fallen.
• Stellen Sie keine schweren Gegenstände auf dieses Gerät.
• Reinigen Sie das Gerät nur mit einem trockenen Tuch.
• Blockieren Sie nicht die Belüftungsönungen.
• Installieren Sie die Geräte nicht in unmittelbarer Nähe von Hitzequellen wie Heizungen, Herden, Öfen
oder anderen heiß werdenden Geräten (wie z.B. Verstärkern o.a.)
• Entfernen Sie die Batterien, wenn Sie das Gerät längere Zeit nicht benutzen.
Aufstellung
• Achtung - Stellen Sie keine Quellen oener Flammen, z.B. brennende Kerzen, auf das Gerät.
• Stellen Sie das Gerät auf eine trockene, ebene, wasserfeste und hitzebeständige Oberäche.
• Suchen Sie einen Aufstellort, an dem Kinder nicht an das Gerät gelangen können.
• Die Steckdose muss leicht zugänglich sein, um im Notfall das Gerät schnell vom Stromkreis trennen
zu können.
• Installieren oder positionieren Sie dieses Gerät nicht in einem Bücherregal, EInbauschrank oder einem

4
sonstigen engen Raum. Stellen Sie eine gute Belüftung des Gerätes sicher.
• Stellen Sie das Gerät nicht auf Verstärker oder andere Geräte, die heiss werden können. Diese Hitze
könnte das Gerät beschädigen.
• Setzen Sie dieses Gerät keinen übermäßigen Erschütterungen aus.
Transport
Bitte bewahren Sie die Originalverpackung auf. Um einen ausreichenden Schutz beim Transport des Geräts
zu erreichen, verpacken Sie es in der Originalverpackung.
Reinigung
Verwenden Sie keine üchtigen Flüssigkeiten, wie Insektensprays. Durch zu starken Druck beim
Abwischen können die Oberächen beschädigt werden. Gummi- oder Plastikteile sollten nicht über einen
längeren Zeitraum mit dem Gerät in Kontakt sein. Nutzen Sie ein trockenes Tuch.
Bedienelemente und Funktionen
Front
Display 1 9 BT LED
Standby-LED 2 10 /
Infrarot-Sensor 3 11 / ENTER
INFO / +10 4 12 / SCAN
PRE / MEM / PLAY MODE 5 13 AUX-In Eingang

5
(Ein-/ausschalten) 6 14 Kopfhörereingang
FUNCTION (Funktionswahl) 7 15 USB-Anschluss
TONE - Regler 8 16 Volumen-Regler
Rückseite
Wurfantenne 17 18 Netzteilanschluss
Fernbedienung
Die mitgelieferte Fernbedienung benötigt eine Batterie des Typs „CR2032“ (Lithium-Knopfzelle). Legen Sie
diese in das Batteriefach auf der Rückseite der Fernbedienung ein wie in der Abbildung dargestellt.

6
Fernbedienung
MUTE Stummschalten
INFO MP3-Modus: Anzeige der ID3-Tags
Radio/DAB: Anzeige des RDS / DAB-Text
FUNCTION Funktionswahl
/ Nächste(r) / Vorige(r) Sender / Frequenz / Titel
Play / Pause
-10 / 10+ MP3-Modus: 10 Tracks vor/zurück
MP3-Modus: Stop / programmierte Playlist löschen
PLAY MODE/
PRE / MEM USB-Modus: Repeat / Random Modi aktivieren
DAB/FM: Sender aufrufen oder aktuellen speichern
ENTER DAB/FM: Die Auswahl bestätigen
SCAN DAB/FM: Sendersuchlauf starten
VOLUME
+ / - Lautstärke einstellen
Nutzung
Radio
• Schalten Sie das Gerät mit ein und wählen Sie den Radio-Modus durch mehrfachen Druck auf
FUNCTION.
• Wählen Sie mit den gewünschten Sender mit / aus und stellen Sie die Lautstärke mit dem
Volumenregler (16) ein.
Auto-Scan
Wählen Sie den Radio-Modus und drücken Sie / SCAN (12). Das Gerät beginnt mit einem automa-
tischen Sendersuchlauf und spielt den zuerst gefundenen Sender ab. Halten Sie / SCAN (12) eine
Sekunde gedrückt, damit die Suche weiterläuft.
RDS (Radio Data System)
Drücken Sie während des Abspielen eines Senders mehrfach INFO/+10 (4), um Informationen auf dem
Display anzuzeigen, die viele Radiosender über ihre RDS-Frequenzen mitsenden. Die Reihenfolge ist
jeweils Radio Text -> Programm-Art -> Signalstärke -> Daturm/Uhrzeit -> Frequenz -> Mono/Stereo.

7
DAB-Radio
• Wählen Sie den DAB-Modus mit FUNCTION (7) aus.
• Drücken Sie / SCAN (12), um einen automatischen Sendersuchlauf durchzuführen.
• Wählen Sie dann den gewünschten DAB-Sender mit / aus.
• Drücken Sie mehrfach INFO (10), um zusätzliche Infos in der folgenden Reihenfolge anzuzeigen: Grup-
penname -> Frequenz -> Transfer Rate -> Signalstärke -> Datum/Uhrzeit -> Programmart / Genre ->
Lauftext (vom Sender generiert).
Senderspeicher
Sie können bis zu 40 Sender im internen Speicher des VIRGINIA ablegen und abrufen (20 x FM, 20 x DAB).
• Schalten Sie in den Radio- bzw. DAB-Modus
• Stellen Sie den gewünschten Sender / die gewünschte Frequenz ein.
• Halten Sie PRE/MEM/PLAY MODE am Gerät oder auf der Fernbedienung gedrückt, um in den Spei-
chermodus zu gelangen.
• Suchen Sie den gewünschten Speicherplatz mit / aus und bestätigen Sie die Auswahl mit
/ ENTER.
Um einen gespeicherten Sender aufzurufen,
• drücken Sie PRE/MEM/PLAY MODE (5) am Gerät oder auf der Fernbedienung und suchen Sie den
gewünschten Speicherplatz mit / .
• Bestätigen Sie Ihre Auswahl mit / ENTER.
Bitte beachten Sie:
• Der Senderspeicher wird durch das Trennen der Netzverbindung vollständig gelöscht. Schalten Sie Ihr
Radio in den Standby-Modus, um den Verlust dieser Daten zu vermeiden.
• Nach 3 Sekunden ohne Eingabe kehrt das Gerät zurück zum Radio-/DAB-Modus.
• Um einen Senderspeicherplatz zu überschreiben, speichern Sie einfach auf dem jeweiligen Speicher-
platz.
Allgemeine Hinweise:
• Rollen Sie die Wurfantenne vollständig aus, um die bestmögliche Empfangsleistung zu garantieren.
• Um die DAB-Senderspeicher zu löschen, halten Sie im DAB-Modus FUNCTION (7) gedrückt. Das Dis-
play wird die Löschung bestätigen und das Gerät führt automatisch einen neuerlichen Sendersuchlauf
aus.
USB
• Stecken Sie ein USB-Speichermedium (USB-Stick, Festplatte, etc.) am USB-Anschluss an.
• Schalten Sie das Gerät ein und wechseln Sie per FUNCTION (7) in den USB-Modus.

8
• Das Gerät liest die enthaltenen Daten aus (es können Musikdateien im MP3-Format abgespielt wer-
den).
• Navigieren Sie in gewohnter Weise - mit den Tasten / , und durch Ihre Medienbib-
liothek.
• Mit +10 / -10 (Fernbedienung) springen Sie jeweils 10 Titel vor bzw. zurück.
• Mit PLAY MODE (5) wählen Sie die Abspielmodi REPEAT 1 (wiederholt den aktuellen Titel) - REPEAT ALL
(wiederholt alle enthaltenen Titel) - RANDOM (spielt die enthaltenen Titel in einer zufälligen Reihen-
folge). Ein entsprechendes Icon wird jeweils auf dem Display angezeigt. Drücken Sie PLAY MODE noch
einmal, um die Funktion abzuschalten.
Bitte beachten Sie:
• Durch unterschiedliche Codierungsvarianten können ecentuell manche MP3-Player nicht ausgelesen
werden.
• USB-Verlängerungskabel können die Funktion beeinträchtigen.
• Das System ist nicht für die Datenkommunikation mit einem Computer ausgelegt.
• MP3-Dateien müssen eine Bit-Rate von 32-320kbps und eine Sampling Rate von 32, 44.1 oder 48kHz
aufweisen.
BT
• Wählen Sie mit FUNCTION (7) den BT-Modus aus.
• Die BT-LED blinkt, um die Suche nach BT-Equipment anzuzeigen.
• Aktivieren Sie BT auf Ihrem Smartphone / Tablet / Computer und verbinden Sie mit „VIRGINIA“.
• Bei erfolgreicher Verbindung hört die LED auf zu blinken und Sie können Ihre mobile Musikbibliothek
via BT wiedergeben.
AUX
Sie können einen externen Medienplayer (wie MP3-Player, Smartphones, CD-Player etc.) auch über ein Au-
diokabel mit dem AUX-Eingang des VIRGINIA verbinden. Wählen Sie per FUNCTION (5) den AUX-Modus
aus und steuern Sie die Wiedergabe über Ihr externes Gerät.
Kopfhörer
Verbinden Sie Kopfhörer mit dem Kopfhörer-Anschluss des VIRGINIA. Dadurch werden die eingebauten
Lautsprecher automatisch abgeschaltet. Beachten Sie, dass zu langes und lautes Hören über Kopfhörer den
Ohren schaden kann.
Energie-Spar-Funktion
Nach 15 Minuten ohne Eingabe und ohne dass Musik abgespielt wurde, schaltet sich das VIRGINIA automa-
tisch in den Standby-Modus, um so Energie zu sparen.

9
Hinweise zur Entsorgung
Elektroaltgeräte
Bendet sich die diese Abbildung (durchgestrichene Mülltonne auf Rädern) auf dem Pro-
dukt, gilt die Europäische Richtlinie 2002/96/EG. Diese Produkte dürfen nicht mit dem
normalen Hausmüll entsorgt werden. Informieren Sie sich über die örtlichen Regelungen
zur getrennten Sammlung elektrischer und elektronischer Gerätschaften. Richten Sie sich
nach den örtlichen Regelungen und entsorgen Sie Altgeräte nicht über den Hausmüll.
Durch die regelkonforme Entsorgung der Altgeräte werden Umwelt und die Gesundheit
ihrer Mitmenschen vor möglichen negativen Konsequenzen geschützt. Materialrecycling
hilft, den Verbrauch von Rohstoen zu verringern.
Konformitätserklärung
Hersteller: CHAL-TEC GmbH, Wallstraße 16, 10179 Berlin, Deutschland
Dieses Produkt entspricht den folgenden Europäischen Richtlinien:
1999/05/EG (R&TTE)
2011/65/EU (RoHS)

10
Dear Customer,
Congratulations on purchasing this product. Please read and follow these instructions, in order to avoid
damaging the item. We do not cover any damages that may arise from improper use of the item or the
disregard of the safety instructions.
Technical Data
Article no 10027102, 10027104
Radio frequencies FM 88-108 MHz
Frequency range (audio) 20Hz - 20 KHz
Power Supply Netzteil (Eingang: 220-240V AC; Ausgang: 14V DC)
Dimensions
Important Safety Instructions
• Read all instructions before using.
• Do not place on or near a hot gas or electric burner or in a heated oven.
• To protect against a re, electric shock or personal injury, do not immerse cord, electric plugs or device
in water or other liquids.
• Do not expose the appliance to extreme temperatures. The appliance shall be used in moderate cli-
mates.
• Disconnect the appliance from the power source if it is not going to be used for a long time, if there is
a thunderstorm or if it isn‘t working properly.
• The use of attachments that are not recommended by the appliance manufacturer may result in re,
electric shock or personal injury.
• Do not open the unit by removing any cover parts. Do not attempt to repair the unit. Any repairs or
servicing should be done by qualied personell only.
• Only qualied persons may perform technical work on the product. The product may not be opened or
changed. The components cannot be serviced by the user. The manufacturer is not responsible for any
radio or TV interference caused by unauthorized modications.
• The appliance is not a toy. Do not let children play with it. Never let children insert foreign objects into
the appliance.
• Do not use the appliance for other than intended use. This appliance has been designed solely for
domestic use; the manufacturer‘s liability shall not be engaged in the event of any professional use, by
any misuse or by any use not complying with the operating instructions.
• Never clean the surface of the device with solvents, paint thinners, cleansers or other chemical pro-
ducts. Instead, use a soft, dry cloth or soft brush.
• Save these instructions.

11
Controls
Front
Display 1 9 BT LED
Standby LED 2 10 /
IR Sensor 3 11 / ENTER
INFO / +10 4 12 / SCAN
PRE / MEM / PLAY MODE 5 13 AUX IN
(Power on/o) 6 14 Headphone out
FUNCTION 7 15 USB port
TONE 8 16 Volume

12
Back
Antenna 17 18 DC IN
Remote Control
The RC requires 1 pc lithium battery type “CR2032“ for operation. Put the batery into the battery compart-
ment on the rear side of the RC as shown below.

13
Remote Control
MUTE Mute the device
INFO MP3-Mode: Show ID3 tags on display
Radio/DAB: Show RDS / DAB-Text
FUNCTION Select functions
/ Next/Previous Station/Frequency/Track
Play / Pause
-10 / 10+ MP3-Mode: skip 10 Tracks / 10 Track back
MP3-Mode: Stop / cancel programmed memory
PLAY MODE/
PRE / MEM USB-Mode: Repeat / Random Modes
DAB/FM: Save to presets / recall presets
ENTER DAB/FM: conrm selection
SCAN DAB/FM: Scan for DAB/FM stations
VOLUME
+ / - Adjust the volume level
Operation
Radio
• Switch the unit on and select the FM radio mode by pressing FUNCTION repeatedly.
• Choose your desired station using / and set the volume to the desired level
Auto Scan
Choose the FM radio mode and press / SCAN. The device will start a station scan and will then
automatically play the rst adequatly tuned in station. Press and hold / SCAN again to continue
the search.
RDS (Radio Data System)
Press INFO repeatedly when in FM mode, to show aditional information on the display (Radio Text ->
Program type -> Signal strength -> Date/Time -> Frequency -> Mono Stereo)

14
DAB
• Choose the DAB mode with FUNCTION.
• Press / SCAN to set o an automatic station scan. Then use and to choose your desired
station.
• Press INFO repeatedly to display further information (Group name -> frequency -> transfer rate ->
signal strength -> date/time -> program type -> scrolling text).
Preset Stations
You can store up to 40 radio stations in the memory (20xFM, 20xDAB).
• Set to FM/DAB mode and tune in your desired station.
• Press and hold PRE/MEM/PLAY MODE to enable memory state.
• Use and to select the desired station memory for storage.
• Press to conrm the preset memory.
To recall a preset station, press PRE/MEM/PLAY MODE and select the desired preset using /
and conrm pressing ENTER.
Please note:
• The preset memories will be deleted completely when the device is disconnected from the main
power supply. You are recommended to switch the system into standby mode for convenient usage.
• The device turns back to radio/DAB mode automatically after 3 seconds of no operation in preset
programming mode.
• You can overwrite a preset station by storing another frequency in its place.
General advice
• Fully unroll the FM antenna for the best possible reception.
• To delete all DAB stations, press and hold FUNCTION for a second (in DAB mode). A conrmation will
be shown on the display and the device will perform another scan for DAB stations automatically.
USB
• Connect any USB storage medium (USB thumb drive, external harddrive etc.) to the USB slot.
• Switch the VIRGINIA on and choose USB mode pressing FUNCTION.
• The device reads the storage device.
• Navigate through your media library in the conveniant way, using / , and .
• Skip 10 tracks back/forth pressing +10 / -10 (on the RC)
• Press PLAY MODE repeatedly to choose the play modes REPEAT 1, REPEAT ALL and RANDOM. Press
again to switch the function o.

15
Please note:
• Due to dierent kinds of MP3 encoding formats, some MP3 players might not work with the VIRGINIA.
• USB extension cables are not supported.
• The system is not designed for data communication with a computer.
• MP3 les must have a bit rate of 32 - 320 kbps and a sampling rate of either 32, 44.1 or 48 kHz.
BT
• Switch to BT mode pressing FUNCTION (7) repeatedly. The BT LED will ash, indicating the BT ready
state.
• Activate BT on your smartphone / tablet / computer and connect to „VIRGINIA“.
• The LED indicates the successful connection attempt by solid light. You can now play your mobile
music library via BT.
AUX
Connect another audio device, e.g. (portable) CD player, MP3 player, (portable) cassette player, iPod, etc.
To this system via a cord with Ø3.5mm jack plugs (not supplied). Connect one end of this cord to the head-
phone jack of the external device and the other end to the aux-in jack (13) at the side of the unit. Then press
FUNCTION (7) to set to AUX mode. Start to playback your external device to enjoy your music.
Headphone
Inserting the plug of your headphones into the headphone jack (14) to start to enjoy the music and keep the
volume at a reasonable level even if your headset is an open-air type designed to allow you to hear outside
sounds. Please note that excessively high volume may still block outside sounds.
Auto-o (Energy Saving)
The unit will switch to standby mode automatically once no any music playing over 15 minutes.

16
Environment Concerns
According to the European waste regulation 2002/96/EG this symbol on the product
or on its packaging indicates that this product may not be treated as household waste.
Instead it should be taken to the appropriate collection point for the recycling of electri-
cal and electronic equipment. By ensuring this product is disposed of correctly, you will
hep prevent potential negative consequences for the environment and human health,
which could otherwise be caused by inappropriate waste handling of this product. For
more detailled information about recycling of this product, please contact your local
council or your household waste disposial service.
Declaration of Conformity
Producer: CHAL-TEC GmbH, Wallstraße 16, 10179 Berlin, Germany
This product is conform to the following European directives:
1999/05/EC (R&TTE)
2011/65/EU (RoHS)

17
Chère cliente, cher client,
Toutes nos félicitations pour l’acquisition de ce nouvel appareil.
Veuillez lire attentivement les instructions de branchement et d’utilisation an d’éviter d’éventuels dom-
mages techniques. Le fabricant ne saurait être tenu pour responsable des dommages dus au non-respect
des consignes de sécurité et à la mauvaise utilisation de l’appareil.
Données techniques
Numéro d’article 10027102, 10027104
Bande de fréquence FM 88 – 108 MHz
Réponse en fréquence 20 Hz – 20 KHz
Alimentation Bloc d’alimentation (entrée : 220-240 V AC, sortie
: 14 V DC)
Important Safety Instructions
• Ne pas exposer l’appareil à la pluie.
• Ne pas poser des récipients remplis de liquide sur l’appareil, tel que des vases.
• Utiliser exclusivement des accessoires recommandés par le fabricant.
• Ne pas réparer l’appareil soi-même.
• Pour la maintenance, s’adresser à un technicien du service après-vente.
• Ne pas laisser d’objets métalliques tomber dans l’appareil.
• Ne poser aucun objet lourd sur l’appareil.
• Nettoyer l‘appareil à l’aide d’un chion sec.
• Veiller à ce que les fentes d’aération ne soient jamais obstruées.
• Ne pas placer l’appareil près d’une source de chaleur telle qu’un radiateur, une cuisinière, un four, ou
d’autres appareils pouvant chauer, comme par exemple un amplicateur.
• Retirer les piles lorsque l’appareil n’est pas utilisé pendant une période prolongée.
• Attention : ne poser aucune amme nue, telle qu’une bougie, sur l’appareil.
• Placer l’appareil sur une surface sèche, plane, imperméable et résistante à la chaleur.
• Installer dans un endroit hors de la portée des enfants.
• La che doit être facilement accessible an de pouvoir être débranchée immédiatement en cas d’urgence.
• Ne pas installer l’appareil sur une étagère, dans un placard ou dans un espace étroit. Assurer une
bonne ventilation.
• Ne pas installer l’appareil sur un amplicateur ou sur d’autres équipements qui pourraient devenir
chauds. Un contact avec une source de chaleur peut endommager l‘appareil.
• Ne pas exposer l’appareil à des chocs violents.
• Veuillez conserver la boîte d’emballage originale. Ranger l’appareil dans cette dernière lors de son
transport, pour obtenir une meilleure protection.
• Ne pas utiliser de liquide volatil tel qu’un spray insecticide, près de l’appareil. Ne pas frotter trop fort
lors du nettoyage, ou la surface de l’appareil pourrait être endommagée. Ne pas laisser trop longt-
emps en contact des éléments en caoutchouc et en plastique avec l’appareil. Utiliser un chion sec
pour le nettoyer.

18
Touches de commande et fonctions
Face avant
Écran d’aichage 1 9 Témoin BT
Témoin de veille 2 10 /
Capteur infrarouge 3 11 / ENTER
INFO / +10 SCROLL (parcourir)
(précédent/suivant) / SELECT 4 12 / SCAN
PRE/MEM/PLAY MODE
(mode mémorisation/lecture) 5 13 Entrée AUX
(Power on/o) 6 14 Prise casque
FUNCTION (sélection de la fonction) 7 15 Prise USB
Bouton de réglage TONE 8 16 Bouton de réglage du volume

19
Face arrière
Antenne 17 16 Prise d’alimentation
Télécommande
La télécommande fournie fonctionne avec une pile de type CR2032 (pile bouton lithium). Insérer la pile
dans le compartiment à l’arrière de la télécommande comme montré dans le schéma.

20
Télécommande
MUTE Couper le son
INFO Mode MP3 : aiche les tags ID3
Mode Radio/DAB : aiche le texte RDS/DAB
FUNCTION Sélection de la fonction
/ Station/fréquence/piste précédente/suivante
Lecture/pause
-10 / 10+ Mode MP3 : sauter 10 pistes en avant / en arrière
Mode MP3 : stop/supprimer la liste de lecture pro-
grammée
PLAY MODE/
PRE / MEM
Mode USB : lecture en boucle / activer le mode lec-
ture aléatoire
Mode DAB/FM : aicher les stations mémorisées /
mémoriser la station en écoute
ENTER DAB/FM : conrmer la sélection
SCAN DAB/FM : lancer la recherche automatique de sta-
tions
VOLUME +
/ - Régler le volume
Utilisation
Radio
• Pour allumer l‘appareil, appuyer sur la touche ON/OFF. Appuyer plusieurs fois sur la touche FUNCTION
pour sélectionner le mode radio.
• Choisir la radio souhaitée à l’aide des touches / et ajuster le volume à l’aide du bouton de
réglage (16).
Recherche automatique
Entrer dans le mode radio et appuyer sur la touche / SCAN. ). L‘appareil lance alors une recherche
automatique des stations de radio et lance la diusion de la première station trouvée Maintenir la
touch / SCAN enfoncée pour poursuivre la recherche de stations.
RDS (Radio Data System – système de données radio)
Pendant l’écoute d’une station, appuyer plusieurs fois sur la touche INFO/+10 (4) pour aicher sur
l’écran les informations transmises par la station via les fréquences RDS. Les types d’informations
s’aichent dans l’ordre suivant : Texte radio -> Type d’émission -> Intensité du signal -> Date/heure ->
Fréquence -> Mono/stéréo.
Table of contents
Languages:
Other auna Radio manuals

auna
auna Silver Star Mini User manual

auna
auna Connect 100 SE User manual

auna
auna 10028699 User manual

auna
auna KR-100 User manual

auna
auna KR-140 User manual

auna
auna 10031854 User manual

auna
auna iTuner 320 ME User manual

auna
auna IR-150 User manual

auna
auna Harmonica User manual

auna
auna iTuner CD 10032753 User manual

auna
auna Soundchef MKII User manual

auna
auna 10032295 User manual

auna
auna Splash User manual

auna
auna WL-60 User manual

auna
auna DigiPlug FM User manual

auna
auna Worldwide Mini 10031919 User manual

auna
auna Stanford User manual

auna
auna IR 130 User manual

auna
auna Weimar User manual

auna
auna 10022778 User manual