manuals.online logo
Brands
  1. Home
  2. •
  3. Brands
  4. •
  5. Axor
  6. •
  7. Bathroom Fixture
  8. •
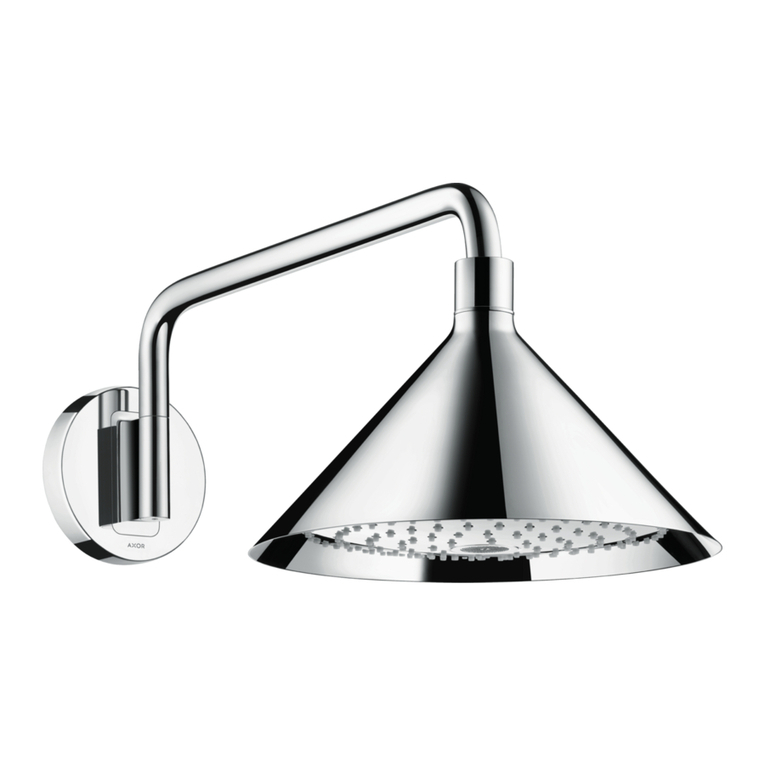
  9. Axor 300 2jet 35303007 Manual

Axor 300 2jet 35303007 Manual

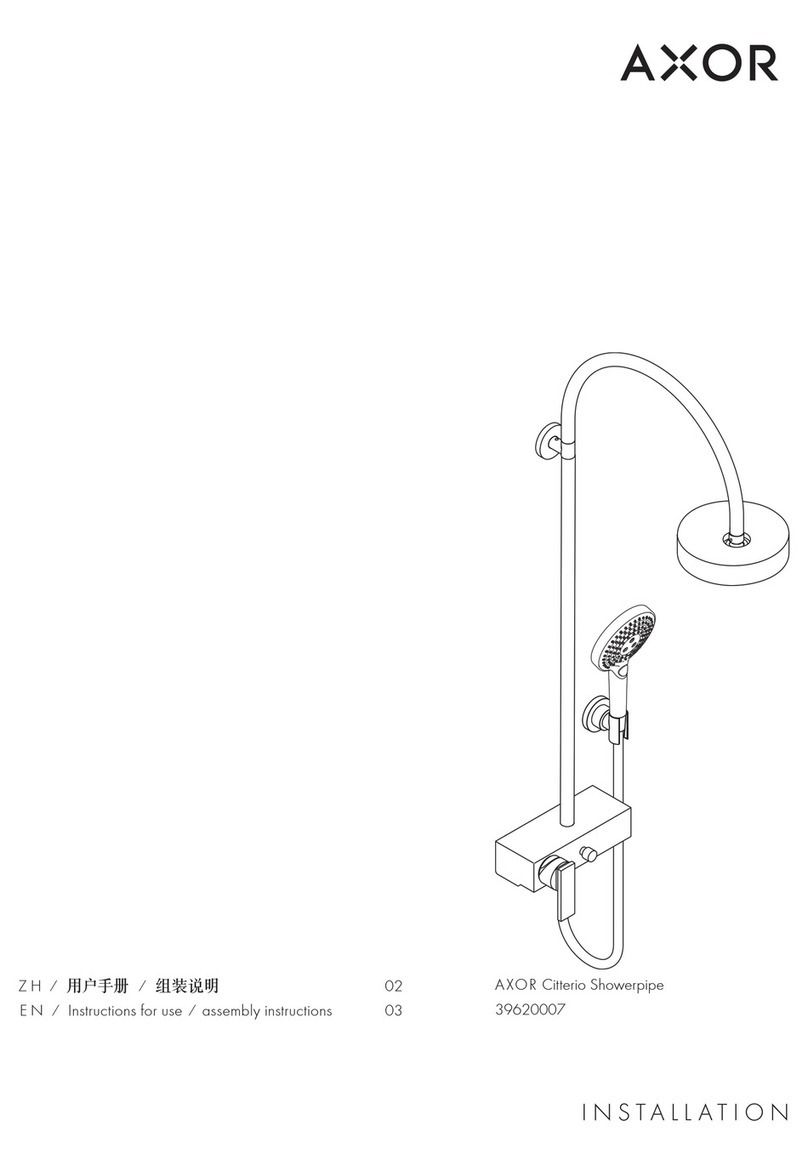
INSTALLATION
ZH ⁄ 用户手册  ⁄  组装说明  02
EN ⁄ Instructions for use ⁄ assembly instructions 03
AXOR 300 2jet
35303007
AXOR 300⁄300 2jet
35318007
02
安全技巧
 装配时为避免挤压和切割受伤,必须戴上手套。
 头顶花洒夹持杆只为夹持头顶花洒而设计,不得
让其承载其它物品!
 该莲蓬头仅允许作淋浴、卫生保健和身体清洁目
的使用。
安装提示
⁄ 安装前必须检查产品是否受到运输损害。 安装后
将不认可运输损害或表面损伤。
⁄ 管道和阀门必须根据通用标准进行安装、冲洗和
检查。
⁄ 请遵守当地国家现行的安装规定。
⁄ 由有资格的专业人员进行产品安装时请注意:在
所有加固区域中,加固表面是否平整(无突出的
接缝或瓷砖),墙体结构是否适合产品安装且未
显露出任何缺点。
技术参数
工作压强:  最大 0,6 MPa
推荐工作压强:  0,2 - 0,4 MPa
  (1 MPa = 10 bar = 147 PSI)
热水温度:  最大 60°C
热力消毒:  最大 70°C ⁄ 4 分钟
该产品专为饮用水设计!
问题 原因 补救
 ⁄花洒头严重泄露 ⁄ 花洒头脏污⁄产生钙质垢 ⁄ 清洁花洒头⁄去除钙质垢 
(参见第页 12)
 ⁄花洒持续滴水 ⁄ 关闭部件损坏 ⁄ 更换关闭部件
 ⁄在关上龙头后,花洒短时滴水 ⁄ 按标准清空管道
 ⁄花洒操作不当 ⁄ 流动压力过小 ⁄ 检查总水压
⁄ 增加水压
⁄ 过滤网有垃圾堵塞 ⁄ 清洗过滤网 (参见第页 14)
⁄ 花洒头脏污⁄产生钙质垢 ⁄ 清洁花洒头⁄去除钙质垢 
(参见第页 12)
备用零件(参见第页 04)
安装(参见第页05)
流量示意图(参见第页 11)
大小(参见第页 10)
请勿使用含有乙酸的硅胶!
符号说明
清洗(参见第页 12)
ZH
操作(参见第页 11)
03
SAFETY NOTES
Gloves should be worn during installation to prevent
crushing and cutting injuries.
The arm of the shower head is intended only to hold
the shower head. Do not load it down with other
objects!
The shower may only be used for bathing, hygiene and
body cleaning purposes.
INSTALLATION INSTRUCTIONS
⁄ Prior to installation, inspect the product for transport
damages. After it has been installed, no transport or
surface damage will be honoured.
⁄ The pipes and the fixture must be installed, flushed and
tested as per the applicable standards.
⁄ The plumbing codes applicable in the respective coun-
tries must be observed.
⁄ During installation of the product by qualified trained
personnel, make sure that the entire fastening surface
is even and smooth (no protruding seams or tile offset),
that the finish of the wall is suitable to apply the product
and has no weak points.
TECHNICAL DATA
Operating pressure: max. 0,6 MPa
Recommended operating pressure: 0,2 - 0,4 MPa
(1 MPa = 10 bar = 147 PSI)
Hot water temperature: max. 60°C
Thermal disinfection: max. 70°C ⁄ 4 min
The product is exclusively designed for drinking water!
FAULT CAUSE REMEDY
⁄ Head shower extremely leaky ⁄ Head shower soiled ⁄ scaled ⁄ Clean ⁄ descale head shower
(see page 12)
⁄ Shower drips continuously ⁄ Shut-off unit damaged ⁄ Exchange shut-off unit
⁄ Water drips from showerhead a short
time after the valve is closed
⁄ Normal clearing of pipes
⁄ Sprays not operating properly ⁄ Flow pressure too low ⁄ Check water pressure (If a pump has
been installed check to see if the
pump is working).
⁄ Increase water pressure
⁄ Filters are dirty ⁄ Clean filters (see page 14)
⁄ Head shower soiled ⁄ scaled ⁄ Clean ⁄ descale head shower
(see page 12)
SPARE PARTS (see page 04)
ASSEMBLY (see page 05)
FLOW DIAGRAM (see page 11)
DIMENSIONS (see page 10)
Do not use silicone containing acetic acid!
SYMBOL DESCRIPTION
CLEANING (see page 12)
EN
OPERATION (see page 11)
04
AXOR 300⁄300 2jet
35318007
AXOR 300 2jet
35303007
93400000
93404000
93403000
93402000
93401000
92137000
(M6x12)
(M6x80)
(M6x60)
93399000
(120x2, 5)
93431000
(M6)
98194000
(28x2)
98129000
(14x2)
98129000
(14x2)
93463000
(4x1, 5)
93461000
AXOR 300⁄300 2jet
98430000
(12x1,5)
98194000
(28x2)
93462000
98186000
(30x2)
98201000
(14x1, 5)
93456000
98430000
(12x1,5)
93459000
AXOR 300 2jet
93454000
Serviceteile Serviceteile
05
2 3
4 5
11.
2.
3 5 3 61187
1 mm
Silicone
SW 12 mm
SW 3 mm
1.
2.
2.
min. max.
1.
MontageMontage
06
6
7
8
SW 4 mm
(M6x60 =
^ min.)
(M6x80 =
^ max.)
0 mm
0 mm
SW 5 mm
min. min.
max. max.
(M6x60)
(M6x80)
(M6x60 =
^ min.)
(M6x80 =
^ max.)
Montage
07
10
2.
SW 4 mm
(6 Nm)
1.
SW 4 mm
± 3°
± 3°
11
9
2.
SW 4 mm
1.
Montage
08
SW 2,5 mm
(2 Nm)
1.
2.
3.
112 13
14 15
16
1.
2.
17
Montage
09
(1 Nm)
CLICK
1.
2.
19
20
18
5,5 kg
Montage
10
AXOR 300⁄300 2jet
35318007
91
°
131/131
15
450
600
300/300
15
30
131
300/300
70
91
°
131/131
15
450
600
Ø 300
15
30
131
Ø 300
70
AXOR 300 2jet
35303007
2050
1100 min. 100
ca. 1700
Maße Maße
11
AXOR 300 2jet
35303007
PowderRain
Intense PowderRain
AXOR 300⁄300 2jet
35318007
bar
4,5
0,0
0,5
1,0
1,5
2,0
2,5
3,0
3,5
4,0
5,0
0,45
0,00
0,05
0,10
0,15
0,20
0,25
0,30
0,35
0,40
0,50
5,50,55
6,00,60
036912 15 18 21 24 27 30
MPa
00,1 0,2 0,3 0,4 0,5
Q = l/min
Q = l/sec
1+2
bar
4,5
0,0
0,5
1,0
1,5
2,0
2,5
3,0
3,5
4,0
5,0
0,45
0,00
0,05
0,10
0,15
0,20
0,25
0,30
0,35
0,40
0,50
5,50,55
6,00,60
036912 15 18 21 24 27 30
MPa
00,1 0,2 0,3 0,4 0,5
Q = l/min
Q = l/sec
1+2
1
2
Durchflussdiagramm ⁄ Bedienung
12
重要说明
肥皂,洗发水、沐浴液、染发剂、香水、刮胡水、指甲油
的残留也会对产品造成损伤。
此 处 :使 用 后 要 小 心 地 用 清 水 将 剩 余 物 冲 洗 干 净 。
同样在产品下方不得存放洗涤剂和化学药品,例如不
可放在用于洗脸盆的梳洗柜中否则挥发气体将损坏
产品。
在已经损伤的表面继续使用清洁剂会给表面造成更大
的损伤。
表面损坏的部件必须更换,否则会有受伤的
危险。
不按规定进行清洁而造成的任何损坏不在本公司产品
保修范围之内。
QUICKCLEAN
有了QuickClean,手工清洁功能,要去掉喷头上的水
垢 ,只 需 简 单 地 搓 除 即 可 。 
担保
Hansgrohe 向用户保证,该产品无制造 缺陷。
如果自购买之日起五年内出现缺 陷,Hansgrohe 
将免费排除。 保证条件和详 情见 
www.hansgrohe-int.com⁄guarantee。 在提 出保修的权
利时请联系您的合同方。本保证 不涉及有关国家法律
规定的消费权
汉斯格雅产品的清洁建议
现代的卫浴龙头、厨房龙头、花洒、配件、盥洗台、浴盆
和加热器采用的制造材料非常迥异,以适应产品外形
设计和使用功能的市场需求。
为 了 避 免 产 品 损 坏 和 由 此 引 发 的 投 诉 及 争 议 ,必 须 在
使用和清洁产品时遵循有关规程。 
在保养汉斯格雅产品时,原则上必须注
意:
 ⁄只能使用那些有明确注明是适用于本产品的清洁
剂。
 ⁄不允许使用含有盐酸、蚁酸、氯漂或醋酸的清洁
剂,因为这些清洁剂会给产品表面造成严重的损
伤。
 ⁄含磷酸的清洁剂必须在特定条件下使用。
 ⁄不允许将两种以上清洁剂混合使用。
 ⁄不允许使用具有研磨 作 用 的 清 洁 工 具 和 设 备 ,如 不
适合的清洁粉末、海绵垫或超细麦克布。
 ⁄必须严格遵守清洁剂生产厂商的使用说明。
 ⁄严格遵守清洁剂的用量和作用时间,决不允许清洁
剂的作用时间长于规定值。
 ⁄定期的清洁以预防水垢。
 ⁄不允许将清洁剂直接喷射到汉斯格雅产品上,因为
喷雾会进入汉斯格雅产品的开口部分和缝隙中而
造成损害。首先将清洁剂喷在软布上,再用软布进
行清洁。
 ⁄清洁之后必须用足够的清水冲洗,以彻底去除残留
的 吸 附 物( 清 洁 剂 )。
 ⁄不允许使用蒸汽清洗机,高温会损害产品。
QUICK
CLEAN
Reinigung
13
⁄ After cleaning rinse thoroughly with clean water to
remove any cleaner residue.
⁄ The use of steam cleaners is not permitted. The high
temperatures can damage the products.
IMPORTANT
Residues of toiletries such as liquid soaps, shampoos and
shower gels, hair dyes, perfumes, aftershave and nail
varnish can also cause damage.
Here too: Carefully rinse with water after use to remove residues.
Likewise, do not store any cleaning agents or chemicals
under the products, for example in a vanity unit, as the
vapours may damage the products.
The damage of already damaged surfaces will deteriorate
under the effect of the cleansers.
COMPONENTS WITH DAMAGED SURFACES
MUST BE EXCHANGED, OTHERWISE THERE
COULD BE AN INJURY DANGER.
Damage caused by improper treatment will not be covered
by our guarantee.
QUICKCLEAN
The QuickClean cleaning function only needs a small
manual rub over to remove the lime scale from the spray
channels.
WARRANTY
Hansgrohe guarantees to the consumer that this product is free
of production faults. If evertheless any defect is detected within 5
years from date of purchase, Hansgrohe will remedy this defect
free of charge. You will find the conditions and details of this
guarantee at www.hansgrohe-int.com⁄guarantee. Please contact
your contracting party to claim your rights under this guarantee.
This guarantee does not affect the customer‘s rights under the
respective national legislation.
CLEANING RECOMMENDATION FOR
HANSGROHE PRODUCTS
Today, modern sanitary and kitchen tapware, showers,
accessories, washstands, tubs and radiators consist of very
different materials to comply with the needs of the market
with regard to design and functionality.
To avoid damage and reclamations, it is necessary to
consider certain criteria when cleaning.
WITH REGARD TO CARING FOR
THE HANSGROHE PRODUCTS, THE
FOLLOWING MUST IN PRINCIPLE BE
HEEDED:
⁄ Only use cleaning material which is explicitly provided
for this type of application.
⁄ Never use cleaning materials, which contain
hydrochloric acid, formic acid, chlorine pale lye or
acetic acid, as they cause considerable damage.
⁄ Phosphorus acidic cleaners are only conditionally applicable.
⁄ Mixing cleaning agents is not permitted, generally.
⁄ Never use cleaning materials or appliances with an
abrasive effect, such as unsuitable cleaning powders,
sponge pads or micro fibre cloths.
⁄ The instructions of the cleaning agent manufacturers
have to be followed absolutely.
⁄ Cleaning has to be carried out with a specified cleaner dosage,
contact time, object-related and adapted to the needs.
⁄ The building up of calcifications has to be removed by
cleaning regulary.
⁄ When using spray cleaners, spray the cleaning solution onto
a soft cloth or sponge, never directly onto the Hansgrohe
products, as the atomised spray could enter openings and
gaps in the Hansgrohe products and cause damage.
QUICK
CLEAN
Reinigung
14
A B
C
E
1.
2.
D
Schmutzfangsiebe
15
2.
1.
3.
1 2
2.
1.
6
3 4
5
max. 10 min
10 mm
CLICK
(1 Nm)
5,5 kg
Reinigung
AXOR ⁄ Hansgrohe SE
Auestraße 5–9
77761 Schiltach
Deutschland
info@axor-design.com
axor-design.com
02 ⁄ 2019
9.06714.51
III

This manual suits for next models

3

Other Axor Bathroom Fixture manuals

Axor Starck X Instruction Manual

Axor

Axor Starck X Instruction Manual

Axor Massaud 18010007 Manual

Axor

Axor Massaud 18010007 Manual

Axor Starck 10929007 Manual

Axor

Axor Starck 10929007 Manual

Axor MyEdition 70 47050 1 Series Instruction Manual

Axor

Axor MyEdition 70 47050 1 Series Instruction Manual

Axor ShowerSelect Round 36723 Series Manual

Axor

Axor ShowerSelect Round 36723 Series Manual

Axor 460/300 2jet 35275 Series User manual

Axor

Axor 460/300 2jet 35275 Series User manual

Axor Starck Organic 12417 Series User manual

Axor

Axor Starck Organic 12417 Series User manual

Axor Citterio M 34715000 Manual

Axor

Axor Citterio M 34715000 Manual

Axor S 120 26050000 User manual

Axor

Axor S 120 26050000 User manual

Axor ShowerSelect Round 36723000 Manual

Axor

Axor ShowerSelect Round 36723000 Manual

Axor Front Showerpipe 26020000 Manual

Axor

Axor Front Showerpipe 26020000 Manual

Axor Starck Organic 12626000 User manual

Axor

Axor Starck Organic 12626000 User manual

Axor Uno 38211 Series User manual

Axor

Axor Uno 38211 Series User manual

Axor hansgrohe Starck Organic 12680000 User manual

Axor

Axor hansgrohe Starck Organic 12680000 User manual

Axor MyEdition 47410 0 Series User manual

Axor

Axor MyEdition 47410 0 Series User manual

Axor Montreux 42066 Series Manual

Axor

Axor Montreux 42066 Series Manual

Axor Citterio 39740 Series User manual

Axor

Axor Citterio 39740 Series User manual

Axor Showerpipe 27984007 Manual

Axor

Axor Showerpipe 27984007 Manual

Axor Uno 27987 Series User manual

Axor

Axor Uno 27987 Series User manual

Axor Starck 240 1 jet 12672 Series Manual

Axor

Axor Starck 240 1 jet 12672 Series Manual

Axor 250 1jet 35284 7 Series Manual

Axor

Axor 250 1jet 35284 7 Series Manual

Axor Citterio Showerpipe 180 1jet 39671009 User manual

Axor

Axor Citterio Showerpipe 180 1jet 39671009 User manual

Axor hansgrohe Uno 38850 Series User manual

Axor

Axor hansgrohe Uno 38850 Series User manual

Axor AXOR 250 1jet 35287007 User manual

Axor

Axor AXOR 250 1jet 35287007 User manual

Popular Bathroom Fixture manuals by other brands

OVE Endless Tampa TA2483101 installation manual

OVE

OVE Endless Tampa TA2483101 installation manual

IB RUBINETTI BOLD 022 Fitting instructions

IB RUBINETTI

IB RUBINETTI BOLD 022 Fitting instructions

Rubi KUMA Installation

Rubi

Rubi KUMA Installation

OVE ZOLA manual

OVE

OVE ZOLA manual

iDo PORSGRUND 8-01 Operating and maintenance instruction

iDo

iDo PORSGRUND 8-01 Operating and maintenance instruction

Sanela SLU 93N Instructions for use

Sanela

Sanela SLU 93N Instructions for use

KAWAJUN KH76 instruction manual

KAWAJUN

KAWAJUN KH76 instruction manual

Speakman SA-1008 quick start guide

Speakman

Speakman SA-1008 quick start guide

Franke PF5200 installation manual

Franke

Franke PF5200 installation manual

THE BOLD LOOK OF KOHLER K-704410 installation guide

THE BOLD LOOK OF KOHLER

THE BOLD LOOK OF KOHLER K-704410 installation guide

Gessi 58421 manual

Gessi

Gessi 58421 manual

antoniolupi GI-RA CARTATENSO installation manual

antoniolupi

antoniolupi GI-RA CARTATENSO installation manual

Abode Chao AB4044 manual

Abode

Abode Chao AB4044 manual

Pegasus 20720P-0104 Use and care guide

Pegasus

Pegasus 20720P-0104 Use and care guide

Kermi Therm X2 installation manual

Kermi

Kermi Therm X2 installation manual

Bradley OmniDeck 4000 Series installation guide

Bradley

Bradley OmniDeck 4000 Series installation guide

ABI INTERIORS Sola 15957 installation guide

ABI INTERIORS

ABI INTERIORS Sola 15957 installation guide

Moen T3291 installation guide

Moen

Moen T3291 installation guide

manuals.online logo
manuals.online logoBrands
  • About & Mission
  • Contact us
  • Privacy Policy
  • Terms and Conditions

Copyright 2025 Manuals.Online. All Rights Reserved.