manuals.online logo
Brands
  1. Home
  2. •
  3. Brands
  4. •
  5. Aztech
  6. •
  7. Modem
  8. •
  9. Aztech 100U Product information sheet

Aztech 100U Product information sheet

Other manuals for 100U

3

Other Aztech Modem manuals

Aztech DSL5018EN User manual

Aztech

Aztech DSL5018EN User manual

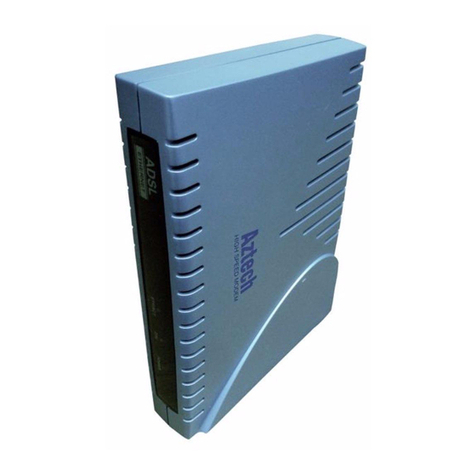
Aztech ADSL USB Modem Product information sheet

Aztech

Aztech ADSL USB Modem Product information sheet

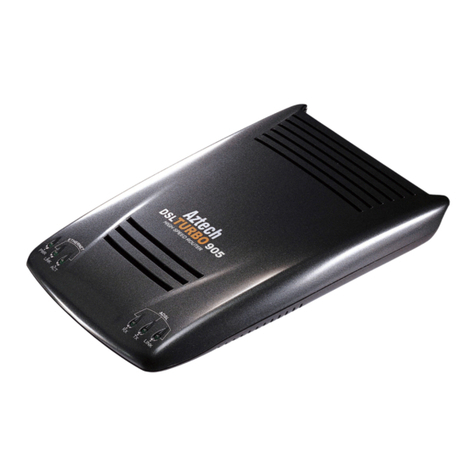
Aztech DSL Turbo 900 Package User manual

Aztech

Aztech DSL Turbo 900 Package User manual

Aztech DSL705EU Manual

Aztech

Aztech DSL705EU Manual

Aztech ADSL USB Modem Instructions for use

Aztech

Aztech ADSL USB Modem Instructions for use

Aztech DSL700P User manual

Aztech

Aztech DSL700P User manual

Aztech 100U Product information sheet

Aztech

Aztech 100U Product information sheet

Aztech UM9800-A User manual

Aztech

Aztech UM9800-A User manual

Aztech UM9800-U User manual

Aztech

Aztech UM9800-U User manual

Aztech MSP2950-W User manual

Aztech

Aztech MSP2950-W User manual

Aztech MR2800-W User manual

Aztech

Aztech MR2800-W User manual

Aztech HomePlug AV with Simple Connect Button User manual

Aztech

Aztech HomePlug AV with Simple Connect Button User manual

Aztech DSL 1015EN L Guide

Aztech

Aztech DSL 1015EN L Guide

Aztech UM3100 User manual

Aztech

Aztech UM3100 User manual

Aztech DSL905E Series User manual

Aztech

Aztech DSL905E Series User manual

Aztech DSL600E User manual

Aztech

Aztech DSL600E User manual

Aztech DSL605E User manual

Aztech

Aztech DSL605E User manual

Aztech MDP3880SP-U User manual

Aztech

Aztech MDP3880SP-U User manual

Aztech 206U User manual

Aztech

Aztech 206U User manual

Aztech DSL1015EN L User manual

Aztech

Aztech DSL1015EN L User manual

Aztech FG7003GRV(AC) User manual

Aztech

Aztech FG7003GRV(AC) User manual

Aztech HW831 User manual

Aztech

Aztech HW831 User manual

Aztech MDP3858U Series User manual

Aztech

Aztech MDP3858U Series User manual

Aztech DSL Turbo 900 Package User manual

Aztech

Aztech DSL Turbo 900 Package User manual

Popular Modem manuals by other brands

Paradyne COMSPHERE 3810 User guide supplement

Paradyne

Paradyne COMSPHERE 3810 User guide supplement

Zhone 6411-A1-xxx Technical specifications

Zhone

Zhone 6411-A1-xxx Technical specifications

Air 802 Linux USB?ADG?2 user guide

Air 802

Air 802 Linux USB?ADG?2 user guide

ETEK TD-8011 user manual

ETEK

ETEK TD-8011 user manual

Arris Touchstone CM8200 user guide

Arris

Arris Touchstone CM8200 user guide

3Com EtherLink 3C900B Installation and operating instructions

3Com

3Com EtherLink 3C900B Installation and operating instructions

Axxera DMH25 Operation manual

Axxera

Axxera DMH25 Operation manual

Lantronix M110 Series Command reference

Lantronix

Lantronix M110 Series Command reference

Megasat HD Stick 510se user manual

Megasat

Megasat HD Stick 510se user manual

Davicom DM562AP Operation manual

Davicom

Davicom DM562AP Operation manual

NetComm IG1000 Specifications

NetComm

NetComm IG1000 Specifications

Intelimax MA-2060 user manual

Intelimax

Intelimax MA-2060 user manual

ELPRO 905U-E user manual

ELPRO

ELPRO 905U-E user manual

SMC Networks D3CM1604V Administrator's manual

SMC Networks

SMC Networks D3CM1604V Administrator's manual

Telstra Wi-Fi 4G Advanced Pro X user guide

Telstra

Telstra Wi-Fi 4G Advanced Pro X user guide

Thrane&Thrane imarsat EXPLORER 300 user manual

Thrane&Thrane

Thrane&Thrane imarsat EXPLORER 300 user manual

Samsung AceLink SAM-335A user guide

Samsung

Samsung AceLink SAM-335A user guide

Enfora Enabler-G Integration guide

Enfora

Enfora Enabler-G Integration guide

manuals.online logo
manuals.online logoBrands
  • About & Mission
  • Contact us
  • Privacy Policy
  • Terms and Conditions

Copyright 2025 Manuals.Online. All Rights Reserved.

Windows®Me, 98, 98 Second Edition and Windows®2000 supported
Easy Start
(Read Me First)
Version 1.4
Protocols Discussed:
RFC 1483
RFC 1577
RFC 2364
RFC 2516
ADSL USB Modem
Contents...
Safety Guidelines ..................................................... 4
About this Easy Start ............................................... 4
Package.................................................................. 4
LED Indicators ........................................................ 5
Step 1: Connecting the ADSL USB Modem ................ 6
Step 2: Installing the ADSL USB Modem Driver ......... 7
Step 3: Running ADSL Modem Setup Program .......... 13
Step 4: Verifying the ADSL USB Modem .................. 14
Step 5: Configuring the IP Settings
(For RFC 1577 protocol only) ...................... 15
Step 6: Setting the PVCs values .............................. 18
Step 7: Establishing the Internet Connection
(for RFC 2364 and RFC 2516 only)............. 18
Running DSL Test ................................................... 19
Advanced Settings .................................................. 20
Uninstalling Your ADSL USB Modem ........................ 21
Troubleshooting ...................................................... 22
2
ADSL USB Modem Easy Start
Part 15 FCC Compliance Statement
This device complies with Part 15 of FCC Rules. Operation is subject to the following two conditions:
1. This device may not cause harmful interference, and
2. This device must accept any interference received, including interference that may cause undesired
operation.
Operating Environment
ForHomeorOfficeUse
Notice
Thisequipmenthasbeen testedandfoundtocomplywith thelimitsofaClass Bdigitaldevice,pursuantto Part15of
theFCCRules.Theselimitsaredesignedtoprovidereasonableprotectionagainstharmfulinterferenceinaresidential
installation.Thisequipmentgenerates, usesandcanradiateradiofrequency energyand,ifnotinstalled andusedin
accordance with the instructions, may cause harmful interference to radio communications. However, there is no
guaranteethatinterferencewillnotoccurinaparticularinstallation,ifthisequipmentdoescauseharmfulinterference
toradioortelevisionreception,whichcanbedeterminedbyturningtheequipmentoffandon,theuserisencouraged
to try to correct the interference by one or more of the following measures:
• Re-orient or relocate the receiving antenna.
• Increasetheseparationbetweentheequipmentandreceiver.
• Connect the equipment into an outlet on a circuit different from that to which the receiver is connected.
• Consultthedealeroranexperiencedradio/TV technicianforhelp.
Caution
TocomplywiththelimitsfortheClassBdigitaldeviceaccordingtoPart15ofFCCRules,thisdevicemustbeinstalled
incomputerequipmentcertifiedtocomplywiththeClassBlimits. Allcablesusedtoconnectthecomputersandperipherals
mustbeshieldedandgrounded. Operationwithnon-certified/shieldedcablesmayresultinradio/TVinterference.
Modification
Anymodificationnotexpresslyapprovedbythemanufacturerofthisdevicecouldvoidtheuser’sauthoritytooperate
thedevice.
PartyResponsibleforProductCompliance:
Aztech Labs, Inc.
45645NorthportLoopEast
Fremont,CA94538,U.S.A.
Part 68 FCC Compliance Statement
(FCC ID : 4J2SNG-47095-DL-N)
This equipment complies with Part 68 of the FCC Rules. On the equipment is a label that contains, among other
information,theFCCregistrationnumberandringerequivalencenumber(REN)forthisequipment.Ifrequested,this
information must be provided to your telephone company.
Connection to the telephone network should be made by using standard modular telephone jack type RJ11.
TheRENisusefultodeterminethequantityofdevicesyoumayconnecttoyourtelephonelineandstillhaveallofthose
devicesringwhenyourtelephonenumberiscalled.Inmost,butnotallareas,thesumoftheRENsofalldevicesconnected
toonelineshouldnotexceedfive(5.0).Tobecertainofthenumberofdevicesyoumayconnecttoyourline,asdetermined
bytheREN,youshouldcontactyourlocaltelephonecompanytodeterminethemaximumRENforyourcallingarea.
Ifyourtelephoneequipmentcausesharmtothetelephonenetwork,thetelephonecompanymaydiscontinueyourservice
temporarily.Ifpossible,theywillnotifyyouinadvance.Butifadvancenoticeisnotpractical,youwillbenotifiedassoon
as possible. You will be informed of your right to file a complaint with the FCC.
3
ADSL USB Modem Easy Start
Your telephone company may make changes in its facilities, equipment, operations or procedures that could affect
theproperfunctioningofyourequipment.Iftheydo,youwillbenotifiedinadvancetogiveyouanopportunitytomaintain
uninterruptedtelephoneservice.
Intheeventthisequipmentshouldfailtooperateproperly,disconnecttheunitfromthetelephoneline.Tryusinganother
FCCapprovedtelephoneinthesametelephonejack.Ifthetroublepersists,callthetelephonecompanyrepairservice
bureau.Ifthetroubledoesnotpersistandappearstobewiththisunit,disconnecttheunitfromthetelephonelineand
discontinueuseoftheunituntilitisrepaired.Pleasenotethatthetelephonecompanymayaskthatyoudisconnectthis
equipmentfromthetelephonenetworkuntiltheproblemhasbeencorrectedoruntilyou'resurethattheequipmentis
notmalfunctioning.
Thisequipmentmaynotbeusedoncoinserviceprovidedbythetelephonecompany.Connectiontopartylinesissubject
to state tariffs.
TheTelephoneConsumerProtectionActof1991makesitunlawfulforanypersontouseacomputerorotherelectronic
devicetosendanymessageviaatelephonefaxmachineunlesssuchmessageclearlycontainsinamarginatthetop
orbottomofeachtransmittedpageoronthefirstpageofthetransmission,thedateandtimeitissentandanidentification
ofthebusinessorotherentity,orindividualsendingmessageandthetelephonenumberofthesendingmachineorsuch
business,orentity,orindividual.
Thisuserinformationcan beprogrammedinthecommunicationsoftwareyouareusing withyourequipment.
RepairorServiceInformation
In the event of the need for service or repair, carefully package the unit along with a note of the problem and send it
to the address below or the authorized service center nearest you. Be sure to include your address (not a P.O Box),
telephonenumberandbesttimetocall.
Attn:
Aztech Labs, Inc.
45645NorthportLoopEast
Fremont,CA94538,U.S.A.
Industry Canada Information
NOTlCE: The Industry Canada label identifies certified equipment. This certification means the equipment meets
telecommunicationsnetworkprotective,operationalandsafetyrequirementsasdescribedintheappropriateTerminal
EquipmentTechnicalRequirementsdocument(s).TheDepartmentdoesnotguaranteetheequipmentwilloperatetothe
user’s satisfaction.
Beforeinstallingthisequipment,usersshouldensurethatitispermissibletobeconnectedtothefacilitiesofthelocal
telecommunicationscompany.Theequipmentmustalsobeinstalledusinganacceptablemethodofconnection.The
customershouldbeawarethatcompliancewiththeaboveconditionsmaynotpreventdegradationofserviceinsome
situations.
Repairsto certified equipmentshould becoordinated by arepresentative designated bythe supplier.Any repairs or
alterationsmadebytheusertothisequipment,orequipmentmalfunctions,maygivethetelecommunicationscompany
causeto requestthe userto disconnect theequipment.
Usersshouldensurefortheirownprotectionthattheelectricalgroundconnectionsofthepowerutility,telephonelines
andinternalmetallicwaterpipesystem,ifpresent,areconnectedtogether.Thisprecautionmaybeparticularlyimportant
in rural areas.
Caution: Usersshouldnotattempttomakesuchconnectionsthemselves,butshouldcontacttheappropriateelectric
inspectionauthority,orelectrician,asappropriate.
NOTICE:
The
RingerEquivalenceNumber(REN)assignedtoeachterminaldeviceprovidesanindicationofthemaximumnumber
of terminals allowed to be connected to a telephone interface. The termination on an interface may consist of any
combinationofdevicessubjectonlytotherequirementthatthesumoftheRingerEquivalenceNumbersofallofthedevices
does not exceed 5.
4
ADSL USB Modem Easy Start
Package
Please check that you have the following items in your package. If you found
any missing items, please contact your dealer immediately.
(The actual cables that are included with your package may differ in appearance from country to
country)
Telephone extension cable
this Easy Start
USB cable
Installation CD
Product warranty does not apply to damage caused by lightning, power surges or wrong voltage.
ËÌ
ÍÎ
Ê
ADSL USB Modem
Safety Guidelines
•Keep the modem away from fluid, direct sunlight and excessive heat
•During times of lightning strike/thunderstorm, do not use the modem
•This product is for use only in UL Listed computers
•To reduce the risk of fire, use only No. 26 AWG or larger telecommunication
line cord
About this
Easy Start
This booklet contains information on setting up your
ADSL USB Modem. It touches on the key installation
procedures to help you setup your modem in a breeze!
ÏMicro-Filter
(optional)
1
1 Micro-Filter is only required for product model with '(M)'. If you are unsure of your product
model, refer to the label at the bottom of your modem casing. The Micro-Filter may or may not
be bundled with your package, depending on country purchased. If it is not bundled, you may
purchased it separately from your dealer.
5
ADSL USB Modem Easy Start
LED Indicators
Ê POWER
Ë ADSL LINK
Ê POWER
LEDs Activity Descriptions
Lights up When you have connected your modem to the
computer. Your computer must also be powered
on for the LED to light up.
Off i. You have not connected your modem to your
computer properly. See Step 1 - Connecting
Your ADSL USB Modem.
ii. You have not powered on your computer.
If problem persists, contact your dealer immediately.
ËADSL LINK
LEDs Activity Descriptions
Flashes Your modem is trying to establish an ADSL
connection.
Lights up When the ADSL connection is established.
If the ADSL Link LED keeps flashing and does not remain lit up, it
could be that your ADSL services has not been activated. Please
contact your ADSL Service Provider.
6
ADSL USB Modem Easy Start
Step 1: Connecting the ADSL USB Modem
With the "Hot Swap" feature in this modem, you can connect your modem to your
computer anytime, without having to power off your system!
Carry out the connections as illustrated.
ÊConnect one end of the USB cable ( ) to the USB Port on your
modem and the other end ( ) to the USB port of your computer.
ËConnect one end of the telephone extension cable to the Line Jack on your
modem and the other end to the telephone wall socket.
ÌA telephone set can be connected to the Tel Jack on your modem.
(This optional connection enables you to use your telephone and your modem
concurrently.)
2 Micro-Filter is only required for product model with '(M)'. If you are unsure of your product model,
refer to the label at the bottom of your modem casing. For details on the usage of the Micro-
Filter, please refer to the Troubleshooting section, 'Do I need to use Micro-Filter when using
ADSL?'
Ë
Telephone set
Telephone
wall socket
Telephone
extension
cable
Ê
Ì
USB cable
USB port
USB Port
TEL jack
LINE jack
Micro-Filter 2
7
ADSL USB Modem Easy Start
2.1 Installing the ADSL USB Modem Driver
- For Windows® Me
Power on your computer (if it is not powered on during connection). If you have
connected the USB cable from your computer to your modem as illustrated in
Step 1, you will be prompted with the following window to install the driver.
Step 2: Installing the
ADSL USB Modem Driver
The following contains the driver installation instructions for protocols RFC 1483,
RFC 1577, RFC 2364 and RFC 2516. You only need to install one of them, as
determined by your ADSL Service Provider.
1. For Windows® 9x users, depending on your system’s configura-
tions, you may be prompted for your Windows CD-ROM during the
driver installation. Have it ready by your side.
2. The screen shots, screens information and steps illustrated
in this manual serve only as a guide. The exact information
and steps you see on your system may vary, depending on
your system configurations. For any dissimilarities, follow
closely to the instructions as prompted on your PC screen.
i. Place the Installation CD into
your CD-ROM Drive.
Select Specify the location of
the driver (Advanced) and click
Next.
8
ADSL USB Modem Easy Start
ii. Select Specify a location.
Click Browse and navigate to the
required protocol folder, (e.g.
\RFC2364)on your Installation
CD.
Click Next.
iii. Click Next again to
proceed installation
with the specified
driver.
iv. Click Finish and proceed with
the second stage of
installation - Step 3:
Running ADSL Modem Setup
Program.
(RFC2364 protocol is used as an illustration throughout this manual. Replace
it accordingly with your assigned one.)
9
ADSL USB Modem Easy Start
2.2 Installing the ADSL USB Modem Driver
- For Windows®98 Second Edition / 98
Power on your computer (if it is not powered on during connection). If you have
connected the USB cable from your computer to your modem as illustrated in
Step 1, you will be prompted with the following window to install the driver.
i. Place the Installation CD
into your CD-ROM Drive
and click Next.
ii. Select Search for the
best driver for your
device (Recommended)
and click Next.
iii. Select Specify a location. Click
Browse and navigate to the
required protocol folder (e.g.
\RFC2364) on your Installation
CD.
Click Next.
(RFC2364 protocol is used as an
illustration throughout this manual.
Replace it accordingly with your
assigned one.)
10
ADSL USB Modem Easy Start
iv. Click Next to proceed
installation with the
specified driver.
v. Click Finish and proceed
with the second stage of
installation - Step 3:
Running ADSL Modem
Setup Program.