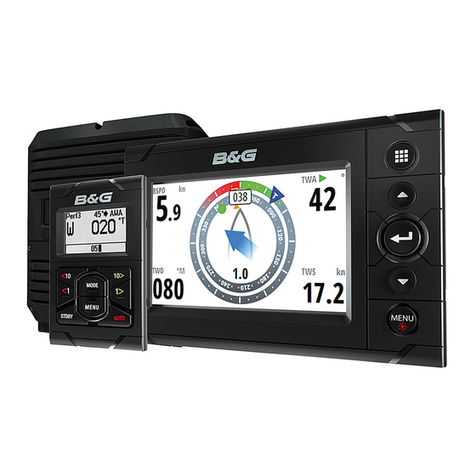
B&G Triton Display User manual

ENGLISH
Triton Display
Installation Manual
bandg.com


| 1
Preface | B&G Triton Display Installation Manual
DRAFT COPY
Preface
As Navico are continuously improving this product, we retain the
right to make changes to the product at any time which may not be
reflected in this version of the manual. Please contact your nearest
distributor if you require any further assistance.
It is the owner’s sole responsibility to install and use the instrument
and transducers in a manner that will not cause accidents, personal
injury or property damage. The user of this product is solely
responsible for observing safe boating practices.
NAVICO HOLDING AS AND ITS SUBSIDIARIES, BRANCHES AND
AFFILIATES DISCLAIM ALL LIABILITY FOR ANY USE OF THIS PRODUCT
IN A WAY THAT MAY CAUSE ACCIDENTS, DAMAGE OR THAT MAY
VIOLATE THE LAW.
Governing Language: This statement, any instruction manuals,
user guides and other information relating to the product
(Documentation) may be translated to, or has been translated from,
another language (Translation). In the event of any conflict between
any Translation of the Documentation, the English language
version of the Documentation will be the official version of the
Documentation.
This manual represents the product as at the time of printing.
Navico Holding AS and its subsidiaries, branches and affiliates
reserve the right to make changes to specifications without notice.
Copyright
Copyright © 2012 Navico Holding AS.
Warranty
The warranty card is supplied as a separate document. In case of
any queries, refer to the brand web site of your display or system:
www.bandg.com
Important text that requires special attention from the reader is
emphasized as follows:
¼Note: Used to draw the reader’s attention to a comment or some
important information.
Warning: Used when it is necessary to warn personnel that
they should proceed carefully to prevent risk of injury and/or
damage to equipment/personnel.
2 | Preface | B&G Triton Display Installation Manual
Declarations and conformance
This equipment is intended for use in international waters as coastal
sea area administered by countries of the E.U. and E.E.A.
B&G Triton Display complies with the following regulations:
• CEunderEMCdirective2004/108/EC
• level2devicesoftheRadiocommunications(Electromagnetic
Compatibility)standard2008
B&G Triton Display meets the technical standards in accordance
with Part 15.103 of the FCC rules.
About this manual
This manual is a reference guide for installing the B&G Triton system.
The manual assumes that the installer has at very least, basic
knowledge of DC electrical systems, and of working with power
tools with materials such as fiberglass and wood.
An understanding of basic navigation, nautical terminology and
practices may be helpful in correct configuration of the product.
Warning: It is your sole responsibility to install and use the
instrument and transducer(s) in a manner that will not cause
accidents, personal injury or property damage. Always observe
safe boating practices.
¼Note: The choice, location, and installation of transducers and other
components of the system are critical to the performance of the
system as intended. If in doubt, consult your B&G dealer.
¼Note: Global Positioning System: The Global Positioning System
(GPS) is operated by the US Government which is solely responsible
for its operation, accuracy and maintenance. The GPS is subject to
changes which could affect the accuracy and performance of all
GPS equipment anywhere in the world, including this instrument.

| 3
Preface | B&G Triton Display Installation Manual
DRAFT COPY
The software
This manual is written for B&G Triton Release to Market 1 (RTM1).
Please check web site for details on the current release version.
¼Note: The menu route shown above is an example only and may
not match the software installed on your unit!
¼Note: To update the software you will need a compatible
multifunction display / chartplotter running on the network. eg.
B&G Zeus multi function display (MFD).
If you do not have a suitable device on the network you can arrange
to update the software via a B&G dealer.
You can download the latest version of the software from
www.bandg.com and upgrade the displays via the B&G MFD,
instructions on how to do this can be found on the B&G website.
www.bandg.com
¼Note: The manual may have been updated to match new software
releases. The latest available manual version can be downloaded
from www.bandg.com
¼Note: Portions of this software are copyright © 2011 The FreeType
Project (www.freetype.org). All rights reserved.


| 5
Contents | B&G Triton Display Installation Manual
DRAFT COPY
Contents
1 Preface
7 Introduction
8 Overview
9 Menus
10 Check the contents
12 Installation
12 Choosing a location
12 Viewing angles
13 Fitting with mounting clip
14 Fittingwithretentionbracket
14 Multipledisplays
15 Wiring
15 Introduction to NMEA 2000 (SimNet)
17 Daisy chaining the Triton display
18 DropcableconnectionoftheTritondisplay
19 Typical network example
20 Display
20 Setup wizard
27 Sources
30 Calibration
30 Depth
31 Sea temperature
31 Boat speed
35 Apparent wind
35 Compass heading
36 Damping

6 | Contents | B&G Triton Display Installation Manual
38 Autopilot
39 Autopilot Setup
39 Dockside
44 Seatrial
46 Pilotresponse
47 Windresponse
48 Seastatelter
48 Sailing
50 Automatic steering
57 Troubleshooting
58 Technical Specications
58 Display
59 Dimensional drawing
60 Spares & Accessories

| 7
Introduction | B&G Triton Display Installation Manual
DRAFT COPY
Introduction
TheTritonDisplayutilizesauniquebonded4.1-inchsunlight
viewable LCD display to offer clearly read sailing information,
including wind, speed, depth, heading, pilot status, log, timer and
much more.
High contrast and a 155˚ viewing angle provide excellent
readability, whilst the bonded display ensures there is no chance of
condensation occurring regardless of the conditions.
Powerconsumptionisextremelylowforthisclassofproduct-155
mA at 13.5 V with backlight driven at full brightness.
DualMicro-Cconnectorsprovideforquickandeasydaisy-chain
connection-idealforretrotornewbuild.Micro-Cistheindustry
standard cabling used for NMEA 2000 systems.

8 | Overview | B&G Triton Display Installation Manual
Overview
The Triton Display and Pilot Controller
15
76
8
9
43
2
1. Display
2. Menu / Enter key
Used to enter the main menu, select sub menus and confirm
selection.
¼Note: Press and holding the Enter key for 3 seconds takes you
directly to the display setup lighting level screen. If the lighting level
is set below 5 it will automatically increase to 5. Use the up and
down keys to set the desired level and press Enter to confirm.
3. Page key
Scrolls through the eight default display pages and navigates back a
step in menus.
¼Note: the eight default display pages including Pilot page can be
customized to display the required data.
4. Directional keys
Scrolls up and down through selected menus / set values.
5. Pilot Controller
6. Mode key
Changes the Pilot mode.
7. Off key
Disengages the autopilot.
8. Course control keys
Changes target course / Activates Non Follow Up (NFU) mode when
in Standby mode.
9. Auto key
Engages the autopilot.

| 9
Overview | B&G Triton Display Installation Manual
DRAFT COPY
Menus
Under normal operation, the unit will power up displaying the most
recently used data page. To enter the menu use the Menu/Enter key.
1
2
3
4
1. Current menu
2. Selection highlight
3. Indication for more content off page
4. Menu expands to further level of detail

10 | Overview | B&G Triton Display Installation Manual
Check the contents
Triton Instrument Display
Mounting Clip
Sun Cover
Fixing Screws
Additional Retention Bracket
Threaded rods, Washers,
and Fasteners for Retention
bracket
0.6m Interconnect Cable
(Micro-C)-Straight
connectors

| 11
Overview | B&G Triton Display Installation Manual
DRAFT COPY
Installation Manual
Quick Reference Guide
Operation Manual DVD
Installation Manual
& Operation Guide
Mounting Template
Triton Display
IMPORTANT. Do not use this template if it has been rescaled by copying or prinng. If
this is not the original, or is a print from a file, please check the dimension lines below
aretoscale before use.
IMPORTANT. Ne pas uliser ce gabarit s’il a été photocopié ou imprimé en format
réduit ou agrandi. Si ce gabarit n’est ni un original ni une version imprimée d’un fi chier
PDF, veuillez vérifi er qu’il est à l’échelle avant de l’uliser.
IMPORTANTE. no usar la planlla si hay peligro que la escala original exacta se ha
alterado por copias o procesos de impresión imprecisos. Si esto no es el original, o un
PDF, verifi car que las líneas abajo están a la escala antes de usar.
WICHTIG. Diesen Vordruck nicht verwenden, wenn er durch Kopieren oder Drucken im
Maßstab verändert wurde. Sollte es nicht das Original oder ein PDF-Ausdruck sein,
müssen untenstehende Zeilen vor erwendung an den richgen Maßstab angepasst
werden.
BELANGRIJK. Gebruik deze mal niet indien de schaal is veranderd doordat het is
gecopieerd of gedrukt. Indien deze mal niet het origineel of een print van PDF is,
controleer dan of de onderstaande lijnen de juiste schaal zijn voordat u ze gebruikt.
IMPORTANTE. Não ulize este gabarito se a escala do mesmo ver sido alterada por
cópia ou impressão. Se não for o original ou uma cópia impressa de um arquivo PDF,
verifi que as linhas abaixo, para acertar a escala antes da ulização.
VIKTIGT. Använd inte denna mall om den skalats om genom utskri eller kopiering. Om
dea inte är originalet eller en utskri från en PDF, kontrollera a linjerna nedan
stämmer med skalan innan det används.
IMPORTANTE. Non ulizzare questo modello se è stato ridimensionato copiandolo o
stampandolo. Se questo non è l’originale o la stampa di un fi le PDF, verifi care se le
linee che seguono devono essere dimensionate prima di essere ulizzate.
TÄRKEÄÄ. Älä käytä tätä kaaviota, jos sen miakaava on muuunut kopio-idessa tai
tulostaessa. Jos tämä ei ole alkuperäinen tai PDF tuloste tarkista rajat miakaavasta alla
ennen käyöä.
注意:请尽量不要使用本安装挖孔尺寸模版图的复印件。如果使用复印件,则在
使用之前请确认其比例一定要与原件大小必须一致。
중요: 복사나 출력으로 크기가 조정 된 경우 이 템플릿을 사용하지 마십시오.
원본이 아니거나 인쇄물이면, 사용하기 전 아래 치수선의 눈금을 확인 해
주십시오.
注:このテンプレートは印刷やコピーによって縮尺が変わっていることがあり
ますので使用しないで下さい。テンプレートがオリジナルのものでない場合に
は、下の寸法線を使って縮尺を確認してください。
*988-10136-001*
Check dimensionsbefore cung
6"
150mm
123mm (4.84")
118mm (4.64")
98.0mm (3.86")
89.0mm(3.5")
120mm(4.72")
115mm (4.53")
80.0mm (3.15")
L
C
L
C
Suncover
Productoutline
Product removal posion
Remove shaded area
OR DRILL PILOT HOLE TO SUIT SELF TAPPING #8 SCREW
5mm (0.20”)
3.5mm0.14 ”
required for removing when
flush mounted
Warranty Booklet

12 | Installation | B&G Triton Display Installation Manual
Installation
The Triton display may be mounted via a flush mounting clip or with
the retention bracket attached to the rear of the unit.
Choosing a location
Choose the mounting locations carefully before you drill or cut.
The display should be mounted so that the operator can easily use
the controls and clearly see the display screen. Be sure the chosen
location allows access for routing the cables.
Ensure that any holes cut will not weaken the boat’s structure. If in
doubt, consult a qualified boat builder. Before cutting a hole in a
surface, make sure that there are no hidden electrical wires or other
parts behind the panel. Leave sufficient clearance space to connect
all relevant cables.
If multiple instruments are to be mounted in a row, ensure
measurement of space takes in to account the correct spacing
between displays.
B&Gdisplaysarehigh-contrast,anti-reectiveandareeasilyreadin
direct sunlight.
For width, height and depth requirements, please see the drawings
at the back of this manual.
Viewing angles
The Triton display offers 170 degrees viewing angle, both
horizontally and vertically. Avoid installation in locations that require
the instrument to have significant rotation of axis relative to the
deck. Users wearing polarized sun glasses may have trouble clearly
reading a screen that is at a significantly different angle to the
lenses.

| 13
Installation | B&G Triton Display Installation Manual
DRAFT COPY
Fitting with mounting clip
Use the template to cut the required size hole in the chosen
location. At the same time mark the holes to be drilled for the
fasteners. Take care to be as accurate as possible when cutting out
themountinghole-themountingclipshouldbeaclose,butnot
tight fit in the hole. If the clip requires pressure to get in to position,
there is a high chance it will distort, and not retain the display as
well as intended.
Check that the clip lines up with the markings for the fastener
mounting holes, then drill the holes. Fasten the mounting clip in
place with the supplied screws.
The display can then be fitted by pressing into the mounting
clipaperture-apositive‘click’shouldbefeltwhenthedisplay
engages with the clip. Check that all four edges of the display make
good contact with the mounting surface, and apply adequate
compression to the gasket.

14 | Installation | B&G Triton Display Installation Manual
Fitting with retention bracket
The Triton display may be mounted using only the mounting clip, or
may be secured additionally with the retention bracket. In order to
secure the bracket, adequate rear access must be available to fit the
fasteners.
Before fitting the display in to the mounting position, firmly wind
the threaded rods into the back of the Triton display by hand.
Place the display in to position and fit the retention bracket,
followed by washers and fasteners.
Multiple displays
If mounting Triton displays in a row or column, ensure that enough
space is left for the sun covers to clip on.
Even where the sun covers are not required, the correct spacing
should be used, as the displays require 3.5mm on each side when
rotating for removal from the mounting clip.
The absolute minimum space that should be allowed for each
display is:
• Width:123mm(4.84”)
• Height:120mm(4.72”)

| 15
Wiring | B&G Triton Display Installation Manual
DRAFT COPY
Wiring
The B&G Triton Display can be connected to either an NMEA2000
or SimNet network. There is no separate power cable, as the unit is
powered from the network.
TherearetwoMicro-Cconnectorsoneachdisplay,allowingfor
daisy chaining, which greatly increases the ease of connecting
multiple displays that are in close proximity, and can save in cable
weight and loom size. Note this method is approved in SimNet
networks, but not in NMEA 2000 networks.
Introduction to NMEA 2000 (SimNet)
NMEA 2000 is a combined electrical and data specification,
andisbasedonCAN(ControllerAreaNetwork-SAEJ1939)bus
technology. NMEA2000 permits exchange of data and commands
between the interfaced products. NMEA2000 stipulates the use of
Micro-CandMini-Chardwareforthephysicalaspectofthenetwork.
SimNet is largely based on NMEA2000, but with added proprietary
messages, and it’s own physical cable and connector system. The
data transfer capacity of NMEA 2000 is 50 times higher than that of
theNMEA0183standardat4800baud.
Most NMEA2000 devices can be connected directly to a SimNet
backbone and SimNet devices can be connected to an NMEA
2000 network by using adapter cables. The physical layout and
limitations of the two networks are nearly identical, so the following
information is interchangeable.
Essential network information
• NMEA2000isapowerednetwork.Itmusthaveaseparate12-15V
DC power supply protected by a 5 Amp fuse. Do not connect the
NMEA 2000 power cable to the same terminals as the start batteries,
Autopilot Computer, Radar, thruster or other high current products
• AnNMEA2000networkconsistsofalinear“backbone”fromwhich
“dropcables”connecttoNMEA2000devices
• A single drop cable has a maximum length of 6 m (20 ft). The total
lengthofalldropcablescombinedshouldnotexceed78m(256ft)
• An NMEA 2000 networkhasamaximumcablelengthof100m(328
ft), between any two points

16 | Wiring | B&G Triton Display Installation Manual
• An NMEA 2000 network needs to have a terminator at each end of
the backbone. A terminator can be one of the following:
• a power cable with built in terminator
• a terminated blanking plug
• a wind transducer (terminator is in the mast head
unit as opposed to mast cable).
• CertainSimradproductshavetwoMicro-CorSimNetconnectors,
which can be made to be an in line component of the backbone.
Connectingfromdevicetodeviceisknownas‘daisychaining’This
network topology is not officially NMEA 2000 compliant.
• NMEA2000 devices can be connected to the SimNet Network
providing they:
• are NMEA2000 certified, or state full compatibility
• meet the CE, FCC regulations with a SimNet adapter
cable
• donotexceedtheSimNetloadspecication-see
Simrad SimNet Installation Manual (20222006)
Planning and installing a network backbone
Plan the backbone carefully.
The NMEA 2000 backbone needs to run between the locations of all
products you want to install, typically in a bow to stern layout, and
be no further than 6 m from a device to be connected.
Choose from the following components to make up your NMEA
2000 backbone:
• Micro-Ccables:Availablelengthsfrom0.4m(1.3ft)to25m(82.5ft)
• Micro-Cpowercableswithorwithouttermination
• T-connector.Useatlocationswhereyouwanttoconnectadevice
by drop cable
• Wind transducer. If using a wind sensor, plan to connect this to one
end of the backbone as this has a terminator built in
• Micro-CmaleandMicro-CfemaletoSimNetadaptorcablesfor
connecting to existing SimNet bus, or adding devices fitted with a
SimNetconnectortoaMicro-Cnetwork.

| 17
Wiring | B&G Triton Display Installation Manual
DRAFT COPY
Power the network
An NMEA 2000 network requires its own 12 V DC power supply
protected by a 5 amp fuse or breaker.
In smaller NMEA 2000 systems, the power connection may be made
anywhere in the system,
For larger systems introduce power at a central point in the
backboneto“balance”thevoltagedropofthenetwork.Useapower
cable without termination.
¼Note: When joining an NMEA 2000 network to a SimNet network, it
is not necessary to introduce power to both.
¼Note: Do not connect the power cable to the same terminals as the
autopilot computer, pulse radar, bow thruster or other high current
devices-thenetworkmaybeaectedbyvoltagedropwhenthese
devices are operated. Avoid connection to the engine starting
batteries where possible.
Daisy chaining the Triton display
Where displays are located close together, the supplied right angle
Micro-Ccablemaybeusedtolinkthedisplaysinseries.Thedaisy
chain should form part of the back bone. It is not advisable to daisy
chain devices off a drop cable.
LTW
LTW
2
LTW
LTW
2
1
3
1 1
3
1. Triton Display
2. RightangleMicro-Cplugconnectorcable0.4m(supplied)
3. NMEA2000 / SimNet backbone

18 | Wiring | B&G Triton Display Installation Manual
Drop cable connection of the Triton display
2
2
3 4
4
4
1
2
3
1
1
1. Triton Display
2. Drop cable
3. NMEA2000 / SimNet backbone
4. Micro-CT-connectors
This manual suits for next models
1
Table of contents
Other B&G Marine Equipment manuals

B&G
B&G Triton Edge User manual

B&G
B&G Zeus2 series User manual

B&G
B&G Vulcan R Series User manual

B&G
B&G H5000 Pilot Use and care manual

B&G
B&G H5000 Pilot User manual

B&G
B&G Zeus3 Glass Helm User manual

B&G
B&G Triton Edge User manual

B&G
B&G h3000 User manual

B&G
B&G h1000 pilot User manual

B&G
B&G HERCULES User manual