manuals.online logo
Brands
  1. Home
  2. •
  3. Brands
  4. •
  5. BEGA
  6. •
  7. Outdoor Light
  8. •
  9. BEGA Strassburg User manual

BEGA Strassburg User manual

BEGA Gantenbrink-Leuchten KG · Postfach 31 60 · 58689 Menden · info@bega.com · www.bega.com 1/2
25.18 · Technische Änderungen vorbehalten · Technical amendments reserved · Modications techniques réservées
IP 44
!
Wandleuchte »Straßburg«
Wall luminaire »Straßburg«
Applique » Straßburg «
31 426
r
230230170170
360360
Ø 5,2
7070
Ø 110Ø 110
unten
bottom
dessous
Gebrauchsanweisung Instructions for use Fiche d’utilisation
Anwendung
Wandleuchte mit Kristallblasenglas.
Für viele Beleuchtungsaufgaben an
oder in Gebäuden.
Application
Wall luminaire with crystal bubble glass.
For many lighting tasks in or on buildings.
Utilisation
Applique avec verre clair bullé.
Pour de nombreuses applications d’éclairage
autour ou dans les bâtiments.
Leuchtmittel
Leuchte mit Sockel E 27
Lampenleistung max. 60W
Für diese Leuchte empfehlen wir folgende
BEGA LED-Leuchtmittel:
13 509 LED 7 W · 805 lm · 2700 K
13 547 LED 7 W · 805 lm · 2700 K
dimmbar
13 583 LED 7 W · 805 lm · 3000 K
13 585 LED 7 W · 805 lm · 3000 K
dimmbar
Ausführliche technische und lichttechnische
Daten zu den Leuchtmitteln entnehmen Sie
bitte den Datenblättern auf unserer Website.
Lamp
Luminaire with lampholder E 27
Lamp output max. 60W
For this luminaire we recommend the following
BEGA LED lamps:
13 509 LED 7 W · 805 lm · 2700 K
13 547 LED 7 W · 805 lm · 2700 K
dimmable
13 583 LED 7 W · 805 lm · 3000 K
13 585 LED 7 W · 805 lm · 3000 K
dimmable
Detailed technical and lighting data for the
lamps can be found in the data sheets on our
website.
Source lumineuse
Luminaire avec culot E 27
Puissance de lampe max. 60W
Pour ces luminaires nous conseillons les
sources lumineuses LED BEGA suivantes :
13 509 LED 7W · 805lm · 2700K
13 547 LED 7W · 805lm · 2700K
pour variation
13 583 LED 7 W · 805 lm · 3000 K
13 585 LED 7 W · 805 lm · 3000 K
pour variation
Les données photométriques détaillées de
toutes les lampes gurent dans les descriptifs
techniques sur notre site.
Produktbeschreibung
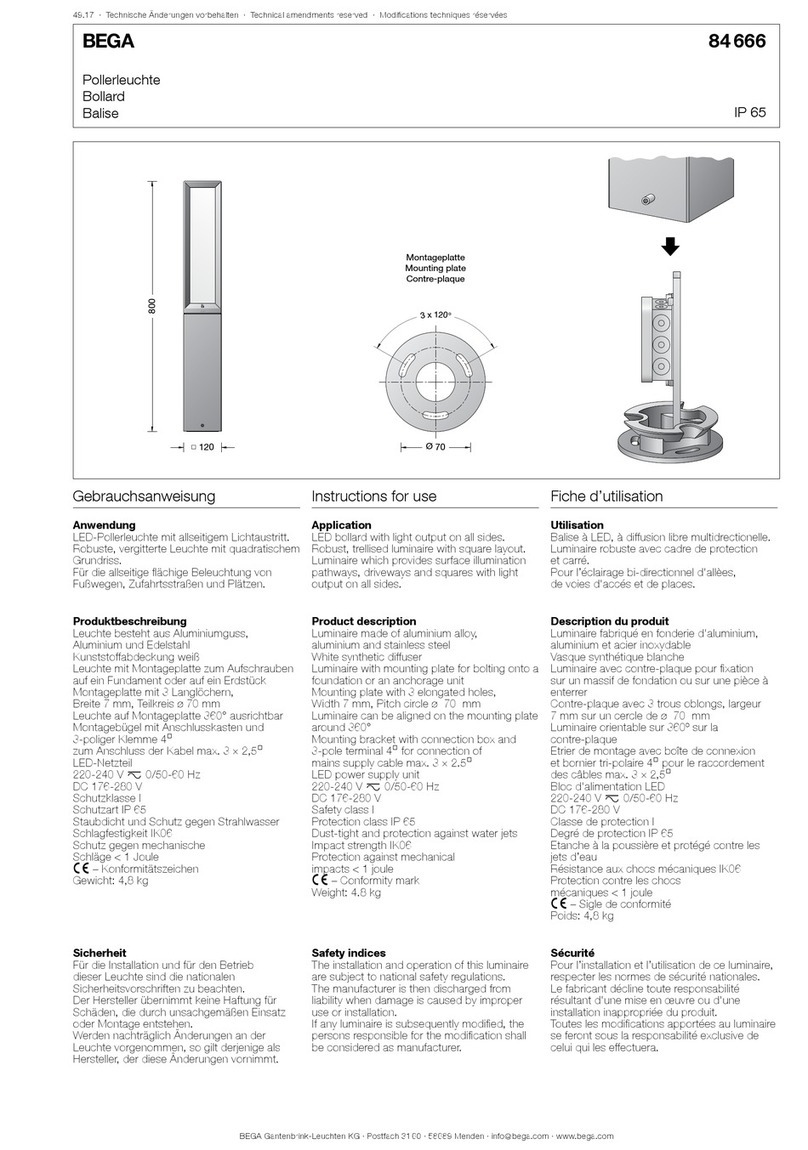
Leuchte besteht aus Aluminiumguss
und Edelstahl
Beschichtungstechnologie BEGA Unidure®
Antikglas
2 Befestigungsbohrungen ø 5,2 mm
Abstand 70 mm
1 Leitungseinführung für Netzanschlussleitung
bis ø10,5mmmax.3×1,5@
Anschlussklemme 2,5@
mit Steckvorrichtung
Schutzleiteranschluss
Fassung E 27
Schutzklasse I
Schutzart IP 44
Schutz gegen Eindringen fester Fremdkörper
> 1 mm und Spritzwasser
r– Sicherheitszeichen
c – Konformitätszeichen
Gewicht: 2,1 kg
Product description
Luminaire made of aluminium alloy
and stainless steel
BEGA Unidure® coating technology
Antique glass
2 mounting holes ø 5.2 mm
Distance apart 70 mm
1 cable entry for mains supply cable
up to ø10,5mmmax.3×1,5@
Connecting terminal 2.5@
with plug connection
Earth conductor connection
Lampholder E 27
Safety class I
Protection class IP 44
Protected against granular foreign bodies
> 1 mm and splash water
r– Safety mark
c – Conformity mark
Weight: 2.1 kg
Description du produit
Luminaire fabriqué en fonderie d’aluminium
et acier inoxydable
Technologie de revêtement BEGA Unidure®
Verre antique
2 trous de xation ø 5,2 mm
Entraxe 70 mm
1 entrée de câble pour câble de raccordement
jusqu’à ø10,5mmmax.3×1,5@
Bornier 2,5@avec connecteur embrochable
Raccordement de mise à la terre
Douille E 27
Classe de protection I
Degré de protection IP 44
Protection contre les corps solides
> 1 mm et les projections d’eau
r– Sigle de sécurité
c – Sigle de conformité
Poids: 2,1 kg
BEGA Gantenbrink-Leuchten KG · Postfach 31 60 · 58689 Menden · info@bega.com · www.bega.com
2/2
Sicherheit
Für die Installation und für den Betrieb
dieser Leuchte sind die nationalen
Sicherheitsvorschriften zu beachten.
Die Montage und Inbetriebnahme darf nur
durch eine elektrotechnische Fachkraft
erfolgen.
Der Hersteller übernimmt keine Haftung für
Schäden, die durch unsachgemäßen Einsatz
oder Montage entstehen.
Werden nachträglich Änderungen an der
Leuchte vorgenommen, so gilt derjenige als
Hersteller, der diese Änderungen vornimmt.
Safety indices
The installation and operation of this luminaire
are subject to national safety regulations.
Installation and commissioning may only be
carried out by a qualied electrician.
The manufacturer is then discharged from
liability when damage is caused by improper
use or installation.
If any luminaire is subsequently modied, the
persons responsible for the modication shall
be considered as manufacturer.
Sécurité
Pour l’installation et l’utilisation de ce luminaire,
respecter les normes de sécurité nationales.
L’installation et la mise en service ne doivent
être effectuées que par un électricien agréé.
Le fabricant décline toute responsabilité
résultant d’une mise en œuvre ou d’une
installation inappropriée du produit.
Toutes les modications apportées au luminaire
se feront sous la responsabilité exclusive de
celui qui les effectuera.
Montage
Schraube am Wandarm lösen.
Montageplatte aus Wandarm herausnehmen.
Netzanschlussleitung durch Dichtnippel der
Montageplatte führen.
Gebrauchslage der Montageplatte »Pfeil unten«
beachten.
Montageplatte mit beiliegendem oder
anderem geeigneten Befestigungsmaterial am
Montagegrund befestigen.
Dabei unbedingt beiliegende Dichtungen
verwenden.
Schutzleiterverbindung herstellen und
elektrischen Anschluss vornehmen.
Steckerteil in Steckvorrichtung bis zum
Anschlag eindrücken.
Schutzleiterverbindung zwischen Wandarm und
Montageplatte herstellen.
Wandarm auf Montageplatte setzen, ausrichten
und mit Schraube festsetzen.
Schrauben am Leuchtendach lösen.
Leuchtendach abheben. Lampe einsetzen und
Leuchtendach montieren.
Bei Einsatz einer Kompakt-Leuchtstofampe
kann die äußere Kerzenhülse nach oben
verschoben werden, um den Lampensockel
vollständig abzudecken.
Installation
Undo screw at wall bracket.
Remove mounting plate from wall bracket.
Lead mains supply cable through the
compression nipple of the mounting plate.
Note the position of application of the mounting
plate »arrow down«.
Fix mounting plate with enclosed or any other
suitable xing material onto the mounting
surface.
It is absolutely essential to use the enclosed
gaskets.
Make earth conductor connection and electrical
connection.
Push plug into coupler up to the stop.
Make earth conductor connection between wall
bracket and mounting plate.
Place wall bracket onto mounting plate, adjust
and secure with screw.
Undo screws at luminaire top.
Lift luminaire top.
Insert lamp and assemble luminaire top.
In case a compact uorescent lamp is used
the outer lampholder sleeve can be shifted
upwards to cover the lamp base completely.
Installation
Desserrer la vis au bras du luminaire.
Retirer la contre-plaque du bras.
Introduire le câble de raccordement par le
nipple d’étanchéité de la contre-plaque.
Vérier à la position d’utilisation de la contre-
plaque »èche en bas«.
Fixer la contre-plaque sur le support de
montage avec le matériel de xation fourni ou
tout autre matériel de xation approprié.
Utiliser dans tous les cas les joints fournis.
Mettre à la terre et procéder au raccordement
électrique.
Enfoncer la che dans le connecteur
embrochable jusqu’à la butée.
Relier le l de terre entre le bras du luminaire et
la contre-plaque.
Poser le bras du luminaire sur la contre-
plaque, ajuster et xer avec la vis.
Desserrer les vis au toit du luminaire.
Retirer le toit du luminaire. Installer la lampe et
monter le toit du luminaire.
Si on utilise une lampe uorescente compacte
le cache lampe extérieur peut être repoussé
vers le haut pour couvrir compètement le socle
de la lampe.
Lampenwechsel · Wartung
Anlage spannungsfrei schalten.
Leuchte öffnen und reinigen.
Nur lösungsmittelfreie Reinigungsmittel
verwenden. Lampe auswechseln.
Dichtung überprüfen, ggf. ersetzen.
Leuchte schließen.
Für Reinigungsarbeiten dürfen keine
Hochdruckreiniger verwendet werden.
Relamping · Maintenance
Disconnect the electrical installation.
Open the luminaire and clean.
Use only solvent-free cleaning agents. Change
the lamp.
Check the gasket and replace, if necessary.
Close the luminaire.
For cleaning, do not use high pressure
cleaners.
Changement de lampe · Entretien
Débrancher l’alimentation.
Ouvrir le luminaire et le nettoyer.
N’utiliser que des produits d’entretien ne
contenant pas de solvant. Changer la lampe.
Vérier et remplacer les joints d’étanchéité le
cas échéant.
Fermer le luminaire.
Ne pas utiliser de nettoyeur haute pression
pour le nettoyage.
Ersatzteile
Ersatzglas 11 002 615 .2
Fassung 63 000 355
Dichtung 83 000 329
Spares
Spare glass 11 002 615 .2
Lampholder 63 000 355
Gasket 83 000 329
Pièces de rechange
Verre de rechange 11 002 615 .2
Douille 63 000 355
Joint 83 000 329

This manual suits for next models

1

Other BEGA Outdoor Light manuals

BEGA 7263LED Manual

BEGA

BEGA 7263LED Manual

BEGA 98 019 Manual

BEGA

BEGA 98 019 Manual

BEGA 84 563 Manual

BEGA

BEGA 84 563 Manual

BEGA 24 217 Manual

BEGA

BEGA 24 217 Manual

BEGA 84 423 User manual

BEGA

BEGA 84 423 User manual

BEGA 22 203 Manual

BEGA

BEGA 22 203 Manual

BEGA 204 User manual

BEGA

BEGA 204 User manual

BEGA 84 991 Series User manual

BEGA

BEGA 84 991 Series User manual

BEGA 24212 User manual

BEGA

BEGA 24212 User manual

BEGA 84 666 User manual

BEGA

BEGA 84 666 User manual

BEGA 77 911 Manual

BEGA

BEGA 77 911 Manual

BEGA UniLink 84 919 User manual

BEGA

BEGA UniLink 84 919 User manual

BEGA 99 552 User manual

BEGA

BEGA 99 552 User manual

BEGA 33 200 Manual

BEGA

BEGA 33 200 Manual

BEGA 84 607 User manual

BEGA

BEGA 84 607 User manual

BEGA 84 761 User manual

BEGA

BEGA 84 761 User manual

BEGA 84 289 Manual

BEGA

BEGA 84 289 Manual

BEGA 84 992 User manual

BEGA

BEGA 84 992 User manual

BEGA 24 011 Manual

BEGA

BEGA 24 011 Manual

BEGA 84 137 User manual

BEGA

BEGA 84 137 User manual

BEGA 84 253 Manual

BEGA

BEGA 84 253 Manual

BEGA 84 760 User manual

BEGA

BEGA 84 760 User manual

BEGA Gobo 84 987 User manual

BEGA

BEGA Gobo 84 987 User manual

BEGA 77 011 User manual

BEGA

BEGA 77 011 User manual

Popular Outdoor Light manuals by other brands

Lithonia Lighting WPX Series installation instructions

Lithonia Lighting

Lithonia Lighting WPX Series installation instructions

Maxim Lighting Schooner manual

Maxim Lighting

Maxim Lighting Schooner manual

nordlux JULIAN Mounting instruction

nordlux

nordlux JULIAN Mounting instruction

nordlux BALANCE Mounting instruction

nordlux

nordlux BALANCE Mounting instruction

ABBA CDR12 installation guide

ABBA

ABBA CDR12 installation guide

Home Decorators Collection JLW1612A-3 Use and care guide

Home Decorators Collection

Home Decorators Collection JLW1612A-3 Use and care guide

Safavieh Lighting FLL4000A quick start guide

Safavieh Lighting

Safavieh Lighting FLL4000A quick start guide

Sunnydaze Decor SKULL TABLETOP TORCHES manual

Sunnydaze Decor

Sunnydaze Decor SKULL TABLETOP TORCHES manual

XanLite TOS19RVBIP user manual

XanLite

XanLite TOS19RVBIP user manual

Gama Sonic GS-121 instruction manual

Gama Sonic

Gama Sonic GS-121 instruction manual

Safavieh LIT4305A manual

Safavieh

Safavieh LIT4305A manual

Safavieh Lighting ERNIA TBL7005A-SET2 quick start guide

Safavieh Lighting

Safavieh Lighting ERNIA TBL7005A-SET2 quick start guide

ML Accessories LSPIKEA Installation & maintenance manual

ML Accessories

ML Accessories LSPIKEA Installation & maintenance manual

Portfolio LBSH01MTN quick start guide

Portfolio

Portfolio LBSH01MTN quick start guide

bover AMPHORA Series Assembly instructions

bover

bover AMPHORA Series Assembly instructions

Velleman XMCL22 user manual

Velleman

Velleman XMCL22 user manual

Lexing LX-180GS12 Instruction

Lexing

Lexing LX-180GS12 Instruction

Cooper Lighting Streetworks TRU Tribute installation instructions

Cooper Lighting

Cooper Lighting Streetworks TRU Tribute installation instructions

manuals.online logo
manuals.online logoBrands
  • About & Mission
  • Contact us
  • Privacy Policy
  • Terms and Conditions

Copyright 2025 Manuals.Online. All Rights Reserved.