manuals.online logo
Brands
  1. Home
  2. •
  3. Brands
  4. •
  5. Bircher Reglomat
  6. •
  7. Security Sensor
  8. •
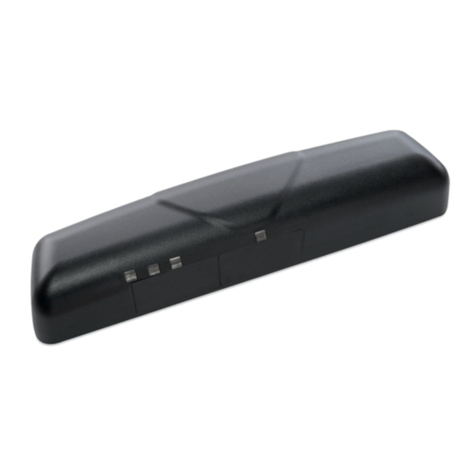
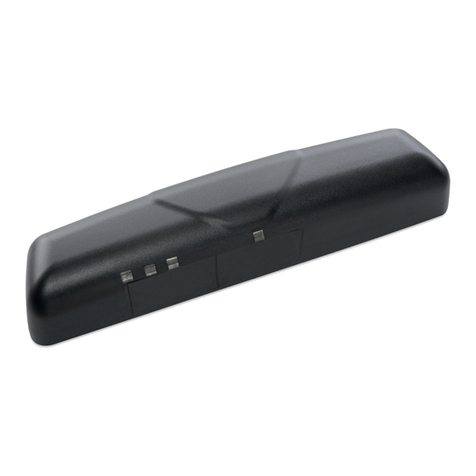
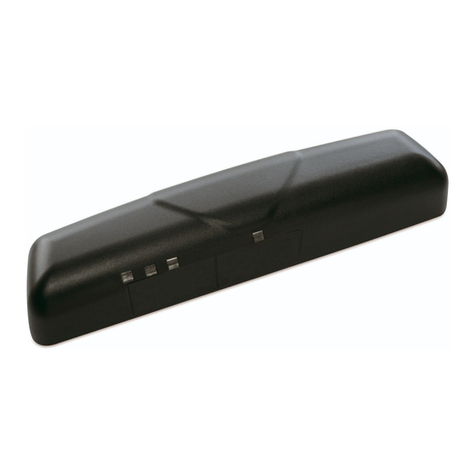
  9. Bircher Reglomat MERKUR User manual

Bircher Reglomat MERKUR User manual

Betriebsanleitung
Operating instructions
Instructions d’utilisation
Istruzioni per l’uso
Instrucciones de servicio
DDas Gerät darf nur an Schutzkleinspannung mit sicherer
elektrischer Trennung betrieben werden.
Eingriffe und Reparaturen nur durch Ihren Lieferanten vor-
nehmen lassen!
EThe device must only be operated at a protective low voltage
with safe electrical isolation.
Interventions and repair work must only be performed by your
supplier!
FL’appareil ne doit être raccordé qu’à une basse tension de
protection possédant un isolement électrique sûr.
Les interventions et réparations ne doivent être effectuées
que par votre fournisseur !
IL’apparecchio deve essere allacciato solo ad una tensione
inferiore a 42 V con separazione elettrica sicura.
Interventi e riparazioni devono essere effettuati solo dal
vostro fornitore.
Sicherheitshinweise/Safety instructions/Consignes de sécurité/Avvisi di sicurezza/Indicaciones de seguridad
ES El aparato sólo debe ser conectado a una tensión baja de
protección con una separación eléctrica segura.
¡Las intervenciones y reparaciones deben ser efectuadas
únicamente por su proveedor!
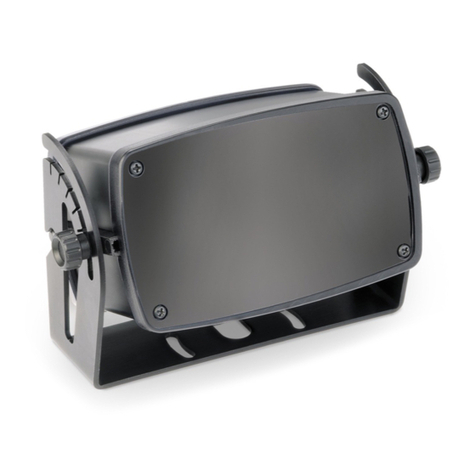
Radar-Bewegungsmelder als Öffnungsimpulsgeber für automatische Türen
Microwave Motion Detector as opening pulse generator for automatic pedestrian doors
Détecteur de mouvement comme générateur d’impulsion d’ouverture pour portes automatiques
Rilevatore di moviemento come generatore di impulsi di apertura per porte automatiche
Detector de movimiento como generador de pulso de la apertura para puertas automàticas
12
3
4
5
1
2
5
4
3
Montage / Mounting / Montage / Montaggio / Montaje
= blinken
= flash
= clignoter
= lampeggiare
= parpadea
= drücken
= press
= presser
= premere
= pulsar
= ein
= on
= contact
= acceso
= en marcha
= Zeit
= time
= temps
= tempo
= tiempo
= Achtung
= Attention
= Attention
= Attenzione
= Atencion
Wandmontage
Mounting to wall
Montage sur paroi
Montaggio alla parete
Montaje a la pared
Deckenmontage
Mounting to ceiling
Montage sur plafond
Montaggio sullo soffitto
Montaje al techo
A
Pictogramme / pictograms
1
Quality
international
level
EN ISO
9001
MERKUR
Programmierung der Empfindlichkeit
Setting the sensivity
Réglage de la sensibilité
Regolazioni della sensibilità
Ajuste de la sensibilidad
Abfrage der Empfindlichkeit
Inquiry of sensivity
Contrôle de sensibilité
Controllo della sensività
Consulta de sensibilidad
F+E-
E-
F+
x 1 : 6
x 1
F
x 1 : 6
x 1
F
x 1... 6
x 1
F
Stufe
Step Richtung
Direction
Montagehöhe
Mount.height
1vor
forward
standard
standard
Richtungserkennung ein
Direction recognition on
2vor
forward
hoch
high
Richtungserkennung ein
Direction recognition on
3rück
backward
standard
standard
Richtungserkennung ein
Direction recognition on
4rück
backward
hoch
high
Richtungserkennung ein
Direction recognition on
5Richtungserkennung aus
Direction recognition off
standard
standard
6Richtungserkennung aus
Direction recognition off
hoch
high
x 1... 9
x 1
E
Stufe / Step
1
2
3
4
5
6
7
8
9
2
x 2
x 1
x 1. . .6
4 sec.
Stufe
Step Richtung
Direction
Montagehöhe
Mount.height
1vor
forward
standard
standard
Richtungserkennung ein
Direction recognition on
2vor
forward
hoch
high
Richtungserkennung ein
Direction recognition on
3rück
backward
standard
standard
Richtungserkennung ein
Direction recognition on
4rück
backward
hoch
high
Richtungserkennung ein
Direction recognition on
5Richtungserkennung aus
Direction recognition off
standard
standard
6Richtungserkennung aus
Direction recognition off
hoch
high
3
x 1... 9
F+E-
E-
F+
x 1... 6
x 1
x 1
6
x 1
x 1
x 3
x 1
8 sec
7
Programmierung innerhalb von 25 sec., sonst Neubeginn.
Réglage entre 25 sec., autrement il faut recommencer.
La configuración se debe hacer entre 25 sec., de otra manera: relanzar por favor.
Setting must be done in 25 sec., otherwise restart please.
Programmazione regolare entro 25 sec., se no: ricominciare.
Empfindlichkeit ist nun eingestellt
Sensivity adjusted
Sensibilité réglé
Sensibilità regolato
Modo de ajuste habra finalizado
Funktion ist nun eingestellt
Function adjusted
Fonction réglé
Funzione regolato
Modo de ajuste habra finalizado
zurück zu
Werkseinstellungen
back to factory
settings
retour au confi-
guration d’usine
ritorno ai regolazioni
della fabbrica
de nuovo a la
configuracion de la
fabrica
Einstellungen ohne Reglobeam /Settings without Reglobeam / Réglage sans Reglobeam / Regolazione senza Reglobeam /Ajuste sin Reglobeam
B
45
89
Die Empfindlichkeit bestimmt die Grösse
des Detektionsfeldes.
The size of the detection field depends
on the sensitivity.
La sensibilité fixe la taille de la zone
detection.
La sensibilità regola il formato del campo
di rilevazione.
La sensibilidad regula la talla del campo
de detección.
2
1Abfrage der Funktionen
Inquiry of functions
Contrôle des fonctions
Controllo dei funzioni
Cons. de funcionalidad
Programmierung der Funktion
Setting the functionality
Réglage de la fonction
Regolazione della funzione
Ajuste de la funcionalidad
Anschluss / Connection / Connexion / Attaco / Conexión
x 1
x 1
x 1... 9
2 sec
Stufe / Step
1
2
3
4
5
6
7
8
9
RJ12 Steckschraubklemme / Plug-inscrew terminal
braun/
brown
blau/
blue
schwarz/
black
weiss/white
braun/
brown
blau/
blue
schwarz/
black
weiss/white
* Abhängig von IhrerAnwendung
Depends on yourapplication
Schliesserkontakt/normaly open → Pin 4
Öffnerkontakt/normaly closed → Pin 5
*
1
2
3
4
5
Empfehlung:
Schliessen Sie das
mitgelieferte Kabel
gemäss Vorschlag an
Recommendation:
Connect the attached
cable as proposed
Montagehöhe
Mounting height
<3m
(9.84')
≥3 m (9.84')*
ohne clip ohne clip
without clip without clip
mit clip ohne clip
with clip without clip
Feld schmal
Narrow field
Feld breit
Wide field
D: Der Reglobeam arbeitet bi-
direktional. Programmierungen sind
nur akzeptiert, wenn Taste perma-
nent leuchtet, nicht blinkt. Stufe1 be-
deutet immer die kleinste Wertigkeit.
E: The Reglobeam works bi-
directional. Settings only are
accepted when key lights up, not
flashes. Grade 1 always is the
lowest valence.
F: Le Reglobeam travaille en manière
bi-directionel. Des Réglages sont
seulement accepter, quand la touche
s’allument, et pas clignote. Degrés 1
c’est toujours la valence la plus petite
possible.
Feld mit Clip
field with tie-clip
champs avec clip
campo con leg-clip
campo con atar-clip
Montagehöhe
Mounting height
Hauteur de montage
Altezza di montaggio
Altura del montaje
2.2 m (7.22')
Feld ohne Clip
field without tie-clip
champs sans clip
campo senza leg-clip
campo sin atar-clip
Montagehöhe
Mounting height
Hauteur de montage
Altezza di montaggio
Altura del montaje
2.2 m (7.22')
Schwenken
Turning
Tourner
Girare
Dando vuelta
neigen
altering
Inclinaison
Inclinazione
Inclinación
min. 5 45
12
Weitere Feldeinstellungen / Other field settings / Autre réglages du champs de detection /
Altri regolazioni del campo di rilevamento / Otras configuraciones del campo de detección
D
2.2 m
(7.22')
2.2 m
(7.22')
34
REGLObeam
Einstellungen mit Reglobeam /Settings with Reglobeam / Réglage avec Reglobeam / Regolazione con Reglobeam / Ajuste con Reglobeam
E
Aus Sicherheitsgründen wird die Verbindung nach
30 min. unterbrochen. Um diese wieder herzustellen
bitte weiter zu 4.
For safety reasons the conection interupt after 30 min.
For restore go to 4.
Interrompu après 30 min. pour des raisons
de sécurité. Pour établir la conexion de nouveau
continuez avec 4.
Per motivi di sicurezza il contatto viene interrotto
dopo 30 min. Per ristabilirlo continui prego al 4.
Por motivos de seguridad al cabo Interrumpe de
30 min. Para el restor va a 4.
1 2 3
min. 0.5 m (1.64')
max. 2.5 m (8.20')
min. 0.5 m (1.64')
max. 2.5 m (8.20')
min. 1.0 m (3.28')
max. 4.0 m (13.12')
min. 0.5 m (1.64')
max. 2.0 m (6.56')
3
10 sec.
13
Testen der Einstellungen / Testing of settings / Contrôle des réglages / Controllo dei regolazioni / Comprobar los ajustes
2
Abschreiten
Measure by pace
Measurer par pas
Misura dal passo
Medida por paso
Achtung
Attention!
Attention!
Attenzione!
Attencion!
C
Geräteadresse leuchtet auf (1–4)
Sensor address lights up (1–4)
Bei Verwendung des
Clips Verstärkung
einschalten (F41)
The use of the clip
requires the
amplification (F41)
D: Zu 3 und 4: Nach dem Aufsetzen
oder Abnehmen des Clips muss die
Spannung für mind. 5 Sekunden
unterbrochen werden.
E: To 3 and 4: After removing
or putting the clip the power
supply must be interrupted for
min. 5 sec.
F: 3 et 4: Après avoir retiré ou
mis le clip l’alimentation d’énergie
doit être interrompue pendant
mn 5 sec.
I: 3 e 4: Dopo la rimozione o messo
della clip il gruppo di alimenta-
zione deve essere interrotto per il
minuto 5 sec.
ES: La tensión debe interrumpirse
durante al menos 5 segundos
después de haber colocado o retirado
el clip.
D: Verwendung des Clips für breite
Felder gemäss nebenstehender Tabelle.
* Bei Montagehöhen über 3 m werden
breite Felder mit dem Neigungswinkel
(Kap. F-1) und der Empfindlichkeit
(Kap. K) eingestellt.
E: Use of the clip for wide fields
according to the opposite table.
* At mounting heights above 3 m
(9.84'), wide fields are set using the
inclination angle (chapter F-1) and the
sensitivity (chapter K).
F: Utilisation du clip pour champs
larges selon le tableau.
* Pour les hauteurs de montage
supérieures à 3 m, il est possible de
régler les champs larges au moyen de
l’angle d’inclinaison (chap. F-1) et de la
sensibilité (chap. K).
I: Utilizzo della leg-clip per campi ampi
conformemente alla tabella.
* Per altezze di montaggio superiori
ai 3 m è possibile regolare campi
ampi tramite l’angolo di inclinazione
(cap. F-1) e la sensibilità (cap. K).
ES: Utilización del clip para campos
anchos de acuerdo con la tabla.
* Para unas alturas de montaje
superiores a 3 m, los campos anchos
pueden ajustarse mediante el ángulo
de inclinación (cap. F-1) y la sensibili-
dad (cap. K).
ES: El Reglobeam funciona de forma
bidireccional. Se validan las
configuraciones solamente, si estàn
encendidas una tecla. El grado 1 es
siempre el valencia màs bajo posible.
I: Il Reglobeam funziona in maniera
bidirezionale. Regolazioni sono
programmati, quando il tasto e
acceso e non lampeggia. Livello 1
è sempre il valence più basso
possibile.
B1E 2
Vorprogrammierte Komforteinstellungen / Pre-programmed convenience configurations / Configurations de confort
preprogrammés / Configurazione comfort preprogrammate / Configuraciones de confort preprogramadas
F
B2
B1E 1
Richtungserkennung / Direction recognition / Détection de direction / Rilevamento della direzione / Detección de la dirección
G
B=mit Rich-
with direction
tungserk. recognition
D=mittel medium
F1 = mittel medium
F2 = aktivactive
F3 = aus off
F4 = standard standard
F5 = wenig low
F6 = aus off
B=mit Rich-
with direction
tungserk. recognition
D=mittel medium
F1 = kurz short
F2 = aktivactive
F3 = aus off
F4 = standard standard
F5 = mittel medium
F6 = aus off
B = ohne Rich-
without direction
tungserk. recognition
D=hochhigh
F1 = mittel medium
F2 = aktivactive
F3 = hochhigh
F4 = standard standard
F5 = aus off
F6 = aus off
B=mit Rich-
with direction
tungserk. recognition
D=mittel medium
F1 = kurz short
F2 = aktivactive
F3 = aus off
F4 = standard standard
F5 = wenig low
F6 = aus off
B=mit Rich-
with direction
tungserk. recognition
D=hochhigh
F1 = mittel medium
F2 = aktivactive
F3 = mittel medium
F4 = hochhigh
F5 = aus off
F6 = aus off
B=mit Rich-
with direction
tungserk. recognition
D=hochhigh
F1 = mittel medium
F2 = aktivactive
F3 = aus off
F4 = hochhigh
F5 = mittel medium
F6 = aus off
Falls Sie mit dem so eingestellen Feld nicht zufrieden sind, weiter bei G.
If the field does not compare with you wishes, please go ahead to step G.
Si le champs de détection ne rivalise pas avec vos souhaits, veuillez aller au pas G.
Se il campo non paragona ai vostri diseri, andare prego avanti al passo G.
Si el campo no compara con sus deseos, vay por favor a continuación a caminar G.
Die Funktionen in den Tabellen sind ab G erklärt. The functions in the tables are explained at the chapters G, H an I. Les fonctions dans les tables sont expliqués
sous G, H et I. Le funzioni nelle tabelle sono spiegate su G, H e I. Los ajustes en los vectores se explican abajo (G, H, I).
vorwärts rückwärts
4
oder
or
Adresse 1
Adresse 2
Adresse 3
Adresse 4
1234
1 2
on
4 5 6 Beim Wechseln der
Geräteadresse
Verbindung
unterbrechen bis
Taste G blinkt –
jetzt richtige
Geräteadresse am
Reglobeam
eingeben.
Changing the sensor
address please
interrupt connection
until button G
flashes – press now
the right sensor
address on the
Reglobeam.
ohne Richtungserkennung, no direction recognition,
sans détection de direction, sin que detección de la
dirección, senza rilevamento della direzione
richtungserkennend, direction recognition, détection de direction,
detección de la dirección, rilevamento della direzione
C1
Standardbetrieb
Standardoperation
Fonctionnement
standard
Funzionamento standard
Funcionamento estàndar
C2
Gehsteigeinstellung
Sidewalk setting
Réglage trottoir
Regolazione marciapiede
Ajuste par aceras
C3
Altersheim-Einstellung
Old people’s home setting
Réglage maison de retraite
Regolazone casa di riposo
Ajuste para residencias de
ancianos
C6
3 m
(9.84')
>
Hohe Montagehöhe
Hight mounting height
Hauteur de montage
élevée
Altezza di montaggio
elevata
Montaje alto
C5
Supermarkt-Einstellung
Supermarket setting
Réglage supermarché
Regolazione
supermercato
Ajuste para
supermercados
C4
Windfang-Einstellung
Draught-proof door
setting
Réglage porte paravent
Regolazione paravento
Ajuste para canceles
F11 9
…
zusätzlich zu smd
additional to smd
<
<
F42
3 m
(9.84')
3 m
(9.84')
… …
3 m
(9.84')
>
>
F41
3 m
(9.84')
F51 9
F6 1F6 2
Querverkehrsoptimierung
Cross traffic optimizing
L’optimisation du traffic transversale
L’ottimizzazzione del traffico transvers.
Optimización de movimientos transvers.
Störunterdrückungsfilter
Interference suppression filter
Filtre de suppression des influences
perturbatrices
Filtro suppressore di disturbi
Filtro antiparàsito
on
on
off
off
123456789
0,2 sec. 0,5 sec. 0,8 sec. 1 sec. 1,5 sec. 2 sec. 2,5 sec. 3 sec. 4 sec.
21
22
= active
= passive
31 ... 9
Spezialfunktionen / Special functions / Fonctions spéciales / Funzioni speciali / Funcionadas especiales
I
Slow motion detection
(detektiert kleinste Bewegungen)
(detects smallest motions)
D Relais schaltet ein bei Detektion
E Relay switches on upon detection
F le relais s’active en cas de détection
I il relè diventa attivo in caso di rilevamento
ESEl relé se concecta en caso de deteccion
D Relais schaltet aus bei Detektion
E Relay switches off upon detection
F le relais se désactive en cas de détection
I il relè diventa inattivo in caso di rilevamento
ESEl relé se desoncecta en caso de deteccion
Slow motion detection Level min. aktive Zeit für Statik in sec.
min. active time for static in sec.
%
0
20
40
60
80
100
0
20
40
60
80
100
1keine Statik / no static keine Statik/no static
2Statik abfallend / static decreasing 0.5
3Statik abfallend / static decreasing 1.0
4Statik abfallend / static decreasing 1.5
5Statik abfallend / static decreasing 2.0
6Statik konstant / static constant 0.5
7Statik konstant / static constant 1.0
8Statik konstant / static constant 1.5
9Statik konstant / static constant 2.0
Optimale Modul-
Neigung >30°
optimum module
position > 30°
Time
Verst.stufe 1 für hohe
Montagehöhe oder
breitere Felder
Amplification grade 1
for high mounting or
wider fields
Degrés d’amplific. 1
pour haute montage
ou champs plus large
Livelli di
amplificazione 1 per
montaggio alto
o campi più largi
Amplificación 1 por
montaje alta y campos
mas anchos
5
2.2 m
(7.22')
2.2 m
(7.22')
Empfindlichkeit / Sensitivity / Sensibilité / Sensibilità / Sensibilidad
H
Feld ohne Clip
field without clip
champs sans clip
campo senza leg-clip
campo sin atar-clip
Feld mit Clip
field with clip
champs avec clip
campo con leg-clip
campo con atar-clip
min.0.5 m (1.64')
max.2.5 m (8.20')
min. 0.5 m (1.64')
max. 2.5 m (8.20')
min.1.0 m (3.28')
max.4.0m (13.12')
min.0.5 m (1.64')
max.2.0 m (6.56')
max. Mont.-
höhe 4 m
max. mounting
height 4 m
(13.12')
Verstellen der Grösse des
smd-Feldes / Adjusting
the width of smd-area /
ajuster le champs smd /
regolare il campo smd /
ajuste el campo smd
71 . . . 9
Haltezeit Ausgang
Holding time output
Temps du maintien de la
sortie
Tempo di tenuta uscita
Tiempo de retención
de la salida
DSpeisespannung 12–36 V DC / 12–28 V AC
Stromaufnahme ca. 70 mA bei 24 V AC
Temp.bereich –20 °C bis +60 °C
Luftfeuchtigkeit 0 bis 90% rel.
Mikrowellenmodul K-Band 24,125 GHz +/– 100 MHz
Sendeleistung < 20 dBm
LED rot = Detektion aktiviert grün = für Einstellung der Funktionen
Relais-Ausgang potentialfrei Umschaltkontakt
Schaltspannung 48 V AC/DC
Schaltstrom 0,5 A AC/1 A DC
Schaltleistung 60 VA / 30 W
Schutzart geeignet für den Einsatz nach IP 54
Gehäusematerial ABS
empfohlene maximale Montagehöhe 4 m
EPower supply 12–36 V DC / 12–28 V AC
Current consumption approx. 70 mA at 24 V AC
Temp. range –20 °C to +60 °C (–4 °F bis +140 °F)
Humidity 0 to 90% rel.
Microwave module K-band 24,125 GHz +/– 100 MHz
Transmitting power < 20 dBm
LED red = Detection activated green = for adjusting functions
Relay output pot. free change-over contact
Switching voltage 48 V AC/DC
Switching current 0.5 A AC/1 A DC
Switching power 60 VA / 30 W
Protection class suitable for the application after IP 54
Housing material ABS
recommended maximum mounting height 4 m (13.12')
FAlimentation 12–36 V DC / 12–28 V AC
Consom. de courant env. 70 mA à 24 V AC
Plage de température –20 °C à +60 °C
Humidité de l’air 0 à 90% rel.
Module à micro-ondes Bande K 24,125 GHz +/– 100 MHz
Puissance de transmission < 20 dBm
LED rouge = détection actif vert = Ajustement des fonctions
Sortie relais sans potentiel contact de commutation
Tension de comm. 48 V AC/DC
Cour. de comm. 0,5 A AC/1 A DC
Puissance de rupture 60 VA / 30 W
Type de protection convaincu pour l’application après IP 54
Materiau du boîtier ABS
max. hauteur de montage recommendé 4 m
IAlimentazione 12–36 V DC / 12–28 V AC
Corrente assorbita ca. 70 mA a 24 V AC
Campo di temp. –20 °C a +60 °C
Umidità dell’aria 0 a 90% rel.
Modulo a microonde Nastro K 24,125 GHz +/– 100 MHz
Potenza transmettente < 20 dBm
LED rosso = rilevamento attiva verde = per regolare le funzioni
Uscita del relè a potenziale zero contatto di commutazione
Tensione di commutaz. 48 V AC/DC
Corrente di commutaz. 0,5 A AC/1 A DC
Potere di rottura 60 VA / 30 W
Tipo di protezione appropriato per luso dopo IP 54
Materiale della carcassa ABS
altezza del montaggio massima ricommandata 4 m
ES Alimentación 12–36 V DC / 12–28 V AC
Absorción de corriente ca. 70 mA a 24 V AC
Margen de temp. –20 °C hasta +60 °C
Humed. atmosfér. 0 hasta 90% rel.
Módulo de microondas Banda K 24,125 GHz +/– 100 MHz
Potencia para transmitir < 20 dBm
LED rojo = deteccion activada verde = por ajuste de la funcionalidad
Salida de relé sin potencial contacto de conmutacion
Tensión de conmutación 48 V AC/DC
Corriente de conm. 0,5 A AC/1 A DC
Potencia de ruptura 60 VA / 30 W
Clase de protección apropiado por l’utilización después IP 54
Material de caja ABS
altura del montaje maxima recomlendada 4 m
Technische Daten / Technical data / Caractéristiques techniques / Dati tecnici / Datos tècnicos
M
Erfüllt folgende Richtlinien:
According to directives:
Segundo las directivas:
Selon les directives:
Secondo i direttivi:
1999/5/EC: R&TTE directive
89/336/EEC: EMC directive + amendments
6
A1
ca. 15 min.
A2
Manuelle Türöffnung / Manual opening of door / Ouverture de porte manuelle /
Apertura manuale di porta / Apertura manual de puerta
K
Störeinflüsse / interferences / peturbations /
Cause di disturbo / interferencias
L
on off
EC-Declaration of Conformity
EU - Konformitätserklärung
Manufacturer / Hersteller: Bircher Reglomat AG
Address / Adresse: Hauptstrasse 22
CH - 9042 Speicher
declares that the product / erklärt, dass das Produkt
Type / Typ: Merkur
Model / Modell: /31, M
Intended use / Verwendungszweck: Microwave motion detection / Radar-Bewegungsmelder
complies with the essential requirement ofArticle 3 ofthe R&TTE 1999/5/EC directive,
if used for its intended use and that the following standards has been applied:
beibestimmungsmässiger Verwendung den grundlegenden Anforderungen gemäss Artikel 3 der R&TTE-
Richtlinie 1999/5/EG entspricht und dass folgende Normen angewandt wurden:
1 Electromagnetic compatibility (Article 3.1.b ofthe R&TTE Directive)
Elektromagnetische Verträglichkeit (Artikel 3.1.b der R&TTE-Richtlinie)
Applied standard(s): EN 50081-1 (Issue: 1992)
EN 50081-2 (Issue: 1993)
EN 50082-1 (Issue: 1997)
EN 50082-2 (Issue: 1995)
EN 61000-6-2 (Issue: 1999)
2efficient use ofthe radio frequency spectrum (Article 3.2 ofthe R&TTE Directive)
Effiziente Nutzung des Funkfrequenzspektrums (Artikel 3.2 der R&TTE-Richtlinie)
Applied standard(s): EN/ETS 300 440-1 (Draft issue: 07/2000)
Speicher, 2001-03-29
(Place and date ofthe declaration ofconformity)
(Ort und Datum der Konformitätserklärung)
Jonas Schuster Thomas Klingele
Business Unit Manager Manager R&D
Pedestrian Door Sensors
Quality
international
level
EN ISO
9001
7
K6202.020 07/05
Cross traffic optimizing (only Mekur)
Querverkehrsoptimierung (nur Merkur)
Amplification grade 1 for high mounting
or wider fields
Verst.stufe 1 für hohe Montagehöhe
oder breitere Felder
Influences on the field adjustment
Einflüsse auf die Feldeinstellung
X = Merkur and Merkur M is applicable in this countries.
X = Der Merkur und Merkur M ist in diesen Ländern für den Betrieb geeignet.
3 m
(9.84')
>
>
F41
3 m
(9.84')
F51 9
E Depending upon adjustment of the transverse
traffic optimization and upon angle position of
module the field becomessmaller during frontal
approximation.
D Je nach Einstellung der Querverkehrsoptimierung
und je nach Winkelstellung desModulsverkleinert
sich das Feld bei frontaler Annäherung.
field with clip
Feld mit Clip
2.2 m
(7.22')
m
2
')
Overview countries
Attestation of conformity
Übersicht Ländereignung
Konformitätserklärung
Frequency / Frequenz 24.125 GHz
Country / Land
Switzerland / Schweiz X
Austria / Österreich X
Germany / Deutschland X
Netherlands / Niederlande X
Belgium / Belgien X
Luxembourg / Luxemburg X
France / Frankreich X
Italy / Italien X
Spain / Spanien X
Portugal / Portugal X
United Kingdom / Grossbritannien X
Frequency / Frequenz 24.125 GHz
Country / Land
Ireland / Irland X
Denmark / Dänemark X
Finland / Finnland X
Sweden / Schweden X
Norway / Norwegen X
Greece / Griechenland X
Czech Republic / Tschechische Republik X
Hungary / Ungarn X
Slovakia / Slowakische Republik X
Poland / Polen X
MERKUR
MERKUR M
8
field without clip
Feld ohne Clip

This manual suits for next models

2

Other Bircher Reglomat Security Sensor manuals
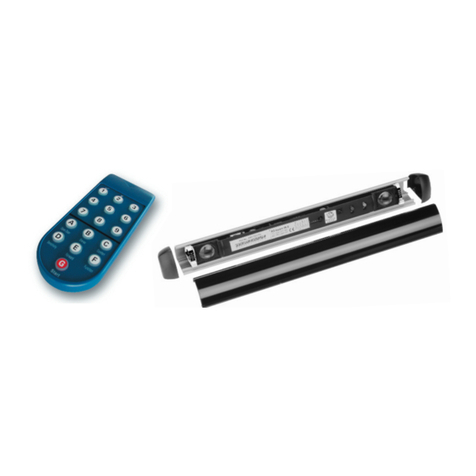
Bircher Reglomat Herkules 2E User manual

Bircher Reglomat

Bircher Reglomat Herkules 2E User manual

Bircher Reglomat Hercules 2 User manual

Bircher Reglomat

Bircher Reglomat Hercules 2 User manual

Bircher Reglomat DI1-Pro V2 User manual

Bircher Reglomat

Bircher Reglomat DI1-Pro V2 User manual

Bircher Reglomat Reflex ES User manual

Bircher Reglomat

Bircher Reglomat Reflex ES User manual

Bircher Reglomat ProLoop 2 User manual

Bircher Reglomat

Bircher Reglomat ProLoop 2 User manual

Bircher Reglomat ProLoop Lite User manual

Bircher Reglomat

Bircher Reglomat ProLoop Lite User manual

Bircher Reglomat ProLoop User manual

Bircher Reglomat

Bircher Reglomat ProLoop User manual

Bircher Reglomat EsGate 2 User manual

Bircher Reglomat

Bircher Reglomat EsGate 2 User manual

Bircher Reglomat US beam Supplement

Bircher Reglomat

Bircher Reglomat US beam Supplement
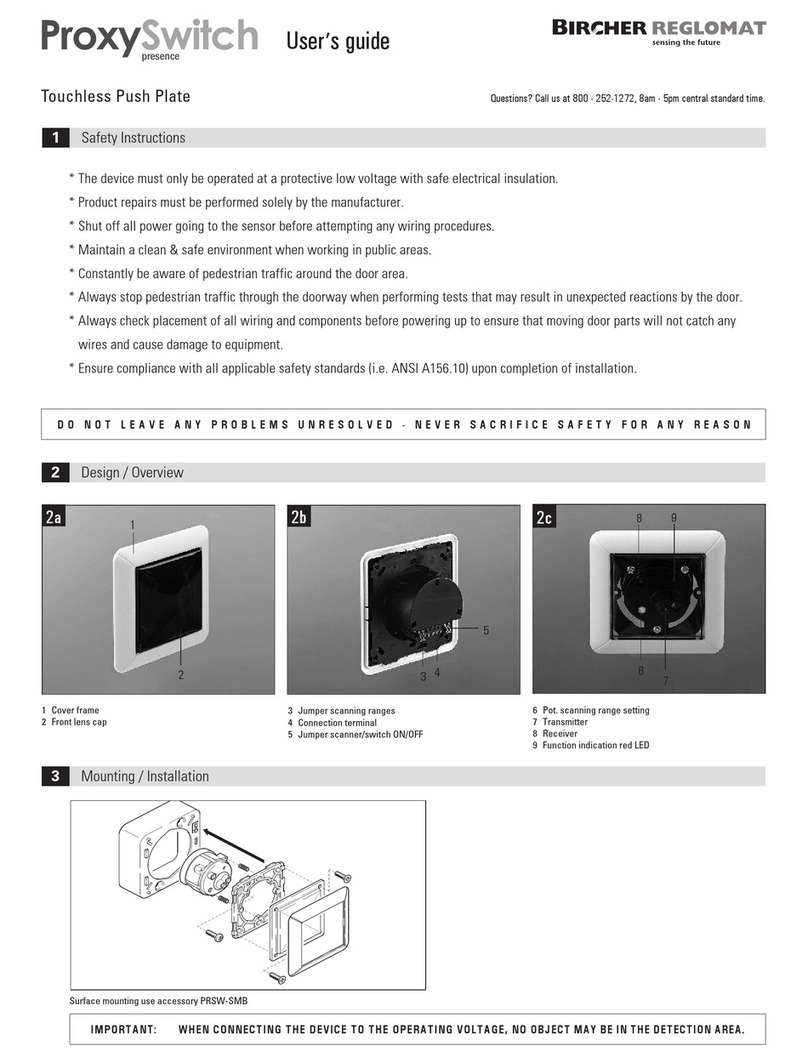
Bircher Reglomat ProLoop User manual

Bircher Reglomat

Bircher Reglomat ProLoop User manual

Bircher Reglomat Swissdoor PrimeMotion B User manual

Bircher Reglomat

Bircher Reglomat Swissdoor PrimeMotion B User manual

Bircher Reglomat MERKUR SE User manual

Bircher Reglomat

Bircher Reglomat MERKUR SE User manual

Bircher Reglomat Merkur 2 Series User manual

Bircher Reglomat

Bircher Reglomat Merkur 2 Series User manual

Bircher Reglomat PrimeScan B Supplement

Bircher Reglomat

Bircher Reglomat PrimeScan B Supplement

Bircher Reglomat EasyMotion User manual

Bircher Reglomat

Bircher Reglomat EasyMotion User manual

Bircher Reglomat PrimeTec B User manual

Bircher Reglomat

Bircher Reglomat PrimeTec B User manual

Bircher Reglomat PrimeTec B User manual

Bircher Reglomat

Bircher Reglomat PrimeTec B User manual

Bircher Reglomat PrimeMotion B User manual

Bircher Reglomat

Bircher Reglomat PrimeMotion B User manual

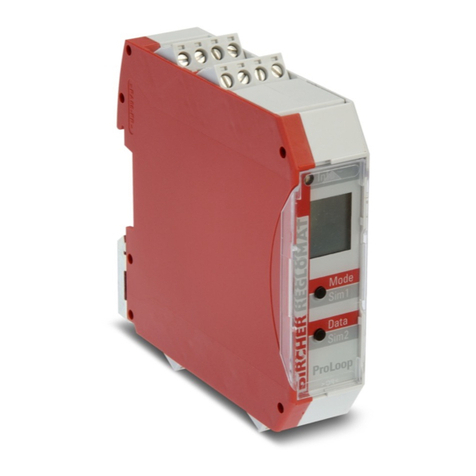
Bircher Reglomat ProxySwitch User manual
Bircher Reglomat

Bircher Reglomat ProxySwitch User manual

Bircher Reglomat PrimeMotion C User manual

Bircher Reglomat

Bircher Reglomat PrimeMotion C User manual

Bircher Reglomat RBM 2 User manual

Bircher Reglomat

Bircher Reglomat RBM 2 User manual

Bircher Reglomat RK 31C-PWH User manual
Bircher Reglomat

Bircher Reglomat RK 31C-PWH User manual

Bircher Reglomat ESM User manual

Bircher Reglomat

Bircher Reglomat ESM User manual

Bircher Reglomat Jupiter User manual

Bircher Reglomat

Bircher Reglomat Jupiter User manual
Popular Security Sensor manuals by other brands

AGD 335 product manual

AGD

AGD 335 product manual

BBC Bircher CareMat Translation of the original instructions

BBC Bircher

BBC Bircher CareMat Translation of the original instructions

Silux Home Seeker Operation manual

Silux Home

Silux Home Seeker Operation manual

POS FTPC SIM-IR installation manual

POS

POS FTPC SIM-IR installation manual

Clare Controls ClareOne CLR-C1-PIR Installation sheet

Clare Controls

Clare Controls ClareOne CLR-C1-PIR Installation sheet

FGD FlameSpec IR3 H2 HD user manual

FGD

FGD FlameSpec IR3 H2 HD user manual

Respirex GLS 300 A User instructions

Respirex

Respirex GLS 300 A User instructions

Waters 3100 Operator's guide

Waters

Waters 3100 Operator's guide

Reed Instruments R9200 instruction manual

Reed Instruments

Reed Instruments R9200 instruction manual

Baumer URDK 10P8914/S35A quick start guide

Baumer

Baumer URDK 10P8914/S35A quick start guide

Omron F3S-TGR-SB2-KXC user manual

Omron

Omron F3S-TGR-SB2-KXC user manual

V-TAC VT-80301 instruction manual

V-TAC

V-TAC VT-80301 instruction manual

TOOLCRAFT OG08 operating instructions

TOOLCRAFT

TOOLCRAFT OG08 operating instructions

BEA FALCON EXXL manual

BEA

BEA FALCON EXXL manual

Siargo FS1100 user manual

Siargo

Siargo FS1100 user manual

Newport 818-BB-20 user guide

Newport

Newport 818-BB-20 user guide

Honeywell ADEMCO 5808EU installation instructions

Honeywell

Honeywell ADEMCO 5808EU installation instructions

IFM Electronic efector500 PI2658 operating instructions

IFM Electronic

IFM Electronic efector500 PI2658 operating instructions

manuals.online logo
manuals.online logoBrands
  • About & Mission
  • Contact us
  • Privacy Policy
  • Terms and Conditions

Copyright 2025 Manuals.Online. All Rights Reserved.