CAUTION / ATTENTION
THIS PRODUCT MUST BE INSTALLED IN ACCORDANCE WITH THE APPLICABLE
INSTALLA-
TION
CODE BY APERSON FAMILIAR WITH THE CONSTRUCTION AND OPERATION OF THE
PRODUCT AND THE HAZARDSINVOLVED.No loose strands or loose connections should be
present. Secure with U.L. certied wire connectors and electrical tape.
CE PRODUIT DOIT ÊTRE INSTALLÉ CONFORMÉMENT AU CODE D'INSTALLATION
APPLICA-
BLE PAR
UNE PERSONNE CONNAISSANT BIEN LA CONSTRUCTION ET LE FONCTIONNEMENT DU
PRODUIT
AINSI QUE LES DANGERS ASSOCIÉS.
Il ne doit pas y avoir de torons ou de
connexions lâches. Fixez- les avec des connecteurs
de ls et du ruban électrique certiés UL.
WARNING - SAFETY / AVERTISSEMENT - SÉCURITÉ
The electricity MUST be turned o at the MAINS FUSE BOX before installing this luminaire
and before performing the branch circuit inspection ; turning the power o using the light
switch is not sucient to prevent electrical shock.. This installation should not be made on a
radiant heat type ceiling.
The luminaire is not intended to support any external weight.”
L'électricité DOIT être coupée au niveau de la boîte à fusibles principale avant d'installer ce
luminaire et avant d'eectuer l'inspection du circuit de dérivation ; couper le courant à l'aide de
l'interrupteur d'éclairage n'est pas susant pour éviter les chocs électriques. Cette installation ne
doit pas être eectuée sur un plafond de type chaleur rayonnante. Le luminaire n'est pas destiné à
supporter un poids extérieur."
ELECTRICAL CONNECTION - SAFETY / RACCORDEMENT ÉLECTRIQUE - SÉCURITÉ
Attach grounding wire (green insulate or bare copper) from the supplier circuit to the
mounting bracket with the green ground attachment screw or wire provided provided.
Connect the grounding wire of the luminaries to the ground conductor of the supply circuit.
Attach all grounding conductors to the mounting bracket with the green ground wire attach-
ment screw.
Referring to the Wire Connection Chart, connect the black and white wires.
Fixez le l de terre (isolant vert ou cuivre nu) du circuit du fournisseur au support de montage à
l'aide de la vis de ou le l de mise à la terre verte fournie.
Raccordez le l de terre des luminaires
au conducteur de terre du circuit d'alimentation.
Fixez tous les conducteurs de mise à la terre au
support de montage à l'aide de la vis de xation du l de terre verte.
Reportez-vous au schéma de
branchement des ls pour brancher les ls noir et blanc.
310 Atticus P 114 Out _ Rev0.0
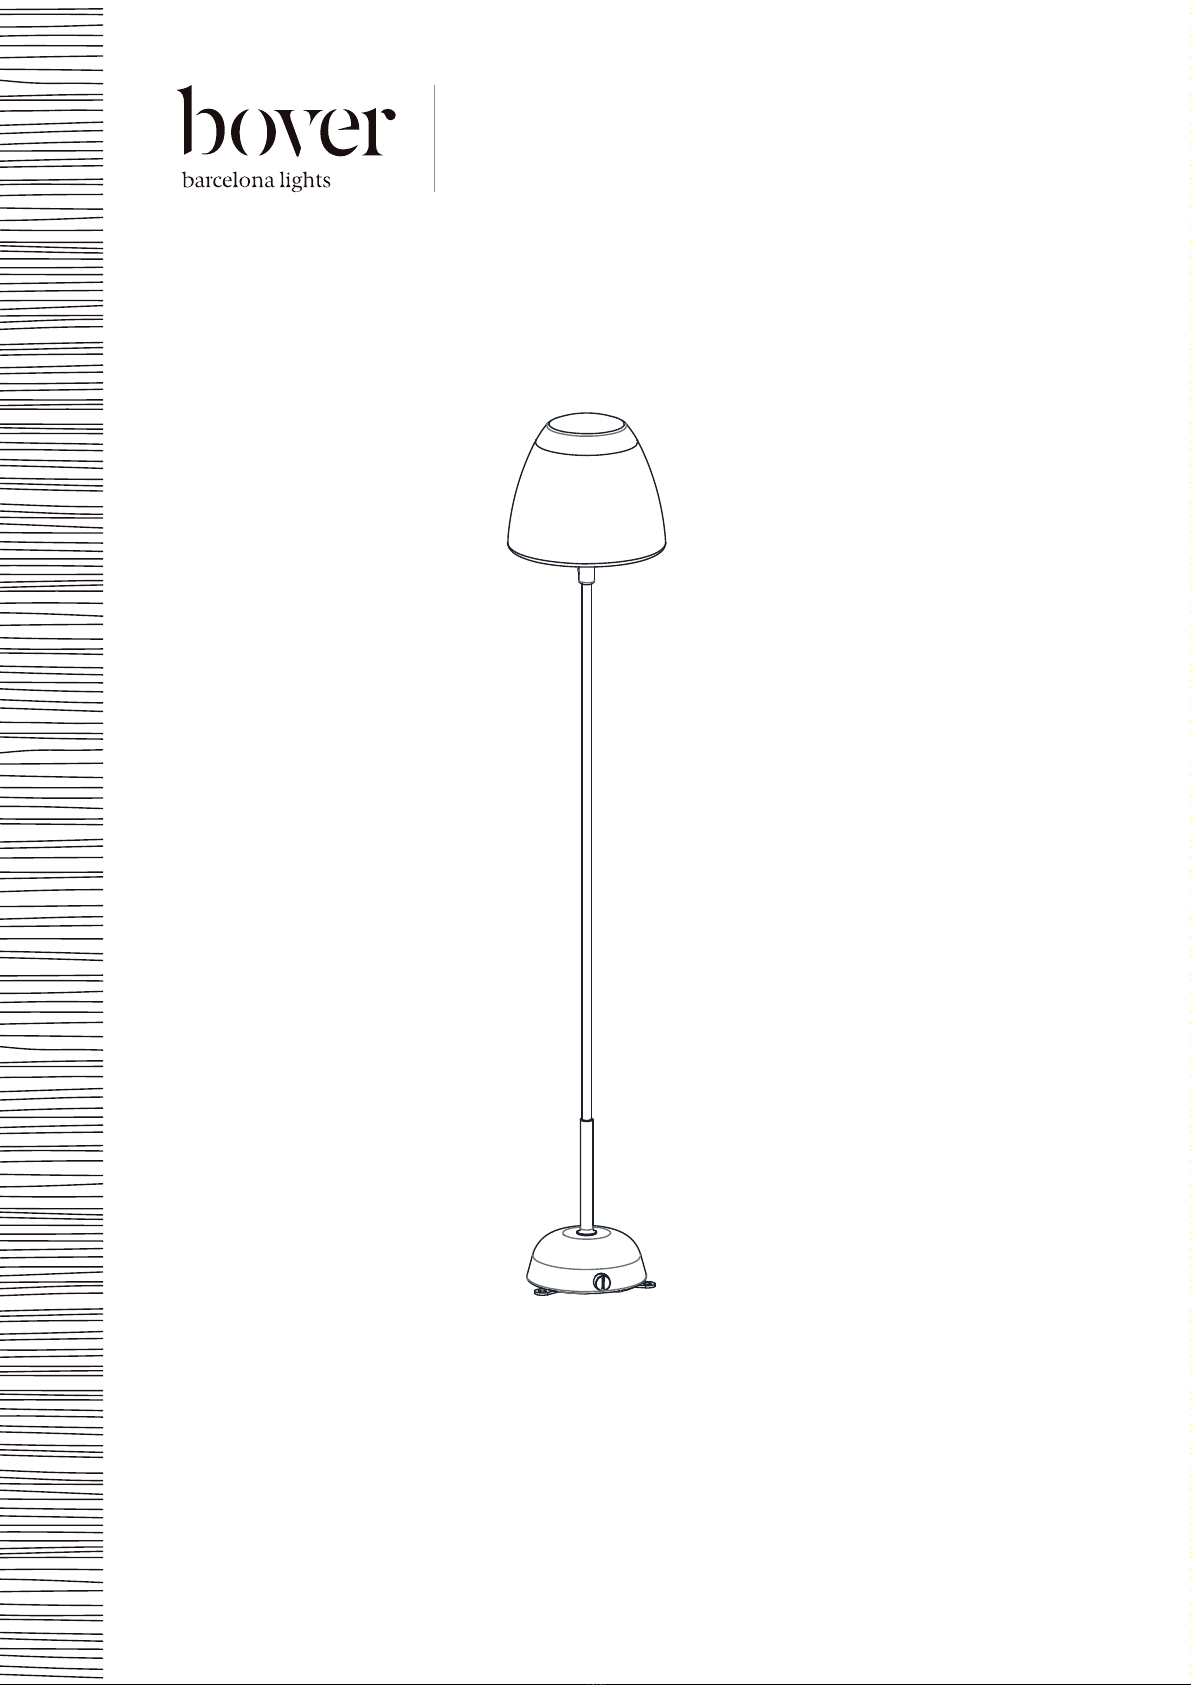
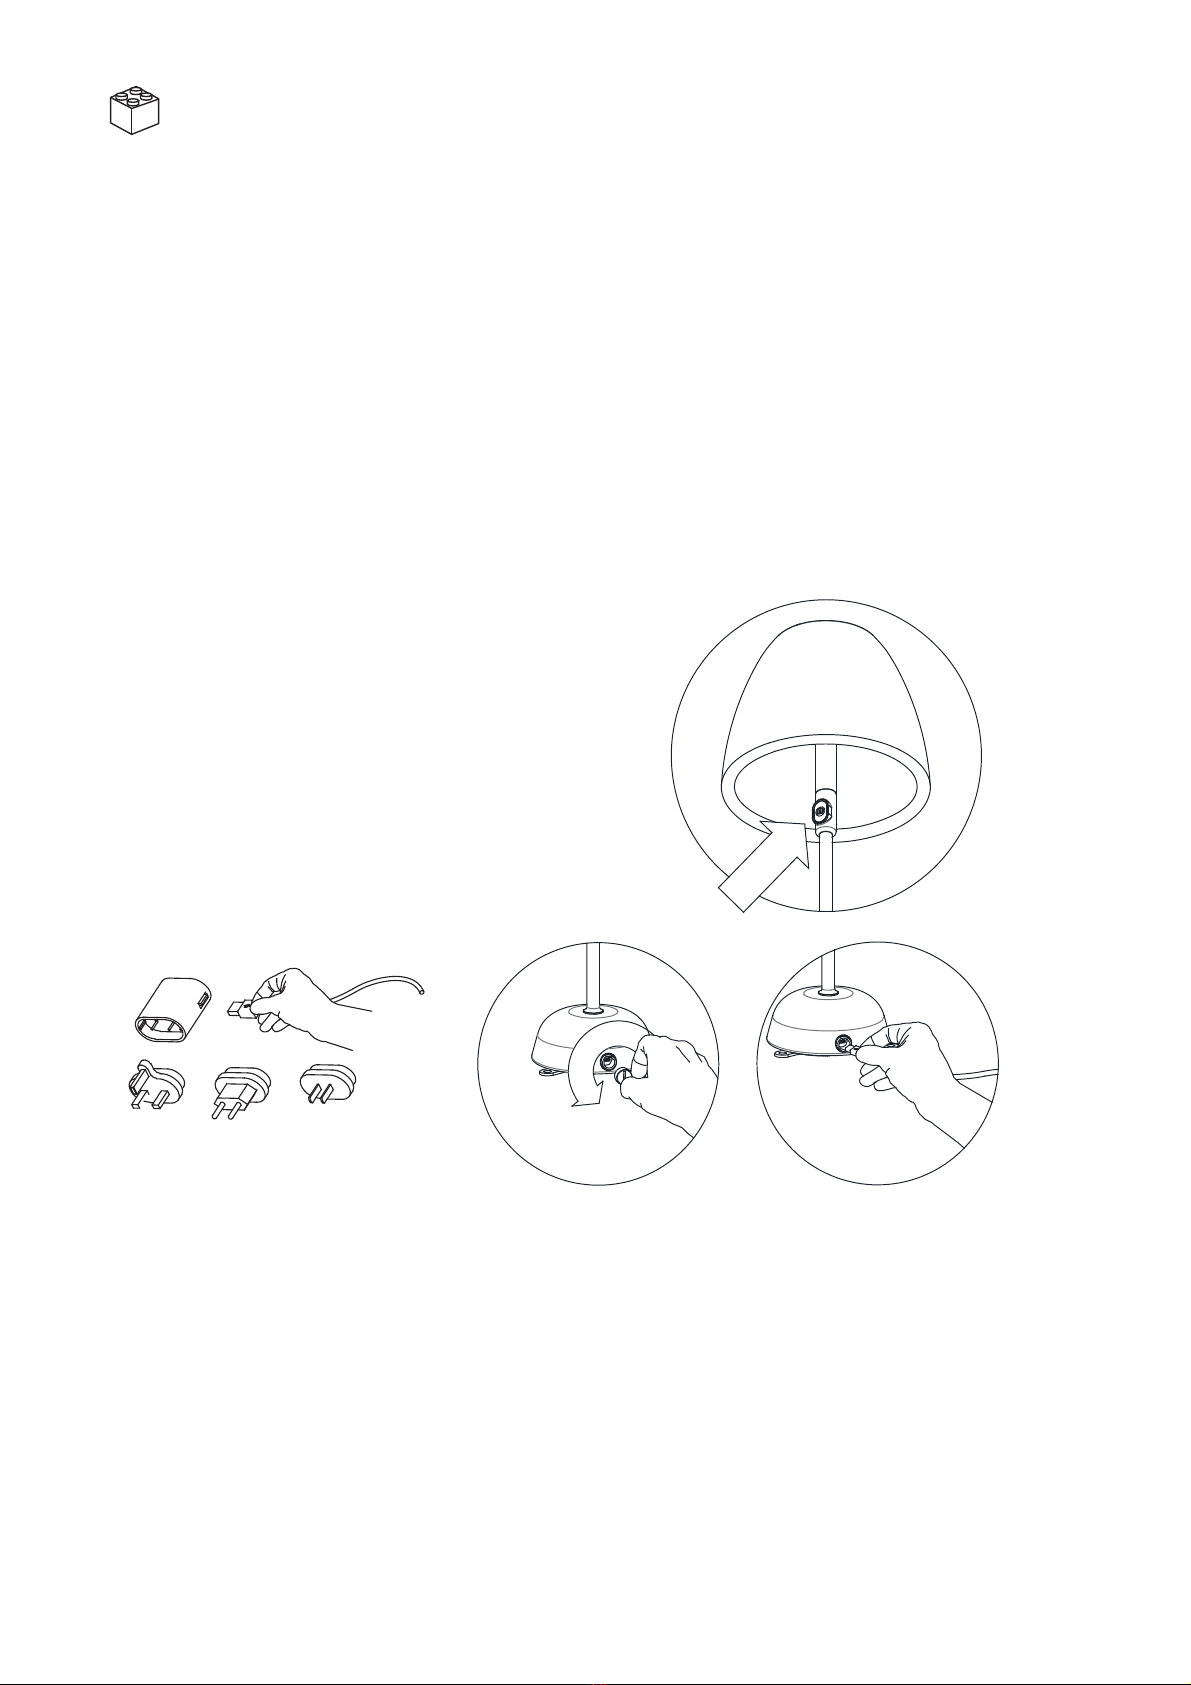
The small feet that make ppossible to secure the Atticus to the oor are nor
supplied; they are oered as an accesory.
Les petits pieds qui permettent de xer l'Atticus au sol ne sont pas fournis.
fournis, ils sont proposés comme accessoire.
4