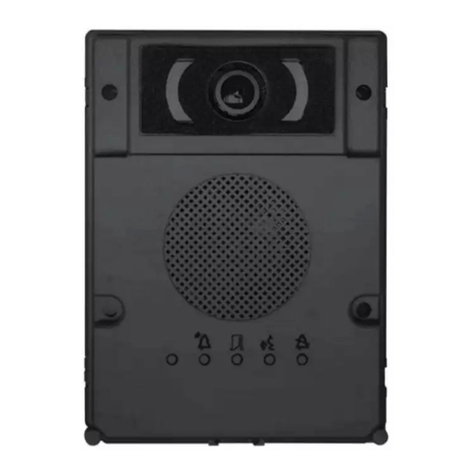
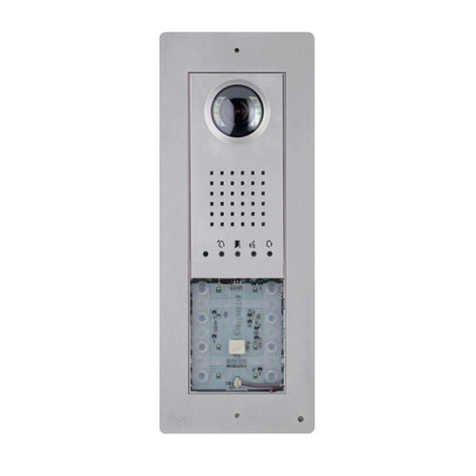
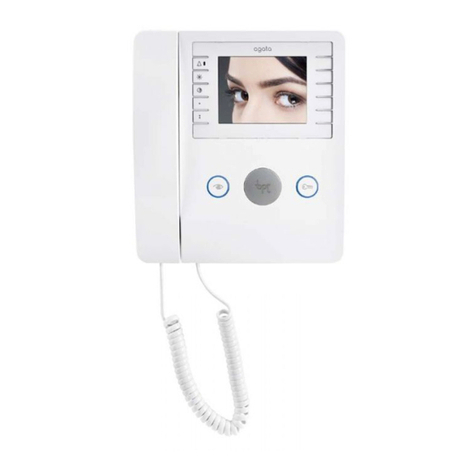
Bpt MTMA/01 Owner's manual

FB00329-EN
PROGRAMMING MANUAL
MTMA/01
MTMV/01

1
3
5
7
2 1
421
632 1
1 2 1
8 4 3 2
Page 2- Manual FB00329-EN - vers. 1
- 05/2016- © Came S.p.A. - The contents of the manual are to be considered as subject to change at any time and without the need for any advance warning.
General precautions
• Read the instructions carefully before beginning the installation and carry out the actions as specified by the manufacturer.
• The installation, programming, commissioning and maintenance of the product must only be carried out by qualified technicians,
properly trained in compliance with the regulations in force, including health and safety measures and the disposal of packaging.
• Before carrying out any cleaning or maintenance operation, disconnect the device from the power supply.
• The equipment must be destined solely for the use for which it was expressly designed.
• The manufacturer declines all liability for any damage as a result of improper, incorrect or unreasonable use.
OPERATIONS FOR REMOTE CONTROL OF CALL BUTTONS
Manual configuration of terminals and as call inputs 1 and 2
Short circuit the terminals ( and ), press and hold the two call buttons on the unit, and power the device. The unit restarts. The
procedure has been completed successfully.
Remove the short circuit and connect the additional N.O. buttons to the terminals and .
BUTTON NUMBERING

PROG
PROG
PROG >3’’
<6’’
a
aa
ab
PROG
<1’’
ab c
Page 3- Manual FB00329-EN - vers. 1
- 05/2016- © Came S.p.A. - The contents of the manual are to be considered as subject to change at any time and without the need for any advance warning.
PROGRAMMING ENTRY PANELS WITHOUT VA/01 OR A/01
Programming for the first time
Programming buttons
C D. The unit
stops flashing and remains on. Repeat for all the other call devices.
NOTE. For the basic unit (no call buttons) a, you do not
need to press the buttons that are shown as flashing in figure
a.
Once programming is complete, you are automatically taken to
“programming calls”.
Programming calls
The LED flashes. Lift the internal receiver handset (if present)
and press the door lock release and AUX2 buttons . On
the entry panel, press the call button to be linked to the internal
receiver a. A beep confirms that the setting has been stored
b. End the call and repeat for the other internal receivers.
NOTE. You can force the switch from one programming mode
to another by pressing the PROG button on the power sup-
ply unit for 3 seconds and releasing within 6 seconds. If you
force the switch to call programming from button program-
ming, the button units which have not been programmed are
configured to 8 calls. If the base unit is not programmed,
calls are not configured.
Exiting Programming
Press the PROG button briefly . The LEDs on the entry panel
switch o.
Entering programming mode
Press the PROG button on the entry panel for at least 3 seconds and release within
6 seconds.
The LEDs and and the button LEDs flash to show the buttons are being pro-
grammed .
Adjusting the brightness and colour of the unit back-
light
During call programming , you can adjust the brightness and
colour of the unit backlight. Press the left call button to select white
and the right call button to select blue .
Press the same button repeatedly to select one of the five bright-
ness levels (o, 25%, 50%, 75%, 100%).

ab
PROG >20’’
PROG >8’’
<11’’
PROG
3
8
4
6
9
7
5
2
1
100 °
82 °
54 °
72 °
1÷9
0
Page 4- Manual FB00329-EN - vers. 1
- 05/2016- © Came S.p.A. - The contents of the manual are to be considered as subject to change at any time and without the need for any advance warning.
Programming the entry panel video camera
While programming calls, the “visual range” of the video camera can be adjusted from any
receiver. To do this, lift the handset (where present) and press the “self-connection”
button . From the default configuration, scroll through the subsequent configurations
pressing the AUX1 button, or go back to the previous configurations by pressing the
AUX2 button . Settings are saved automatically.
Programming an intercommunicating group
NOTE: Leave the function disabled if the entry panel is connected to a VA/01, A/01
or VSE/301.01.
Before programming an intercommunicating group, enable the intercommunicating func-
tion. This function is disabled by default.
Enabling/disabling
Press the PROG button on the entry panel and hold for at least 20 seconds .
The red and yellow LEDs flash quickly for 3 seconds .
NOTE: If the intercommunicating function is disabled, follow this procedure to en-
able it, and vice versa.
The yellow LED comes on for 2 seconds to show the function has been enabled or the
red LED comes for 2 seconds to show the function has been disabled.
NOTE. Program the intercommunicating group after assigning calls to all internal
receivers.
Programming an intercommunicating group
Press the PROG button on the entry panel for at least 8 seconds and release within 11
seconds .
The red and yellow LEDs flash to show intercom programming is in progress.
Adjusting the brightness level of the light on the entry panel
While programming calls athe brightness level of the light on the entry panel can be adjusted from any
receiver. Pressing the “self-connection” button on the internal receiver bactivates the video camera on
the entry panel for which the brightness level of the light is to be adjusted. Use a previously assigned call button
to increase/decrease the brightness of the light M.
Reprogramming
Reprogramming a system which has already been programmed, you access the call programming phase directly. To access button repro-
gramming, follow the process for forcing the mode switch described above.
If you add, replace or remove an entry panel, you must follow the “programming buttons” procedure so that the system recognises the
changes.
PROG
PROG
PROG
<1’’
M1
A
PROGPROG
>3’’
1 P.E.
2 P.E.
1 P.E.
2 P.E.
1 P.E.
2 P.E.
2 P.E.1 P.E.
PROG
PROG
a a
Page 5- Manual FB00329-EN - vers. 1
- 05/2016- © Came S.p.A. - The contents of the manual are to be considered as subject to change at any time and without the need for any advance warning.
To enable the intercommunicating function, press the intercommunicating call button you
want to call on the internal receiver you want to program . A beep indicates that the
function has been programmed successfully. Repeat for all internal receivers to be in-
cluded in the intercommunicating group. To conclude the programming, press the PROG
button on the entry panel briefly .
NOTE. Once an internal receiver has been included in a group by assigning the in-
tercommunicating call button, it cannot be excluded from this group. If you want to
change the call button on an internal receiver which has already been programmed
as an intercommunicating receiver, or you want to add new internal receivers to
the group, repeat the operations detailed under “programming an intercommuni-
cating group”.
PROGRAMMING ENTRY PANELS WITH VA/01 OR A/01
Programming for the first time
Programming buttons
Press the first call button on each unit (see “call number”
section) until the blue LED and the button LEDs stop flashing.
NOTE. The LED lights on the unit remain on to show that the
buttons have been programmed correctly.
NOTE. For the basic unit (no call buttons), you do not need to
press the buttons that are shown as flashing in figure a.
Repeat for all entry panels to be programmed. Once programming
is complete, the configuration is implemented Eand you are au-
tomatically taken to “programming calls”.
Entering programming mode
Press the PROG button on the power supply until the PROG LED lights up.
The LEDs and and the button LEDs flash to show the buttons are being pro-
grammed .

ab
3
8
4
6
9
7
5
2
1
100 °
82 °
54 °
72 °
1÷9
0
ab c
G
ab
M1
A
PROGPROG
<1’’
Page 6- Manual FB00329-EN - vers. 1
- 05/2016- © Came S.p.A. - The contents of the manual are to be considered as subject to change at any time and without the need for any advance warning.
Adjusting the brightness and colour of the unit back-
light
During call programming a, you can control the brightness
and colour of the unit backlight. Press the left call button to select
white b, and the right call button to select blue c.
Press the same button repeatedly to select one of the five bright-
ness levels (o, 25%, 50%, 75%, 100%).
Programming the entry panel video camera
While programming the calls, the “visual range” of the video camera can be adjusted from
any receiver. To do this, lift the handset (where present) and press the “self-connection”
button . Starting from the default configuration, scroll through the subsequent con-
figurations by pressing the AUX1 button, or go back to the previous configurations by
pressing the AUX2 button . Settings are saved automatically.
Programming calls
The green LED flashes. Lift the internal receiver handset (if
present) and press the door lock release and AUX2 but-
tons . On the entry panel, press the call button to be linked to
the internal receiver a. A beep confirms that the setting has
been stored b. End the call and repeat for the other internal
receivers.
NOTE. The operation can only be carried out from the entry panel with the blue LED o (1 entry panel in ). To change the
entry panel from which calls are programmed, press one of the call buttons on the entry panel you wish to use for program-
ming.
NOTE. You can force the switch from one programming mode to another by pressing the PROG button on the power supply unit
for 3 seconds and releasing within 6 seconds. If you force the switch to call programming from button programming, the button
units which have not been programmed are configured to 8 calls. If the base unit is not programmed, calls are not configured.
Exiting Programming
Press the PROG button briefly . The LEDs on the entry panel
switch o.

Page 7- Manual FB00329-EN - vers. 1
- 05/2016- © Came S.p.A. - The contents of the manual are to be considered as subject to change at any time and without the need for any advance warning.
Adjusting the brightness level of the light on the entry panel
While programming calls athe brightness level of the entry panel can be adjusted
from any receiver. Pressing the “self-connection ” button on the internal receiver b
activates the video camera on the entry panel for which the brightness level is to be adjust-
ed. Use a previously assigned call button to increase/decrease brightness of the light .
Reprogramming
Reprogramming a system which has already been programmed, you access the call programming phase directly. To access button repro-
gramming, follow the process for forcing the mode switch described above.
If you add, replace or remove an entry panel, you must follow the “programming buttons” procedure so that the system recognises the
changes.
RESTORE FACTORY DEFAULT
To restore the entry panel to the default settings (including the terminal functions , ), remove the power supply, press and hold the
two call buttons on the unit and power the device.
After 5 seconds the entry panel restarts.
NOTE. If the entry panel does not restart, it has not been restored to default settings.
This product complies with the relevant directives in force.
Decommissioning and disposal. Dispose of the packaging and the device at the end of its life cycle responsibly, in compliance with
the laws in force in the country where the product is used. The recyclable components are marked with a symbol and the material's
ID marker.
THE DATA AND INFORMATION SHOWN IN THIS MANUAL ARE TO BE CONSIDERED AS SUBJECT TO CHANGE AT ANY TIME AND WITHOUT THE NEED
FOR ANY ADVANCE WARNING.
MEASUREMENTS, UNLESS OTHERWISE INDICATED, ARE IN MILLIMETRES.

Came S.p.A.
Via Martiri Della Libertà, 15 Via Cornia, 1/b - 1/c
31030 Dosson di Casier
Treviso - Italy
33079 Sesto al Reghena
Pordenone - Italy
(+39) 0422 4940
(+39) 0422 4941
(+39) 0434 698111
(+39) 0434 698434
www.came.com
English - Manual FB00329-EN - vers. 1- 05/2016 - © Came S.p.A.
The contents of the manual are to be considered as subject to change at any time and without the need for any advance warning.
This manual suits for next models
1
Table of contents
Other Bpt Intercom System manuals

Bpt
Bpt VMF/100.01 Operation manual

Bpt
Bpt Agata V 200 User manual

Bpt
Bpt YVL200 UK Operation manual

Bpt
Bpt HPV/0-2 VR User manual

Bpt
Bpt NVM/301 US Operation manual

Bpt
Bpt DVC/IP ME User manual

Bpt
Bpt XC/200 User manual

Bpt
Bpt OPHERA Operation manual

Bpt
Bpt Agata C User manual

Bpt
Bpt XV/200+XKP/200 User manual
Popular Intercom System manuals by other brands

Extron electronics
Extron electronics MediaLink IPI 200 Series installation instructions

2N Telekomunikace
2N Telekomunikace 2N IP Style Brief manual

Panasonic
Panasonic VL-MVN511 quick guide

b-red
b-red VRK01 US user manual

golmar
golmar ART 7T/G2+ MONITOR quick guide

Panasonic
Panasonic VL-SWD272 quick start guide