Bticino 391719 User manual

391719
LE04689AE-01CB-14W02
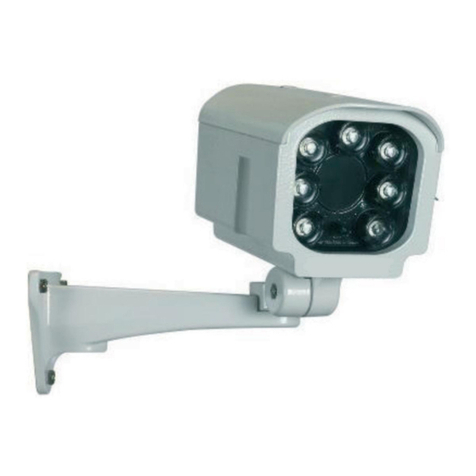
Compact camera 2,8-12 mm, MMIP66
Guida Rapida • Quick Start Guide • Bedienungsanleitung
294 mm
282 mm
101 mm

Istruzioni di sicurezza
Questo prodotto deve essere installato in conformità con le regole d’installazione e di preferenza da un elettricista qualicato.
L’eventuale installazione e utilizzo improprio dello stesso possono comportare rischi di shock elettrico o incendio.
Prima di procedere all’installazione, leggere attentamente le istruzioni associate e individuare un luogo di montaggio idoneo in
funzione del prodotto.
Non aprire, smontare, alterare o modicare l’apparecchio eccetto speciale menzione indicata nel manuale. Tutti i prodotti Bticino
devono essere esclusivamente aperti e riparati da personale adeguatamente formato e autorizzato da Bticino. Qualsivoglia apertura o
riparazione non autorizzata comporta l’esclusione di eventuali responsabilità, diritti alla sostituzione e garanzie.
Utilizzare esclusivamente accessori a marchio Bticino.
Safety instructions
This product should be installed in compliance with installation rules, preferably by a qualied electrician. Incorrect installation and
use can lead to risk of electric shock or re.
Before carrying out the installation, read the instructions and take account of the product’s specic mounting location.
Do not open up, dismantle, alter or modify the device except where specically required to do so by the instructions. All Bticino
products must be opened and repaired exclusively by personnel trained and approved by Bticino. Any unauthorised opening or repair
completely cancels all liabilities and the rights to replacement and guarantees.
Use only Bticino brand accessories.
Sicherheitshinweise
Dieses Produkt darf nur durch eine Elektro-Fachkraft eingebaut werden. Bei falschem Einbau bzw. Umgang besteht das Risiko eines
elektrischen Schlages oder Brandes.
Vor der Installation die Anleitung lesen, den produktspezischen Montageort beachten.
Das Gerät vorbehaltlich besonderer, in der Betriebsanleitung angegebener Hinweise nicht önen, zerlegen, beschädigen oder
abändern. Alle Produkte von Bticino dürfen ausschließlich von durch Bticino geschultes und anerkanntes Personal geönet und
repariert werden. Durch unbefugte Önung oder Reparatur erlöschen alle Haftungs-, Ersatz- und Gewährleistungsansprüche.
Ausschliesslich Zubehör der Marke Bticino benutzen.
Consignes de sécurité
Ce produit doit être installé conformément aux règles d’installation et de préférence par un électricien qualié. Une installation et une
utilisation incorrectes peuvent entraîner des risques de choc électrique ou d’incendie. Avant d’eectuer l’installation, lire la notice, tenir
compte du lieu de montage spécique au produit.
Ne pas ouvrir, démonter, altérer ou modier l’appareil sauf mention particulière indiquée dans la notice. Tous les produits Bticino
doivent exclusivement être ouverts et réparés par du personnel formé et habilité par Bticino. Toute ouverture ou réparation non
autorisée annule l’intégralité des responsabilités, droits à remplacement et garanties.
Utiliser exclusivement les accessoires de la marque Bticino.
Συστάσεις ασφαλείας
Το προϊόν αυτό πρέπει να εγκατασταθεί σύμφωνα με τις οδηγίες εγκατάστασης και κατά προτίμηση από ειδικευμένο ηλεκτρολόγο. Η
λανθασμένη εγκατάσταση και χρήση μπορούν να προκαλέσουν κίνδυνο ηλεκτροπληξίας ή πυρκαγιάς.
Πριν πραγματοποιήσετε την εγκατάσταση, διαβάστε τις οδηγίες λαμβάνοντας υπόψη τον χώρο τοποθέτησης του προϊόντος.
Μην ανοίγετε, αποσυναρμολογείτε, τροποποιείτε ή επεμβαίνετε στο προϊόν εκτός κι αν υπάρχουν σαφείς σχετικές οδηγίες
στο εγχειρίδιο. Όλα τα προϊόντα της Bticino πρέπει να ανοίγονται και να επισκευάζονται αποκλειστικά από εκπαιδευμένο και
εξουσιοδοτημένο από τη Bticino προσωπικό. Οποιαδήποτε επέμβαση ή επιδιόρθωση πραγματοποιηθεί χωρίς άδεια, ακυρώνει το
σύνολο των ευθυνών, δικαιωμάτων αντικατάστασης και εγγυήσεων.
Να χρησιμοποιείτε αποκλειστικά εξαρτήματα επωνυμίας Bticino.

3
Sicurezza del prodottoit
Caratteristiche tecniche
Sensore SONY
Giorno/Notte Si
ICR No
DSP (Digital Signal Processor) SONY EFFIO-E
Sistema TV PAL
Risoluzione orizzontale 420 TVL
Illuminazione minima 0,08 Lux / F1.2
Rapporto S/N > 50 db
Otturatore elettronico automatico Sì
Controllo diaframma automatico Controllo manuale del diaframma
Caratteristica gamma 0,45
Controllo automatico di guadagno Sì
Bilanciamento automatico del bianco Sì
Compensazione controluce Sì
Sistema sincrono Interno
Montaggio ottiche 2,8-12 mm
Uscita video CVBS 1,0 Vpp; /75 Ω
Distanza dell’irradiazione delle lampade a raggi infrarossi 25 m
Grado IP IP66
Alimentazione 12 Vdc
Corrente assorbita 450 mA
Temperatura di funzionamento -10°C + 50°C
Dimensioni 294 mm x 99 mm
Attenzione
- L’installazione e la taratura di questa
telecamera devono essere eseguite
da personale qualicato.
- Non aprire la telecamera, esiste il
rischio di scosse elettriche.
- Le telecamere a bassa tensione
devono essere alimentate da
un alimentatore con tensione
stabilizzata.
Questa gamma di telecamere è stata
realizzata per applicazioni CCTV e
non per altri utilizzi.
Utilizzare queste telecamere solo in
condizioni di temperatura da
(-10) – (+50) °C.
Non utilizzare le telecamere
con tensioni dierenti da quelle
specicate.
L’utilizzo di questo prodotto deve
essere fatto nel rispetto delle norme
vigenti, sia in materia di privacy
(d.lgs.n.196/2003) sia di tutela dei
lavoratori (l.300/1970 Statuto dei
lavoratori).
Specications
Sensor SONY
Day/Night Yes
ICR No
DSP (Digital Signal Processor) SONY EFFIO-E
TV system PAL
Horizontal resolution 420 TVL
Minimum illumination 0,08 Lux / F1.2
S/N ratio > 50 db
Auto electronic shutter Yes
Auto iris control Manual iris control
Gamma characteristic 0,45
Auto gain control Yes
Auto white balance Yes
Back light compensation Yes
Synchronous system Internal
Lens mount 2,8-12 mm
Video output CVBS 1,0 Vpp; /75 Ω
Infrared lamps irradiation distance 25 m
IP degree IP66
Power supply 12 Vdc
Input current 450 mA
Operating temperature -10°C + 50°C
Dimensions 294 mm x 99 mm
Safety of product
en
Warning
- The installation and calibration of
this camera must be carried out by
highly skilled personnel.
- Do not open the camera: there may
be a risk of electric shock.
- Low voltage cameras must be
powered by a power supply unit
with stabilized voltage.
This range of cameras has been
created for CCTV applications and not
for other uses.
Use these cameras only for the
following temperature conditions:
from (-10) – (+50) °C.
Do not use the cameras with voltages
dierent from the ones specied.
Produktsicherheit
de
Achtung
- Die Installation und Einstellung
dieser Kamera dürfen nur
von qualifiziertem Personal
vorgenommen werden.
- Kamera nicht öffnen; Stromschlag-
gefahr.
- Niederspannungs-Kameras müssen
über ein Netzgerät mit stabilisierter
Spannung gespeist werden.
Diese Kamera-Baureihe wurde aus-
schließlich für
CCTV Anwendungen entwickelt.
Diese Kameras nur bei Temperaturen
zwischen
(-10) – (+50) °C verwenden.
Die Kameras nicht mit anderen
Spannungen als
angegeben versorgen.
Eigenschaften
Aufnahmesensor SONY
Tag/Nacht Ja
ICR Nein
DSP (Digital Signal Processor) SONY EFFIO-E
TV-System PAL
Horizontalauflösung 420 TVL
Mindestbeleuchtung 0,08 Lux/F1,2
Signalrauschabstand > 50 dB
Automatischer elektronischer shutter Ja
Automatische iris steuerung Manuelle Irissteuerung
Gamma eigenschaft 0,45
Automatische verstärkungsregelung Ja
Automatischer weißabgleich Ja
Gegenlichtkompensation Ja
Synchronisation Intern
Linsen 2,8-12 mm
Videoausgang CVBS 1,0 Vpp;/75 Ω
Leuchtweite der IR-lichter 25 m
Schutzklasse IP66
Stromversorgung 12 V DC
Stromaufnahme 450 mA
Betriebstemperatur -10°C + 50°C
Maße 294 mm x 99 mm

4
3
2
1
1
5
67
4
Zoom Messa a fuoco
Fokus
Focus
it
de
en
Regolazione della rotazione
destra-sinistra
Zum Anpassen der
Schwenkposition nach links
oder rechts.
Pan Left - Right Ajustment
Regolazione dell’angolo di
inclinazione della visualizzazione
Zum Anpassen des Schwenkwinkels.
View Tlt Angle Ajustment
1 Rimuovere la parte anteriore della telecamera: questa operazione serve a semplicare la regolazione dello zoom e della messa
a fuoco in un secondo momento.
2 Forare, allora ssare la telecamera.
3 Con la telecamera montata è possibile collegare i cavi di alimentazione e video.
4 Utilizzando la chiave a brugola, regolare la posizione su/giù e sinistra-destra e ssare in posizione.
5 Regolare zoom e messa a fuoco in base alle proprie necessità.
6 Rimontare la sezione anteriore rimossa al punto 1 e pulire la supercie con un panno morbido senza lacce.
7 Montare quindi il parasole utilizzando il dado fornito in dotazione.
Controllare che i LED a infrarossi funzionino coprendo la fotocellula della telecamera con il pollice, in modo che i LED a
infrarossi producano un eetto come di un guanto rosso appena visibile.
(Non ssare i LED a infrarossi per periodi prolungati, altrimenti si potrebbero provocare danni agli occhi.)
1 Vordere Abdeckung der Kamera entfernen: Vereinfacht das spätere Einstellen von Zoom und Fokus.
2 Bohrer , dann bringen Sie die Kamera.
3 Nachdem die Kamera befestigt wurde, können Sie nun die Stromversorgung herstellen und die Videokabel anschließen.
4 Positionieren Sie mithilfe des L-Hex-Schlüssels die Kamera nach oben/unten und rechts/links und xieren Sie sie in dieser Stellung.
5 Passen Sie den Zoomfokus an.
6 Bringen Sie die vordere Abdeckung wieder an, die in Schritt 1 entfernt wurde und säubern Sie die Oberäche mit einem weichen,
fusselfreien Tuch.
7 Bringen Sie nun die Sonnenblende mithilfe der Schraube an, die dem Zubehör beiliegt.
Überprüfen Sie, ob die IR-LEDs funktionieren, indem Sie die Fotozelle der Kamera mit Ihrem Daumen abdecken. Daraufhin beginnen
die IR-LEDs leicht zu glimmen.
(Blicken Sie niemals über einen längeren Zeitraum in die IR-LEDs, dies könnte Ihren Augen schaden.)
1 Remove the front of the camera: this is just to make it easier to adjust zoom and focus later.
2 Drill, then attach camera.
3 With attached camera you can now connect power and video cables.
4 Using the L-Hex tool you position left-rigth up/down and lock into place.
5 Adjust zoom-focus to suite.
6 Re-attach front section as removed in step 1 and clean surface with a soft lint free cloth.
7 Now put the sunvisor on using the nut provided in the accessories.
Check IR LEDs are working by recovering the photocell of camera with your thumb, the IR LEDs will give a faint red glow.
(Don’t look at IR LEDs for long periods of time, as you could damage your eyes).

5
REGOLAZIONE DELLA TELECAMERA
RIEPILOGO DELLA STRUTTURA DEI MENU
Pulsanti delle funzioni OSD: il pulsante centrale funge da funzione ENTER.
SETUP MENU
LANGUAGE
LENS
WHITE BAL
PICT ADJUST
NR
NEXT
EXIT
ENGLISH
AUTO
ATW
SAVE ALL
AUTO IRIS
TYPE
MODE
SPEED
RETURN
DC
AUTO
080
PICT ADJUST
MIRROR
BRIGHTNESS
CONTRAST
SHARPNESS
HUE
GAIN
RETURN
OFF
000
128
128
128
128
NR
NR MODE
Y LEVEL
C LEVEL
RETURN
Y / C
004
004
ATW
SPEED
DELAY SNT
ATW FRAME
ENVIRONMENT OUTDOOR
RETURN
239
016
x1.00
MANUAL WB
LEVEL
RETURN
058
USER1 WB
B-GAIN
R-GAIN
RETURN
029
034
USER2 WB
B-GAIN
R-GAIN
RETURN
045
026
ATR
LUMINANCE MID
CONTRAST MID
RETURN
PRIVACY
AERA SEL
TOP
BOTTOM
LEFT
RIGHT
COLOR
TRANSP
MOSAIC
RETURN
000
000
000
000
1 / 4
1
1.00
OFF
MOTION DET
DETECT SENSE
BLOCK DISP
MONITOR AREA
AREA SEL
TOP
BOTTOM
LEFT
RIGHT
RETURN
111
000
000
000
1 / 4
ON
OFF
000
CAMERA ID
CAMERA
ABCDEFGHIJKLMNOPQRSTUV
WXYZ0123456789-#$%&?
()_`.:;<=> @^*./^*X+/
CHR1 CHR2
CLR POS
RETURN
SETUP MENU
BACKLIGHT
ATR
PRIVACY
MOTION DET
CAMERA ID
SYNC
CAMERA RESET
BACK
EXIT
OFF
OFF
OFF
OFF
OFF
INT
SAVE ALL
it

6
Controllo OSD MENU
Premere il pulsante centrale per accedere al menu di impostazione.
• Il menu di impostazione principale viene visualizzato sullo schermo del monitor.
SETUP MENU
Selezionare una funzione premendo il pulsante su e giù e premere il pulsante
destra o sinistra per modicare il valore dell’impostazione e il pulsante centrale
per confermare la selezione.
Se un sottomenu è disponibile, è possibile accedervi premendo il pulsante
centrale.
Selezionare “NEXT” per visualizzare il promemoria del menu di impostazione OSD.
Una volta terminato l’aggiornamento delle impostazioni, selezionare “EXIT” e
premere il pulsante centrale per uscire dal menu di impostazione.
Per mantenere le impostazioni modicate dopo l’accensione/spegnimento della
telecamera è necessario selezionare l’opzione SAVE ALL nel menu.
LANGUAGE
SETUP MENU
LANGUAGE ENGLISH
LENS AUTO
WHITE BAL ATW
PICT ADJUST
NR
L
AN
GU
A
G
E ENGLI
S
H
NEXT
EXIT SAVE ALL
Consente di selezionare la lingua di visualizzazione del menu OSD
Nota: eettuando la selezione, la lingua visualizzata cambia immediatamente.
LENS
LANGUAGE: Inglese, giapponese, tedesco, francese,
russo, portoghese, spagnolo, cinese.
Consente di modicare le impostazioni della lente interna.
TYPE: DC
MODE:
SPEED:
AUTO, CLOSE, OPEN
- AUTO: l’iride meccanica viene controllata automaticamente
- CLOSE: l’iride meccanica è impostata sulla posizione chiusa
- OPEN: l’iride meccanica è impostata sulla posizione aperta
Impostazione predenita: Auto
000-255
Consente di impostare la velocità di convergenza dell’iride meccanica.
L’impostazione predenita è 80.
SETUP MENU
LANGUAGE ENGLISH
LENS AUTO
WHITE BAL ATW
PICT ADJUST
NR
L
AN
GU
A
G
E ENGLI
S
H
NEXT
EXIT SAVE ALL
WHITE BAL
SETUP MENU
LANGUAGE ENGLISH
LENS AUTO
WHITE BAL ATW
PICT ADJUST
NR
L
AN
GU
A
G
E ENGLI
S
H
NEXT
EXIT SAVE ALL
Il bilanciamento del bianco può essere impostato con le seguenti opzioni:
ATW / PUSH / USER1 / USER2 / ANTI CR
/ MANUAL / PUSH LOCK
SETUP MENU
LANGUAGE
LENS
WHITE BAL
PICT ADJUST
NR
NEXT
EXIT
ENGLISH
AUTO
ATW
SAVE ALL
AUTO IRIS
TYPE
MODE
SPEED
RETURN
DC
AUTO
080
LENS: MANUAL / AUTO
Opzioni di bilanciamento del bianco: la telecamera ha a disposizione un’ampia gamma di metodi per applicare il bilanciamento del bianco, che la rendono
straordinariamente essibile e aumentano la gamma di ambienti di sorveglianza in cui può essere utilizzata. Alcune opzioni includono sottomenu, altre no.
Di seguito è riportato l’elenco completo:
ATW: bilanciamento del bianco (sottomenu)
USER1 e USER2: impostazioni singole che possono avere livelli R/B/G univoci (sottomenu disponibili per ciascuna opzione)
MANUAL WB: funzione intuitiva (sottomenu)
PUSH: non implementata in questo modello
ANTI CR: soppressione del cambio di colore (nessun sottomenu)
PUSH LOCK: richiede che l’utente punti un colore (in genere il bianco) verso la lente per l’acquisizione. La compensazione del bilanciamento del bianco si
basa quindi automaticamente sul colore acquisito.

7
• ATW (bilanciamento del bianco autotracciante)
Consente di utilizzare il bilanciamento del bianco indipendentemente dalle condizioni del soggetto.
Regolazione del guadagno denita dall’utente per blu e rosso.
• PUSH
• USER1
ATW
SPEED
DELA Y CNT
ATW FRAME
ENVIRONMENT
RETURN
239
016
x1.00
OUTDOOR
USER1 WB
B-GAIN
R-GAIN
RETURN
239
016
La telecamera monitora costantemente la luce e ne regola il colore
per mantenere bianche le aree. Con questa funzione la telecamera
regola automaticamente le impostazioni del colore per ottenere
una qualità uniforme nelle aree bianche dell’immagine.
USER1 e USER2: Questo sottomenu consente di apportare modiche signicative alla saturazione del colore. B-GAIN controlla il blu, R-GAIN controlla il
rosso. Il verde viene regolato automaticamente quando si modicano le impostazioni di blu e rosso, pertanto non è disponibile la regolazione G-GAIN.
Nel menu OSD sono disponibili 2 menu (USER1 e USER2, che funzionano nello stesso modo), pertanto è possibile archiviare le 2 impostazioni.
Per gli utenti ipovedenti (daltonici) le impostazioni del sottomenu USER1/USER2 possono risultare utili. Tali impostazioni possono inoltre essere utili, se
si sta monitorando un’area che è sempre saturata da un solo colore di luce, ad esempio luoghi di intrattenimento, bar o taverne, ecc. Alcune persone
potrebbero provare a utilizzare tali aree di colore inusuale per scopi personali; queste regolazioni possono impedire tali tentativi.
• USER2
USER2 WB
B-GAIN
R-GAIN
RETURN
043
047
• ANTI CR
000-255 Consente di impostare il controllo AE per ATW
L'impostazione predenita è 89.
SPEED:
000-255 Consente di impostare il tempo base della
variazione ATW. L'impostazione predenita è 16.
DELAY CNT:
x0.50 / x1.00 / x1.50 / x2.00
Consente di impostare il fotogramma di attivazione per
l'ingrandimento
L'impostazione predenita è x1.00.
ATW FRAME:
INDOOR / OUTDOOR
Consente di impostare il fotogramma di attivazione di ATW
Impostazione predenita: OUTDOOR.
ENVIRONMENT:
Regolazione del guadagno denita dall'utente per B e R.
Regolazione del guadagno B 000-255 per WB
B-GAIN:
R-GAIN: Regolazione del guadagno R 000-255 per WB
Consente di attivare la soppressione del cambio di colore.
ANTI CR (soppressione del cambio di colore) è fondamentalmente il bilanciamento del colore precedente con tecnologia di soppressione del
cambio di colore. Se si utilizza l'impostazione MANUAL WB e sull'immagine vengono visualizzate barre di colori che si muovono sullo schermo
provare a utilizzare questa impostazione.
ANTI CR in alcune circostanze può anche migliorare la visione notturna.

8
• BILANCIAMENTO DEL BIANCO MANUALE
MANUAL WB
LEVEL
RETURN
058
Questa è l’impostazione del bilanciamento del bianco base precedente programmata nelle telecamere CCTV, da quando è stata creata
l’impostazione. Abbiamo aggiunto la possibilità di forzare la compensazione complessiva utilizzando la regolazione del livello.
All’accensione, la telecamera acquisisce un valore di bilanciamento del bianco dall’oggetto più bianco presente nel campo visivo. Per riprodurre il
colore bianco, fa riferimento a questo valore indipendentemente dalle modiche di temperatura del colore o da qualsiasi altro fattore. La barra di
scorrimento può essere spostata dall’estrema sinistra (livello = 0) all’estrema destra (livello = 255) per eettuare la compensazione manuale.
• PUSH LOCK
PUSH LOCK è un metodo di bilanciamento del bianco che richiede l’intervento dell’utente. Per impostare il bilanciamento del bianco utilizzando
PUSH LOCK, puntare la telecamera su un oggetto bianco, assicurarsi che riempia il più possibile lo schermo, quindi fare clic sul pulsante centrale.
La telecamera riprodurrà i colori utilizzando il colore bianco presentato come base di riferimento.
PICT ADJUST
Impostazioni dei controlli di display e immagine
SETUP MENU
LANGUAGE ENGLISH
LENS AUTO
SHUTTER/AGC AUTO
WHITE BAL ATW
PICT ADJUST
NR
PI
C
T AD
JUST
• MIRROR:
• BRIGHTNESS:
• CONTRAST:
• SHARPNESS:
• HUE:
• GAIN:
PICT ADJUST
MIRROIR
BRIGHTNESS
CONTRAST
SHARPNESS
HUE
GAIN
RETURN
000
128
128
128
150
OFF
SETUP MENU
LANGUAGE ENGLISH
LENS AUTO
SHUTTER/AGC AUTO
WHITE BAL ATW
PICT ADJUST
NR
NR
NEXT
EXIT SAVE ALL
NR
OPZIONI NR (RIDUZIONE DEL RUMORE): è possibile impostare i valori di riduzione del rumore e le componenti croma del segnale video.
NR MODE: selezionare Y/C per regolare luminosità e croma, C per regolare solo croma, Y per regolare solo luminosità e OFF per non eettuare alcuna
regolazione. Le barre di scorrimento per la regolazione Y LEVEL e C LEVEL appaiono e scompaiono a seconda della selezione. Il loro comportamento è
intuitivo. Quando si regolano le barre di scorrimento sul display viene visualizzato un valore numerico.
LEVEL: 000-255 R
Consente di specicare i valori di guadagno R e B per
WB manuale.
L'intervallo variabile eettivo è limitato a quello dalla temperatura di colore
inferiore (circa 1.800K) alla temperatura di colore superiore (circa 10.500K).
L'impostazione predenita è 33.
ON / OFF Capovolgimento in orizzontale dell'uscita
del display.
000-255 Luminosità dello schermo.
000-255 Contrasto dello schermo.
000-255 Nitidezza dello schermo.
000-255 Consente di regolare la tonalità.
000-255 Consente di regolare il guadagno.

9
NEXT
Nel menu di impostazione principale selezionare NEXT per entrare nella seconda
pagina di tale menu.
SETUP MENU
LANGUAGE ENGLISH
LENS AUTO
SHUTTER/AGC AUTO
WHITE BAL ATW
PICT ADJUST
NR
NEXT
EXIT SAVE ALL
NEXT
BACKLIGHT OPTIONS: Sono disponibili 3 impostazioni per le opzioni di compensazione della retroilluminazione, ma non sono presenti sottomenu.
Le impostazioni disponibili sono OFF (nessuna compensazione), BLC (compensazione della retroilluminazione attivata) e HLC (compensazione della
retroilluminazione con compensazione della luminosità).
HLC, compensazione della retroilluminazione con compensazione della luminosità, è un metodo di compensazione della retroilluminazione che
maschera anche aree con intensa luminosità. Alcuni ladri e individui disonesti sanno che è possibile disabilitare temporaneamente alcune telecamere
CCTV puntando luci potenti verso la lente. HLC è uno dei diversi metodi sviluppati per ovviare a questo problema.Quando la funzione HLC è attiva, la
sorgente della luce luminosa viene mascherata con uno schermo scuro, che consente di visualizzare e registrare l’area a lato della sorgente luminosa.
Le persone che ritengono quindi di essere protette da un velo di luce bianca sfocata sono invece visibili.
La funzione HLC può inoltre essere utilizzata per rendere visibile la targa delle automobili quando hanno le luci accese.
SETUP MENU
BACKLIGHT
ATR
PRIVACY
MOTION DET
CAMERA ID
SYNC
CAMERA RESET
BACK
EXIT
OFF
OFF
OFF
OFF
OFF
INT
SAVE ALL
• SHADOW REDUCTION (ATR) OFF / ON
Adaptive Tone Reproduction: è un miglioramento studiato per riprodurre accuratamente i toni di colore in una scena che include aree con bassa e
alta luminosità.
LUMINANCE: questa impostazione controlla il modo in cui le aree luminose vengono visualizzate senza compromettere le aree a bassa luminosità
o le aree scure della scena. Le opzioni sono MID, HIGH o LOW.
CONTRAST: questa impostazione controlla il modo in cui le aree scure vengono visualizzate senza compromettere le aree ad alta luminosità o le
aree luminose della scena. Le opzioni sono LOW, HIGH, MIDHIGH, MID e MIDLOW.
ATR
LUMINANCE
CONTRAST
RETURN
MID
MID
OFF / ON
• PRIVACY
PRIVACY
AREA SEL
TOP
BOTTOM
LEFT
RIGHT
COLOR
TRANSP
MOSAIC
RETURN
1 / 4
1
1.00
OFF
000
000
000
000
• BACK LIGHT
Consente di impostare il lato sinistro del telaio della maschera
mediante il parametro AREA SEL.
LEFT:
Consente di impostare il lato destro del telaio della maschera
mediante il parametro AREA SEL.
RIGHT:
Consente di impostare i colori dei telai della maschera.
COLOR:
Consente di impostare il rapporto di trasparenza dei telai della maschera.
TRANSP:
Consente di impostare il mosaico del telaio della maschera su ON
oppure OFF.
MOSAIC:
Consente di selezionare il telaio della maschera da regolare.
AREA SEL:
Consente di impostare il lato superiore del telaio della maschera
mediante il parametro AREA SEL.
TOP:
Consente di impostare il lato inferiore del telaio della maschera
mediante il parametro AREA SEL.
BOTTOM:
Consente di nascondere un'area in modo che non venga visualizzata sul monitor.
Questa opzione può essere utile per mascherare un'area per motivi di
privacy, continuando a monitorare i movimenti.

10
OFF / ON
• MOTION DET
MOTION DET
DETECT SENSE
BLOCK DISP
MOTION AREA
AREA SEL
TOP
BOTTOM
LEFT
RIGHT
RETURN
111
000
000
000
000
OFF
ON
1 / 4
OFF / ON• CAMERA ID
CAMERA ID
CAMERA
ABCDEFGHIJKLMNOPQRSTUV
WXYZ0123456789-#$%&?
()_`.:;<=> @^*./^*X+/
CHR1 CHR2
CLR POS
RETURN
Sono disponibili due modi per consentire agli utenti di congurare il rilevamento del
movimento.
DETECT SENSE: la barra di scorrimento imposta la sensibilità del rilevamento del
movimento a 0 o 255 (sensibilità massima).
BLOCK DISP: le impostazioni possibili sono ON, OFF ed ENABLE.
Se è selezionato ON, quando viene rilevato un movimento la telecamera mostra un
mosaico nell'immagine.
Se è selezionato ENABLE, l'utente visualizza uno schema a griglia sullo schermo.
Utilizzando il mini joystick, è possibile selezionare/deselezionare ogni quadrato nella
griglia per il rilevamento del movimento. Al termine dell'operazione spostare il cursore
nell'angolo inferiore destro, tenere e rilasciare. La griglia scompare e si torna al menu.
Nell'immagine della telecamera viene visualizzato un quadrato. Quando viene rilevato
un movimento, il quadrato lampeggia.
MONITOR AREA: questa opzione funziona con le selezioni AREA SEL descritte di seguito
e consente di attivare o disattivare le "aree".
AREA SEL: consente di selezionare no a 4 sezioni rettangolari (1/4, 2/4, 3/4 e 4/4),
denite dai controlli a scorrimento TOP, BOTTOM, LEFT e RIGHT.
L'ID della telecamera mostra il nome selezionato sullo schermo.
Utilizzare i tasti su/giù/sinistra/destra per muovere il dispositivo. Mantenere
l'impostazione CHR1. CLR consente di cancellare tutte le informazioni. POS
consente di modicare la posizione.
INT
• SYNC
Sincronizzazione video visualizzata INT (interno).
• CAMERA RESET Consente di ripristinare i valori predeniti della telecamera.
Consente di tornare al menu precedente.
Consente di uscire dal menu.
Consente di salvare le impostazioni. Fare clic su questa
impostazione per salvare le opzioni modicate nel menu,
altrimenti la telecamera perderà tutte le modiche in caso di
perdita di potenza.
• BACK
• EXIT
• SAVE ALL

11
MENU TREE SUMMARY
OSD function buttons: Center button acts as ENTER function
SETUP MENU
LANGUAGE
LENS
WHITE BAL
PICT ADJUST
NR
NEXT
EXIT
ENGLISH
AUTO
ATW
SAVE ALL
AUTO IRIS
TYPE
MODE
SPEED
RETURN
DC
AUTO
080
PICT ADJUST
MIRROR
BRIGHTNESS
CONTRAST
SHARPNESS
HUE
GAIN
RETURN
OFF
000
128
128
128
128
NR
NR MODE
Y LEVEL
C LEVEL
RETURN
Y / C
004
004
ATW
SPEED
DELAY SNT
ATW FRAME
ENVIRONMENT OUTDOOR
RETURN
239
016
x1.00
MANUAL WB
LEVEL
RETURN
058
USER1 WB
B-GAIN
R-GAIN
RETURN
029
034
USER2 WB
B-GAIN
R-GAIN
RETURN
045
026
ATR
LUMINANCE MID
CONTRAST MID
RETURN
PRIVACY
AERA SEL
TOP
BOTTOM
LEFT
RIGHT
COLOR
TRANSP
MOSAIC
RETURN
000
000
000
000
1 / 4
1
1.00
OFF
MOTION DET
DETECT SENSE
BLOCK DISP
MONITOR AREA
AREA SEL
TOP
BOTTOM
LEFT
RIGHT
RETURN
111
000
000
000
1 / 4
ON
OFF
000
CAMERA ID
CAMERA
ABCDEFGHIJKLMNOPQRSTUV
WXYZ0123456789-#$%&?
()_`.:;<=> @^*./^*X+/
CHR1 CHR2
CLR POS
RETURN
SETUP MENU
BACKLIGHT
ATR
PRIVACY
MOTION DET
CAMERA ID
SYNC
CAMERA RESET
BACK
EXIT
OFF
OFF
OFF
OFF
OFF
INT
SAVE ALL
CAMERA ADJUSTMENT
en

12
OSD MENU control
Press center button to access the setup menu.
• Main setup menu is displayed on the monitor screen.
SETUP MENU
Select a function by pressing up and down button and press left or right button
to change setting value and press center button to conrm selection.
If a sub menu is available it can be accessed by pressing center button.
Select ‘NEXT’ to view remainder of the OSD setup menu.
Once nished updating settings, highlight ‘EXIT’ and press center button to exit
setup menu.
To retain the changed settings after a power on/o of the camera you need to
select SAVE ALL option on the menu.
LANGUAGE
SETUP MENU
LANGUAGE ENGLISH
LENS AUTO
WHITE BAL ATW
PICT ADJUST
NR
L
AN
GU
A
G
E ENGLI
S
H
NEXT
EXIT SAVE ALL
Select the language in which to display the OSD menu
Note: Selection changes the language displayed immediatly.
LENS
LANGUAGE: English, Japanese, German, French,
Russian, Portuguese, Spanish, Chinese.
Changes the settings of the internal lens.
TYPE: DC
MODE:
SPEED:
AUTO, CLOSE, OPEN
- AUTO: The mechanical iris is controlled automatic
- CLOSE: The mechanical iris is set to the closed position
- OPEN: The mechanical iris is set to the open position
Default setting: Auto
000-255
Sets the convergence speed of the mechanical iris.
Default setting is 80.
SETUP MENU
LANGUAGE ENGLISH
LENS AUTO
WHITE BAL ATW
PICT ADJUST
NR
L
AN
GU
A
G
E ENGLI
S
H
NEXT
EXIT SAVE ALL
WHITE BAL
SETUP MENU
LANGUAGE ENGLISH
LENS AUTO
WHITE BAL ATW
PICT ADJUST
NR
L
AN
GU
A
G
E ENGLI
S
H
NEXT
EXIT SAVE ALL
White Balance can be set to following options:
ATW / PUSH / USER1 / USER2 / ANTI CR
/ MANUAL / PUSH LOCK
SETUP MENU
LANGUAGE
LENS
WHITE BAL
PICT ADJUST
NR
NEXT
EXIT
ENGLISH
AUTO
ATW
SAVE ALL
AUTO IRIS
TYPE
MODE
SPEED
RETURN
DC
AUTO
080
LENS: MANUAL / AUTO
White Balance Options: This camera provides a wide variety of ways to eect white balance. These multiple methods make this camera extraordinarily
exible, increasing the range of surveillance environments where this camera can be used. Some options include sub-menus, some do not. The whole list
includes the following:
ATW: auto-tracking white balance (sub-menu)
USER1 and USER2: individual settings that can have unique R/B/G levels (sub-menu for each)
MANUAL WB: self explanatory (sub-menu)
PUSH: not implemented in this model
ANTI-CR: anti-color rolling (no sub)
PUSH LOCK: requires the user to present a color (generally white) to the lens for “capture”. White balance compensation is then based automatically on that
captured color.

13
• ATW (Auto Tracing White Balance)
000-255 Specifes the AE control for ATW
Default setting is 89.
SPEED:
000-255 Sets the time based of ATW
change. Default setting is 16.
DELAY CNT:
x0.50 / x1.00 / x1.50 / x2.00
Sets pull in frame for magnication
Default setting is x1.00.
ATW FRAME:
INDOOR / OUTDOOR
Set the pull in frame of ATW
Default setting outdoor.
ENVIRONMENT:
Use white balance regardless of the subject conditions.
User dened gain adjustment on Blue and Red.
• PUSH
• USER1:
ATW
SPEED
DELA Y CNT
ATW FRAME
ENVIRONMENT
RETURN
239
016
x1.00
OUTDOOR
USER1 WB
B-GAIN
R-GAIN
RETURN
239
016
The camera constantly monitors the light and adjusts its
color to maintain white areas. With this feature, the camera
will automatically adjust color settings to achieve consistent
quality in the white areas of the image.
USER1 & USER2: This sub-menu lets you make major changes in color saturation. B-GAIN controls blue, R-GAIN controls red. Green automatically
adjusts as you change the blue and red settings so no specic G-GAIN adjustment is provided.The OSD menu provides 2 menus (USER1 and USER2 -
both work the same way) so 2 settings can be stored.
Vision impaired (color blind) users may nd USER1/USER2 sub-menu settings helpful. These settings can also be helpful if you are monitoring an
area that is always saturated by a single color of light, such as entertainment venues, bars or taverns, etc. Some people may attempt to use such
areas of unusual color for their own purposes - these adjustments can negate such attempts.
• USER2:
User dened gain adjustment on B and R.
000-255 B Gain adjustment for WB
B-GAIN:
R-GAIN: 000-255 R Gain adjustment for WB
USER2 WB
B-GAIN
R-GAIN
RETURN
043
047
• ANTI CR Activates color rolling suppression.
ANTI-CR (anti-color rolling) is essentially the legacy white balance with anti-color rolling technology. If you use the MANUAL WB setting and the
picture exhibits intermittent color bars rolling across the screen try using this setting.
ANTI-CR can also improve night vision is some circonstances.

14
• MANUAL WHITE BALANCE:
LEVEL: 000-255 R
Specifes the R and B gain values for manual WB.
The actual variable range is limited to the range from the low color
(approx. 1800K) to the hight color temperature (approx. 10500K).
Default setting is 33.
MANUAL WB
LEVEL
RETURN
058
This setting is the basic legacy white balance setting that has been programmed into CCTV cameras since the setting was rst created. We added the
ability to force some overall compensation using a level adjustment.
Upon power-up, the camera will acquire a white balance value from the whitest object in its eld of view. When it reproduces the color white it will
refer to this value regardless of changes in color temperature or any other factors. The slide bar can be moved from extreme left (level = 0) to extreme
right (level = 255) to make manual compensation.
• PUSH LOCK
PUSH-LOCK is a white balance method that requires user intervention. To set white balance using PUSH-LOCK, point the camera at a white object,
make sure it lls as much of the screen as possible, then click the center button. The camera will reproduce colors using the white color you presen-
ted as a baseline.
PICT ADJUST
Picture and display control settings
SETUP MENU
LANGUAGE ENGLISH
LENS AUTO
SHUTTER/AGC AUTO
WHITE BAL ATW
PICT ADJUST
NR
PI
C
T AD
JUST
ON / OFF Horizontally ip the display output.
• MIRROR:
000-255 Screen brightness.
• BRIGHTNESS:
000-255 Screen contrast.
• CONTRAST:
000-255 Screen sharpness.
• SHARPNESS:
000-255 Adjust the hue.
• HUE:
000-255 Adjust the gain.
• GAIN:
PICT ADJUST
MIRROIR
BRIGHTNESS
CONTRAST
SHARPNESS
HUE
GAIN
RETURN
000
128
128
128
150
OFF
SETUP MENU
LANGUAGE ENGLISH
LENS AUTO
SHUTTER/AGC AUTO
WHITE BAL ATW
PICT ADJUST
NR
NR
NEXT
EXIT SAVE ALL
NR
NR (NOISE REDUCTION)OPTIONS: You can set noise reduction values on luminance and chroma components of the video signal.
NR MODE - Select Y/C to adjust luminance and chroma, C to adjust only chroma, Y to adjust only luminance, or OFF for no adjustments. The Y LEVEL
and C LEVEL adjustment slide bars will appear or disappear depending upon your selection. Their behavior is self explanatory. The display will show a
numeric value when you adjust the slide bars, for your convenience.

15
NEXT
From the main setup menu select NEXT to enter second page of main setup menu.
SETUP MENU
LANGUAGE ENGLISH
LENS AUTO
SHUTTER/AGC AUTO
WHITE BAL ATW
PICT ADJUST
NR
NEXT
EXIT SAVE ALL
NEXT
BACKLIGHT OPTIONS: There are 3 settings for backlight compensation options and no sub-menus. Available settings are OFF (no compensation),
BLC (Back Light Compensation enabled), and HLC (Back Light Compensation with High Light Compensation).
HLC - High Light Compensation - is a method of backlight compensation that also masks areas of intense light. Some thieves and unsavory
individuals have learned that you can momentarily disable some CCTV cameras by shining bright lights directly at the lens. HLC is one of several
methods developed to combat this threat. When HLC is active it will mask the source of the bright light with a dark shape, thus allowing the area
to the side of the light source to be viewed and recorded. People who think they are concealed in a halo of hazy white light will be revealed.
HLC can also be used to reveal licence plate when car’s lights are on.
SETUP MENU
BACKLIGHT
ATR
PRIVACY
MOTION DET
CAMERA ID
SYNC
CAMERA RESET
BACK
EXIT
OFF
OFF
OFF
OFF
OFF
INT
SAVE ALL
• SHADOW REDUCTION (ATR) OFF / ON
Adaptive Tone Reproduction – is an enhancement designed to accurately reproduce color tones in a scene that includes areas of high and low
brightness.
LUMINANCE - This setting will control how bright areas of high luminance appear without eecting the areas of low luminance or dark areas of
the scene. Options are MID, HIGH, or LOW.
CONTRAST - This setting will control how dark areas appear without eecting the areas of high luminance or bright areas of the scene. Options
are LOW, HIGH, MIDHIGH, MID and MIDLOW.
ATR
LUMINANCE
CONTRAST
RETURN
MID
MID
OFF / ON
• PRIVACY:
PRIVACY
AREA SEL
TOP
BOTTOM
LEFT
RIGHT
COLOR
TRANSP
MOSAIC
RETURN
1 / 4
1
1.00
OFF
000
000
000
000 Sets the left side of the mask frame selected by the
AREA SEL parameter.
LEFT
Sets the right side of the mask frame selected by the
AREA SEL parameter.
RIGHT:
Sets the colors of the mask frames.
COLOR:
Sets the transparency ratio of the mask frames.
TRANSP:
Sets the mask frame mosaic to ON or OFF.
MOSAIC:
Selects the mask frame to be adjuted.
AREA SEL:
Sets the top side of the mask frame selected by the
AREA SEL parameter.
TOP:
Sets the bottom side of the mask frame selected by the
AREA SEL parameter.
BOTTOM:
Hide an area so that it is not displayed on the monitor.
This can be useful if you want to mask an area for privacy but still
monitor it for movement.
• BACK LIGHT

16
OFF / ON
• MOTION DET
There are two ways for users to set up motion detection.
DETECT SENSE - Slide bar sets sensitivity of motion detection to 0 or 255 (maximum
sensitivity).
BLOCK DISP - Settings are ON, OFF and ENABLE.
When ON is selected, the camera will show a mosaic in the image when a motion is
detected.
When ENABLE is selected, the user will see a grid pattern on screen. Using the mini-
joystick, each square on the grid can be selected/deselected for motion detection.
When nished move the cursor to the lower right corner,hold and release. The grid will
disappear and this menu will return.
The camera will show a square in the image. When a motion is detected, the square
ashes.
MONITOR AREA - This option works with the AREA SEL selections, described below. It
enables the “areas” or turns them o.
AREA SEL - Lets you select up to 4 rectangular sections (1/4, 2/4, 3/4 and 4/4), dened
by the TOP, BOTTOM, LEFT and RIGHT slide controls.
MOTION DET
DETECT SENSE
BLOCK DISP
MOTION AREA
AREA SEL
TOP
BOTTOM
LEFT
RIGHT
RETURN
111
000
000
000
000
OFF
ON
1 / 4
OFF / ON• CAMERA ID
Camera ID shows a name on the screen as chosen.
Use Up/Down/Left/Right buttons to move around. Keep CHR1 setting. CLR will
clear info. POS allows position change.
INT
• SYNC
Video synchronization displayed INT (Internal).
• CAMERA RESET
CAMERA ID
CAMERA
ABCDEFGHIJKLMNOPQRSTUV
WXYZ0123456789-#$%&?
()_`.:;<=> @^*./^*X+/
CHR1 CHR2
CLR POS
RETURN
Reset camera to default values.
Returns you to the previous menu.
Takes out of the menu
Saves settings. You must click this setting to save any options
you changed in this menu or the camera will lose all your chan-
ges if it loses power.
• BACK
• EXIT
• SAVE ALL

17
KAMERAEINSTELLUNG
ZUSAMMENFASSUNG DER
MENÜSTRUKTUR
OSD-Funktionstasten: Taste in der Mitte dient der Funktion EINGABE.
de

18
OSD MENU-Steuerung
Drücken Sie auf die Taste in der Mitte, um das Einrichtungsmenü aufzurufen.
• Das Haupteinrichtungsmenü wird auf dem Monitor angezeigt.
SETUP MENU (EINRICHTUNGSMENÜ)
Wählen Sie durch Drücken der Nach- oben- oder Nach unten-Taste bzw. der Nach links-
oder Nach rechts-Taste eine Funktion aus, und drücken Sie anschließend die Taste in der
Mitte, um die Auswahl zu bestätigen.
Wenn ein Untermenü verfügbar ist, können Sie es durch Drücken der Taste in der Mitte
aufrufen.
Wählen Sie "NEXT (WEITER)", um den Rest des OSD-Einrichtungsmenüs anzuzeigen.
Wenn Sie die Einstellungen vorgenommen haben, markieren Sie EXIT (BEENDEN), und
drücken Sie auf die Taste in der Mitte, um das Einrichtungsmenü zu beenden.
Um die geänderten Einstellungen nach dem Aus- und Einschalten der Kamera
beizubehalten, müssen Sie die Option SAVE ALL (ALLES SPEICHERN) im Menü
auswählen.
LANGUAGE (SPRACHE)
SETUP MENU
LANGUAGE ENGLISH
LENS AUTO
WHITE BAL ATW
PICT ADJUST
NR
L
AN
GU
A
G
E ENGLI
S
H
NEXT
EXIT SAVE ALL
Wählen Sie eine Sprache, die auf dem OSD-Menü angezeigt werden soll.
Hinweis: Die Spracheinstellung tritt sofort in Kraft.
LENS (OBJEKTIV)
LANGUAGE (SPRACHE): Englisch, Japanisch, Deutsch, Französisch,
Russisch, Portugiesisch, Spanisch, Chinesisch.
Ändert die Einstellungen des internen Objektivs.
TYPE (TYP): DC
MODE (MODUS):
SPEED
(GESCHWINDIGKEIT):
AUTO, CLOSE, OPEN
- AUTO: Die mechanische Iris wird automatisch gesteuert.
- CLOSE (SCHLIESSEN): Die mechanische Iris wird gesch-
lossen.
- OPEN (ÖFFNEN): Die mechanische Iris wird geönet.
Standardeinstellung: Auto
000-255
Zum Einstellen der Konvergenzgeschwindigkeit der mecha-
nischen Iris.
Die Standardeinstellung ist 80.
SETUP MENU
LANGUAGE ENGLISH
LENS AUTO
WHITE BAL ATW
PICT ADJUST
NR
L
AN
GU
A
G
E ENGLI
S
H
NEXT
EXIT SAVE ALL
WHITE BAL (WEISSABGLEICH)
SETUP MENU
LANGUAGE ENGLISH
LENS AUTO
WHITE BAL ATW
PICT ADJUST
NR
L
AN
GU
A
G
E ENGLI
S
H
NEXT
EXIT SAVE ALL
Der Weißabgleich kann auf die folgenden Optionen eingestellt werden:
ATW / PUSH / USER1 / USER2 / ANTI CR / MANUAL / PUSH
LOCK
LENS (OBJEKTIV): MANUAL / AUTO (MANUELL/AUTOM.)
Weißabgleichsoptionen: Diese Kamera bietet viele Optionen zum Anpassen und Einstellen des geeigneten Weißabgleichs. Die verschiedenen Methoden
machen die Kamera außerordentlich exibel und erhöhen die Anwendungsmöglichkeiten der Kamera. Einige Optionen verfügen über Untermenüs,
andere wiederum nicht. Die gesamte Liste umfasst Folgendes:
ATW: Untermenü für den automatischen Weißabgleich
USER1 (BENUTZER1) und USER2 (BENUTZER2): individuelle Einstellungen, die eindeutige R/B/G-Ebenen haben können (jeweils mit Untermenü)
MANUAL WB (MANUELLER WEISSABGLEICH): selbsterklärend (Untermenü)
PUSH: bei diesem Modell nicht verfügbar
ANTI-CR: Anti-Color Rolling (kein Untermenü)
PUSH LOCK: erfordert vom Benutzer, eine Farbe (im Allgemeinen Weiß) festzulegen, an der sich das Objektiv orientiert. Der Weißabgleich basiert dann auf
der erfassten Farbe.

19
• ATW (Automatischer Weißabgleich)
000-255 Gibt die AE-Steuerung für ATW fest.
Standardeinstellung ist 89.
SPEED
(GESCHWINDIGKEIT):
000-255 Legt die Zeit der ATW
Änderung fest. Die Standardeinstellung ist 16.
DELAY CNT
(CNT-VERZÖGERUNG):
x0.50 / x1.00 / x1.50 / x2.00
Legt die Bildvergrößerung fest.
Standardeinstellung: x1.00.
ATW FRAME
(ATW-BILD):
INDOOR / OUTDOOR (IN GEBÄUDEN/
AUSSENAUFNAHME)
Legt die Einstellung des ATW fest.
Standardeinstellung: OUTDOOR
(AUSSENAUFNAHME).
ENVIRONMENT
(UMGEBUNG):
Verwenden den Weißabgleich unabhängig von den Motivbedingungen.
Benutzerdenierte Verstärkungsanpassung für Blau und Rot.
• PUSH
• USER1 (BENUTZER1)
Die Kamera überwacht dauernd das Licht und passt die Farbe an,
um weiße Bereiche beizubehalten. Mit dieser Funktion passt die
Kamera Farbeinstellungen automatisch an, um eine konsistente
Qualität in weißen Bereichen des Bilds zu erzielen.
USER1 & USER2 (BENUTZER1 UND BENUTZER2): In diesem Untermenü können Sie grundlegende Änderungen an der Farbsättigung vornehmen.
B-GAIN (B-VERSTÄRKUNG) steuert Blau, R-GAIN (R-VERSTÄRKUNG) steuert Rot. Grün wird beim Anpassen der Blau- und Rot-Einstellungen
automatisch angepasst, deshalb gibt es keine eigene Grün-Anpassung. Das OSD-Menü bietet zwei Untermenüs (USER1 und USER2, beide
funktionieren gleichartig), deshalb können 2 Einstellungen gespeichert werden.
Die Untermenüs USER1/USER2 sind besonders für Benutzer mit Sehbehinderung (Farbblindheit) nützlich. Diese Einstellungen sind auch nützlich,
wenn Sie einen Bereich überwachen, der immer mit einer bestimmten Lichtfarbe gesättigt ist, z. B. in Spielhallen, Bars, Kneipen usw. Einige Personen
versuchen, solche Bereiche für ihre eigenen unlauteren Zwecke zu missbrauchen – diese Einstellungen machen solche Versuche unwirksam.
• USER2 (BENUTZER2)
Benutzerdenierte Verstärkungsanpassung für B und R.
000-255 V-Verstärkungsanpassung für WA
B-GAIN (B-VERSTÄRKUNG):
R-GAIN
(R-VERSTÄRKUNG): 000-255 R-Verstärkungsanpassung für WA
• ANTI CR Aktiviert die Color Rolling-Unterdrückung.
ANTI-CR ist im Prinzip der Weißabgleich mit angewandter Anti Color Rolling-Technologie. Wenn Sie die Einstellung MANUAL WA (MANUELLER
WA) verwenden und beim Anzeigen des Bilds Farbstreifen über den Bildschirm rollen, verwenden Sie diese Einstellung.
ANTI-CR kann im manchen Situationen auch die Nachtsicht verbessern.

20
• MANUAL WHITE BALANCE (MANUELLER WEISSABGLEICH)
LEVEL (EBENE): 000-255 R
Gibt die R- und B-Verstärkungswerte für den manuellen WA
an.
Der tatsächliche variable Bereich ist durch die geringe Farbtemperatur (ca.
1800 K) und die hohe Farbtemperatur (ca. 10.500 K) begrenzt.
Die Standardeinstellung ist 3300K.
Die Einstellung ist eine grundlegende Einstellung für den Weißabgleich, die in CCTV-Kameras programmiert wurde, seitdem die Einstellung erstmals
erstellt wurde. Wir haben die Möglichkeit hinzugefügt, mithilfe der Ebenenanpassung etwas Gesamtausgleich zu erzwingen.
Beim Einschalten fragt die Kamera einen Weißabgleichswert vom weißesten Objekt im Blickfeld ab. Wenn Sie dann die Farbe Weiß reproduziert,
verwendet es diesen Wert, unabhängig von Änderungen in der Farbtemperatur oder anderen Faktoren. Der Schieberegler kann von ganz links
(Ebene = 0) nach ganz rechts (Ebene = 255) geschoben werden, um einen manuellen Abgleich vorzunehmen.
• PUSH LOCK
PUSH-LOCK ist eine Methode des Weißabgleichs, die Benutzereingri erfordert. Richten Sie beim Festlegen des Weißabgleichs mit PUSH-LOCK die
Kamera auf ein weißes Objekt, stellen Sie sicher, dass es so viel wie möglich des Bildschirms einnimmt, und klicken Sie dann auf die Taste in der Mitte.
Die Kamera produziert die Farben dann mithilfe der weißen Farbe, die Sie als Ausgangsfarbe angegeben haben.
PICT ADJUST (BILDANPASSUNG)
Bild- und Anzeigesteuerungseinstellungen
SETUP MENU
LANGUAGE ENGLISH
LENS AUTO
SHUTTER/AGC AUTO
WHITE BAL ATW
PICT ADJUST
NR
PI
C
T AD
JUST
ON / OFF
(EIN/AUS)
• MIRROR
(SPIEGELN):
000-255 Zum Anpassen der Helligkeit.
• BRIGHTNESS
(HELLIGKEIT):
000-255
Zum Anpassen des Bildschirmkontrasts.
• CONTRAST (KON-
TRAST):
000-255 Zum Anpassen der Bildschirmschärfe.
• SHARPNESS
(SCHÄRFE):
000-255 Hiermit passen Sie den Farbton an.
• HUE
(FARBTON):
000-255 Hiermit passen Sie die Verstärkung an.
• GAIN
(VERSTÄRKUNG):
SETUP MENU
LANGUAGE ENGLISH
LENS AUTO
SHUTTER/AGC AUTO
WHITE BAL ATW
PICT ADJUST
NR
NR
NEXT
EXIT SAVE ALL
NR
NR-OPTIONEN (NOISE REDUCTION, RAUSCHUNTERDRÜCKUNG): Sie können die Rauschunterdrückungswerte zu Luminanz- und Chroma-
Komponenten des Videosignals festlegen.
NR MODE (RU-MODUS) - Wählen Sie Y/C aus, um die Luminanz und Chroma anzupassen, C nur für Chromaanpassung, Y nur für Luminanzanpassung,
oder OFF (AUS), um nichts anzupassen. Die Schieberegler Y LEVEL (Y-EBENE) und C LEVEL (C-EBENE) werden abhängig von Ihrer Auswahl angezeigt.
Das Verhalten erklärt sich von selbst. Beim Anpassen der Schieberegler wird ein numerischer Wert zur besseren Übersicht angezeigt.
Zum horizontalen Spiegeln
der Anzeigeausgabe.
Table of contents
Languages:
Other Bticino Security Camera manuals

Bticino
Bticino LE06585AA-01AT-13W27 User manual

Bticino
Bticino 391697 User manual

Bticino
Bticino 391780 User manual

Bticino
Bticino 391716 User manual

Bticino
Bticino 391891 User manual

Bticino
Bticino TVCC T9654A User manual

Bticino
Bticino LE03110AA User manual

Bticino
Bticino 391773 User manual

Bticino
Bticino TVCC User manual

Bticino
Bticino 391348 User manual