manuals.online logo
Brands
  1. Home
  2. •
  3. Brands
  4. •
  5. Calix
  6. •
  7. Heater
  8. •
  9. Calix CLASSIC 1200 User manual

Calix CLASSIC 1200 User manual

Low Voltage Directive, 73/23/EEC, the EMC
Directive, 89/336/EEC, including amendments
by the CE marking Directive, 93/68/EEC
Product Type designation
Engine preheater .................................................. MVP…
Inlet cable ................................................................. MK
Mains supply cable .....................................................MS
The following harmonised European standards or technical
specifications have been applied:
Standards Test reports issued by Regarding
SS 433 07 90.......................Calix ............electrical safety
EN 60 335-1 ........................Calix ............electrical safety
EN 60309-1/ 2 (1992)..........Calix ............electrical safety
CENELEC HD 22 ...................Calix ............electrical safety
CEE 7...................................Calix............electrical safety
EN 50 081-1 (1992)..............Calix ..............EMC-emission
EN 50 082 (1995) ................Calix ............. EMC-immunity
– The products comply with the LVD safety standards as per
above.
We have an internal production control system that ensures
compliance between the manufactured products and the
technical documentation.
– The products comply with the harmonised EMC standards
as per above.
The products is CE marked in -96.
As manufacturer, we declare under our sole responsibility
that the equipment follows the provisions of the Directives
stated above.
Eskilstuna, May, 2014
Fredrik Andreassen, President
medlem av
member of
mitglied von
medlem av
member of
mitglied von
Part no. 2200961
Calix AB
PO-Box 5026
SE-630 05 Eskilstuna
Sweden
Phone:
+46 (0)16-10 80 00
Support:
+46 (0)16-10 80 90
Fax:
+46 (0)16-10 80 60
E-mail:
[email protected]
E-mail:
[email protected]
Internet:
www.calix.se
4
7
6
3
12
11
21
8
9
10
5
5
1 Anslutningssladd MS
Liitäntäjohto / Connecting
cable / Anschlusskabel
2 Intagskabel MK
Elementtikaapeli / Inlet
cable / Einbaukabel
3 Batteriladdare BL
Akkuvaraaja / Battery
Charger / Batterielader
4 Relä till timer
Rele ajastimelle / Relay for
the timer / Timerrelais
5 Skarvkabel
Jatkokaapeli / Extension
cable / Verlängerungskabel
6 Grenuttag
Haaroituspistorasia / Multi-
ple socket / Verteilerstück
7 Motorvärmare
Vastusosa / Engine heater /
Motorvor-wärmer
8 Kupévägguttag
Sisätilapistorasia / Cab
wall socket / Heizlüfter-
Steckdose
9 Kupévärmare
Tehokasta lämpöä / Cab
heater / Heizlüfter
10 Fjärrkontroll till timer
Kaukosäädin ajastimelle /
Remote for the timer / Fe-
dersteuerung für den Timer
11 Strålningsskydd
Lämpöeriste / Heat Shield /
Hitzeschutz
12 Pump
Pumppu / Pump / Pumpe
MONTERINGSANVISNING
ASENNUSOHJEET
ASSEMBLY INSTRUCTIONS
EINBAUHINWEISE
CLASSIC 1200
EFFEKT: 1200W @-25° / 230V ~
14.04.15
IP46
1
2
SVENSKA
Teknisk information
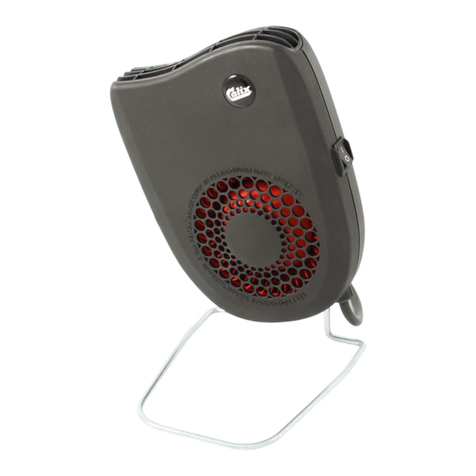
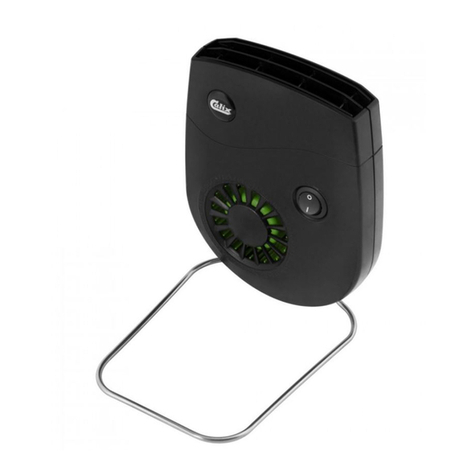
Kupévärmare Calix Classic har ett effektläge, 1200 Watt vid -25°C.
Kupévärmarens element är av sådan typ att det reglerar effekten efter
omgivningstemperatur och luftflöde, se diagram. Diagrammet visar effekten
vid fritt luftflöde. Finns för luften störande detaljer såsom säte, vägg etc.
minskar effekten. Normalt förekommande tillverkningstoleranser påverkar
också effekten.
Det är viktigt att kupévärmaren monteras med iakttagande av i bild 1 an-
givnaminimiavstånd.Kupévärmaren skall anslutas till 230V växelspänning.
Installation
Kupévärmaren är avsedd att placeras på golvet i kupén med hjälp av
medföljande ställning se bild 2. Kupévärmaren får endast anslutas till
jordat uttag i kupén. Jordförbindningen måste vara genomgående från
kupévärmarens hölje, bilens kaross och ända fram till jordat eluttag.
Installationen görs enklast med hjälp av Calix anslutningsdetaljer med
plug-in-kopplingar, enl. följande punkter.
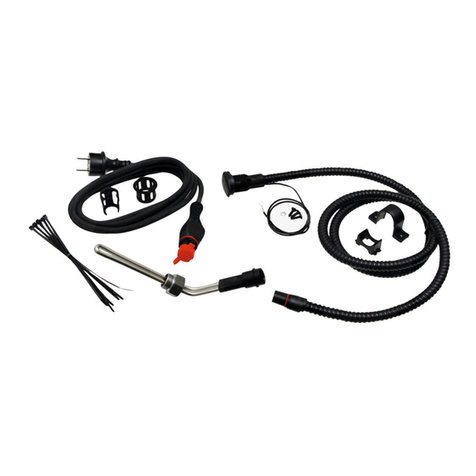
• Om motorvärmare saknas, komplettera med Calix intagskabel, skarv-
kabel och kupévägguttag.
• Finns motorvärmare inmonterad eller avses att monteras samtidigt,
installeras kupévärmaren lämpligast med Calix grenledningssats, som
består av skarvkabel, grenuttag och kupévägguttag. Se bruksanvisning
till grenledningssatsen.
• Om plug-in-kopplingen ej används ska installationen utföras av behörig
elinstallatör. Anslutningskabeln ska vara oljebeständiga gummikabel
av ej lättare typ än RDO 3x1,5 mm2. Ledningen mellan kupévägguttag
och bilens apparatintag ska vara dragen i metallslang. Stickproppen
bör vara av termoplast samt godkänd i sköljtätt utförande(IP 44).
Bruksanvisning
Kontrollera säkringens amperetal innan Du ansluter kupévärmaren och
glöm inte att räkna med motorvärmarens effekt om Du har en sådan
monterad i bilen.
5 Amp säkring medger max effektuttag 1150 Watt
6 Amp säkring medger max effektuttag 1380 Watt
10 Amp säkring medger max effektuttag 2300 Watt
16 Amp säkring medger max effektuttag 3680 Watt
Viktigt
Calix Kupévärmare är försedd med en återställbar temperaturbegränsare
som bryter spänningen till elementet och motorn om temperaturen stiger
över tillåtet värde. Temperaturbegränsaren kan utlösas bl a om värmaren
placeras så att luften inte kan cirkulera tex. vid övertäckning av utblåsgaller
eller insugsgaller. Om temperaturbegränsaren utlösts fungerar inte
kupévärmaren. Vid återställning av temperaturbegränsaren: se till att
kupévärmaren är spänningslös och avsvalnad innan arbetet påbörjas!
återställ med den lilla svarta knappen som sitter i fronten på värmaren,
se bild 3.
Produkten är inte ämnad att användas av personer (inklusive barn) med
nedsatt fysisk eller mental förmåga eller som har brist på kunskap eller
erfarenhet, om de inte har fått handledning eller
fått information om hur man använder produkten av en person som är
ansvarig för deras säkerhet. Barn skall övervakas så att de inte leker med
produkten.
Vid ev. sladdställsbyte skickas kupévärmaren till Calix AB eller inköpsställe
/ återförsäljare för åtgärd.



  








3
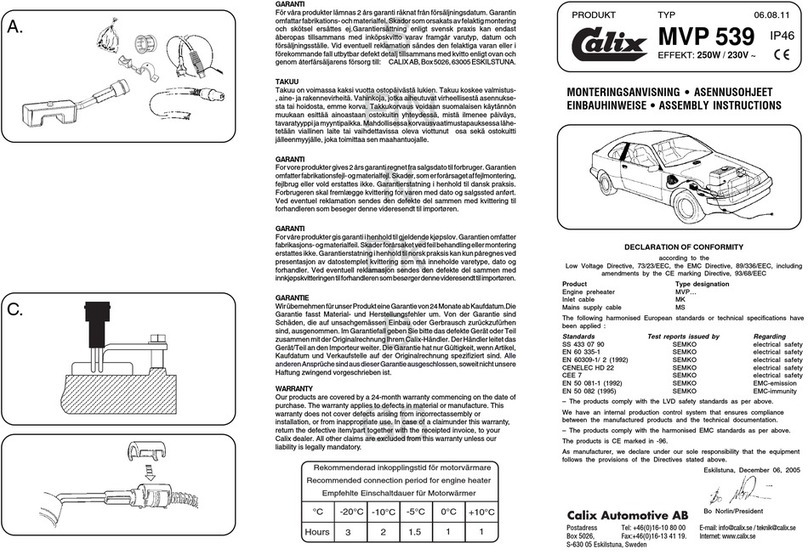
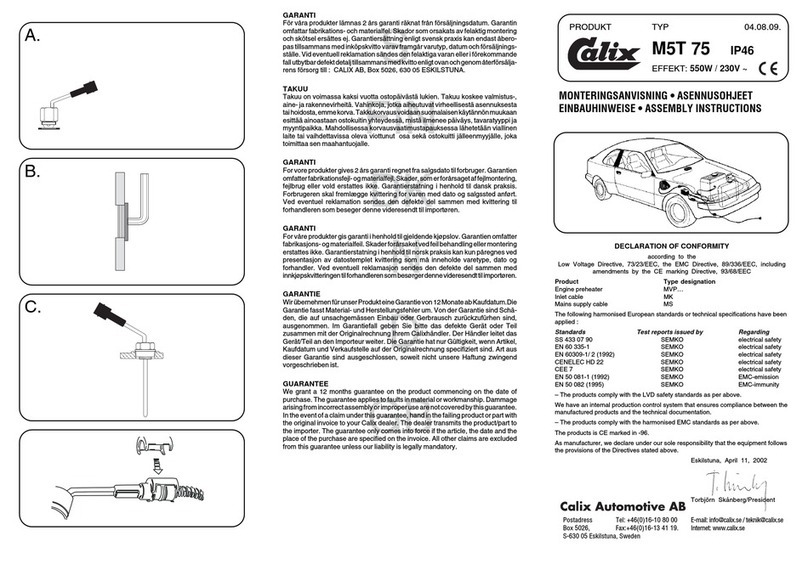
GARANTI
För våra produkter lämnas 3 års garanti räknat från försäljningsdatum. Garantin
omfattar fabrikations- och materialfel. Skador som orsakats av felaktig montering
och skötsel ersättes ej.Garantiersättning enligt svensk praxis kan endast åberopas
tillsammans med inköpskvitto varav framgår varutyp, datum och försäljningsställe.
Vid eventuell reklamation sändes den felaktiga varan eller i förekommande fall
utbytbar defekt detalj tillsammans med kvitto enligt ovan och genom återfärsäljarens
försorg till: CALIX AB, Box 5026, 63005 ESKILSTUNA.
TAKUU
Takuu on voimassa 3 vuotta ostopäivästä lukien. Takuu koskee valmistus-, aine-
ja rakennevirheitä. Vahinkoja, jotka aiheutuvat virheellisestä asennuksesta tai
hoidosta, emme korva. Takkukorvaus voidaan suomalaisen käytännön muukaan
esittää ainoastaan ostokuitin yhteydessä, mistä ilmenee päiväys, tavaratyyppi ja
myyntipaikka. Mahdollisessa korvausvaatimustapauksessa lähetetään viallinen laite
tai vaihdettavissa oleva viottunut osa sekä ostokuitti jälleenmyyjälle, joka toimittaa
sen maahantuojalle.
GARANTIE
Wir übernehmen für unser Produkt eine Garantie von 36 Monate ab Kaufdatum.Die
Garantie fasst Material- und Herstellungsfehler um. Von der Garantie sind Schäden,
die auf unsachgemässen Einbau oder Gerbrausch zurückzufürhen sind, ausgenom-
men. Im Garantiefall geben Sie bitte das defekte Gerät oder Teil zusammen mit der
Originalrechnung Ihrem Calix-Händler. Der Händler leitet das Gerät/Teil an den
Importeur weiter. Die Garantie hat nur Gültigkeit, wenn Artikel, Kaufdatum und
Verkaufstelle auf der Originalrechnung spezifiziert sind. Alle anderen Ansprüche
sind aus dieser Garantie ausgeschlossen, soweit nicht unsere Haftung zwingend
vorgeschrieben ist.
WARRANTY
Our products are covered by a 36-month warranty commencing on the date
of purchase. The warranty applies to defects in material or manufacture. This
warranty does not cover defects arising from incorrectassembly or installation, or
from inappropriate use. In case of a claimunder this warranty, return the defective
item/part together with the receipted invoice, to your Calix dealer. All other
claims are excluded from this warranty unless our liability is legally mandatory.
CLASSIC 1200
ENGLISH
Technical information
Car Heater Calix Classic has one output position, 1200 Watt at -25°C.
The car heater’s heating coil is of the type that adjusts the output according
to ambient temperature and air flow, see diagram. The figure shows the
output during free air flow. If there are objects such as the seat, wall, etc.
that obstruct air flow, then the output is reduced.Normal manufacturing
tolerances also affect output.
It is important that the car heater is mounted according to minimum distance
stated in figure 1. The car heater shall be connected to 230 Volt AC.
Dimensions: 195 x 160 x 77 mm.
Installation
The car heater designed for placement on the cab floor using the supplied
stand, see figure 2. The car heater may only be connected to a grounded
socket inside the car. The ground connection must be a continuous from
the car heater’s casing, the car’s body all the way to the grounded power
socket. Installation is easily performed using Calix installation parts with
plug-in couplings, according to the following points.
• If there is no engine heater, supplement with inlet cable, extension cable
and cab wall socket.
• If an engine heater has been installed or is to be installed at the same
time, the installation of the car heater is most suitably done using Calix
branching cable kit, consisting of extension cable, branching outlet and
cab wall socket. See instructions for the branching cable kit.
• If the plug-in connection is not used, the installation shall be performed by
a certified electrician. The connection cable must be oil-resistant rubber
cable of a type not lighter than RDO 3 x 1.5 mm2. The cable between the
cab wall socket and the car’s appliance inlet must be routed in a metal
hose. The plug should be made of thermal plastic and of approved rinse-
proof type (IP44).
Instructions for use
Check the fuse rating (ampere) before connecting the heater and do not
forget to include the engine heater’s power in case one is installed in the car.
5 Amp fuse allowing max. power 1150 Watt
6 Amp fuse allowing max. power 1380 Watt
10 Amp fuse allowing max. power 2300 Watt
16 Amp fuse allowing max. power 3680 Watt
Important
Calix Car Heater is equipped with a resettable temperature limiter
(thermostat) that cuts off current to the heating coil and engine if the
temperature exceeds the permitted value. Among others, the temperature
limiter (thermostat) can be triggered if the heater is placed so that the air
cannot circulate, e.g. if the air outlet grate or air intake grate is covered. If
the temperature limiter (thermostat) has been triggered, the car’s cab heater
will not work. When resetting the temperature limiter (thermostat), make
sure that the car’s cab heater is not supplied with voltage and is cool before
starting the work. Reset with the small black button located on the front of
the heater, see figure 3.
The product is not intended to be used by persons (incl. children) with
reduced physical or mental capacities, or who lack knowledge or
experience, if they have not received instructions or information on how
to use the product by a person who is responsible for its safety. Children
shall be supervised so that they do not play with the product.
In case of replacing the cable stand, the heater must be sent to Calix AB.
DEUTSCH
Technische Information
Der Fahrzeug-Heizlüfter Calix Classic verfügt über eine Heizstufe, 1200 Watt
bei -25 °C. Der Heizlüfter ist so konzipiert, daß er die Heizleistung entsprechend
der Umgebungstemperatur und der Luftzirkulation regelt, siehe Diagramm. Das
Diagramm zeigt die Leistung bei freier Luftzirkulation. Wird die Luftzirkulation
durch beispielsweise Sitze, Wände etc. behindert, setzt dies die Leistung herab.
Die Leistung wird auch durch normale Herstellungsdifferenzen beeinflußt. Es ist
wichtig, daß der Heizlüfter mit dem in Bild 1 angegebenen Mindestabstand montiert
wird. Der Heizlüfter ist an 230 V Wechselspannung anzuschließen.
Maße: 195 x 160 x 77 mm
Installation
Der Heizlüfter ist zur Plazierung im Fußraum mittels des mitgelieferten Standbügels,
siehe Bild 2, vorgesehen. Der Heizlüfter darf nur an eine geerdete Steckdose
im Innenraum des Fahrzeugs angeschlossen werden. Die Erdung muß vom
Heizlüftergehäuse über die Autokarosserie bis zu einem geerdeten elektrischen
Stromanschluß durchgängig sein. Die Installation erfolgt am einfachsten mit
Hilfe der Calix-Anschlußteile mit Einsteck-Kupplungen, gemäß der nachfolgend
aufgeführten Schritte.
• Falls keine Motorheizung vorhanden ist, kann die Ausrüstung mit einem
Calix-Anschlußkabel, Einbaukabel, -Verlängerungskabel (nach Bedarf) und
-Heizlüftersteckdose komplettiert werden.
• Beivorhandener Motorvorwärmung oder bei geplanter gleichzeitiger Montage
wird der Heizlüfter am einfachsten mit Hilfe des Calix-Verteilerkabelsatzes
montiert, der aus Verlängerungskabeln, Verteilerstück und Heizlüftersteckdose
besteht. Siehe Gebrauchsanweisung für den Verteilerkabelsatz.
• Werden keine Einsteck-Kupplungen verwendet, ist die Montage von einem
autorisierten Elektroinstallateur vorzunehmen. Die Elektrokabel müssen eine
ölbeständige Gummiummantelung haben und mindestens der Typklasse RDO
3x1,5 mm2 angehören. Die Leitung zwischen der Heizlüftersteckdose und der
Anschlussdose des Fahrzeugs muß mit einem Metallschlauch geschützt sein.
Der Stecker muß aus Thermoplastmaterial bestehen, zugelassen und schwall-
wasserdicht sein (IP44).
Gebrauchsanweisung
Die Leistungseinstellung muß an die vorhandene Leistung des Stromnetzes
angepaßt sein. Die Ampere-Zahl der Sicherung kontrollieren, bevor der Heizlüfter
angeschlossen wird. Falls im Fahrzeug eine Motorheizung vorhanden ist, nicht
vergessen, deren Leistung ebenfalls zu berücksichtigen.
5-A-Sicherung erlaubt höchstens 1150 Watt Stromabnahme
6-A-Sicherung erlaubt höchstens 1380 Watt Stromabnahme
10-A-Sicherung erlaubt höchstens 2300 Watt Stromabnahme
16-A-Sicherung erlaubt höchstens 3680 Watt Stromabnahme
Wichtig
Der Calix-Heizlüfter ist mit einer rückstellbaren Überhitzungsschutzsicherungversehen,
die die Stromzufuhr zur Heizung und zum Lüftermotor unterbrechen, wenn
die zulässige Temperatur überschritten wird. Der Überhitzungsschutz kann
beispielsweise ausgelöst werden, wenn der Heizlüfter so plaziert wurde, daß
die Luftzirkulation behindert wird, z. B. durch Abdecken der Luftaustritts-- bzw.
Lufteintrittslamellen. Für die Rückstellung der Temperatursicherung ziehen Sie den
Netzstecker und lassen Sie das Gerät abkühlen. Drücken Sie dann den schwarzen
Knopf an der Frontseite des Heizlüfters, wie in Bild 3 dargestellt.
Er ist nicht für die Verwendung von Personen (inkl. Kinder) mit körperlichen
oder geistigen Einschränkungen oder mit mangelndem technischem
Verständnis auch aufgrund einer unzureichenden Einweisung durch einen
Sicherheitsbeauftragten geeignet. Kindern sollten darauf hingewiesen werden,
dass es sich um kein Spielzeug handelt.
Für den Ersatz des Anschlusskabels muss der Heizlüfter über Ihren Händler zum
Hersteller Calix AB zurückgeschickt werden.
Other Calix Heater manuals

Calix M7T 745 User manual

Calix

Calix M7T 745 User manual

Calix M5S 514 User manual

Calix

Calix M5S 514 User manual

Calix M7T 358 User manual

Calix

Calix M7T 358 User manual

Calix MVP 539 User manual

Calix

Calix MVP 539 User manual

Calix M5T 198A User manual

Calix

Calix M5T 198A User manual

Calix M7T 466 User manual

Calix

Calix M7T 466 User manual

Calix M5T 184 User manual

Calix

Calix M5T 184 User manual

Calix M5S 513 User manual

Calix

Calix M5S 513 User manual

Calix M5T 75 User manual

Calix

Calix M5T 75 User manual

Calix M5S 504 User manual

Calix

Calix M5S 504 User manual

Calix M5T 1013 User manual

Calix

Calix M5T 1013 User manual

Calix MVP Series User manual

Calix

Calix MVP Series User manual

Calix M5S 511 User manual

Calix

Calix M5S 511 User manual

Calix M7T 734 User manual

Calix

Calix M7T 734 User manual

Calix M7T 738 User manual

Calix

Calix M7T 738 User manual

Calix M5T 258 User manual

Calix

Calix M5T 258 User manual

Calix M8T 201 User manual

Calix

Calix M8T 201 User manual

Calix Slim Line 800 User manual

Calix

Calix Slim Line 800 User manual

Calix WaveLine 800 User manual

Calix

Calix WaveLine 800 User manual

Calix BLM 1500 R13 User manual

Calix

Calix BLM 1500 R13 User manual

Calix Compact L User manual

Calix

Calix Compact L User manual

Popular Heater manuals by other brands

IRSAP KART manual

IRSAP

IRSAP KART manual

Space-Ray SURA GSS15 Installation and operation manual

Space-Ray

Space-Ray SURA GSS15 Installation and operation manual

Spartan HB-1500 instruction manual

Spartan

Spartan HB-1500 instruction manual

Dimplex FutuRad FutM2BT manual

Dimplex

Dimplex FutuRad FutM2BT manual

EINHELL NKH 1500 D operating instructions

EINHELL

EINHELL NKH 1500 D operating instructions

Unold 86525 Instructions for use

Unold

Unold 86525 Instructions for use

L.B. White Premier 80 Owner's manual and instructions

L.B. White

L.B. White Premier 80 Owner's manual and instructions

Bosch TR4000 Installation and operating instructions

Bosch

Bosch TR4000 Installation and operating instructions

Mi-T-M MH-0075-RM10 Operator's manual

Mi-T-M

Mi-T-M MH-0075-RM10 Operator's manual

Dimplex Quantum series Installation and operating manual

Dimplex

Dimplex Quantum series Installation and operating manual

Infratech W-1512 SS Installation, use & care manual

Infratech

Infratech W-1512 SS Installation, use & care manual

OYPLA Home 3680 user manual

OYPLA Home

OYPLA Home 3680 user manual

STIEBEL ELTRON CNS 50-2 E Operation and installation

STIEBEL ELTRON

STIEBEL ELTRON CNS 50-2 E Operation and installation

Hardy C3 Installation and operating instructions

Hardy

Hardy C3 Installation and operating instructions

Gasmate FH209 instructions

Gasmate

Gasmate FH209 instructions

Webasto Air Top Evo 40 Workshop manual

Webasto

Webasto Air Top Evo 40 Workshop manual

Dimplex XMX706N Installation and operating instructions

Dimplex

Dimplex XMX706N Installation and operating instructions

Mistral MCH5/1000 operating instructions

Mistral

Mistral MCH5/1000 operating instructions

manuals.online logo
manuals.online logoBrands
  • About & Mission
  • Contact us
  • Privacy Policy
  • Terms and Conditions

Copyright 2025 Manuals.Online. All Rights Reserved.