manuals.online logo
Brands
  1. Home
  2. •
  3. Brands
  4. •
  5. CAMPAGNOLO
  6. •
  7. Bicycle Accessories
  8. •
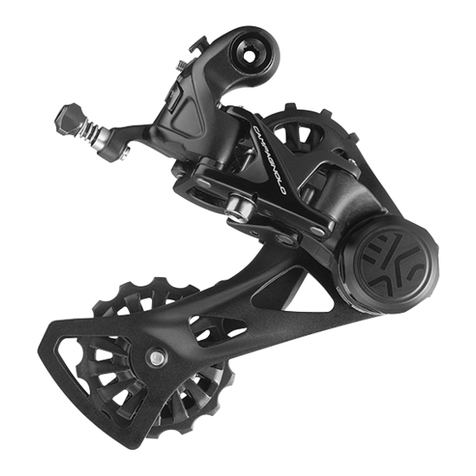
  9. CAMPAGNOLO Ekar RD21 User manual

CAMPAGNOLO Ekar RD21 User manual

CAMPAGNOLO.COM
REPLACING THE JOCKEY CAGE OF THE
REAR DERAILLEUR (RD21-EK13)
REPLACING THE JOCKEY CAGE - Rev. 01/ 06-2021 CAMPAGNOLO COMPONENTS - TECHNICAL MANUAL
2
Always wear protective gloves and glasses while working on the bicycle.
WARNING!
REPLACING THE JOCKEY CAGE - Rev. 01/ 06-2021 CAMPAGNOLO COMPONENTS - TECHNICAL MANUAL
3
REPLACING THE EKAR JOCKEY CAGE
THIS TECHNICAL MANUAL IS INTENDED FOR USE BY PROFESSIONAL MECHANICS.
Anyone who is not a qualied professional for bicycle assembly must not attempt to install and operate on
the components independently due to the risk of carrying out incorrect operations which could cause the
components to malfunction, resulting in accidents, physical injury or even death.
The actual product may dier from what is illustrated, as the specic purpose of these instructions is to
explain the procedures for using the component.
1.1 - TOOLS REQUIRED
ALLEN WRENCH TORX WRENCH T15
FIXED WRENCH FIXED WRENCH
3
mm
8 mm
8 mm
30 mm 8 mm
T15
Tools supplied by other manufacturers for components similar to Campagnolo®components, may
not be compatible with Campagnolo®components. Likewise, tools supplied by Campagnolo s.r.l.
may not be compatible with components supplied by other manufacturers. Always check with your
mechanic or the tool manufacturer to insure compatibility before using tools supplied by one manu-
facturer on components supplied by another.
!
1 - DISASSEMBLING THE EKAR REAR DERAILLEUR JOCKEY CAGE
(RD21-EK13)
The operations described in this procedure are only applicable to jockey cage
code RD21-EK13.
REPLACING THE JOCKEY CAGE - Rev. 01/ 06-2021 CAMPAGNOLO COMPONENTS - TECHNICAL MANUAL
4
1) Grasp the body and rotate the jockey
cage anti-clockwise until the screw is visible
(A - Fig.1).
2) Keeping the jockey cage locked, remove
the screw (A - Fig.2).
3) Accompany the jockey cage until the
spring is completely unloaded (Fig. 3).
WARNING!
Left-hand thread.
WARNING!
The rear derailleur is spring-loaded
and will quickly return to its starting
position.
Pay special attention when accom-
panying the jockey cage and keep
your fingers well away from points
at risk of crushing.
4) Remove the clutch cover (Fig.4 / Fig. 5).
WARNING!
Left-hand thread.
Fig.1 Fig.2
3
mm
Fig.4 Fig.5
8 mm
30 mm
Fig.3
REPLACING THE JOCKEY CAGE - Rev. 01/ 06-2021 CAMPAGNOLO COMPONENTS - TECHNICAL MANUAL
5
5) Remove the jockey cage fixing nut (Fig.6
/ Fig.7).
6) Use a T15 Torx wrench to remove the
nut on the jockey cage side, acting on the
clutch shaft (Fig.8 / Fig.9).
7) Remove the jockey cage and the sealing
ring (Fig. 10).
Fig.6 Fig.7
8 mm
Fig.8 Fig.9
T15
Fig.10
REPLACING THE JOCKEY CAGE - Rev. 01/ 06-2021 CAMPAGNOLO COMPONENTS - TECHNICAL MANUAL
6
2 - ASSEMBLING THE EKAR REAR DERAILLEUR JOCKEY CAGE
(RD21-EK13)
2.1 - TOOLS REQUIRED
Tools supplied by other manufacturers for components similar to Campagnolo®components, may
not be compatible with Campagnolo®components. Likewise, tools supplied by Campagnolo s.r.l.
may not be compatible with components supplied by other manufacturers. Always check with your
mechanic or the tool manufacturer to insure compatibility before using tools supplied by one manu-
facturer on components supplied by another.
!
Campagnolo spare parts must only be installed by qualied personnel with specialised knowledge, suitable
tools and sucient experience and who carefully follow the installation instructions. Failure to comply with
the above could result in product malfunctions, accidents, physical injury or death.
WARNING!
ALLEN WRENCH INSERT FOR ALLEN WRENCH
TORX WRENCH T15 INSERT FOR TORX WRENCH T15
TORQUE WRENCH INSERT FOR
TORQUE WRENCH
FIXED WRENCH
3
mm
8 mm
30 mm
T15
3
mm
T15
8
mm
REPLACING THE JOCKEY CAGE - Rev. 01/ 06-2021 CAMPAGNOLO COMPONENTS - TECHNICAL MANUAL
7
1) Insert the sealing ring, making sure it is
positioned correctly (Fig.1).
2) Apply “Loctite 2701” (Fig.2) to the clutch
shaft.
3) Install the jockey cage, hooking the spring
in the corresponding hole on the jockey
cage itself (Fig. 3).
4) Install the nut on the jockey cage side by
acting on the clutch shaft (Fig. 4).
Using a T15 Torx wrench, tighten to a torque
of 8 Nm (Fig.5).
Fig.1
Fig.2
Fig.3
Fig.4 Fig.5
T15
8 Nm
REPLACING THE JOCKEY CAGE - Rev. 01/ 06-2021 CAMPAGNOLO COMPONENTS - TECHNICAL MANUAL
8
6) Install the jockey cage fixing nut (Fig.7 /
Fig.7).
Tighten to a torque of 2.5 Nm (Fig.8).
5) Apply “Loctite 2701” (Fig. 6) to the jockey
cage fixing nut.
WARNING!
Observe the tightening torque.
A higher tightening torque could
damage the components inside the
rear derailleur, causing it to malfun-
ction.
7) Apply “Loctite medium 243” to the cover
(Fig.9).
8) Screw on the cover by hand (Fig.10).
9) Use an open-end spanner to tighten
the cover until a certain resistance is felt
(Fig.11).
WARNING!
Left-hand thread.
Fig.7 Fig.8
8
mm
Fig.6
Fig.9
Fig.10 Fig.11
8 mm
30 mm
2 Nm
2,5 Nm
REPLACING THE JOCKEY CAGE - Rev. 01/ 06-2021 CAMPAGNOLO COMPONENTS - TECHNICAL MANUAL
9
10) Load the spring by turning the
jockey cage ONE (360°) complete turn
counterclockwise (Fig. 12).
WARNING!
The rear derailleur is spring-loaded
and will quickly return to its starting
position.
Pay special attention when accom-
panying the jockey cage and keep
your fingers well away from points
at risk of crushing.
11) Install the jockey cage end-stop screw
and, using a 3 mm Allen wrench, tighten the
screw to a torque of 1 Nm (Fig.13).
WARNING!
Left-hand thread.
Fig.13
3
mm
1 Nm
Fig.12
360°

This manual suits for next models

1

Other CAMPAGNOLO Bicycle Accessories manuals
CAMPAGNOLO Bora 2003 User manual

CAMPAGNOLO

CAMPAGNOLO Bora 2003 User manual

CAMPAGNOLO Ergopower Record 12s User manual

CAMPAGNOLO

CAMPAGNOLO Ergopower Record 12s User manual

CAMPAGNOLO Brakes User manual

CAMPAGNOLO

CAMPAGNOLO Brakes User manual

CAMPAGNOLO Centaur Ultra-Torque Crankset User manual

CAMPAGNOLO

CAMPAGNOLO Centaur Ultra-Torque Crankset User manual

CAMPAGNOLO Neutron User manual

CAMPAGNOLO

CAMPAGNOLO Neutron User manual

CAMPAGNOLO Ekar 13S Chain User manual

CAMPAGNOLO

CAMPAGNOLO Ekar 13S Chain User manual

CAMPAGNOLO CENTAUR REAR DERAILLEUR User manual

CAMPAGNOLO

CAMPAGNOLO CENTAUR REAR DERAILLEUR User manual

CAMPAGNOLO Ekar 13S Rear Derailleur User manual

CAMPAGNOLO

CAMPAGNOLO Ekar 13S Rear Derailleur User manual

CAMPAGNOLO 10 Speed User manual

CAMPAGNOLO

CAMPAGNOLO 10 Speed User manual

CAMPAGNOLO Ergopower Record 12s User manual

CAMPAGNOLO

CAMPAGNOLO Ergopower Record 12s User manual

CAMPAGNOLO SHAMAL CARBON User manual

CAMPAGNOLO

CAMPAGNOLO SHAMAL CARBON User manual

CAMPAGNOLO Ergopower Record 12s User manual

CAMPAGNOLO

CAMPAGNOLO Ergopower Record 12s User manual

CAMPAGNOLO C10 HD-L User manual

CAMPAGNOLO

CAMPAGNOLO C10 HD-L User manual

CAMPAGNOLO 11 Speed User manual

CAMPAGNOLO

CAMPAGNOLO 11 Speed User manual

CAMPAGNOLO 11s User manual

CAMPAGNOLO

CAMPAGNOLO 11s User manual

CAMPAGNOLO EKAR 13s SPROCKETS User manual

CAMPAGNOLO

CAMPAGNOLO EKAR 13s SPROCKETS User manual

CAMPAGNOLO V3 User manual

CAMPAGNOLO

CAMPAGNOLO V3 User manual

CAMPAGNOLO SUPER RECORD WIRELESS CRANKSET User manual

CAMPAGNOLO

CAMPAGNOLO SUPER RECORD WIRELESS CRANKSET User manual

CAMPAGNOLO Ekar 13S Crankset User manual

CAMPAGNOLO

CAMPAGNOLO Ekar 13S Crankset User manual

CAMPAGNOLO 11 Speed User manual

CAMPAGNOLO

CAMPAGNOLO 11 Speed User manual

CAMPAGNOLO Ekar 13S Chain C-Link User manual

CAMPAGNOLO

CAMPAGNOLO Ekar 13S Chain C-Link User manual

CAMPAGNOLO Ekar 13S Rear Derailleur User manual

CAMPAGNOLO

CAMPAGNOLO Ekar 13S Rear Derailleur User manual

CAMPAGNOLO SUPER RECORD WIRELESS User manual
CAMPAGNOLO

CAMPAGNOLO SUPER RECORD WIRELESS User manual

CAMPAGNOLO ErgoBrain User manual

CAMPAGNOLO

CAMPAGNOLO ErgoBrain User manual

Popular Bicycle Accessories manuals by other brands

Galeo Galeo user guide

Galeo

Galeo Galeo user guide

Shimano DURA-ACE FC-R9100 Dealer's manual

Shimano

Shimano DURA-ACE FC-R9100 Dealer's manual

BAFANG BT C01.340.UART Customer's manual

BAFANG

BAFANG BT C01.340.UART Customer's manual

Minshine T154 Series manual

Minshine

Minshine T154 Series manual

Cateye TRIPLE SHOT PRO HL-EL830RC instruction manual

Cateye

Cateye TRIPLE SHOT PRO HL-EL830RC instruction manual

Navad Trail 200 Quick manual guide

Navad

Navad Trail 200 Quick manual guide

Specialized Elite CylcoComputer user manual

Specialized

Specialized Elite CylcoComputer user manual

Sigma BC 16.16 manual

Sigma

Sigma BC 16.16 manual

Playcore Dero Setbacks installation instructions

Playcore

Playcore Dero Setbacks installation instructions

VDO Cyclecomputing x3dw instruction manual

VDO Cyclecomputing

VDO Cyclecomputing x3dw instruction manual

Cateye RAPID X2 manual

Cateye

Cateye RAPID X2 manual

buratti meccanica Clorofilla Trail Use and maintenance manual

buratti meccanica

buratti meccanica Clorofilla Trail Use and maintenance manual

Shimano SG-8R20 Service instructions

Shimano

Shimano SG-8R20 Service instructions

BOB YAK owner's manual

BOB

BOB YAK owner's manual

APLIC 303303/20190717TW012 user manual

APLIC

APLIC 303303/20190717TW012 user manual

Polini HI-SPEED E-BIKE quick start guide

Polini

Polini HI-SPEED E-BIKE quick start guide

SRAM AXS BlipBox user manual

SRAM

SRAM AXS BlipBox user manual

Shimano FD-RX810 Dealer's manual

Shimano

Shimano FD-RX810 Dealer's manual

manuals.online logo
manuals.online logoBrands
  • About & Mission
  • Contact us
  • Privacy Policy
  • Terms and Conditions

Copyright 2025 Manuals.Online. All Rights Reserved.