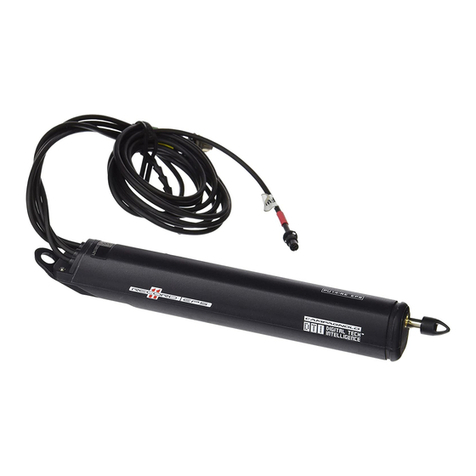
ATTENZIONE!
TUTTE LE OPERAZIONI DI CONNESSIONE, MONTAGGIO, SMONTAGGIO E REGOLAZIONE SISTEMA DI
INTERFACCIA EPS DEVONO ESSERE ESEGUITE SOLO ED ESCLUSIVAMENTE DA UN SERVICE CENTER
CAMPAGNOLO, UN PRO-SHOP CAMPAGNOLO O UN MECCANICO SPECIALIZZATO NEL MONTAGGIO DEI
GRUPPI EPS. VI PREGHIAMO INOLTRE DI RICORDARE CHE LA MANOMISSIONE O IL MONTAGGIO SCORRETTO
O INCOMPLETO, ANCHE DI UN SOLO COMPONENTE DEL GRUPPO EPS, COMPORTA AUTOMATICAMENTE
LA DECADENZA DA OGNI GARANZIA.
NOTA PER MECCANICI SPECIALIZZATI
Vi ricordiamo che tutte le procedure di montaggio, smontaggio, regolazione e manutenzione della trasmissione
EPS sono descritte all’interno del manuale tecnico EPS, disponibile in formato pdf nel nostro sito internet www.
campagnolo.com.
Questa interfaccia V3 è compatibile solo con le Power Unit V3.
In caso di montaggio/smontaggio e manutenzione dei componenti si deve spegnere la trasmissione EPS posizio-
nando l'apposita fascia magnetica di spegnimento (B - Fig.1) nella zona sensibile presente sulla Power Unit (Fig. 1).
Questa interfaccia presenta il connettore per la carica della batteria della Power Unit V3 sotto il tappino in gomma
(Fig.1). Per la procedura di ricarica, fate riferimento a quanto riportato nelle istruzioni del caricabatterie per Power
Unit V2 / V3.
AVVERTENZA: Il danneggiamento del connettore del caricabatterie, oltre alla necessità di sostituire il caricabatte-
rie stesso, può anche comportare il danneggiamento dell’unità di potenza, quindi prestate particolare attenzione
alla procedura presente nello User Manual del caricabatterie V2/V3.
AVVERTENZA: Per garantire una corretta procedura di carica, prima di effettuare la connessione, accertatevi che
il connettore del caricabatterie, della PU V2 o dell'interfaccia V3, sia perfettamente asciutto e pulito eliminando
ogni eventuale residuo di acqua o sporcizia. E' fondamentale che il connettore rimanga perfettamente pulito,
eventuali residui sono infatti molto difficili da rimuovere e potrebbero compromettere la corretta procedura di
ricarica della Power Unit.
AVVERTENZA: Il tappino in gomma dell'interfaccia V3, deve essere sollevato per permettere l'inserimento del
connettore di ricarica (Fig.2). Fate attenzione a non ruotare il tappino stesso, poichè la connessione in gomma
potrebbe spezzarsi (Fig.2).
L’indicatore luminoso, normalmente spento durante il funzionamento, può mostrare i livelli di carica residui di batteria
oppure eventuali anomalie del gruppo EPS.
L’indicatore luminoso, come indicato nella tabella LIVELLI DI CARICA BATTERIA, mostra i livelli di carica residua della
batteria quando richiesto, tramite una breve pressione di uno dei due tasti “mode” posizionati su entrambi i comandi
EPS (fate riferimento ai fogli istruzioni forniti in dotazione con i comandi Ergopower EPS / Bar End EPS).
In condizioni di non utilizzo della bicicletta e sistema EPS acceso, l’indicatore luminoso si attiva brevemente lam-
peggia con colore rosso a bassa frequenza ed ad intervalli di tempo predeterminati, quando la carica residua della
batteria attraversa scende sotto la soglia del 6%.
In condizioni di utilizzo della bicicletta, l’indicatore luminoso si attiva brevemente ed ad intervalli di tempo predeter-
minati costanti ogni 5 minuti, quando la carica residua della batteria attraversa scende sotto la soglia del 6%.
Durante la fase di ricarica, cioè con il caricabatterie inserito, l’indicatore luminoso rimane attivo e mostra costante-
mente lo stato di carica residua della batteria.
L’indicatore luminoso mostra eventuali anomalie del sistema EPS con lampeggi ad alta frequenza dell’indicatore
luminoso come indicato nella tabella riportata di seguito.
Questa Interfaccia possiede al suo interno un sensore ANT+™ed un sensore Bluetooth Smart (Bluetooth Low Energy)
ed è perciò predisposta per connettere il sistema EPS a:
•ciclocomputerscompatibiliconsensoriANT+™, predisposti per la lettura dei parametri di gruppi di trasmissione
elettroniche, per i dettagli riferirsi alle informazioni dei singoli ciclo computer;
•ciclocomputerpredispostiperilcontrolloremotoANT+TM tramite i tasti MODE dei comandi Ergopower, in parti-
colare il MODE destro per lo scorrimento della pagina visualizzata dal ciclo computer ed il MODE sinistro per creare
il Lap. Per i dettagli fate riferimento alle informazioni dei singoli ciclo computer;
•supportielettronici(smartphone/tablet)dotatidisistemaBluetoothReady/SmartReady, nei quali sia installato il
software o l’applicazione ‘’MyCampy™, permettendo la visualizzazione di dati di funzionamento e la personalizzazio-
ne del sistema EPS.
Le specifiche dei supporti elettronici compatibili sono consultabili sul sito www.campagnolo.com nell’area:
‘’MyCampy™’’.
In caso di montaggio/smontaggio e manutenzione dei componenti si deve spegnere la trasmissione EPS posizio-
nando l'apposita fascia magnetica di spegnimento (B - Fig.1) nella zona sensibile presente sulla Power Unit (Fig. 1).
IMPORTANTE!
Per la pulizia della Interface Unit EPS, utilizzate solo acqua e sapone neutro, non utilizzate alcool, acetone o sol-
venti.
NOTA
Non lavate mai la vostra bicicletta con acqua a pressione. L’acqua a pressione, perfino quella che esce dall’ugello di
una canna da giardino, può oltrepassare le guarnizioni ed entrare all’interno dei vostri componenti Campagnolo®,
danneggiandoli irreparabilmente. Lavate la vostra bicicletta e i componenti Campagnolo®pulendo delicatamente
con acqua e sapone ed asciugandoli accuratamente.
ATTENZIONE!
Leggete attentamente le istruzioni riportate nel presente manuale. Questo manuale è parte integrante del pro-
dotto e deve essere conservato in un luogo sicuro per future consultazioni.
COMPETENZE MECCANICHE - La maggior parte delle operazioni di manutenzione e riparazione della biciclet-
ta richiedono competenze specifiche, esperienza e attrezzatura adeguata. La semplice attitudine alla meccanica
potrebbe non essere sufficiente per operare correttamente sulla vostra bicicletta. Se avete dubbi sulla vostra capacità
di effettuare tali operazioni, rivolgetevi a personale specializzato.
“UN INCIDENTE” – Vi preghiamo di notare che nel presente manuale si fa riferimento al fatto che potrebbe veri-
ficarsi “un incidente”. Qualunque incidente può provocare danni alla bicicletta, ai suoi componenti e, soprattutto,
potrebbe essere causa di gravi ferite o persino di morte per voi o per un passante.
USO DESIGNATO - Questo prodotto Campagnolo®è stato progettato e fabbricato per essere usato esclusivamente
su biciclette del tipo “da corsa” utilizzate solo su strade con asfalto liscio o in pista. Qualsiasi altro uso di questo
prodotto, come fuori strada o sentieri è proibito.
CICLO VITALE - USURA - NECESSITA’ DI ISPEZIONE - Il ciclo vitale dei componenti Campagnolo®dipende da molti
fattori, per esempio il peso dell’utilizzatore e le condizioni di utilizzo. Urti, cadute, incidenti, più in generale un uso
improprio o aggressivo possono compromettere l’integrità strutturale delle componenti, riducendone considerevol-
mente il ciclo vitale. Alcuni componenti sono inoltre soggetti a usura nel tempo. Vi preghiamo di far ispezionare
regolarmente la bicicletta e i suoi componenti da un meccanico qualificato per controllare che non vi siano cricche,
deformazioni, segni di logoramento o usura. Durante questi controlli, è necessario smontare i componenti della
bicicletta, soprattutto i pedali. Se l’ispezione evidenziasse qualsiasi deformazione, cricca, segni di impatto o di fati-
ca, non importa quanto piccoli, rimpiazzate immediatamente il componente; anche i componenti eccessivamente
usurati devono essere immediatamente sostituiti. La frequenza delle ispezioni dipende da molti fattori; contattate
un rappresentante della Campagnolo S.r.l. per scegliere l’intervallo più adatto a voi. Se pesate più di 82 kg/180 lbs,
dovete prestare particolare attenzione e fare ispezionare la vostra bicicletta con una maggiore frequenza (rispetto
a chi pesa meno di 82 kg/180 lbs) per controllare se vi siano cricche, deformazioni, indicazioni di fatica o usura.
Verificate con il vostro meccanico che i componenti Campagnolo®che avete scelto siano adatti all’uso che ne farete
e stabilite con lui la frequenza delle ispezioni.
Avviso Importante su PRESTAZIONI, SICUREZZA E GARANZIA -
Gentile cliente, ti ricordiamo che per ottenere
le migliori prestazioni della tua trasmissione EPS e per non compromettere la sicurezza, le prestazioni, la longevità e la
funzionalità di questa, è assolutamente necessario utilizzare i 6 componenti della trasmissione EPS con i componenti della
trasmissione meccanica ad 11 velocità Campagnolo; in nessun caso è possibile utilizzare i componenti EPS con componenti
non di produzione Campagnolo.
L’utilizzatore di questo prodotto Campagnolo®riconosce espressamente che l’uso della bicicletta può comportare
dei rischi che includono la rottura di un componente della bicicletta come pure altri rischi, dando luogo a incidenti,
lesioni fisiche o morte. Acquistando e utilizzando questo prodotto Campagnolo®, l’utilizzatore accetta espressamen-
te, volontariamente e coscientemente e/o assume tali rischi e accetta di non imputare alla Campagnolo S.r.l. la colpa
di qualsiasi danno che ne potrebbe derivare.
Se avete qualsiasi domanda vi preghiamo di contattare il vostro meccanico o il più vicino rivenditore Campagnolo®
per ottenere ulteriori informazioni.
1 -
MONTAGGIO DEL SISTEMA DI INTERFACCIA
3 -
INDICATORE LUMINOSO
4 -
FUNZIONI WIRELESS
WARNING!
Carefully read, follow and understand the instructions given in this manual. It is an essential part of the product,
and you should keep it in a safe place for future reference.
MECHANIC QUALIFICATION - Please be advised that many bicycle service and repair tasks require specialized
knowledge, tools and experience. General mechanical aptitude may not be sufficient to properly service or repair
your bicycle. If you have any doubt whatsoever regarding your service/repair ability, please take your bicycle to a
qualified repair shop.
INTENDED USE - This Campagnolo®product is designed and manufactured for use only on road racing style
bicycles that are ridden only on smooth road or track surfaces. Any other use of this product, such as off-road or on
trails is forbidden.
"AN ACCIDENT" - Please note that throughout this manual, reference is made that "an accident" could occur. Any
accident could result in damage to your bicycle, its components and, more importantly, could cause you or a bystan-
der to sustain severe personal injury or even death.
LIFESPAN - WEAR - INSPECTION REQUIREMENT - The lifespan of Campagnolo®components depends on many
factors, such as rider size and riding conditions. Impacts, falls, improper use or harsh use in general may compromise
the structural integrity of the components and significantly reduce their lifespan. Some components are also subject
to wear over time. Please have your bicycle and its components regularly inspected by a qualified mechanic for any
cracks, deformation, signs of fatigue or wear. Disassembly your bicycle components and especially the pedals, is
required during these inspections. If the inspection reveals any deformation, cracks, impact marks or stress marks,
no matter how slight, immediately replace the component; components that have experienced excessive wear also
need immediate replacement. The frequency of inspection depends on many factors; check with your authorized
representative of Campagnolo S.r.l. to select a schedule that is best for you. If you weigh 82 kg/180 lbs or more, you
must be especially vigilant and have your bicycle inspected more frequently (than someone weighting less than 82
kg/180 lbs) for any evidence of cracks, deformation, or other signs of fatigue or stress. Check with your mechanic to
discuss whether the components you selected are suitable for your use, and to determine the frequency of inspec-
tions.
Important PERFORMANCE, SAFETY and WARRANTY Notice - Dear customer, Please remember that to maximise
the performance of your EPS drivetrain and ensure that its safety, performance, longevity and functionality are not
compromised, the 6 components of the EPS drivetrain must be used with the components of the Campagnolo 11
speed mechanical drivetrain; EPS components cannot be used together with components not manufactured by
Campagnolo.
The user of this Campagnolo®product expressly recognizes that there are risks inherent in bicycle riding, including
but not limited to the risk that a component of the bicycle can fail, resulting in an accident, personal injury or death.
By his purchase and use of this Campagnolo®product, the user expressly, voluntarily and knowingly accepts and/or
assumes these risks and agrees to hold Campagnolo S.r.l. harmless against any resulting damages.
If you ever have any questions, please contact your mechanic or your nearest Campagnolo®dealer for additional
information.
ACHTUNG!
Lesen Sie die Anweisungen in diesem Handbuch bitte aufmerksam durch. Dieses Handbuch ist integrierender
Bestandteil des Produkts und ist an einem sicheren Ort aufzubewahren, um es später jederzeit wieder zu Rate
ziehen zu können.
MECHANISCHE KENNTNISSE - Ein Großteil der Wartungs- und Reparaturarbeiten am Fahrrad setzen spezifische
Kenntnisse, einschlägige Erfahrung und geeignetes Werkzeug voraus. Mechanisches Talent allein könnte nicht
ausreichen, um an Ihrem Fahrrad fachgerechte Wartungs- und Reparaturarbeiten auszuführen. Sollten Sie an Ihren
Fähigkeiten zweifeln, diese Arbeiten korrekt durchzuführen, so wenden Sie sich bitte an Ihren Fachhändler.
„UNFÄLLE“ – Wir machen Sie darauf aufmerksam, dass in dieser Anleitung wiederholt auf die Möglichkeit von
Unfällen hingewiesen wird.
VERWENDUNGSZWECK - Dieses Campagnolo®Produkt wurde ausschließlich für den Gebrauch an Rennrädern
für den Einsatz auf asphaltierten Straßen oder Rennbahnen entwickelt und hergestellt. Jeglicher andere Gebrauch
dieses Produkts wie beispielsweise für Geländefahrten oder auf unbefestigten Wegen ist verboten.
LEBENSDAUER - ABNUTZUNG – NOTWENDIGKEIT DER INSPEKTION - Die Lebensdauer der Campagnolo®-
Komponenten hängt von vielen Faktoren wie z.B. vom Gewicht des Fahrers und von den Einsatzbedingungen
ab. Stöße, Schläge, Stürze und ganz generell ungeeigneter Gebrauch können die strukturelle Unversehrtheit der
Komponenten beeinträchtigen und deren Lebensdauer dadurch erheblich verkürzen. Einige Komponenten nutzen
sich außerdem im Laufe der Zeit ab. Wir bitten Sie, Ihr Fahrrad regelmäßig von einem Fahrradmechaniker untersu-
chen zu lassen, um Risse, Deformationen oder andere Ermüdungs- oder Abnutzungserscheinungen festzustellen.
Für diese Kontrollen müssen die Komponenten Ihres Rennrads, insbesondere die Pedale demontiert werden.
Sollten bei der Inspektion auch nur die geringsten Anzeichen von Deformationen, Rissen, Schlageinwirkungen oder
Ermüdung festgestellt werden, so ist die betreffende Komponente sofort zu ersetzen, auch übermäßig abgenutzte
Komponenten sind sofort zu auszutauschen. Die Inspektionshäufigkeit hängt von vielen Faktoren ab; wenden
Sie sich an einen Vertreter von Campagnolo S.r.l., um das für Sie am besten geeigneten Inspektionsintervall zu
wählen. Wenn Sie mehr als 82 kg/180 lbs wiegen, sollten Sie besonders darauf achten, dass Ihr Fahrrad häufiger
(als bei Personen, die weniger als 82 kg/180lbs wiegen) inspektioniert wird, um festzustellen, ob etwaige Risse,
Deformationen, Anzeichen von Ermüdung oder Abnutzung vorhanden sind. Prüfen Sie zusammen mit Ihrem
Mechaniker, ob die von Ihnen ausgewählten Campagnolo®-Komponenten für die vorgesehenen Einsatzbedingungen
geeignet sind und legen Sie gemeinsam mit ihm das Inspektionsintervall fest.
Wichtiger Hinweis zu PRODUKTLEISTUNG, SICHERHEIT und GARANTIE -
Sehr geehrter Kunde, wir möchten Sie
daran erinnern, dass es unbedingt notwendig ist, die 6 Komponenten des EPS-Antriebssystems mit den Komponenten
des mechanischen 11-Gang-Antriebssystems von Campagnolo zu benutzen, um die besten Leistungen aus Ihrem EPS-
Antriebssystem herauszuholen und die Sicherheit, die Leistungen und die Lebensdauer desselben nicht zu beeinträchtigen.
Die EPS-Komponenten dürfen keinesfalls mit nicht von Campagnolo hergestellten Komponenten benutzt werden.
Der Benutzer dieses Campagnolo®-Produkts erkennt ausdrücklich an, dass der Gebrauch des Fahrrads Gefahren mit
sich bringen kann, welche den Bruch einer Fahrradkomponente sowie auch andere Risken umfassen und Unfälle mit
körperlichen und sogar lebensgefährlichen Verletzungen verursachen können. Mit dem Kauf und Gebrauch dieses
Campagnolo®-Produkts akzeptiert der Benutzer diese Gefahren und/oder geht diese Risiken ausdrücklich, freiwillig
und bewusst ein. Dabei sagt er zu, dass der Campagnolo S.r.l. niemals die Schuld für irgendeinen möglicherweise
daraus entstehenden Schaden zuweisen wird.
Falls Sie Fragen haben, wenden Sie sich für weitere Informationen bitte an Ihren Mechaniker oder an den nächst-
gelegenen Campagnolo®-Fachhändler.
LED VERDE FISSO da 100% a 60% di carica
CONTINUOUSLY LIT GREEN LED Between 100 % and 60 % charge
LED LEUCHTET FEST GRÜN Von 100 % bis 60 % Ladung
LED VERDE LAMPEGGIANTE (a bassa frequenza) da 60% a 40% di carica
FLASHING GREEN LAMP (low frequency) Between 60 % and 40 % charge
LED BLINKT GRÜN (langsam) Von 60 % bis 40 % Ladung
LED GIALLO FISSO da 40% a 20% di carica
CONTINUOUSLY LIT YELLOW LED Between 40 % and 20 % charge
LED LEUCHTET FEST GRÜN Von 40 % bis 20 % Ladung
LED ROSSO FISSO da 20% a 6% di carica
CONTINUOUSLY LIT RED LED Between 20 % and 6 % of the charge
LED LEUCHTET FEST ROT Von 20 % bis 6 % Ladung
LED ROSSO LAMPEGGIANTE (a bassa frequenza)
da 6% a 0% di carica
FLASHING RED LAMP (low frequency) Between 6 % and 0 % charge
LED BLINKT ROT (langsam) Von 6 % bis 0 % Ladung
LED PROBLEMA COSA FARE
luce bianca ad alta
frequenza Anomalia alla Power Unit per spegnere il led, premere per breve tempo uno dei
due tasti mode posti sui comandi. Se il problema persiste
contattate il servizio assistenza.
luce gialla ad alta
frequenza Anomalia
al deragliatore o alla Power Unit
luce verde ad alta
frequenza Anomalia
al cambio o alla Power Unit
per spegnere il led, premere per breve tempo il tasto
mode posto sul comando del cambio. Se il problema
persiste contattate il servizio assistenza.
luce viola ad alta
frequenza Anomalia al comando
del cambio o alla Interface Unit
per spegnere il led, premere per breve tempo il tasto
mode posto sul comando del cambio.
Se il problema persiste contattate il servizio assistenza.
luce blu ad alta
frequenza
Anomalia al comando
del deragliatore o alla Interface
Unit
per spegnere il led, premere per breve tempo il tasto
mode posto sul comando del deragliatore. Se il proble-
ma persiste contattate il servizio assistenza.
WARNING!
ALL CONNECTION, INSTALLATION, REMOVAL AND ADJUSTMENT OPERATIONS OF THE EPS INTERFACE
SYSTEM MUST ONLY BE CARRIED OUT BY A CAMPAGNOLO SERVICE CENTER, A CAMPAGNOLO PRO-SHOP
OR A MECHANIC SPECIALISED IN INSTALLING EPS SYSTEMS.
ANY TAMPERING WITH OR INCORRECT OR INCOMPLETE INSTALLATION OF ANY PART OF THE EPS SYSTEM
WILL AUTOMATICALLY VOID THE WARRANTY.
NOTE FOR SPECIALISED MECHANICS!
Please remember that all assembly, disassembly, adjustment and maintenance procedures for the EPS drivetrain are
described in the EPS technical manual, which is available in PDF format on our internet site www.campagnolo.com.
This V3 interface unit is compatible only with the V3 Power Units.
When installing/removing components, the EPS drivetrain must be switched off by placing the special power off ma-
gnet (B - Fig. 1) in the sensitive area on the Power Unit (Fig. 1).
This interface unit has a connector to charge the V3 Power Unit battery under the rubber cap (Fig.1). For the rechar-
ging procedure see the instructions for the V2 / V3 Power Unit battery charger.
CAUTION: In addition to requiring the replacement of the battery charger itself, damage to the battery charger's
connector can also result in damage to the power unit. Maximum caution must therefore be used when performing
the procedure indicated in the User Manual for the V2/V3 battery charger.
CAUTION: In order to guarantee a correct charging procedure, before making the connection ensure that the PU
V2 or the V3 interface battery charger connector is perfectly dry and clean, removing any water or dirt residue.
The connector must stay perfectly clean. In fact, any residue is very difficult to remove and could compromise the
correct Power Unit recharging procedure.
CAUTION: The V3 interface unit rubber cap must be lifted in order to allow the recharging connector to be inser-
ted (Fig. 2). Take care not to rotate the cap itself because the rubber connection could break (Fig. 2).
The indicator lamp, which is normally off during use, may light to indicate the residual battery charge or to indicate
EPS drivetrain faults.
As indicated in the BATTERY CHARGE LEVEL table, the indicator lamp displays the residual battery charge when
requested by briefly pressing one of the two “mode” buttons on the EPS control sets (see the instruction sheets
included with the EPS Ergopower / EPS Bar End controls).
When the cycle is not in use and the EPS system is left on, the indicator lamp flashes red briefly at low frequency and
at predetermined time intervals when residual battery charge reaches 6%.
When the bicycle is not used, the indicator lamp will flash briefly at a fixed predetermined time interval of 5 minutes
when residual battery charge drops below 6%.
During recharging, while the battery charger is connected, the indicator lamp remains lit and displays the battery
charge level continuously.
The indicator lamp indicates any EPS system faults by flashing at high frequency as described in the following table.
This interface unit contains an ANT+™sensor and a Bluetooth Smart sensor (Bluetooth Low Energy) and it is therefore
predisposed to connect the EPS system to:
•cyclecomputerswithANT+™sensors, predisposed to read the electronic drivetrain unit parameters. For details see
the information on the individual cycle computer
• cycling computers predisposed for remote ANT+TM monitoring using the MODE keys on the Ergopower unit's
controls, namely the right MODE key for scrolling the screen displayed on the cycling computer, and the left MODE
key for creating Laps. For more details, please refer to the information on the individual cycling computers;
•electronicdevices(smartphone/tablet)withBluetoothReady/SmartReadysystemwherethe‘’MyCampy™’’ softwa-
re or app is installed, allowing the operating data to be displayed and the EPS system to be personalised.
Specifications on compatible electronic devices can be found at www.campagnolo.com in the area: ‘’MyCampy™’’.
When installing/removing components, the EPS drivetrain must be switched off by placing the special power off ma-
gnet (B - Fig. 1) in the sensitive area on the Power Unit (Fig. 1).
IMPORTANT!
Use only water and neutral detergent to clean the EPS Interface Unit. Do not use alcohol, acetone or solvents.
NOTE
Never wash your bicycle using pressurised water. Pressurised water - even from a normal garden hose - may infiltrate
through the seals and into your Campagnolo®components, causing irreparable damage. Wash your bicycle and
Campagnolo®components by carefully cleaning them with soap and water and drying them thoroughly.
1 -
INTERFACE SYSTEM ASSEMBLY
3 -
INDICATOR LAMP
4 -
WIRELESS FEATURES
LED PROBLEM WHAT TO DO
white lamp, flashing
at high frequency Power Unit fault press one of the two mode buttons on the controls briefly
to switch off the LED. Contact the support service if the pro-
blem persists.
yellow lamp, flashing
at high frequency Front derailleur or
Power Unit fault
green lamp, flashing
at high frequency Rear derailleur
or Power Unit fault
press the mode button on the rear derailleur control brie-
fly to switch off the LED. Contact the support service if the
problem persists.
purple lamp, flashing
at high frequency
Rear derailleur control
fault
or Interface Unit fault
press the mode button on the rear derailleur control brie-
fly to switch off the LED. Contact the support service if the
problem persists.
blue lamp, flashing
at high frequency
Front derailleur control
fault
or Interface Unit fault
press the mode button on the front derailleur control brie-
fly to switch off the LED. Contact the support service if the
problem persists.
ACHTUNG!
ALLE ANSCHLUSS-, EINBAU-, AUSBAU- UND EINSTELLUNGSARBEITEN AN IHREM
EPS-VERBINDUNGSSYSTEMS
DÜRFEN AUSSCHLIESSLICH VON EINEM CAMPAGNOLO-SERVICECENTER, EINEM CAMPAGNOLO-PRO-SHOP ODER
EINEM AUF DIE MONTAGE VON EPS-GRUPPEN SPEZIALISIERTEN MECHANIKER DURCHGEFÜHRT WERDEN.
WIR BITTEN SIE AUSSERDEM ZU BEDENKEN, DASS EINE BESCHÄDIGUNG ODER EINE FALSCHE ODER
UNVOLLSTÄNDIGE MONTAGE VON AUCH NUR EINER KOMPONENTE DER EPS-GRUPPE AUTOMATISCH ZUM
VERLUST JEGLICHER GARANTIEANSPRÜCHE FÜHRT.
HINWEISE FÜR SPEZIALISIERTE MECHANIKER!
Es wird daran erinnert, dass alle Arbeiten für den Einbau, den Ausbau, die Einstellung und die Wartung des EPS-
Antriebssystems im technischen Handbuch EPS beschrieben werden, das auf unserer Homepage www.campagnolo.
com im PDF-Format zur Verfügung steht.
Dieses V3 Interface ist nur mit den V3 Power Units kompatibel.
Bei der Montage/Demontage und Wartung der Komponenten muss das EPS-Antriebssystem durch Anbringen des
magnetischen Abschaltbands (B - Abb. 1) im sensiblen Bereich auf der Power Unit (Abb. a) ausgeschaltet werden.
Dieses Interface enthält den Stecker zum Aufladen der Batterie der Power Unit V3 unter dem Gummistöpsel (Abb.1).
Für das Aufladeverfahren beachten Sie bitte die Gebrauchsanleitung des Batterieladegeräts für Power Unit V2 / V3.
HINWEIS: Ein beschädigter Stecker des Batterieladegeräts kann, neben der Notwendigkeit des Austauschs des
Batterieladegeräts, auch eine Beschädigung der Power Unit bewirken. Schenken Sie daher dem Verfahren in der
Bedienungsanleitung des Batterieladegeräts V2/V3 besondere Aufmerksamkeit.
WARNHINWEIS : Um ein korrektes Ladeverfahren zu gewährleisten, vor dem Anschluss sicherstellen, dass der
Stecker des Batterieladegeräts, der PU V2 oder des Interface V3 perfekt trocken und sauber ist und ggf. alle
Wasser- oder Schmutzrückstände entfernen. Es ist äußerst wichtig, dass der Stecker perfekt sauber bleibt.
Eventuelle Rückstände sind nämlich sehr schwer zu entfernen und können den korrekten Ladevorgang der Power
Unit beeinträchtigen.
WARNHINWEIS: Der Gummistöpsel des Interface V3, muss angehoben werden, um den Aufladestecker (Abb.
2) einsetzen zu können. Achten Sie darauf den Stöpsel selbst nicht zu drehen, da die Gummiverbindung reißen
könnte (Abb. 2).
Die Leuchtanzeige, die normalerweise während des Betriebs ausgeschaltet ist, kann den Ladezustand der Batterie
oder eventuelle Störungen der EPS-Gruppe anzeigen.
Die Leuchtanzeige zeigt, wie in der Tabelle BATTERIELADEZUSTAND beschrieben, bei Bedarf die Restladung der
Batterie an, wenn ein kurzer Druck auf eine der zwei Mode-Tasten auf den beiden EPS-Schaltgriffen ausgeübt wird
(siehe den EPS-Schaltgriffen Ergopower / EPS-Lenkerendschalthebeln beiliegendes Anweisungsblatt).
Wenn das Fahrrad nicht benutzt wird und das EPS-System eingeschaltet ist, blinkt die Leuchtanzeige schnell und in
festgelegten Zeitabständen rot, wenn die Restladung der Batterie die Schwelle von 6% unterschreitet.
Wenn das Fahrrad benutzt wird, aktiviert sich die Leuchtanzeige kurz in festgelegten, konstanten Zeitabständen alle
5 Minuten, wenn die Restladung der Batterie die Schwelle von 6% unterschreitet.
Während des Ladevorgangs, d.h. mit verbundenem Batterieladegerät, bleibt die Leuchtanzeige aktiv und zeigt kon-
tinuierlich die Restladung der Batterie an.
Die Leuchtanzeige zeigt eventuelle Störungen des EPS-Systems durch schnelles Blinken gemäß der in der Folge
abgebildeten Tabelle an.
In diesem Interface ist ein ANT+™Sensor und ein Bluetooth Smart (Bluetooth Low Energy) Sensor eingebaut. Dadurch
kann das EPS-System an folgende Vorrichtungen angeschlossen werden:
• mit ANT+™Sensoren kompatible Fahrradcomputer, die für das Auslesen der Parameter elektronischer
Antriebsgruppen vorgerüstet sind. Für die Einzelheiten wird auf die Informationen zu den einzelnen Fahrradcomputern
verwiesen
•Zyklus-ComputervorgerüstetfürdieFernsteuerungANT+TM über die MODE-Tasten der Ergopower Schaltgriffe,
insbesondere die rechte MODE-Taste zum Scrollen durch die vom Zyklus-Computer angezeigte Seite und die linke
MODE-Taste zum Erstellen der Laps. Für Einzelheiten wird auf die Informationen zu den einzelnen Zyklus-Computern
verwiesen;
• mit Bluetooth Ready/Smart Ready-System ausgestattete elektronische Halterungen (für Smartphone/Tablet), in
denen die Software oder die App ‘„MyCampy™’’ installiert ist, wodurch die Betriebsdaten und die Personalisierung
des EPS-Systems angezeigt werden können.
Die Spezifikationen der kompatiblen elektronischen Halterungen können auf der Website www.campagnolo.com im
Bereich: ‘„MyCampy™’’ eingesehen werden.
Bei der Montage/Demontage und Wartung der Komponenten muss das EPS-Antriebssystem durch Anbringen des
magnetischen Abschaltbands (B - Abb. 1) im sensiblen Bereich auf der Power Unit (Abb. 1) ausgeschaltet werden.
WICHTIG!
Für die Reinigung der EPS Interface Unit ausschließlich Wasser und ph-neutrale Seife benutzen. Keinesfalls
Alkohol, Aceton oder Lösemittel benutzen.
HINWEIS
Waschen Sie Ihr Fahrrad niemals mit unter Druck stehendem Wasser. Unter Druck stehendes Wasser, sogar das aus
einem Gartenschlauch, kann in die Dichtungen und in das Innere Ihrer Komponenten von Campagnolo®eindringen
und diese irreparabel beschädigen. Waschen Sie Ihr Fahrrad und die Komponenten von Campagnolo®vorsichtig mit
Seifenwasser und trocknen Sie diese sorgfältig ab.
1 -
EINBAU DES VERBINDUNGSSYSTEMS
3 -
LEUCHTANZEIGE
5 -
WARTUNG
LED PROBLEM ABHILFE
blinkt schnell weiß Störung der Power Unit Zum Ausschalten der Led kurz eine der beiden Mode-
Tasten an den Drehgriffen drücken. Wenn das Problem
weiter besteht, den Kundendienst kontaktieren.
blinkt schnell gelb Störung des Umwerfers oder der
Power Unit
blinkt schnell grün Störung des Schaltwerks oder
der Power Unit
Zum Ausschalten der Led kurz die Mode-Taste am
Drehgriff der Schaltung drücken. Wenn das Problem wei-
ter besteht, den Kundendienst kontaktieren.
blinkt schnell
violett
Störung des Schaltgriffs
des Schaltwerks oder
der Interface Unit
Zum Ausschalten der Led kurz die Mode-Taste am
Drehgriff der Schaltung drücken. Wenn das Problem wei-
ter besteht, den Kundendienst kontaktieren.
blinkt schnell blau Störung des Schaltgriffs
des Umwerfers
oder der Interface Unit
Zum Ausschalten der Led kurz die Mode-Taste am
Drehgriff der Kettenschaltung drücken. Wenn das Pro-
blem weiter besteht, den Kundendienst kontaktieren.
Printed on 100% recycled paper cod.
7225901
- Rev00 - 04/2017
© Campagnolo S.r.l. 2017
CAMPAGNOLO S.R.L. CAMPAGNOLO IBERICA S.L.
Via della Chimica, 4
36100 Vicenza - ITALY
Phone: +39-0444-225600
Fax: +39-0-444-225606
Avda. de Los Huetos 46 Pab. 3-2afila
01010 Vitoria - SPAIN
Phone: +34-945-2171195
Fax:+34-945-2171198
CAMPAGNOLO DEUTSCHLAND GMBH
CAMPAGNOLO NORTH AMERICA INC.
Alte Garten 62
51371 Leverkusen - GERMANY
Phone: +49-214-206 95 3-0
Fax: +49-214-206 95 3-15
5431 Avenida Encinas, Suite C
Carlsbad CA 92008 - U.S.A.
Phone: +1-760-9310106
Fax: +1-760-9310991
CAMPAGNOLO FRANCE SAS CAMPAGNOLO JAPAN LTD.
ZA du Tissot
42530 St Genest - Lerpt - FRANCE
Phone: +33-477-556305
Fax: +33-477-556345
65 Yoshida-cho, Naka-ku - 231-0041
Yokohama - JAPAN
Phone: +81-45-2642780
Fax: +81-45-2418030
PRIMATEK LTD
No 4, Gongyequ 10th Rd., Nantue Dist.
TAICHUNG CITY 408 - TAIWAN (R.O.C.)
Phone: +886-4-23506831
Fax: +886-4-23596764
ITALIANO ENGLISH DEUTSCH
1
8 cm
2 -
CONNETTORE DI RICARICA EPS
5 -
MANUTENZIONE
V3 INTERFACE
UNIT
FOR EPS V3 POWER UNIT
LIVELLI DI CARICA DELLA BATTERIA / BATTERY CHARGE LEVEL
LADEZUSTAND DER BATTERIE
2
OK! NO!
2 -
EPS RECHARGE CONNECTOR
5 -
MAINTENANCE
Campagnolo S.r.l. reserves to modify the content of this manual without notice. The updated version will always
be available www.campagnolo.com.
2 -
EPS-AUFLADESTECKER
4 -
WIRELESS-FUNKTIONEN
