DICHIARAZIONE CE
DI CONFORMITÁ EC DECLARATION
OF CONFORMITY DECLARATION CE
DE CONFORMITE EG-
KONFORMITÄTSERKLÄRUNG
dichiara qui di seguito che la taglierina da
cantiere per ceramica, monocottura,
marmo, granito, laterizi, manufatti in
cemento e simili
herewith declares that the masonry saws
for ceramics, marble, granite, bricks,
concrete items and similar materials
déclare par la présente que la scie sur table de
chantier pour matériaux céramiques, marbre,
granit, briques, ouvrages en béton et
similaires
erklärt hiermit, daß die Schneidemaschine für
die Baustelle, das sich für Schneidarbeiten
auf Keramik, Marmor, Granit, Ziegel,
Zementerzeugnissen, usw. eignet
Data di costruzione N° di Serie: Date of manufacture Series N. Date de fabrication N° de série Produktionsdatum Seriennummer
risulta in conformità a quanto previsto dalle
seguenti direttive comunitarie:
DIRETTIVA 2006/42/CE, DIRETTIVA
2006/95/CE, DIRETTIVA 2004/108/CE,
DIRETTIVA 2002/96/CE.
e che sono state applicate tutte le norme
e/o specifiche tecniche indicate.
is in conformity with the provisions of the
following EC directives:
2006/42/EC, 2006/95/EC, 2004/108/EC,
2002/96/EC
and that the standards and/or technical
specifications referenced have been
applied.
est conforme aux dispositions des
directives CE suivantes:
DIRECTIVE 2006/42/CE, DIRECTIVE
2006/95/CE, DIRECTIVE 2004/108/CE,
DIRECTIVE 2002/96/CE.
et que les normes et/ou spécifications
techniques ont été appliquées.
in Übereinstimmung ist mit den Bestimmungen
der nachstehenden EG-Richtlinien:
EG RICHTLINIE 2006/42, EG RICHTLINIE
2006/95, EG RICHTLINIE 2004/108, EG
RICHTLINIE 2002/96.
und daß die Normen und/oder technischen
Spezifikationen, zurAnwendung gelangt sind.
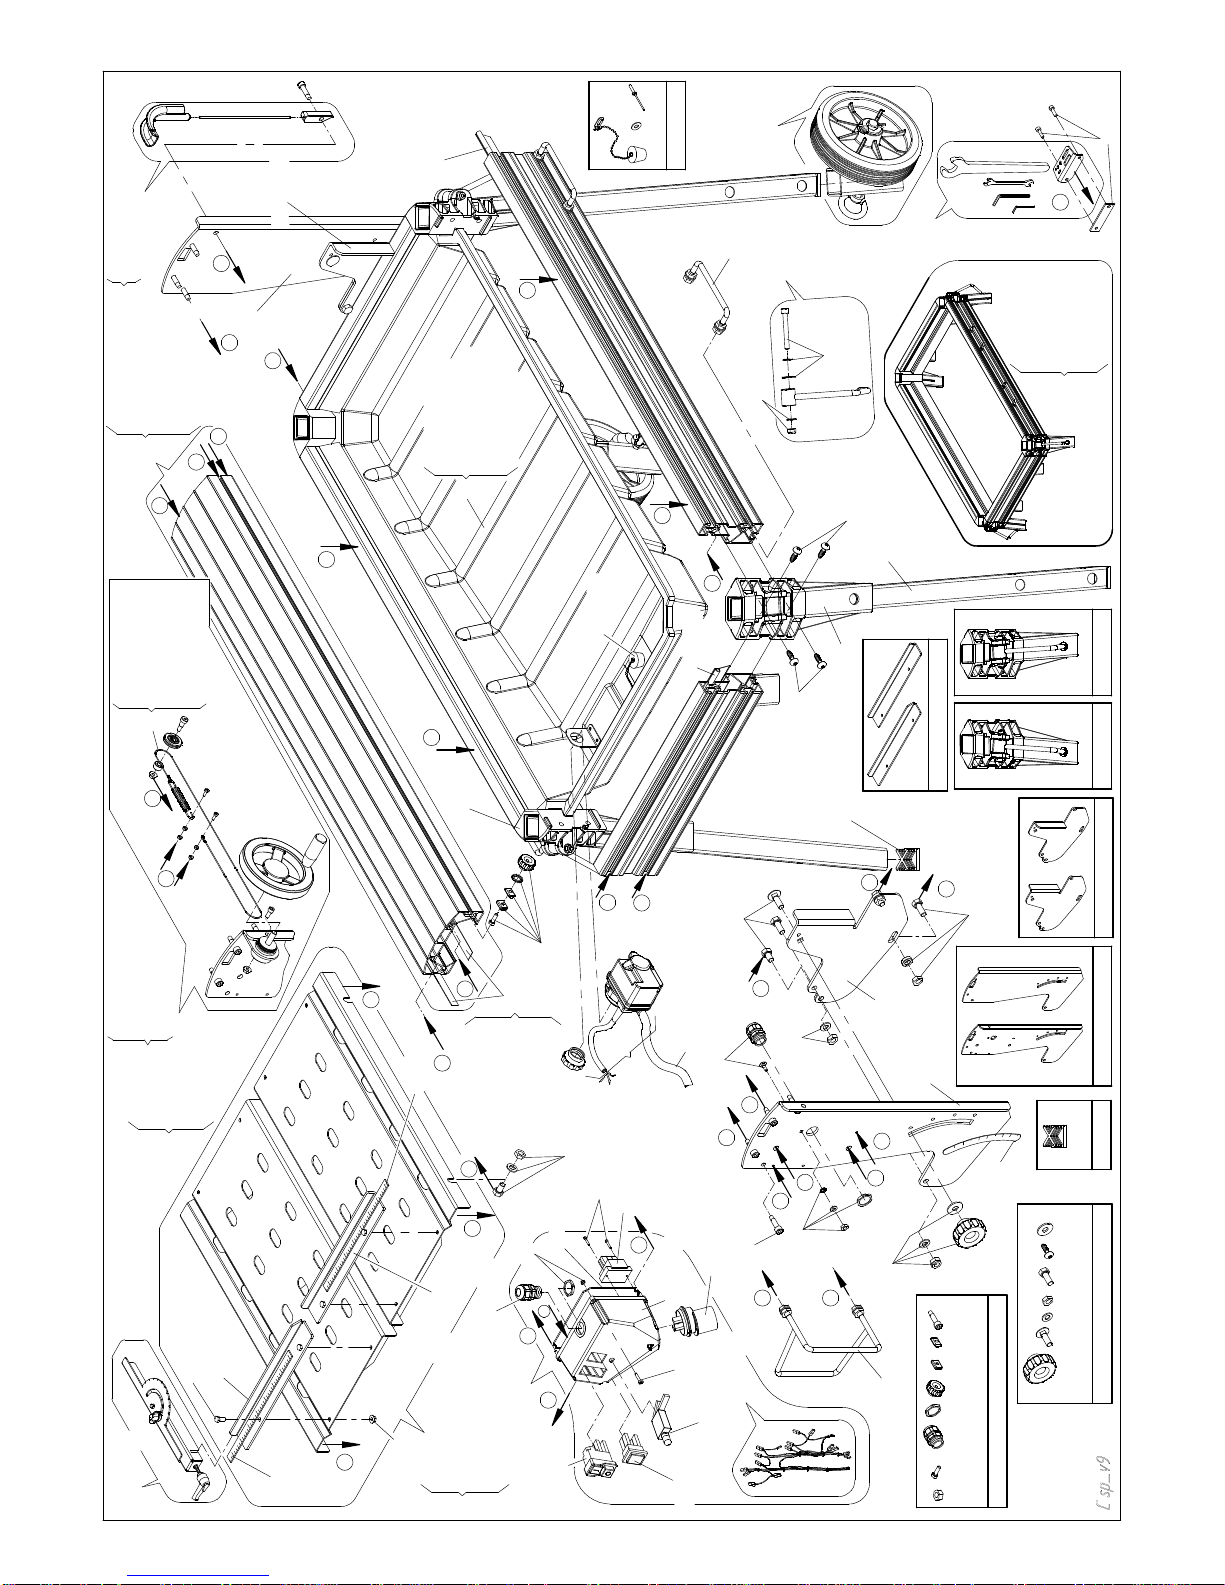
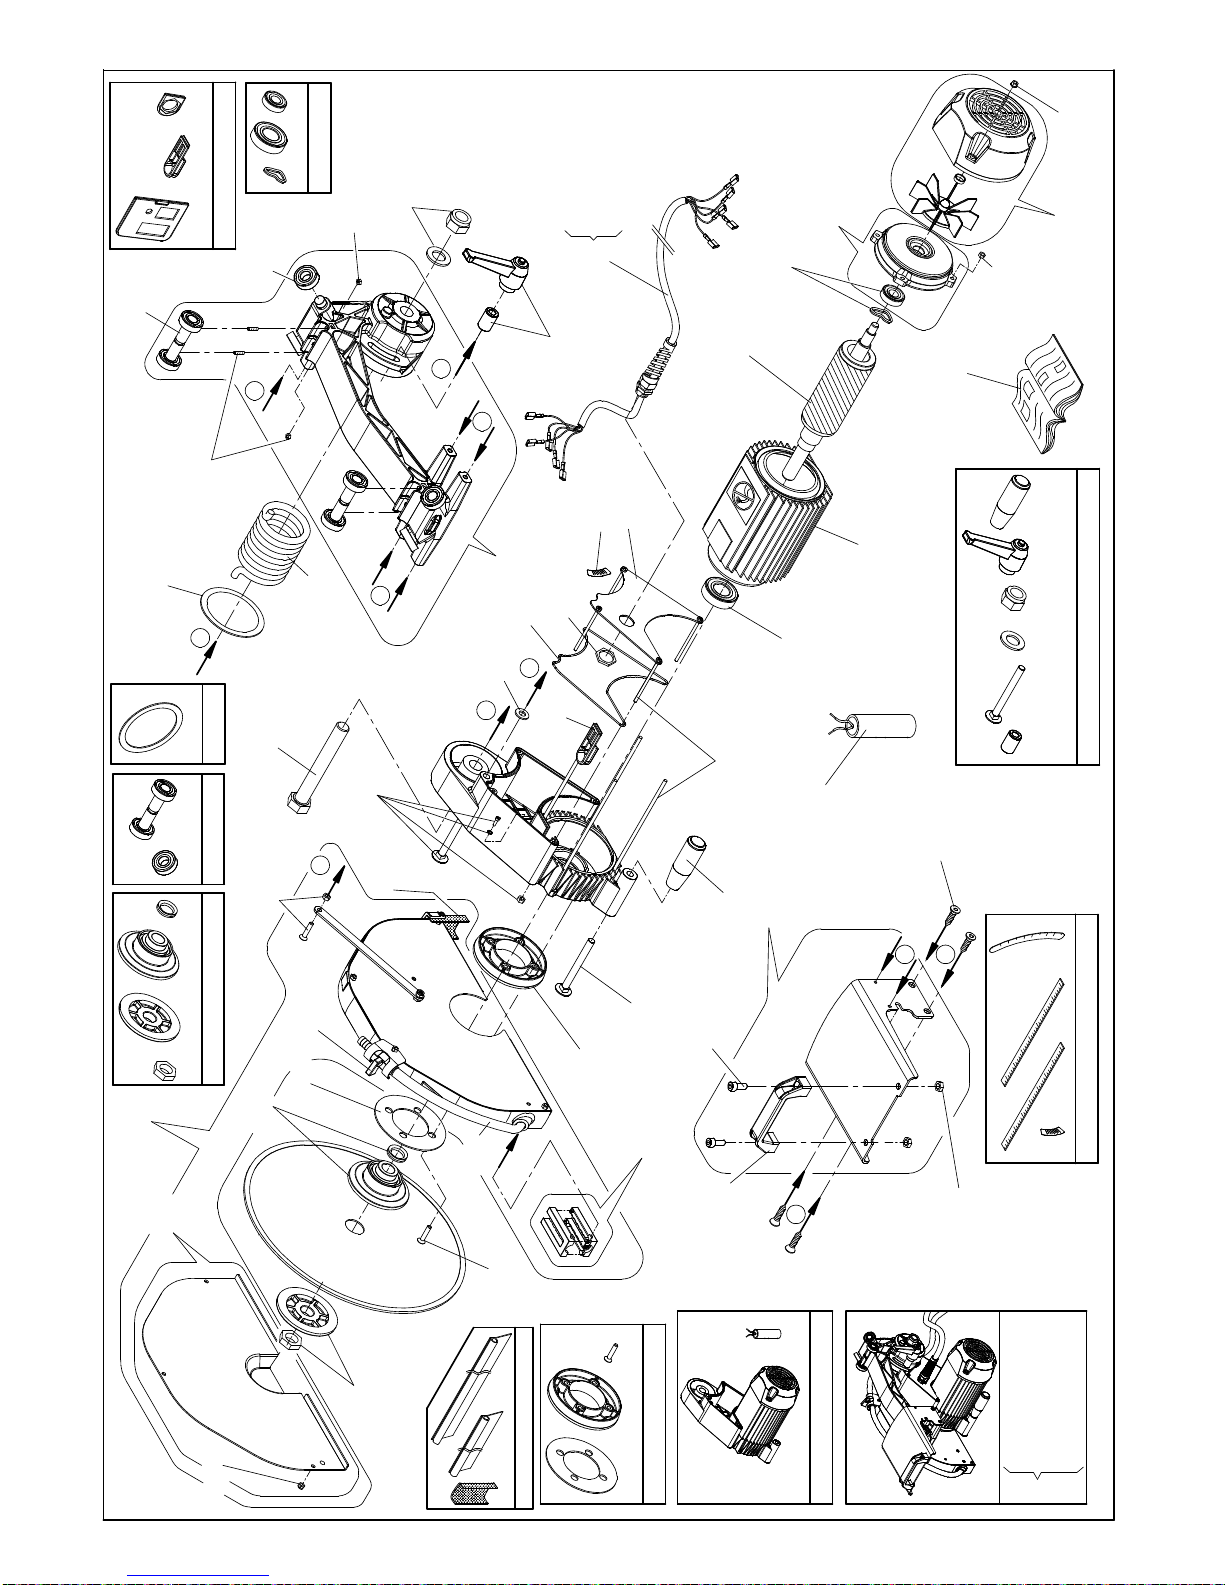
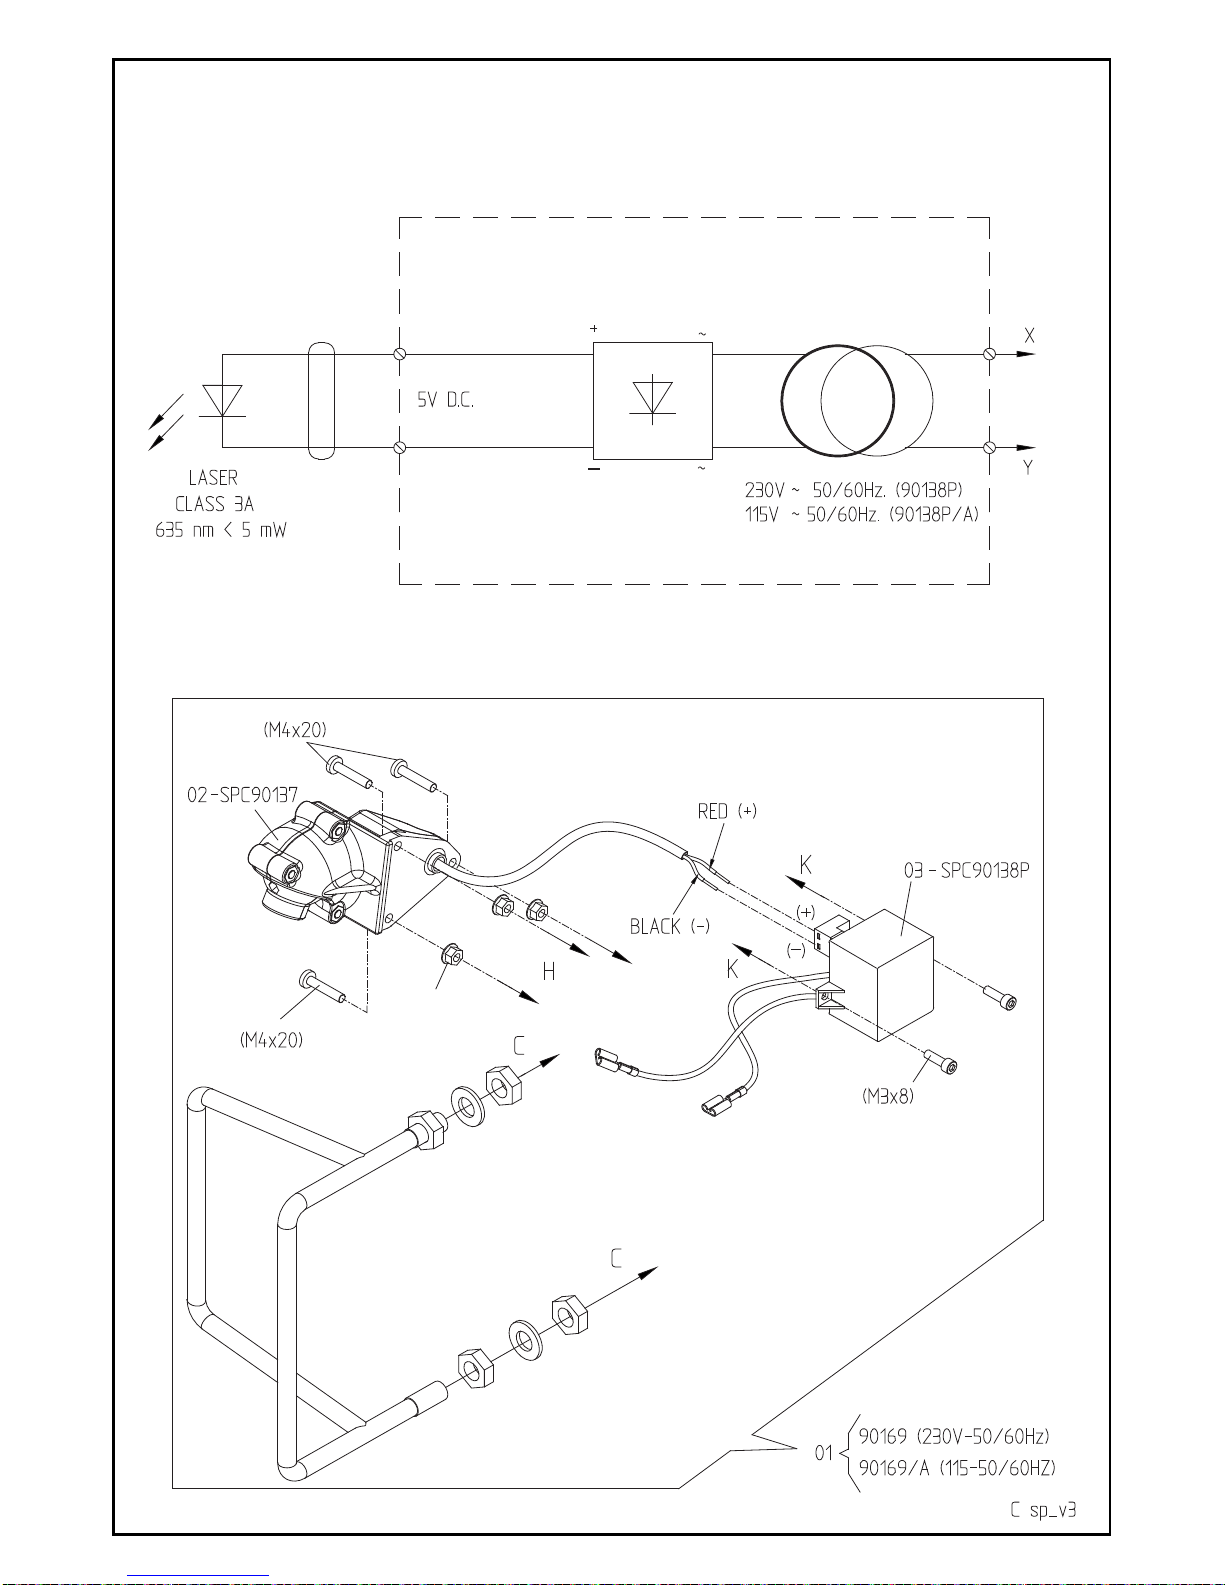
BP35060000, BP35080000, BP35100000, BP35120000, BP35150000
230 V ~ 50 Hz 2200 W
S6 40% 2800 min-1
MOTOR CLASS F
EN ISO 12100-1, EN ISO 12100-2, EN ISO 14121-1, EN 61029-1, EN 60335-1, EN 60335-2-41, EN 12418, IEC 1029-2-7,
EN 55014-1, EN 55014-2, EN 610006-1, EN 610006-3, EN 610006-4-2, EN 610006-4-4, EN 610006-4-5, EN 610006-4-6
IGB FD
The undersigned, representing the
following manufacturer
Il sottoscritto, rappresentante il seguente
costruttore Le soussigné, représentant le constructeur
ci-aprésDer Unterzeichner, der den nachstehenden
Hersteller vertritt
Direttore Generale
Kees van Beek General Manager
Kees van Beek Le Directeur Général
Kees van Beek Der Generaldirektor
Kees van Beek
Carat Nederland BV.
Nikkelstraat 18, - 4823 AB Breda
The Netherlands