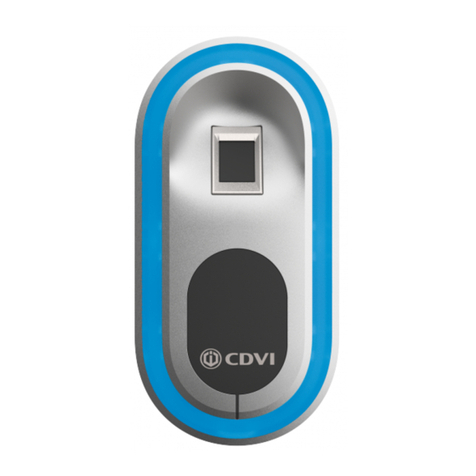
CDVI Ievo User manual

Getting started with ievo Biometric
Solutions
ievo User Guide
EN

2 3
EN EN
ievo USER GUIDE
Getting started with ievo biometric solutions
TITLE PAGE
2] Welcome to Biometrics 3
3] Using ievo desktop registration units 5
4] Using the ievo ultimate reader 8
5] Using the ievo micro reader 10
6] Using ievo as a card reader 12
7] Administration guide 14
8] Troubleshooting 16
9] Problem ngerprints 18
10] Data protection 19
11] Further reading 21
12] Technical Specications 22
1] CONTENTS

2 3
EN EN ievo USER GUIDE
Getting started with ievo biometric solutions
2] WELCOME TO BIOMETRICS
A LITTLE BIT ABOUT US
CDVI Ltd. is a global manufacturer of access control solutions and with
its brand ievo is industry leading in biometric ngerprint readers. Having
spoken to professionals such as architects, facility managers, contractors,
security installers and end users, our experienced team pride themselves
on understanding what requirements are needed to integrate with a secure
access control system. The ievo biometric ngerprint range has been
developed with the aim of being the most technologically advanced, reliable
and secure ngerprint reader on the market.
Thank you for choosing CDVI Ltd. and the ievo brand as your provider of biometric
security solutions. Your new ngerprint reader(s) will offer a safe, reliable system
to assist with your access control and /or time and attendance system. Although
very simple to use, this guide will ensure you obtain the maximum benets of
your products. The guide will cover registration, usage, data protection and
troubleshooting. Should you encounter any issues not covered in this reference
guide please contact your provider for further support.
WHY BIOMETRICS?
Fingerprint biometric systems are considered to be the most reliable and
trustworthy form of security due to the very nature of biometric data being
unique to a sole individual. The advantage of using an ievo ngerprint biometric
system is that common faults like; lost, stolen or copied cards/fobs; forgotten pin
numbers/or access codes; hacking threats or any other form of unnecessary user
interaction are all resolved. This saves time and resources while enhancing your
access systems.
4 5
EN EN
ievo USER GUIDE
Getting started with ievo biometric solutions
HOW DO IEVO FINGERPRINT READERS WORK?
Simply put, by using advanced image reading sensors ievo readers take a
highly detailed scan of your nger, from the surface and subsurface levels of
the skin, to capture a highly accurate digital image. Specic data from the
image is converted into a digital template used for ngerprint identication.
Providing a user presents a nger that matches a stored user template, then
access and/or time & attendance, will be granted and/or recorded.
The methods that ievo readers use to capture ngerprint data cannot be
reverse engineered to replicate your actual ngerprint, nor is the data stored
on the ngerprint reader head themselves, adding an additional layer of
security and protection. As such we do not contravene any data protection or
Human Rights laws.
Note:
Before using your ievo system, please ensure that all required software and drivers have
been correctly installed and set up by your installation provider.
Should you have any technical issues or concerns please speak to your supplier or installation
provider as the rst line of contact. For further support, visit our website or alternatively
contact our technical support team at:
E-mail: [email protected]
Tel: +44 (0) 1628 531300
Website: www.ievoreader.com/Support
!

4 5
EN EN ievo USER GUIDE
Getting started with ievo biometric solutions
3] USING ievo DESKTOP REGISTRATION UNITS
ievo offers two variants of registration units:
The ultimate desktop reader
The ievo ultimate desktop reader is
designed for use with installations
using either only ievo ultimate readers,
or a mixed system of both ultimate
and ievo micro ngerprint readers.
The difference is due to the size of the sensor’s scanning areas on the two devices.
Once you have installed the ievo registration software* and are ready to register
new users, make sure you follow these steps to ensure effective registration using
either the ievo ultimate desktop reader or the ievo micro desktop reader.
*If using an alternative registration software package refer to documentation supplied by
your provider for further assistance.
The micro desktop reader
The micro desktop reader has been
design specically to work alongside
installations only using ievo micro readers.

6 7
EN EN
ievo USER GUIDE
Getting started with ievo biometric solutions
Ensure you follow the steps outlined in
the registration software for optimum results
Keep your nger straight and cover
the whole of the sensor area
Do Not Use
Your Finger Tip
Do Noy Bend
Your Finger
Please ensure when using either reader that the device is on a desk and the user is
standing up when registering ngerprints. This is due to the sensor’s angle being
optimised for an elevated approach, replicating how a user will physically use the
unit for authentication. Approaching the device from a ‘sitting’ position during
registration will provide a different reading from that of an elevated position which
may cause identication errors.
For further instructions on how to enrol a user using the ievo registration software please
see page 10.
Once scan is complete
remove finger to
complete the process.
Present finger again to
confirm the registered
finger.
Once scan is complete
remove finger from
device.
Present finger to sensor
when sensor is blue.
Keep your finger straight and cover the
whole of the sensor area
Ensure you follow the steps outlined in
the registration software for optimum results.
ievo ultimate desktop reader:
Once scan is complete
remove finger to
complete the process.
Present finger again to
confirm the registered
finger.
Once scan is complete
remove finger from
device.
Present finger to sensor
when sensor is blue.
Keep your finger straight and cover the
whole of the sensor area
Ensure you follow the steps outlined in
the registration software for optimum results.
Present nger
to sensor when
sensor is blue.
Once scan is
complete remove
nger from
device.
Present nger
again to conrm
the registered
nger.
Once scan com-
plete remove n-
ger to complete
the process.
Once scan is complete
remove finger to
complete the process.
Present finger again to
confirm the registered
finger.
Once scan is complete
remove finger from
device.
Present finger to sensor
when sensor is blue.
Keep your finger straight and cover the
whole of the sensor area
Ensure you follow the steps outlined in
the registration software for optimum results.
Once scan is complete
remove finger to
complete the process.
Present finger again to
confirm the registered
finger.
Once scan is complete
remove finger from
device.
Present finger to sensor
when sensor is blue.
Keep your finger straight and cover the
whole of the sensor area
Ensure you follow the steps outlined in
the registration software for optimum results.

6 7
EN EN ievo USER GUIDE
Getting started with ievo biometric solutions
Present finger to sensor
when sensor is blue.
Once scan is complete
remove finger from
device.
Present finger again to
confrim the registrated
finger.
Once scan is complete
remove finger to
complete the process.
Keep your finger straight and
cover the whole of the sensor area
Ensure you follow the steps outlined in
the registration software for optimum results.
ievo micro desktop reader:
Once scan is complete
remove finger to
complete the process.
Present finger again to
confirm the registered
finger.
Once scan is complete
remove finger from
device.
Present finger to sensor
when sensor is blue.
Keep your finger straight and cover the
whole of the sensor area
Ensure you follow the steps outlined in
the registration software for optimum results.
Ensure you follow the steps outlined in
the registration software for optimum results
Keep you nger straight and cover
the whole of the sensor area
Do Not Use
Your Finger Tip
Do Noy Bend
Your Finger
Once scan is complete
remove finger to
complete the process.
Present finger again to
confirm the registered
finger.
Once scan is complete
remove finger from
device.
Present finger to sensor
when sensor is blue.
Keep your finger straight and cover the
whole of the sensor area
Ensure you follow the steps outlined in
the registration software for optimum results.
Present nger
to sensor when
sensor is blue
Once scan is
complete remove
nger from
device.
Present nger
again to conrm
the registered
nger.
Once scan com-
plete remove n-
ger to complete
the process.
Once scan is complete
remove finger to
complete the process.
Present finger again to
confirm the registered
finger.
Once scan is complete
remove finger from
device.
Present finger to sensor
when sensor is blue.
Keep your finger straight and cover the
whole of the sensor area
Ensure you follow the steps outlined in
the registration software for optimum results.
Present finger to sensor
when sensor is blue.
Once scan is complete
remove finger from
device.
Present finger again to
confrim the registrated
finger.
Once scan is complete
remove finger to
complete the process.
Keep your finger straight and
cover the whole of the sensor area
Ensure you follow the steps outlined in
the registration software for optimum results.

8 9
EN EN
ievo USER GUIDE
Getting started with ievo biometric solutions
4] USING THE ievo ultimate READER
To start a scan place your nger in the centre of the scanning plate making sure
that the whole area is covered, without pressing down too hard.
Using multispectral imaging the sensor will scan your nger with beams of light,
gathering all the information required from between 1 - 100 individual reference
points on your ngerprint.
It is vital that you keep your nger still during the scanning process to ensure
there is no distortion in the image, which could lead to recognition issues. The
better quality the scan, the faster the process for gaining access.
Note: If you are nding it difcult to gain access, ask a site administrator for assistance.
Place nger in the
centre of sensor....
Not to the side!
Step 1:
Place your nger on the
sensor, which will activate
via proximity detection. The
sensor will glow ‘blue’ when
activated.
Step 2:
Keep your nger still until
the scan nishes. The ‘halo’
button will turn green once
access has been granted.

8 9
EN EN ievo USER GUIDE
Getting started with ievo biometric solutions
Once scan is complete
remove finger to
complete the process.
Present finger again to
confirm the registered
finger.
Once scan is complete
remove finger from
device.
Present finger to sensor
when sensor is blue.
Keep your finger straight and cover the
whole of the sensor area
Ensure you follow the steps outlined in
the registration software for optimum results.
Place nger on sensor to activate
(the sensor will illuminate).
Do not move or remove nger while
scan is active!
Once scan is nished, remove nger
and wait for the ‘halo’ button to
change colour.
Green
Access granted,
please proceed
through door.
Red
Access denied,
plase contact
your administrator
Do Not Use
Your Finger Tip
Do Noy Bend
Your Finger
Once scan is complete
remove finger to
complete the process.
Present finger again to
confirm the registered
finger.
Once scan is complete
remove finger from
device.
Present finger to sensor
when sensor is blue.
Keep your finger straight and cover the
whole of the sensor area
Ensure you follow the steps outlined in
the registration software for optimum results.
Once scan is complete
remove finger to
complete the process.
Present finger again to
confirm the registered
finger.
Once scan is complete
remove finger from
device.
Present finger to sensor
when sensor is blue.
Keep your finger straight and cover the
whole of the sensor area
Ensure you follow the steps outlined in
the registration software for optimum results.
Keep your nger straight
Once scan is complete
remove finger to
complete the process.
Present finger again to
confirm the registered
finger.
Once scan is complete
remove finger from
device.
Present finger to sensor
when sensor is blue.
Keep your finger straight and cover the
whole of the sensor area
Ensure you follow the steps outlined in
the registration software for optimum results.
Ensure the reader has been installed in a vertical position.

10 11
EN EN
ievo USER GUIDE
Getting started with ievo biometric solutions
6] USING THE ievo micro READER
Step 1:
Place your nger on the sensor,
which will activate via proximity
detection. The sensor will glow
‘blue’ when activated.
Step 2:
Keep your nger still until the
scan nishes. The ‘halo’ button
will turn green once access has
been granted.
To start a scan place your nger in the centre of the scanning plate making sure
that the whole area is covered, without pressing down too hard.
The advance optical sensor will scan your nger with beams of light, gathering all
the information required from up to a hundred individual reference points on your
ngerprint.
The ievo micro scan in less that 200ms so it is essential to keep your nger still to
prevent any sliding or movement that may distort the image, which could lead to
recognition issues. The better quality the scan, the faster the process for gaining
access.
Place nger in the
centre of sensor....
Not to the side!
Note: If you are nding it difcult to gain access, ask a site administrator for assistance.

10 11
EN EN ievo USER GUIDE
Getting started with ievo biometric solutions
Place nger on sensor to activate
(the sensor will illuminate).
Do not move or remove nger while
scan is active!
Once scan is nished, remove nger
and wait for the ‘halo’ button to
change colour.
Once scan is complete
remove finger to
complete the process.
Present finger again to
confirm the registered
finger.
Once scan is complete
remove finger from
device.
Present finger to sensor
when sensor is blue.
Keep your finger straight and cover the
whole of the sensor area
Ensure you follow the steps outlined in
the registration software for optimum results.
Green
Access granted,
please proceed
through door.
Red
Access denied,
plase contact
your administrator
Do Not Use
Your Finger Tip
Do Noy Bend
Your Finger
Keep your nger straight
Ensure the reader has been installed in a vertical position.

12 13
EN EN
ievo USER GUIDE
Getting started with ievo biometric solutions
7] USING ievo AS A CARD READER
CARD READER FUNCTION
ievo ngerprint readers can be upgraded with a card reader module to allow for
combined use of both biometrics data and security cards. Using the HID iCLASS
SE™ reader module you will be able to utilise existing card reader systems through
ievo reader units. To check that your cards are compatible with the module please
contact us.
There are 3 functions available :
Pass through:
Usually used in areas where there is a transition period moving from card readers
to biometrics, or for visitor access only. A user will just need to present their card
to the reader’s ‘halo’ to be veried.
1:1 Template on card:
Used in environments whereby a user’s ngerprint template data is stored on a
security card. Users will present their card to the reader’s ‘halo’ which will tell the
reader to expect a nger to be presented. The reader will scan the user’s nger
and compare this with the biometric template stored on the card for verication.
Multimodal:
Offering two options; to either use both the card reader and the ngerprint reader
as a primary and secondary verication unit (i.e. two levels of verication are
needed for identication, set-up via an access control system), or to use both
methods of identication in an ‘either or’ situation. Meaning if a user forgets, loses
or damages their security card, they can use the biometric function, or if they are
wearing heavy gloves, or have damaged their registered nger, the card reader
function can be utilised.
NOTE: Our readers use highly accurate sensors and when combined with the card
reader module the opportunities to compromise the identication phase reduces
to virtually zero.

12 13
EN EN ievo USER GUIDE
Getting started with ievo biometric solutions
However you are using the card reading functions on your ievo reader, the process
is the same:
Present card to
ievo reader’s ‘halo’.
If required, present nger to
the sensor on the ievo reader.

14 15
EN EN
ievo USER GUIDE
Getting started with ievo biometric solutions
7] ADMINISTRATION GUIDE
User’s ngerprint is not being recognised?
1. Ensure that the user has a registered prole with an active ngerprint
template.
This can be checked through your registration software.
2. Does the user have the required permissions for access?
This can be checked and changed as required through your access control
software.
3. Ensure the user is using the same nger that is registered on their user
template. If needed, remove any previously stored ngerprint images and
re-register the user’s ngerprint.
4. Ensure the user is placing their nger correctly?
Ensure the user is placing the nger correctly, face down and at. Refer
to the nger placement guides within this document.
5. Try registering a second nger as a backup.
It is always advisable to register a second nger when possible for backup.
In the instance when a user’s nger is either damaged or experiencing
temporary problems, having a backup image can save time during busy
periods and can be looked into further when more time is available. In
some cases it may be required that a user registers multiple ngers (see
‘Problem Fingerprints’).
6. Is the user’s nger damaged?
Any cuts, abrasions or damage on the nger could affect ngerprints
as damaged skin may impair previously recorded images. Re-register
the user’s nger or register an alternative nger to use until the original
is healed. Once healed the user may be required to re-register their
ngerprint as scar tissue may be present which can alter ngerprints.

14 15
EN EN ievo USER GUIDE
Getting started with ievo biometric solutions
The system is not behaving as expected.
1. Ensure that doors have not been set to ‘always closed’.
This can be checked through your access control software. ievo devices
do not control door access.
2. Check that the user is not trying to gain entry outside of allowed times.
Check within your access control software that users have the required
permissions on their proles.
3. The ievo reader’s sensor is not responding.
Please contact your supplier or installer for technical support.
4. The ievo reader’s ‘halo’ button is ashing white.
This indicates that the ievo reader is re-establishing a connection with
the ievo Control Board and should function as normal once the halo has
returned to the normal blue LED light.
NOTE: If none of the above checks provide a solution to a problem you are
experiencing, please contact your supplier or installer for further technical support.
7. Is there excessive dirt or debris on the user’s nger or sensor?
Although ievo readers can scan through levels of dirt and debris, having
a ‘clean’ nger will always increase the effectiveness of the reader. Also
ensure that there is no excessive dirt or debris on the reader’s sensor
itself before scanning.
8. Has the sensor been damaged?
Damage to the sensor’s glass can interfere when scanning a ngerprint.
If there is a deep scratch or other damage present, please contact your
supplier or installer.

16 17
EN EN
ievo USER GUIDE
Getting started with ievo biometric solutions
8] TROUBLESHOOTING
My ngerprint is not being recognised?
1. Are you registered?
Ensure that you have been registered as a user and had your ngerprint
registered correctly.
2. Are you using the same nger you registered with?
Ensure you are using the same nger that you registered with, the most
common nger used is the ‘index’ nger.
3. Keep your nger still until the sensor nishes scanning.
In order to get the best scan possible it is vital you keep your nger still
while the sensor is scanning. Do not remove your nger until the sensor
has nished its scan, the scanning process is indicated by a white light.
Once complete remove your nger and wait for access.
4. Have you damaged your ngerprint?
If you have a cut, abrasion or damage on your nger this could affect
your ngerprintas damag ed skin may impair a previously recorded
image. Please re-register your nger, or register an alternative nger to
use until the original is healed. Once healed you may be required to re-
register your ngerprint as scar tissue may be present which can alter
your ngerprint.
5. Are you placing your nger correctly?
To ensure you are placing your nger correctly; face down and at. Please
refer to the nger placement guides within this document.
6. Is there excessive dirt or debris on your nger?
Although ievo readers can scan through levels of dirt and debris, having a
‘clean’ nger will always increase the effectiveness of the reader.
7. Ensure that you are not pressing too heavily on the reader during a scan.
Pressing heavily on the reader can squash your ngerprint meaning that
the key reference points are spread differently from the original scan.

16 17
EN EN ievo USER GUIDE
Getting started with ievo biometric solutions
My ngerprint is accepted but the door does not open?
1. Check that you are not trying to gain entry outside of your allowed times.
Check with your administrator or software handler that you do not have
any restricted entry times on your user prole.
2. Check the door has not been bolted or locked from the inside.
If none of these checks provide a solution to a problem you are
experiencing, it could mean a faulty locking mechanism or relay. Please
contact your supplier or installer for technical support.
Is my ngerprint stored on a database? If so, who has access to
my information?
Fingerprint images are not stored. An ievo reader scans a nger and collates a range
of different identifying reference points. These reference points are converted to a
template and stored on an ievo Control Board. For more information, please read
the ‘Data Protection’ section of this guide.
I want to know more about our biometric system and have
further questions. Who can I contact?
You should contact your supplier or installer in the rst instance as they will be
familiar with your installation.
For further support, visit our website or alternatively contact our technical support
team at:
E-mail: [email protected]
Tel: +44 (0) 1628 531300
Website: www.ievoreader.com/Support

18 19
EN EN
ievo USER GUIDE
Getting started with ievo biometric solutions
9] PROBLEM FINGERPRINTS
What is a ‘problem ngerprint’?
While the vast majority of ngerprints can be used with ievo ngerprint readers
there are a few occasions where some ngerprints can be tricky to capture.
These instances usually occur when a nger has been heavily damaged causing
permanent surface and subsurface skin abrasions. While it is uncommon, studies
have shown that one out of two hundred ngerprints can be problematic when
using biometric readers.
I have a problem ngerprint, can I still use biometrics?
Even though it may seem like the technology is against you, there are methods
that can be attempted to combat some problem ngerprints.
What can I do to combat a problem ngerprint?
When registering a known problem nger, or if problems persist with a registered
ngerprint, try registering all of the user’s ngers, including the thumbs. This will
help give the user a number of options when trying to gain access.
You can enrol multiple images of the same nger from different angles, such as
lying your nger on both its sides and mid section.
Start with scanning the left side of your nger, and then keep scanning
different angles rotating to the right until a good scan has been
captured. If a registered nger is still not being identied, keep trying
different angles.
Fig.1

18 19
EN EN ievo USER GUIDE
Getting started with ievo biometric solutions
10] DATA PROTECTION
What happens when my ngerprint is scanned?
When registering as a user, an ievo reader will scan your ngerprint and a
connected ievo Control Board will use an extraction algorithm to identify specic
features within your ngerprint called minutiae. Identied minutiae points are
categorised into groups, which include line bifurcations and ridge endings amongst
other data groups. During this acquisition process, the algorithm will identify the
type, direction and distance between minutiae. The ievo Control Board then stores
them in a unique proprietary template format (See Fig.2 below) which will be
stored in a database on the control board. The original ngerprint image is not
stored or recorded.
After registering a similar process described above will commence for general
use. However, this time the matching algorithm will be used to compare the
new minutiae data against the stored templates in the database. Once a pre-
set number of minutiae points have been matched against a stored template,
the user’s identity can be conrmed, this conrmation will be forwarded to the
access control system or ‘time and attendance’ system for entry access and/or
data logging.
Image depicting
what an ievo reader
scan
Imade depicting
an example of key
minutiae feature
points taken from
the ngerprint
Image depicting
key feature data
which is extracted,
transferred and
stored as a template
on a separate ievo
Control Board.
Fig.2

20 21
EN EN
ievo USER GUIDE
Getting started with ievo biometric solutions
How is my data stored?
An advanced algorithm is used to extract specic ngerprint data captured after
a scan. This data is stored on an ievo Control Board using a unique proprietary
template format. The stored template is unique to an individual and the template
is only accessed for identication purposes by the ievo Control Board. The data
cannot be accessed for any other purpose nor can it be viewed using common
software. The data CANNOT be used to re-construct the original ngerprint image.
Who has access to my ngerprint image?
No one has access to a ngerprint image as images are not stored.
Once a ngerprint has been scanned, the original image is not stored or recorded.
The only stored information is the template constructed from the key features of
the ngerprint and is only accessed for identication purposes by the ievo Control
Board. The data cannot be accessed for any other purpose nor can it be viewed
using common software. The algorithm is extensive in size and the template data
cannot be reverse engineered to recreate an image of the original ngerprint
Can my data be accessed and used for other purposes?
No, once acquired, a ngerprint template can only be referred to by ievo software
(via the ievo Control Board) for identication purposes.
Algorithms:
ievo systems use a cutting-edge Automated Fingerprint Identication System
(AFIS) algorithm for data enrolment, extraction and matching processes.
Table of contents
Other CDVI IP Access Controllers manuals

CDVI
CDVI Digicode Mifare PCV123D User manual

CDVI
CDVI NANOPW User manual

CDVI
CDVI DGLIWLC User manual

CDVI
CDVI SOLARPB Instruction Manual

CDVI
CDVI PASS KCPASS User manual

CDVI
CDVI micro IEVO-M User manual

CDVI
CDVI KCPROXWLC User manual

CDVI
CDVI PROMI500 User manual

CDVI
CDVI MOONARW User manual

CDVI
CDVI GALEOR User manual

CDVI
CDVI Digicode Mifare PCV123D User manual

CDVI
CDVI DGLIEWLC User manual

CDVI
CDVI BIOSYS 1 User manual

CDVI
CDVI STAR1M User manual

CDVI
CDVI KCPROXWLC User manual

CDVI
CDVI TERENA User manual

CDVI
CDVI DGLIWLC User manual

CDVI
CDVI SOLARPW User manual

CDVI
CDVI KCPROXWLC User manual

CDVI
CDVI SOLARPW User manual