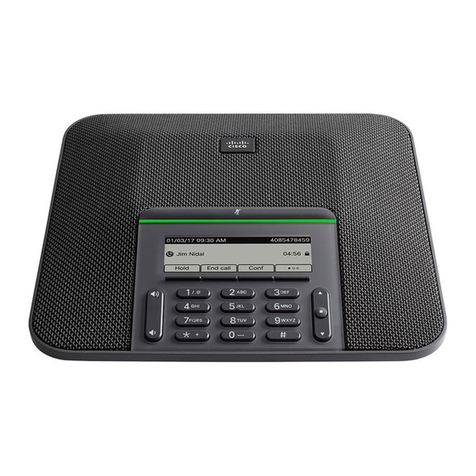
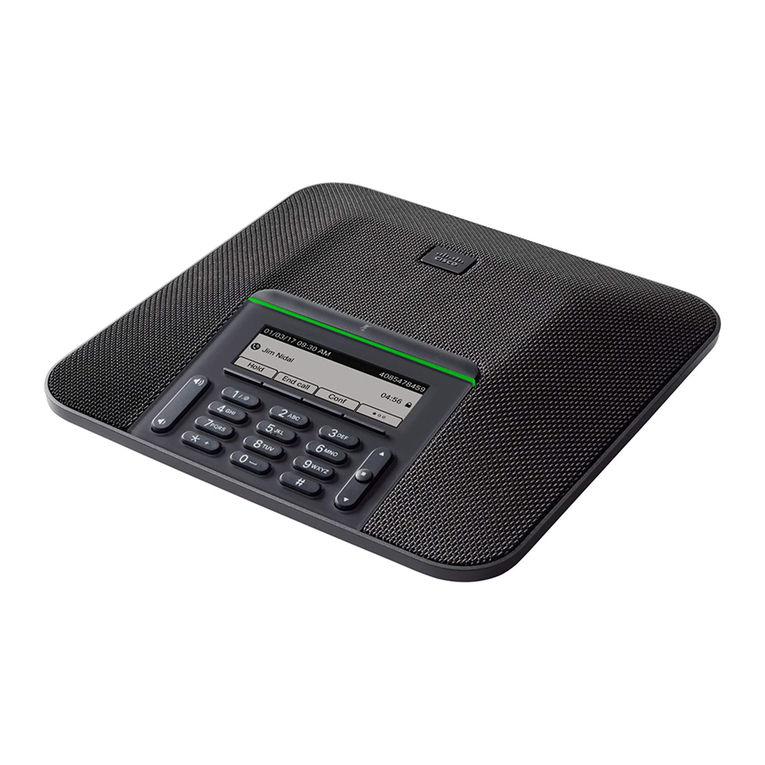
Cisco 8832 User instructions

Settings
•Phone Settings Overview, on page 1
•Change the Ringtone, on page 2
•Turn on Do Not Disturb from the Phone Screen, on page 2
•Forward Calls from Your Phone, on page 2
•Assign a Ring Tone with the Phone Web Page, on page 4
•Turn on DND from the Phone Web Page, on page 4
•Configure the Screen Saver with the Phone Web Interface, on page 4
•Adjust the Backlight Timer from Phone Web Page, on page 5
•Enable Anonymous Call Blocking from the Phone Web Page, on page 6
•Enable Call Waiting from the Phone Web Page, on page 6
•Block an Anonymous Call, on page 6
•Block Caller ID , on page 7
•Enable Call Waiting, on page 7
•Secure a Call, on page 8
•Set Up an Auto Answer Page, on page 8
•Set Up Voicemail, on page 8
•Change the Time Format, on page 9
•Change the Date Format, on page 9
•Change the Screen Saver, on page 9
•Add a Logo as a Phone Background, on page 10
•Change Wallpaper from the Phone Page, on page 10
•Set Language, on page 11
•Set Password, on page 11
•Set up the Profile Account, on page 12
•Add Multiple Locations for a BroadWorks XSI User, on page 12
Phone Settings Overview
Your administrator can configure the phone to make the setting menus available on the phone screen or on
the phone web interface. If you can't find a specific menu, contact your administrator.
Settings
1

Change the Ringtone
You can set a ringtone for an incoming call.
Procedure
Step 1 Press Settings.
Step 2 Select User preferences >Ringtone >Ext (n) - Ring tone, where n= extension number.
Step 3 Scroll through the list of ringtones and press Play to hear a sample.
Step 4 Press Select and then Set to save a selection.
Turn on Do Not Disturb from the Phone Screen
Set do not disturb (DND) to silence your phone and suppress incoming call notifications when you need to
avoid distractions. You can suppress all incoming call notifications or you can suppress a specific caller
notification.
Procedure
Step 1 Press Settings.
Step 2 Select User preferences >Call preferences >Do not disturb.
If the Do not disturb menu doesn't display on the screen, contact your administrator.
Note
Step 3 Select On to turn on DND or select Off to turn off DND.
Step 4 Press Set to save the setting.
Forward Calls from Your Phone
You can set up your phone to forward incoming calls.
Before you begin
Your administrator must enable the call forwarding services.
Procedure
Step 1 Press Settings.
Step 2 Select User preferences >Call preferences >Call forwarding to access the Call forward settings screen.
Settings
2
Settings
Change the Ringtone

You can also press the Forwardsoftkey on the phone home screen to access the Callforwardsettings screen.
Step 3 Select a call forwarding service.
•Forward all—Determines whether to forward all incoming calls to a target phone number.
•Forward busy—Determines whether to forward an incoming call to a target phone number when the
line is busy.
•Forward no answer—Determines whether to forward an incoming call to a target phone number when
the call isn't answered.
Step 4 Enable the call forwarding service by pressing Select button of the Navigation cluster.
Step 5 Assign a target phone number for the call forwarding service.
•Forward all number—Specifies the target phone number to which you want to forward all incoming
calls.
•Forward busy number—Specifies the target phone number to which you want to forward the incoming
call when the line is busy.
•Fwd no answer number—Specifies the target phone number to which you want to forward the coming
call when the call isn't answered.
•Fwd no answer delay—Assigns a response delay time for the no answer scenario.
If your administrator disables the feature key synchronization (FKS) and XSI sync for call forwarding on
your phone, you can enter the value as number of seconds after which call needs to be forwarded.
If your administrator enables FKS or XSI sync for call forwarding on your phone, you can enter the value as
number of rings after which call needs to be forwarded.
The call forward settings on the phone take effect only when FKS and XSI are disabled. For more information,
consult your administrator.
Step 6 (Optional) Assign a target phone number by using the Contacts softkey.
a) In the Call forward settings screen, select any of the call forwarding service.
b) Select Forward all number,Forward busy number, or Fwd no answer number based on the call
forwarding service that you selected, then press the Contacts softkey.
c) Search for a contact. For more information, see Search for a Contact in the All Directories Screen.
d) Press Call to assign the target phone number.
You can find that the target phone number displays next to the call forwarding service.
Step 7 Press Set to apply the settings.
Step 8 Verify if the setting takes effect by looking for the call forwarding icon. The icon displays with a target
number on the top left or middle of the phone screen.
After you enable any type of call forwarding, the Forward softkey changes to the Clr fwd on the phone
screen. You can press the Clr fwd softkey to disable all types of call forwarding, while the target phone
number remains.
If the call forward settings on the phone don't take effect, consult your administrator.
Settings
3
Settings
Forward Calls from Your Phone
Assign a Ring Tone with the Phone Web Page
Procedure
Step 1 On the phone web page, select User Login >Voice >Ext(n), where (n) is the number of an extension.
Step 2 In Call Feature Settings area, choose a ringtone from the Default Ring drop-down list.
If you don't want to specify a ringtone for the phone line, choose No ring. Your phone doesn't ring when
receiving an incoming call.
Step 3 Click Submit All Changes.
Turn on DND from the Phone Web Page
Procedure
Step 1 On the phone web page, select User Login >Voice >User.
Step 2 Under Supplementary Services, set DND Settings to Yes.
You can turn on DND on for all lines if your administrator hasn't enabled feature key sync (FKS).
Step 3 Click Submit All Changes.
Configure the Screen Saver with the Phone Web Interface
You can configure a screen saver for the phone. When the phone is idle for a specified time, it enters screen
saver mode.
Any button press returns the phone to normal mode.
Procedure
Step 1 On the phone web page, select Voice >User.
Step 2 In the Screen section, set up the fields as described in the following table.
Settings
4
Settings
Assign a Ring Tone with the Phone Web Page

DescriptionParameter
Select Yes to enable a screen saver on the phone.
When the phone is idle for a specified time, it enters
screen saver mode.
Default: No
Screen Saver Enable
Types of screen saver. Options you can choose:
•Clock—Displays a digital clock on a plain
background.
•Download Picture—Displays a picture pushed
from the phone webpage.
•Logo: Displays a logo on the phone screen. Add
a logo image in the Logo URL field.
Screen Saver Type
Amount of idle time before screen saver displays.
Enter the number of seconds of idle time to elapse
before the screen saver starts.
Default: 300
Screen Saver Wait
URL locating the (.png) file to display on the phone
screen background. If you select picture as as
screensaver type, this image displays as a screensaver
on the phone screen.
When you enter an incorrect URL to download a new
wallpaper, the phone fails to upgrade to the newer
wallpaper and displays the existing downloaded
wallpaper. If the phone does not have any wallpaper
downloaded earlier, it displays a gray screen.
Picture Download URL
Enter a URL or path for the location where the logo
image is saved. If you select logo as as screensaver
type, this image displays as a screensaver on the phone
screen.
Logo URL
Step 3 Click Submit All Changes.
Adjust the Backlight Timer from Phone Web Page
You can save energy by disabling the backlight on the phone at a preset time. The phone's desktop remains
visible, even with the backlight off.
Settings
5
Settings
Adjust the Backlight Timer from Phone Web Page

Procedure
Step 1 On the phone web page, select User Login >Advanced >Voice >User.
Step 2 Under Screen, select a duration for the Back Light Timer parameter.
Enable Anonymous Call Blocking from the Phone Web Page
Procedure
Step 1 On the phone web page, select User Login >Voice >User.
Step 2 Under Supplementary Services, set Block ANC Setting to Yes.
The setting applies to all lines, except for the ones where your administrator has enabled synchronization of
Anonymous Call Rejection between the lines and the BroadSoft XSI service.
Step 3 Click Submit All Changes.
Enable Call Waiting from the Phone Web Page
Procedure
Step 1 On the phone web page, select User Login >Voice >User.
Step 2 Under Supplementary Services, set CW Setting to Yes.
The setting applies to all lines, except for the ones where your administrator has enabled synchronization of
Call Waiting between the lines and the BroadSoft XSI service.
Step 3 Click Submit All Changes.
Block an Anonymous Call
You can block an incoming call that does not have caller information for a specific line or all lines.
If your administrator has enabled synchronization of Anonymous Call Rejection between a line and a BroadSoft
XSI service, then your setting only applies to the specific line instead of all lines. Typically, the setting applies
to all the lines, except for the ones where the synchronization is enabled.
Settings
6
Settings
Enable Anonymous Call Blocking from the Phone Web Page

Procedure
Step 1 Press Settings.
Step 2 Select User preferences >Call preferences >Block anonymous call.
Step 3 Select On if you want to block the call that does not have caller information, or select Off to allow the call.
Step 4 Press Set to save the setting.
Block Caller ID
You can block your caller identification to prevent your name and phone number from being displayed on
the receiver's screen when you make a call. This feature helps you to maintain privacy.
Before you begin
Your administrator enables Block CID feature on your phone.
Your administrator enables Block CID feature on the XSI BroadWorks server.
Procedure
Step 1 Press Settings.
Step 2 Select User preferences >Call preferences.
Step 3 Select Block caller ID.
Step 4 Press Select to toggle caller ID blocking on or off.
If your administrator enables the block caller ID feature on the XSI BroadWorks server, your phone retrieves
the value from the server and you see the value that your administrator sets on the server. You can then modify
the value from the Block caller ID menu on the phone.
Step 5 Press Set to save the change.
Enable Call Waiting
You can enable call waiting for a specific line or all lines. If enabled, you can receive the call notification (a
single beep and the line button flashes red) while on an active call.
If your administrator has enabled synchronization of Call Waiting between a line and a BroadSoft XSI service,
then your setting only applies to the specific line instead of all lines. Typically, the setting applies to all lines,
except for the ones where the synchronization is enabled.
Settings
7
Settings
Block Caller ID

Procedure
Step 1 Press Settings.
Step 2 Select User preferences >Call preferences >Call waiting.
Step 3 Select On to allow you to answer an incoming call that rings while on another call, or select Off to disable
the function.
Step 4 Press Set to save the setting.
Secure a Call
You can encrypt calls to protect them from eavesdroppers. You can set up the secure call feature on all
outbound calls or for a specific call.
Procedure
Step 1 Press Settings.
Step 2 Select User preferences >Call preferences >Secure call.
Step 3 Select On to enable secure call feature or select Off to disable the secure call feature.
Step 4 Press Set to save the setting.
Set Up an Auto Answer Page
Procedure
Step 1 Press Settings.
Step 2 Select User preferences >Call preferences >Auto answer page.
Step 3 Select On to enable the Auto answer page or select Off to disable Auto answer page.
Step 4 Press Set to save the changes.
Set Up Voicemail
Procedure
Step 1 Press Settings.
Settings
8
Settings
Secure a Call

Step 2 Select User preferences >Call preferences >Voice mail.
Step 3 Enter a phone number to check voicemail.
Step 4 Press Set to confirm the assigned number.
Step 5 Press Back to exit.
Change the Time Format
You can change the current time format that the phone screen displays.
Procedure
Step 1 Press Settings.
Step 2 Select Device administration >Date/Time >Time format.
To set daylight savings, select Device administration >Date/Time >Daylight savings. Select On to turn
on the daylight savings and select Off to turn it off.
Step 3 (Optional) Select Device administration >Date/Time >Time zone.
Step 4 Select a time format and press Set to apply the changes.
Change the Date Format
You can change the date format that you want to see on your phone screen.
Procedure
Step 1 Press Settings.
Step 2 Select Device administration >Date/Time >Date format.
Step 3 Select a date format and press Set to apply the changes.
Change the Screen Saver
You can enable your phone screen saver, and specify its appearance and the amount of time for the phone to
be idle before the screen saver appears.
Settings
9
Settings
Change the Time Format

Procedure
Step 1 Press Settings.
Step 2 Select User preferences >Screen preferences >Screen saver.
Step 3 Select On to turn on screen saver and select Off to turn it off.
Step 4 Select Screen saver settings to choose the settings:
•Screen saver type—Choose one of the following options:
•Clock—Displays a rounded clock with the wallpaper in the background.
•Download Picture—Displays a picture pushed from the phone web page.
•Logo: Displays a logo as the phone screensaver. This image is added in the Logo URL field of the
pone web page.
•Trigger interval—Enter the number of seconds that the phone remains idle before the screen saver turns
on.
•Refresh interval—Enter the number of seconds before the screen saver should refresh (if, for example,
you chose a rotation of pictures).
Step 5 Press Set.
Add a Logo as a Phone Background
To add a logo icon as your phone screen background, add it from phone web page.
Procedure
Step 1 On the phone web page, select User Login >Voice >User.
Step 2 In the Screen section, select Logo from the Phone Background field and in the Logo URL field enter a URL
or path for the location where the logo image is saved.
Step 3 Click Submit All Changes.
After the logo is added in the phone background, if you select Default from the Phone Background list and
save the changes, the logo icon on the phone screen will disappear.
Change Wallpaper from the Phone Page
Your administrator can allow you to change the default wallpaper on your phone to one of the wallpapers
available.
Settings
10
Settings
Add a Logo as a Phone Background

Procedure
Step 1 On the phone web page, select User Login >Voice >User.
Step 2 In the Phone Background field of the Screen section, select any of the options as a phone wallpaper.
•Default: Phone does not have any wallpaper. If no wallpaper is added to the phone screen, the phone
screen displays monochrome wallpaper.
•Logo: In the phone web page you can select Logo as your phone background option. The logo that you
add in the Logo URL is used as the wallpaper.
Do not exceed a maximum length of 255 characters for the Logo URL or Picture Download
URL.
Caution
The logo display area is the center of the phone screen. The logo display area size of the phone is 128x128
pixels. If original logo size does not fit display area, the logo scales to fit the display area.
Step 3 Click Submit All Changes.
Set Language
Depending upon how your phone is configured, you may be able to change the language used by your phone.
Procedure
Step 1 Press Settings.
Step 2 Select Device administration >Language.
Step 3 Select a language from the list of available languages.
Step 4 Select Save.
Set Password
Reset your phone password regularly to maintain network security. Keep all passwords in a safe place to avoid
theft.
Before you begin
You must have your existing password.
Procedure
Step 1 Press Settings.
Settings
11
Settings
Set Language

Step 2 Select Device administration >Set password.
Step 3 Enter your current password in the Old password field.
Step 4 Enter your new password in the New password and the Reenter new password fields.
Step 5 Select Save.
Set up the Profile Account
You need to enter the authentication credentials to resynchronize your phone with the provisioning profile
when prompted with the Profile account setup screen.
If you missed the Profile account setup screen, you can also access it from the phone menu or the Setup
softkey if available.
If the phone fails to sign in, contact your administrator.
Before you begin
Your administrator specifies the profile authentication type on your phone and provides you with the
authentication credentials.
Procedure
Step 1 Press Settings.
Step 2 Select Device administration >Profile account setup.
Your username and password are automatically filled. These fields are blank if your username and password
were not added before.
Step 3 Press Sign in to save your username and password.
If any of the Username field or the Password field is empty, the phone displays a grey Sign in
softkey and you can't press the softkey.
Note
Step 4 (Optional) Enter a new username and password if you want to login with another set of credentials.
Add Multiple Locations for a BroadWorks XSI User
You can add multiple locations to your phone extension. This allows an incoming call to seamlessly be moved
from your phone to other mobile phones or desk phones that are added to your extension.
Before you begin
Your administrator has enabled the Anywhere feature on the extension.
Settings
12
Settings
Set up the Profile Account

Procedure
Step 1 Press Settings.
Step 2 Select User preferences >Call preferences.
Step 3 Select Anywhere.
Step 4 (Optional) Select a line if BroadWorks Anywhere is configured on multiple lines.
Step 5 Add contact number and name in the Locations screen.
Maximum length of a name that you can enter is 25. You can also keep the Name field empty.
Maximum length of a number that you can enter is 20.
Step 6 Enable or disable the location.
Step 7 Press Save to add the locations to the Locations list.
Settings
13
Settings
Add Multiple Locations for a BroadWorks XSI User

Settings
14
Settings
Add Multiple Locations for a BroadWorks XSI User
Other manuals for 8832
13
Table of contents
Other Cisco Conference Phone manuals

Cisco
Cisco 8831 User manual

Cisco
Cisco Unified IP Conference Phone 8831NR Instruction Manual

Cisco
Cisco MPP 8832 Manual

Cisco
Cisco 7832 User manual

Cisco
Cisco CP-8832 User manual

Cisco
Cisco Webex Room Kit User manual

Cisco
Cisco Conference Phone User manual

Cisco
Cisco TANDBERG?150MXP User manual

Cisco
Cisco 7832 User manual

Cisco
Cisco 8831 User manual

Cisco
Cisco 8832 User manual

Cisco
Cisco IP Conference Phone 7832 User manual

Cisco
Cisco Unified IP Conference Phone 8831 User manual

Cisco
Cisco 7832 User manual

Cisco
Cisco Webex Room Kit User manual

Cisco
Cisco EX60 User manual

Cisco
Cisco 7832 User manual

Cisco
Cisco 8832 User manual

Cisco
Cisco 8832 User manual

Cisco
Cisco 8832 User manual