manuals.online logo
Brands
  1. Home
  2. •
  3. Brands
  4. •
  5. Cisco
  6. •
  7. Telephone
  8. •
  9. Cisco 7965 User manual

Cisco 7965 User manual

Reference Guide
Cisco
7900
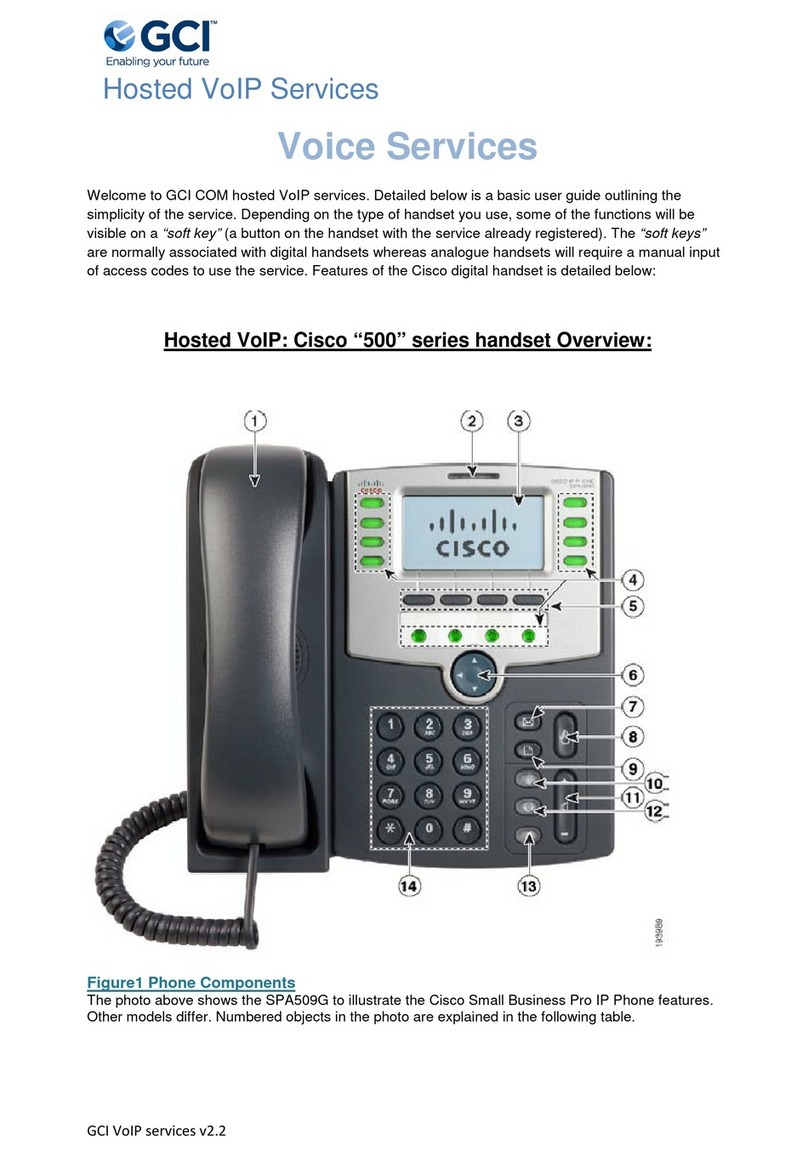
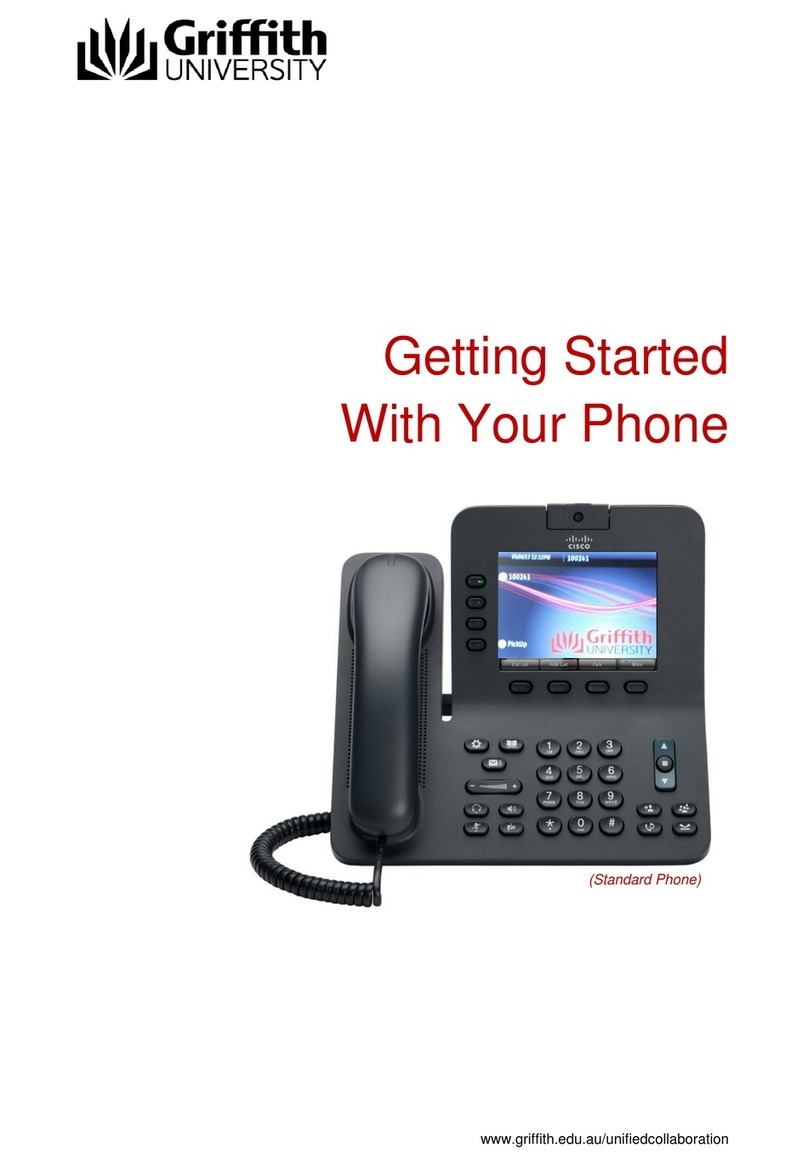
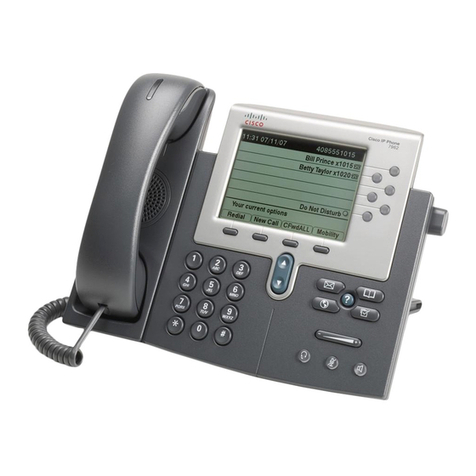
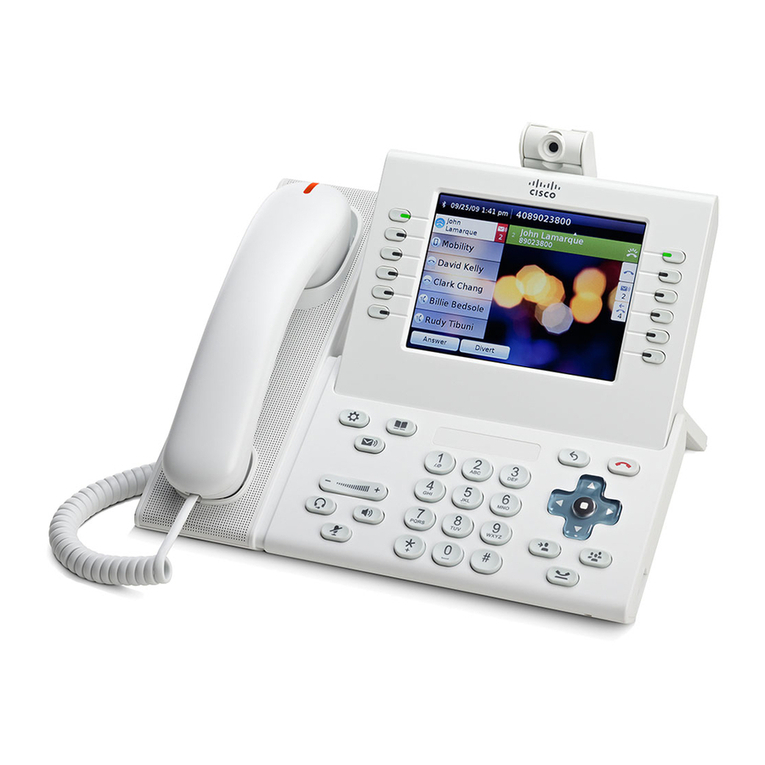
Overview of a Cisco Phone
Model depicted is a 7965
Date and Time Masking Number
Programmable Buttons
Phone line(s), BLF (Busy Lamp
Field), or Features
Foot Stand Button
Raise/Lower incline
Display Wake-Up Button
Voice Mail (access)
Navigation Pad
Provides 4-way
navigation. Center
Select button.
Soft Keys
Last line of the display
(Soft Key labels)
correspond to Soft Key
buttons directly below
the display. Use buttons
to activate features.
Handset Light Strip
Indicates an incoming call or when
lit, a new voice mail message
Directories
Phone Help
Settings
Services
Volume Control
Tap bar to increase/decrease.
Independently controls incoming
volume, not outgoing volume:
 Handset and headset
(adjust while off-hook)
 Speaker volume
(adjust while off-hook)
 Ringer volume
(adjust while on-hook)
Dial Pad
Headset
Mute
On/Off
Button lights
when microphone
is muted.
Speaker
On/Off
Status Line
Call Activity Area
Displays current
calls per line
and information
Display Icon Description
Phone on-hook, no activity
Phone off-hook, making/receiving a call
Connected call
Incoming call, line is ringing
Call on-hold
Call Forward is enabled
Shared line in use. Someone who shares your line has a connected call.
7900R (Revised 11/19/2013)
www.its.ny.gov/telecommunications
Reference Guide
Reference Guide for All Cisco 7900 Series Phones
Cisco
7900
How To... Directions...
Place a Call Internal and External:
1. Lift handset or press the Speaker button.
2. Dial the 10-digit number.
To make a second call:
1. While on active call, press Hold soft key to hold first call.
2. Press New Call soft key. After dial tone, dial 10-digit number.
To pre-dial:
1. With handset on-hook, begin entering 10-digit number.
2. A history of pre-dialed numbers displays. To select one, use the Navigation Pad.
3. Highlight the desired number, and press the Dial soft key.
To correct a dialing error, press the < (backspace) soft key to erase.
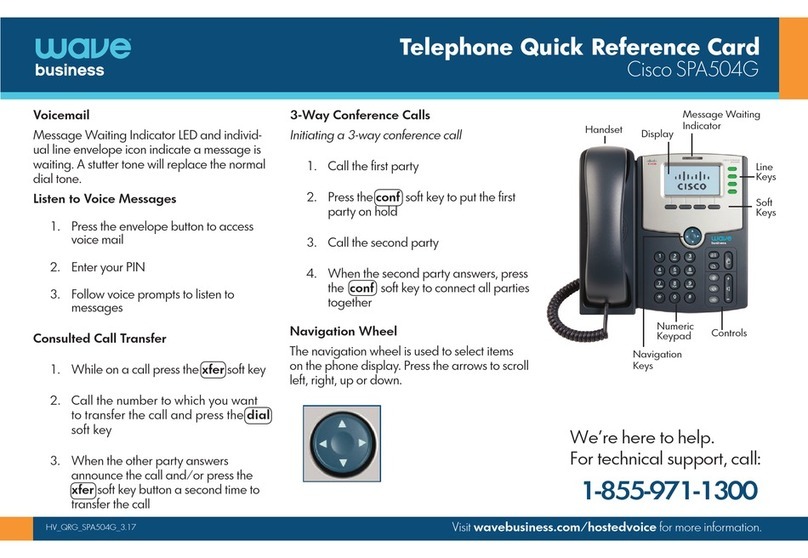
Soft Keys Available features (soft keys) appear across the bottom of your display in groups of four, and change
according to your activity. The phone may have more than four available features. To view additional features,
press the More soft key. To use, press the corresponding soft key located directly below the features.
Redial Press Redial soft key to redial last number dialed.
To view Placed Calls log:
1. While on-hook, press the Navigation Pad up/down.
2. Highlight desired number.
3. Press Dial soft key.
Hold and Resume To Hold: Press the Hold soft key. Note the display icon indicating the call is on hold (paused).
To Resume: Press the Resume soft key, to reconnect the highlighted call.
To answer second incoming call, press the Answer soft key. The first call is automatically placed on hold, and
you are connected to the second call. When multiple calls are on hold, use the Navigation Pad to highlight
the appropriate call. Then, press Resume.
iDivert iDivert sends a call to voicemail To use, press the iDivert soft key.
Join Join joins two existing calls together on one line:
1. From an active call, press the Answer soft key. Use the Navigation Pad to highlight the call to be
included in the conference.
2. Press the Join soft key to connect the two calls together.
3. Repeat this step for each call to be added.
It may be necessary to press the More soft key to see Join.
Park To Park a call and for retrieval at another phone:
1. While on active call, press the Park soft key. The LCD screen displays the call park number (i.e. *XXXX).
2. Make a note of the number and hang up. Call will time out in 120 seconds and ring back to original
phone.
To retrieve a parked call from any phone, dial * and the 4-digit number.
www.its.ny.gov/telecommunications
Reference Guide
Cisco
7900
Reference Guide for All Cisco 7900 Series Phones
www.its.ny.gov/telecommunications
How To... Directions...
Transfer 1. While connected, press Transfer soft key. Call is automatically placed on hold. A new line is automatically
activated, and a dial tone is heard.
2. Dial the number to which you want to transfer.
3. While second line is ringing, you may perform either:
a. Supervised Transfer (preferred): Wait on line to announce the call. Then press Transfer to connect
the two callers.
b. Unsupervised Transfer: Press Transfer to connect the call and complete the transfer.
To cancel a transfer:
1. Use the Navigation Pad to highlight the original call.
2. Press the Resume soft key to reconnect to the original call.
Transfer to Unity
Voice Mail
To Transfer a call directly to Unity Voice Mail:
1. While connected, press Transfer soft key.
2. Dial * and the 10-digit number where the call should be transferred.
3. Press Transfer soft key.
Conference Call 1. While connected, press Confrn soft key. Call is automatically placed on hold. A new line is automatically
activated, and a dial tone is heard.
2. Dial number of second party. Wait for second call to connect, and announce conference.
3. Press Confrn to add party to the conference call.
4. To remove last party, press End Call soft key.
Repeat steps to conference up to four parties, including you. ConfList lists all conference parties.
Abbreviated/
Speed Dial
All Abbreviated/Speed Dial configuration MUST be done via the Self Care Portal.
To use a Speed Dial code, :
1. With the handset down, enter the Abbreviated/Speed Dial code.
2. Press the AbbrDial soft key.
3. Lift handset.
Call Forward To activate:
1. Press CFwdALL soft key, and enter desired number.
2. To cancel, press CFwdALL soft key.
To forward All Calls to Voice Mail (optional):
1. Press CFwdALL soft key.
2. Press Messages button. Display status: “Forwarded to Voicemail”
3. To cancel forwarding to Voice Mail, press CFwdALL soft key.
Pick Up To answer call in Your PickUp group:
1. Lift handset.
2. Press PickUp soft key to be connected to the incoming call:
a. To answer call, press Answer soft key.
b. To divert to your voicemail, press Divert soft key.
c. To send call back to original called number, let call ring.
Reference Guide
Cisco
7900
Reference Guide for All Cisco 7900 Series Phones
How To... Directions...
Call Logs To view Call Logs of missed, placed and received calls:
1. Press the Directories button. Call Logs are displayed:
●Missed Calls ●Received Calls
●Placed Calls ●Personal Directory
●Corporate Directory
2. Use the Navigation Pad to highlight the desired Call Log.
3. Press Soft Key button option:
a. Select: Selects the highlighted Call Log, and collected call records are displayed.
b. Clear: Erases ALL call records within the highlighted Call Log.
c. Exit: Exits the Directories menu.
4. Use Navigation Bar to highlight desired Call Record.
Soft Keys provide the following choices:
a. Dial: Dials the number.
b. EditDial: Allows editing of call record.
c. Exit: Exits the Directories menu.
d. Details: Displays call information.
e. Delete: Deletes highlighted Call Record.
f. More: Displays additional Soft Keys.
g. Clear: Erases ALL call records in Call Log.
Each log stores up to 100 records. Details includes the following call record information, when available:
●Called number ●Calling number
●Time of day ●Call duration (for placed and received calls only)
If a single call record is highlighted and Delete is pressed, only the single call record is erased.
Directories
a. Personal
Directory
b. Corporate
Directory
To Access the Directories Menu:
1. Press Directories button.
2. Use the Navigation Pad to scroll, highlight Personal Directory or Corporate Directory.
3. Press Select soft key to choose.
Use Navigation Pad to scroll through search choices (first/last name, nickname, or number, where
applicable). Use the dial pad to enter letters or numbers. See your System Administrator for your user ID and
PIN, to access the Personal Directory.
Settings
 Preferences
a. Ringtone
b. Contrast
To access the Settings Menu:
1. Press Settings button.
2. Use the Navigation Pad to scroll through the menu.
3. Highlight Preferences, and press Select.
4. Use Navigation Pad to scroll to desired menu (Rings, Contrast).
5. Press Select soft key.
Press soft keys to Save or Select desired changed options prior to pressing Exit.
Help 1. For Help, press the ?Button.
2. Press a button or feature for which you need help, or wait for Help Topics to appear in the display.
Corresponding help will appear in the display.
3. Use soft keys for more choices.
For a list of Help topics, press the ?button twice.
www.its.ny.gov/telecommunications

Other manuals for 7965

8

Other Cisco Telephone manuals

Cisco MPP 6851 Manual

Cisco

Cisco MPP 6851 Manual

Cisco Cisco 7940 User manual

Cisco

Cisco Cisco 7940 User manual

Cisco Small Business Pro SPA 502G User manual

Cisco

Cisco Small Business Pro SPA 502G User manual

Cisco DX650 User manual

Cisco

Cisco DX650 User manual

Cisco 6945 Series User manual

Cisco

Cisco 6945 Series User manual

Cisco Webex 840 User manual

Cisco

Cisco Webex 840 User manual

Cisco SPA502 User manual

Cisco

Cisco SPA502 User manual

Cisco ATA186-I1 Operator's manual

Cisco

Cisco ATA186-I1 Operator's manual

Cisco 7945 Series User manual

Cisco

Cisco 7945 Series User manual

Cisco SPA-500 Series Instruction manual

Cisco

Cisco SPA-500 Series Instruction manual

Cisco ATA adaptor Installation guide

Cisco

Cisco ATA adaptor Installation guide

Cisco SPA Phones User manual

Cisco

Cisco SPA Phones User manual

Cisco 8800 Series User manual

Cisco

Cisco 8800 Series User manual

Cisco Cisco 7940 Instruction manual

Cisco

Cisco Cisco 7940 Instruction manual

Cisco Cisco 7960 User manual

Cisco

Cisco Cisco 7960 User manual

Cisco 7821 User manual

Cisco

Cisco 7821 User manual

Cisco 3951 User manual

Cisco

Cisco 3951 User manual

Cisco UNIFIED 9971 User manual

Cisco

Cisco UNIFIED 9971 User manual

Cisco SPA 303 User manual

Cisco

Cisco SPA 303 User manual

Cisco Quick Set C20 Service manual

Cisco

Cisco Quick Set C20 Service manual

Cisco 7821 User manual

Cisco

Cisco 7821 User manual

Cisco VoIP 7945 User manual

Cisco

Cisco VoIP 7945 User manual

Cisco 7945 Series User manual

Cisco

Cisco 7945 Series User manual

Cisco Small Business Pro SPA 504G User manual

Cisco

Cisco Small Business Pro SPA 504G User manual

Popular Telephone manuals by other brands

Fanvil X1S user manual

Fanvil

Fanvil X1S user manual

Hall Technologies HT-ODYSSEY user manual

Hall Technologies

Hall Technologies HT-ODYSSEY user manual

Linksys WIP320 - iPhone Wireless VoIP Phone Quick installation

Linksys

Linksys WIP320 - iPhone Wireless VoIP Phone Quick installation

Zayo ena Yealink SIP-T46S Quick reference guide

Zayo

Zayo ena Yealink SIP-T46S Quick reference guide

Mitel 8568 Quick reference guide

Mitel

Mitel 8568 Quick reference guide

Uniden D1788 user guide

Uniden

Uniden D1788 user guide

Plantronics CALISTO P830-M user guide

Plantronics

Plantronics CALISTO P830-M user guide

SSS Siedle BTCV 850-02 Product information

SSS Siedle

SSS Siedle BTCV 850-02 Product information

Nortel N0060609 installation guide

Nortel

Nortel N0060609 installation guide

Witech WT-1020 Operation manual

Witech

Witech WT-1020 Operation manual

Telematrix 3002MWD Installation and user guide

Telematrix

Telematrix 3002MWD Installation and user guide

NEC DT400 user guide

NEC

NEC DT400 user guide

Siemens optiPoint  family Brochure & specs

Siemens

Siemens optiPoint family Brochure & specs

DETEWE OPENPHONE 63 user guide

DETEWE

DETEWE OPENPHONE 63 user guide

Konftel 70 quick guide

Konftel

Konftel 70 quick guide

Bell System Practices 851 Identification, Installation, Connections, and Maintenance

Bell System Practices

Bell System Practices 851 Identification, Installation, Connections, and Maintenance

Huawei F616 user guide

Huawei

Huawei F616 user guide

Unify OpenSpace CP600 Administration manual

Unify

Unify OpenSpace CP600 Administration manual

manuals.online logo
manuals.online logoBrands
  • About & Mission
  • Contact us
  • Privacy Policy
  • Terms and Conditions

Copyright 2025 Manuals.Online. All Rights Reserved.