manuals.online logo
Brands
  1. Home
  2. •
  3. Brands
  4. •
  5. COMPRO
  6. •
  7. Security Camera
  8. •
  9. COMPRO CS530 User manual

COMPRO CS530 User manual

To begin setup, insert the installation CD into your CD-ROM
drive, and the iWizard will start automatically. ( If it doesn’t,
browse the contents of the CD and run the ‘iWizard.exe’).
Then, select the language and the device you wish to set up.
The first step shows how to connect all the cables. Hit [Next]
twice to proceed with the 2nd step in which the iWizard scans
for available cameras on your local network. Then select your
camera from the list, and wait until the live video and camera
information are displayed on the right. (You can double-check
the device name and the MAC ID which are printed on the serial
number sticker on the back of the camera and on the package).
Click [Next] when you’re ready. Meanwhile, if you see the
Windows Security Alert dialog box during the search, please
choose [Unblock].
The default password is `admin.’ Enter a new password here
(please note down your new password). You can also click
[Next] to skip this process.
Check the camera name, date and time setting.
Please check the package contents. If anything is missing, please
don’t hesitate to contact your local distributor.
Network camera RJ-45 LAN cable
Network Video Recorder
Screw for ceiling mount x 3,
screw anchor x 3, camera pad x4 Quick installation guide
2x 2x
Installation CD Wall mount plate
Power adapter Wireless antenna (only available
for CS530W)
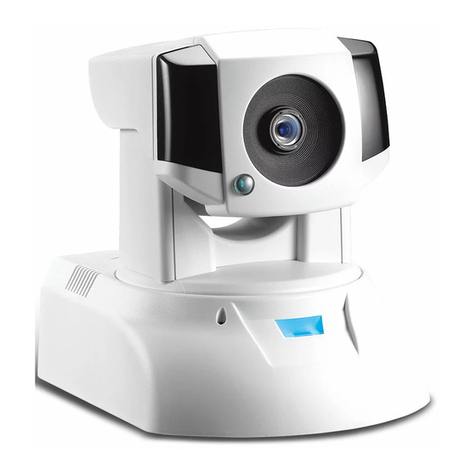
IR LEDs x 6 (12 in total)
Light sensor
Lens
IR LEDs x 6 (12 in total)
Detachable wireless
antenna
Microphone
LED status indicator
Ethernet port
Reset button
Audio output
Microphone in
Power connector
WPS button
LAN cable from PC to switch/router: If your LAN cable from
PC has been connected to the Cable/ADSL modem, please re-
connect it to the Ethernet port of your network switch/router.
Ethernet port on camera: Use the bundled RJ-45 LAN cable to
connect the Ethernet port of the IP camera to the Ethernet port
of your switch/router. Note you must use wired Ethernet to
congure wireless connection on CS530W
Wireless antenna (for CS530W only): If you are installing a
Compro CS530W, attach the supplied wireless antenna to the
connector provided on the back of the camera.
Power: Attach the power adapter to the camera’s power
connector and connect the power plug to a power outlet.
Follow the instruction below to mount the camera on the wall or ceiling.
Fix the mounting plate. Attach the IP camera.
Loosen the screw that
fixes the trapezoid-shaped
fastening bracket
Let fastening bracket slide
into its position on the
camera base (as circled).
Push and hold the fastening
bracket to the right.
Tighten the screw on the
fastening bracket.
IR LEDs x 6 (12 in total)
Light sensor
Lens
IR LEDs x 6 (12 in total)
Built-in microphone
LED status indicator
Ethernet port
Reset button
Audio output
Microphone in
Power connector
* Do not rotate your CS530/CS530W camera manually as it may
damage your camera.
Network Camera
Quick Installation Guide
Set Up the SoftwareConnect the Cables Mount the Camera
CS530 / CS530W
Package Contents CS530 Hardware Overview CS530W Hardware Overview
The iWizard indicates the setup has completed successfully.
You can click on the URL to view the live video now. Click [Yes]
if you wish you set up another camera from scratch.
Enter the correct passphrase, and choose the IP address
conguration.
(Skip here if you enabled Seedonk service) If you are using
oating IP, you can use DDNS service and create a hostname
that links to your camera’s IP address. Click [Yes] and input
an address name. Then click [Check Availability] button. For
complete information on Compro iDDNS, refer to the user
manual in the installation CD.
Select the orientation of your IP camera.
(Skip here if you are not using wireless connection.) If you are
installing Compro CS530W, you can choose to use wireless
LAN. Please click [Yes] to connect wirelessly by default. The
wizard will search for available access points. Then select one
access point.
(Skip here if you didn’t enable Seedonk service.) You need to
log in to your Seedonk account. If you don’t have a Seedonk
account yet, choose to create a Seedonk account and continue
with account registration.
After logging on to your Seedonk account, you may click on
[Download and Install] to install Seedonk Messenger. Or click
on [Next] to do so later manually.
The iWizard starts programming your camera based on your
settings. Please wait patiently and DO NOT interrupt the
process.
The iWizard performs system diagnosis based on your
network settings and alert you for inappropriate settings
(marked with a question mark icon).
Choose whether to use Seedonk service to remotely access your
camera. You may also use a dierent Seedonk server by clicking on
[Advanced Settings]. (If Seedonk service is enabled, iDDNS service will
not be available for use on the camera.)
Choose to have the camera obtain IP address automatically
(DHCP) or manually assign its IP address. Then set the
connection port and local power line frequency settings (not
available for change when Seedonk service is enabled)
Using PC
Follow the steps below to access your camera via WebVUer on
Internet Explorer:
1. Open the Internet Explorer on your Windows system.
2.Enter the camera’s IP address in the address bar. (e.g.
192.168.0.100).
3. A dialog box that requests the user name and password appears;
enter a valid user name and password, and then press OK. The
default user name and password are both `admin.’
4. Meanwhile, a Windows security warning dialog box may appear.
Please click [Run] to run the camera’s application.
5. Now you can start using WebVUer on Internet Explorer to watch
live video and manage your network camera.
Using Smartphone
If you have enabled the Seedonk service for your camera, you can log in
to the iPhone App Store or Google Play Store on your smartphone and
download the Seedonk Camera Viewer app. Then log in to the Seedonk
Camera Viewer to view and manage your Compro network cameras.
View Live Camera VideoSet Up the Software (Continued)
Set Up the Software (Continued)
Compro Technical Support Information
Before you request technical support, please check the troubleshooting
section in the user manual. You may fill out the online form (www.
comprousa.com/feedback/) or directly email to support@comprousa.com.
Compro Technology, Inc.
www.comprosecurity.com | Tel. +886 2 2918 0169 | Fax +886 2 2915 2389
3F, No.12, Alley 6, Lane 45, Pao Shin Road, Hsintien District, New Taipei City 231, Taiwan
© 2012 Compro Technology, Inc. All rights reserved.
Trademark
Compro Technology is the registered logo of Compro Technology,
Inc. Seedonk and Seedonk Messenger are registered trademarks
of Seedonk Inc. All other company and product names mentioned in this
document are registered trademarks of the respective companies.
Restriction & Disclaimer
No part of this document may be copied or reproduced in any form or by any means
without the prior written consent of Compro Technology, Inc. Compro Technology
makes no warranties with respect to this documentation and disclaims any implied
warranties of merchantability, quality, or fitness for any particular purpose. The
information in this document is subject to change without prior notice.
FCC Information
This device complies with Part 15 of the FCC Rules. Operation is subject
to the following two conditions: (1) This device may not cause harmful
interference, and (2) This device must accept any interference received,
including interference that may cause undesired operation.
Compro CS530W FCC ID : HXICS530W
Federal Communication Commission Interference Statement
This equipment has been tested and found to comply with the limits for a Class B digital device, pursuant
to Part 15 of the FCC Rules. These limits are designed to provide reasonable protection against harmful
interference in a residential installation. This equipment generates, uses, and can radiate radio frequency
energy and, if not installed and used in accordance with the instructions, may cause harmful interference
to radio communications. However, there is no guarantee that interference will not occur in a particular
installation. If this equipment does cause harmful interference to radio or television reception, which can
be determined by turning the equipment off and on, the user is encouraged to try to correct the
interference by one or more of the following measures:
• Reorient or relocate the receiving antenna.
• Increase the separation between the equipment and receiver.
• Connect the equipment into an outlet on a circuit different from that to which the receiver is connected.
• Consult the dealer or an experienced radio/TV technician for help.
This device complies with Part 15 of the FCC Rules. Operation is subject to the following two conditions:
(1) This device may not cause harmful interference, and (2) this device must accept any interference
received, including interference that may cause undesired operation.
Changesormodificationsnotexpresslyapprovedbythepartyresponsibleforcompliancecouldvoidtheuser's
authoritytooperatetheequipment.

FCC Radiation Exposure Statement:
This equipment complies with FCC radiation exposure limits set forth for an uncontrolled environment.
This equipment should be installed and operated with minimum distance 20cm between the radiator &
your body.

CAUTION:

This manual suits for next models

1

Other COMPRO Security Camera manuals

COMPRO TN920P User manual

COMPRO

COMPRO TN920P User manual

COMPRO IP60 User manual

COMPRO

COMPRO IP60 User manual

COMPRO IP55 User manual

COMPRO

COMPRO IP55 User manual

COMPRO IP55 User manual

COMPRO

COMPRO IP55 User manual

COMPRO TN4230 User manual

COMPRO

COMPRO TN4230 User manual

COMPRO NC3230 User manual

COMPRO

COMPRO NC3230 User manual

COMPRO NC420 User manual

COMPRO

COMPRO NC420 User manual

COMPRO TN1500 User manual

COMPRO

COMPRO TN1500 User manual

COMPRO TN80 User manual

COMPRO

COMPRO TN80 User manual

COMPRO TN50 User manual

COMPRO

COMPRO TN50 User manual

COMPRO TN900R User manual

COMPRO

COMPRO TN900R User manual

COMPRO IP540 User manual

COMPRO

COMPRO IP540 User manual

COMPRO VideoMate IP50 User manual

COMPRO

COMPRO VideoMate IP50 User manual

COMPRO TN65 User manual

COMPRO

COMPRO TN65 User manual

COMPRO TN3230 User manual

COMPRO

COMPRO TN3230 User manual

COMPRO TN30 User manual

COMPRO

COMPRO TN30 User manual

COMPRO TN900 User manual

COMPRO

COMPRO TN900 User manual

COMPRO TN900R User manual

COMPRO

COMPRO TN900R User manual

COMPRO IP70 User manual

COMPRO

COMPRO IP70 User manual

COMPRO TN70 User manual

COMPRO

COMPRO TN70 User manual

COMPRO VideoMateIP50 User manual

COMPRO

COMPRO VideoMateIP50 User manual

COMPRO IP55 User manual

COMPRO

COMPRO IP55 User manual

COMPRO TN96P User manual

COMPRO

COMPRO TN96P User manual

Popular Security Camera manuals by other brands

Samsung SCP-2273 Specifications

Samsung

Samsung SCP-2273 Specifications

Nuvico Xcel NCT-8ML2-E21AF quick start guide

Nuvico

Nuvico Xcel NCT-8ML2-E21AF quick start guide

JVC VN-T16U Specifications

JVC

JVC VN-T16U Specifications

Mi MJSXJ05CM user manual

Mi

Mi MJSXJ05CM user manual

Samsung SCV-3120 Technical specifications

Samsung

Samsung SCV-3120 Technical specifications

Clarion CC-2001E installation manual

Clarion

Clarion CC-2001E installation manual

Wisenet SNB-6003 quick guide

Wisenet

Wisenet SNB-6003 quick guide

Bosch NBN-498-21P Specifications

Bosch

Bosch NBN-498-21P Specifications

Cellinx CamPilot MR330 user manual

Cellinx

Cellinx CamPilot MR330 user manual

Digital Watchdog MEGApix DWC-MPVA5WiAT user manual

Digital Watchdog

Digital Watchdog MEGApix DWC-MPVA5WiAT user manual

FLIR A3 F series Getting started

FLIR

FLIR A3 F series Getting started

Vivotek IP7151 Quick installation guide

Vivotek

Vivotek IP7151 Quick installation guide

VADDIO CLEARVIEW HD-18 Installation and user guide

VADDIO

VADDIO CLEARVIEW HD-18 Installation and user guide

Vicon Roughneck Pro V2000B Series quick guide

Vicon

Vicon Roughneck Pro V2000B Series quick guide

SenTech STC-C42A Product specification

SenTech

SenTech STC-C42A Product specification

Honeywell HCD544 Specifications

Honeywell

Honeywell HCD544 Specifications

Dahua IPC-HFW2831T-ZS-27135-S2 quick start guide

Dahua

Dahua IPC-HFW2831T-ZS-27135-S2 quick start guide

Elvox 559C Installation and operation manual

Elvox

Elvox 559C Installation and operation manual

manuals.online logo
manuals.online logoBrands
  • About & Mission
  • Contact us
  • Privacy Policy
  • Terms and Conditions

Copyright 2025 Manuals.Online. All Rights Reserved.