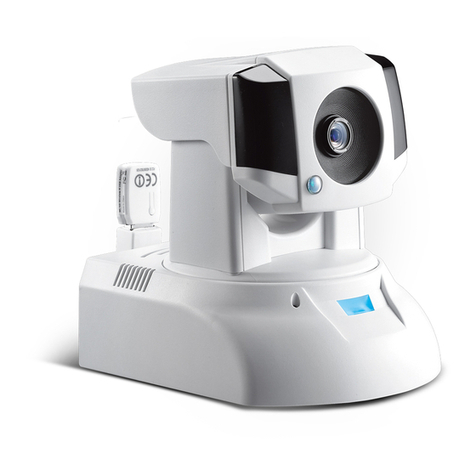
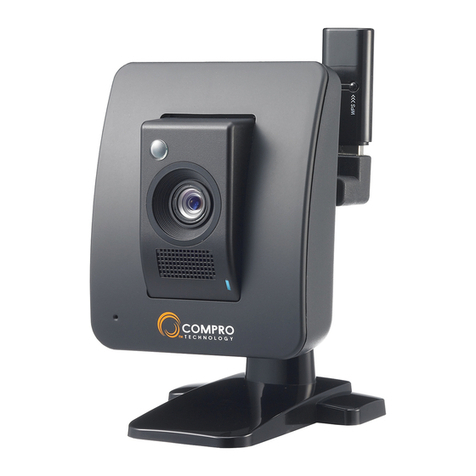
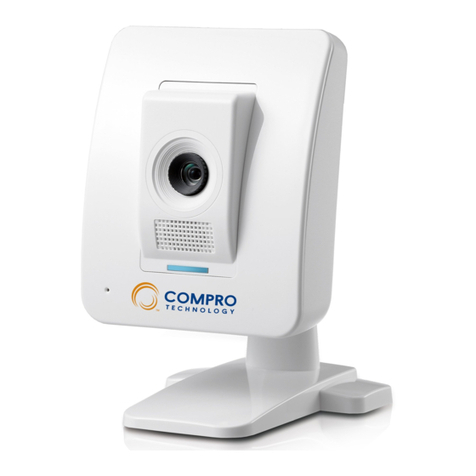
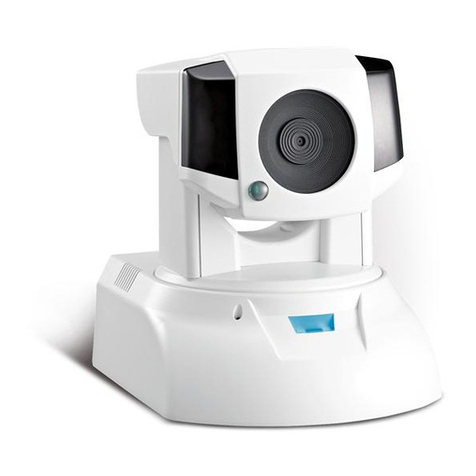
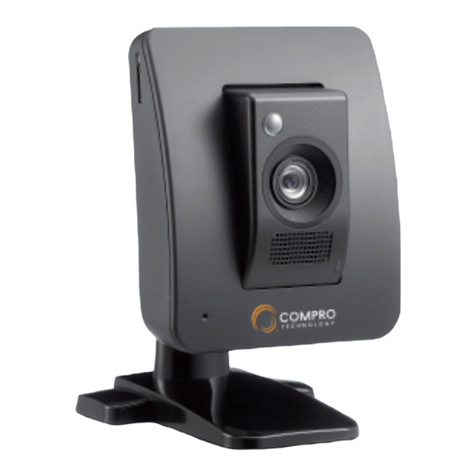
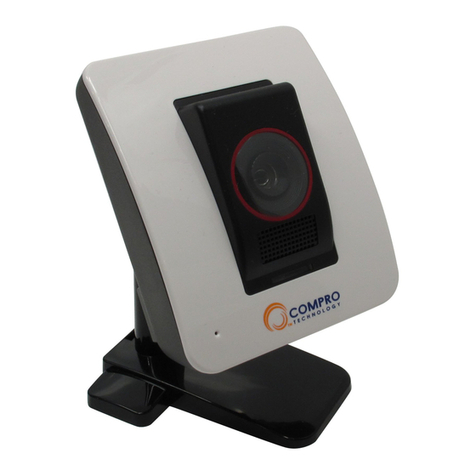
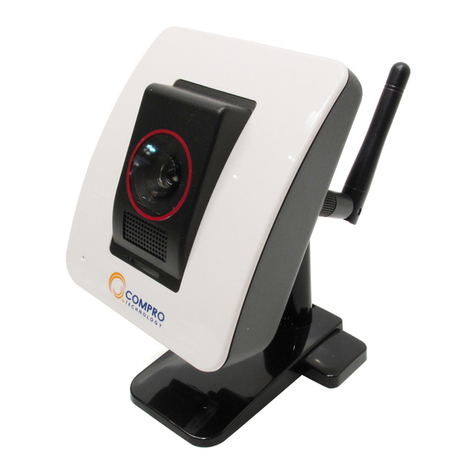
COMPRO TN30 User manual

Network Camera
Model No.
V1-130823
TN30
TN30W

Copyright
© 2013 Compro Technology, Inc. All rights reserved.
Trademark
Compro, and the Compro logo are trademarks of Compro Technology, Inc. C4Home and C4Home logo
are registered trademarks of AVSecur Technology, Inc. Microsoft, Windows Vista, Windows and the
Windows logo are trademarks of the Microsoft group of companies. SD, SDHC and microSDHC Logos
are trademarks of SD-3C, LLC. Apple, Apple Logo, Mac, Mac OS, iPad, iPhone are trademarks of Apple
Inc., registered in the U.S. and other countries. Android is a registered trademark of Google, Inc. Other
names and marks are trademarks of their respective owners.
Restriction
No part of this document may be copied or reproduced in any form or by any means without the prior
written consent of Compro Technology, Inc.
Disclaimer
Compro Technology makes no warranties with respect to this documentation and disclaims any implied
warranties of merchantability, quality, or fitness for any particular purpose. The information in this
document is subject to change without notice. COMPRO reserves the right to make revisions to this
publication without obligation to notify any person or entity of any such changes.
Revision History
2013/08/23 Original Version (V1.06)
Compro Technology, Inc.
www.comprosecurity.com
Tel. +886 2 2918 0169, Fax +886 2 2915 2389
4F, No.12, Alley 6, Lane 45, Pao Shin Road,
Hsintien District, New Taipei City 231, Taiwan

01
<頁頁頁頁頁頁>
Contents
Contents
Chapter 1: Important Notices . . . . . . . . . . . . . . . . . . . . . . . . . . . . . . . . . . . . . . . . . . . . . . . . . . . . . .1-1
Regulatory Notice . . . . . . . . . . . . . . . . . . . . . . . . . . . . . . . . . . . . . . . . . . . . . . . . . . . . . . . . . . 1-1
FCC Interference Statement. . . . . . . . . . . . . . . . . . . . . . . . . . . . . . . . . . . . . . . . . . . . . . . . . . 1-1
Operation Safety . . . . . . . . . . . . . . . . . . . . . . . . . . . . . . . . . . . . . . . . . . . . . . . . . . . . . . . . . . . 1-1
About this Manual . . . . . . . . . . . . . . . . . . . . . . . . . . . . . . . . . . . . . . . . . . . . . . . . . . . . . . . . . . 1-2
Conventions in this Manual . . . . . . . . . . . . . . . . . . . . . . . . . . . . . . . . . . . . . . . . . . . . . . . . . . . . 1-2
Chapter 2: Product Overview. . . . . . . . . . . . . . . . . . . . . . . . . . . . . . . . . . . . . . . . . . . . . . . . . . . . . . . 2-1
Key Features. . . . . . . . . . . . . . . . . . . . . . . . . . . . . . . . . . . . . . . . . . . . . . . . . . . . . . . . . . . . . . 2-1
Package Contents . . . . . . . . . . . . . . . . . . . . . . . . . . . . . . . . . . . . . . . . . . . . . . . . . . . . . . . . . . 2-1
Hardware Overview . . . . . . . . . . . . . . . . . . . . . . . . . . . . . . . . . . . . . . . . . . . . . . . . . . . . . . . . . 2-2
LED Status Indicator . . . . . . . . . . . . . . . . . . . . . . . . . . . . . . . . . . . . . . . . . . . . . . . . . . . . . . . . . 2-3
Chapter 3: Installation . . . . . . . . . . . . . . . . . . . . . . . . . . . . . . . . . . . . . . . . . . . . . . . . . . . . . . . . . . . 3-1
Connect the Cables . . . . . . . . . . . . . . . . . . . . . . . . . . . . . . . . . . . . . . . . . . . . . . . . . . . . . . . . . 3-1
Setup Network Camera from iPhone/Android phone or tablet . . . . . . . . . . . . . . . . . . . . . . . . . . .3-1
Setup TN30W Network Camera from WPS Connection . . . . . . . . . . . . . . . . . . . . . . . . . . . . . . . . . 3-2
Setup Network Camera from PC and Installation CD . . . . . . . . . . . . . . . . . . . . . . . . . . . . . . . . . .3-4
Mount the Camera. . . . . . . . . . . . . . . . . . . . . . . . . . . . . . . . . . . . . . . . . . . . . . . . . . . . . . . . . 3-10
Chapter 4: Accessing the Camera . . . . . . . . . . . . . . . . . . . . . . . . . . . . . . . . . . . . . . . . . . . . . . . . . . . . 4-1
Ways of Viewing Live Video . . . . . . . . . . . . . . . . . . . . . . . . . . . . . . . . . . . . . . . . . . . . . . . . . . . .4-1
Instant Monitoring. . . . . . . . . . . . . . . . . . . . . . . . . . . . . . . . . . . . . . . . . . . . . . . . . . . . . . . . . . 4-2
From C4Home iPhone/Android App . . . . . . . . . . . . . . . . . . . . . . . . . . . . . . . . . . . . . . . . . . . .4-2
From Android Phone/Tablet App . . . . . . . . . . . . . . . . . . . . . . . . . . . . . . . . . . . . . . . . . . .4-4
From C4Home Website . . . . . . . . . . . . . . . . . . . . . . . . . . . . . . . . . . . . . . . . . . . . . . . . . . . . . 4-4
Accessing via PC Web Browser. . . . . . . . . . . . . . . . . . . . . . . . . . . . . . . . . . . . . . . . . . . . . . . . 4-5
Chapter 5: Live View (With WebVUer on PC) . . . . . . . . . . . . . . . . . . . . . . . . . . . . . . . . . . . . . . . . . . . . . 5-1
Page Layout . . . . . . . . . . . . . . . . . . . . . . . . . . . . . . . . . . . . . . . . . . . . . . . . . . . . . . . . . . . . . . 5-1
Icons on Live View Page . . . . . . . . . . . . . . . . . . . . . . . . . . . . . . . . . . . . . . . . . . . . . . . . . . . . . .5-2
Top Panel . . . . . . . . . . . . . . . . . . . . . . . . . . . . . . . . . . . . . . . . . . . . . . . . . . . . . . . . . . . . .5-2
Left Panel . . . . . . . . . . . . . . . . . . . . . . . . . . . . . . . . . . . . . . . . . . . . . . . . . . . . . . . . . . . . .5-2
Chapter 6: Conguration (From WebVUer) . . . . . . . . . . . . . . . . . . . . . . . . . . . . . . . . . . . . . . . . . . . . . . 6-1
Main Setup Page . . . . . . . . . . . . . . . . . . . . . . . . . . . . . . . . . . . . . . . . . . . . . . . . . . . . . . . . . . . 6-1
Video Settings . . . . . . . . . . . . . . . . . . . . . . . . . . . . . . . . . . . . . . . . . . . . . . . . . . . . . . . . . . . .6-1
Camera Settings . . . . . . . . . . . . . . . . . . . . . . . . . . . . . . . . . . . . . . . . . . . . . . . . . . . . . . . . . . .6-2
Video Properties . . . . . . . . . . . . . . . . . . . . . . . . . . . . . . . . . . . . . . . . . . . . . . . . . . . . . . . . . 6-2
Flickerless . . . . . . . . . . . . . . . . . . . . . . . . . . . . . . . . . . . . . . . . . . . . . . . . . . . . . . . . . . . . . 6-2
Exposure Control. . . . . . . . . . . . . . . . . . . . . . . . . . . . . . . . . . . . . . . . . . . . . . . . . . . . . . . . .6-2
Low Light Mode . . . . . . . . . . . . . . . . . . . . . . . . . . . . . . . . . . . . . . . . . . . . . . . . . . . . . . . . .6-2
LED Indicator . . . . . . . . . . . . . . . . . . . . . . . . . . . . . . . . . . . . . . . . . . . . . . . . . . . . . . . . . . . 6-2
IR Light Control. . . . . . . . . . . . . . . . . . . . . . . . . . . . . . . . . . . . . . . . . . . . . . . . . . . . . . . . . . 6-3
Embed Text and Image . . . . . . . . . . . . . . . . . . . . . . . . . . . . . . . . . . . . . . . . . . . . . . . . . . . . . 6-3
Flip Mode . . . . . . . . . . . . . . . . . . . . . . . . . . . . . . . . . . . . . . . . . . . . . . . . . . . . . . . . . . . . .6-3
Audio Settings . . . . . . . . . . . . . . . . . . . . . . . . . . . . . . . . . . . . . . . . . . . . . . . . . . . . . . . . . . . .6-3
User Settings . . . . . . . . . . . . . . . . . . . . . . . . . . . . . . . . . . . . . . . . . . . . . . . . . . . . . . . . . . . . .6-4
Network Settings. . . . . . . . . . . . . . . . . . . . . . . . . . . . . . . . . . . . . . . . . . . . . . . . . . . . . . . . . . . 6-4
Ethernet . . . . . . . . . . . . . . . . . . . . . . . . . . . . . . . . . . . . . . . . . . . . . . . . . . . . . . . . . . . . . . 6-4
Wireless . . . . . . . . . . . . . . . . . . . . . . . . . . . . . . . . . . . . . . . . . . . . . . . . . . . . . . . . . . . . . .6-4
Network Diagnostic . . . . . . . . . . . . . . . . . . . . . . . . . . . . . . . . . . . . . . . . . . . . . . . . . . . . . . . 6-5
Network Bandwidth. . . . . . . . . . . . . . . . . . . . . . . . . . . . . . . . . . . . . . . . . . . . . . . . . . . . . . . 6-5
Advanced . . . . . . . . . . . . . . . . . . . . . . . . . . . . . . . . . . . . . . . . . . . . . . . . . . . . . . . . . . . . .6-6
DDNS . . . . . . . . . . . . . . . . . . . . . . . . . . . . . . . . . . . . . . . . . . . . . . . . . . . . . . . . . . . . . . . . 6-6
UPnP . . . . . . . . . . . . . . . . . . . . . . . . . . . . . . . . . . . . . . . . . . . . . . . . . . . . . . . . . . . . . . . .6-6
Event Setup . . . . . . . . . . . . . . . . . . . . . . . . . . . . . . . . . . . . . . . . . . . . . . . . . . . . . . . . . . . . . . 6-7
02
<頁頁頁頁頁頁>
Compro TN30/TN30W Network Camera
Event Server Setup . . . . . . . . . . . . . . . . . . . . . . . . . . . . . . . . . . . . . . . . . . . . . . . . . . . . . . .6-7
Trigger Setup . . . . . . . . . . . . . . . . . . . . . . . . . . . . . . . . . . . . . . . . . . . . . . . . . . . . . . . . . . . 6-9
Motion Detection Setup . . . . . . . . . . . . . . . . . . . . . . . . . . . . . . . . . . . . . . . . . . . . . . . . . . . . 6-9
Date Setup. . . . . . . . . . . . . . . . . . . . . . . . . . . . . . . . . . . . . . . . . . . . . . . . . . . . . . . . . . . . . . . 6-9
Chapter 7: Event Viewer . . . . . . . . . . . . . . . . . . . . . . . . . . . . . . . . . . . . . . . . . . . . . . . . . . . . . . . . . . 7-1
Chapter 8: Maintenance . . . . . . . . . . . . . . . . . . . . . . . . . . . . . . . . . . . . . . . . . . . . . . . . . . . . . . . . . . 8-1
Information . . . . . . . . . . . . . . . . . . . . . . . . . . . . . . . . . . . . . . . . . . . . . . . . . . . . . . . . . . . . . . 8-1
Log . . . . . . . . . . . . . . . . . . . . . . . . . . . . . . . . . . . . . . . . . . . . . . . . . . . . . . . . . . . . . . . . . . .8-1
Maintenance . . . . . . . . . . . . . . . . . . . . . . . . . . . . . . . . . . . . . . . . . . . . . . . . . . . . . . . . . . . . . 8-1
Reboot Camera. . . . . . . . . . . . . . . . . . . . . . . . . . . . . . . . . . . . . . . . . . . . . . . . . . . . . . . . . . 8-1
Prole Management . . . . . . . . . . . . . . . . . . . . . . . . . . . . . . . . . . . . . . . . . . . . . . . . . . . . . .8-1
Reset All Settings to Default. . . . . . . . . . . . . . . . . . . . . . . . . . . . . . . . . . . . . . . . . . . . . . . . . . 8-2
Firmware Update . . . . . . . . . . . . . . . . . . . . . . . . . . . . . . . . . . . . . . . . . . . . . . . . . . . . . . . .8-2
Chapter 9: Troubleshooting. . . . . . . . . . . . . . . . . . . . . . . . . . . . . . . . . . . . . . . . . . . . . . . . . . . . . . . . 9-1
Reset to Factory Default Settings. . . . . . . . . . . . . . . . . . . . . . . . . . . . . . . . . . . . . . . . . . . . . . . . . 9-1
Trouble with the ActiveX Client . . . . . . . . . . . . . . . . . . . . . . . . . . . . . . . . . . . . . . . . . . . . . . . . .9-2
No user interface in the browser: . . . . . . . . . . . . . . . . . . . . . . . . . . . . . . . . . . . . . . . . . . . . . .9-2
Trouble with Remote Viewing on Browser . . . . . . . . . . . . . . . . . . . . . . . . . . . . . . . . . . . . . . . . . . . 9-4
DDNS Conguration. . . . . . . . . . . . . . . . . . . . . . . . . . . . . . . . . . . . . . . . . . . . . . . . . . . . . . . . . 9-6
Symptoms, Causes and Solutions . . . . . . . . . . . . . . . . . . . . . . . . . . . . . . . . . . . . . . . . . . . . . . . .9-7
Contacting Compro Technical Support . . . . . . . . . . . . . . . . . . . . . . . . . . . . . . . . . . . . . . . . . . . . 9-12
Chapter 10: Technical Specications . . . . . . . . . . . . . . . . . . . . . . . . . . . . . . . . . . . . . . . . . . . . . . . . . 10-1
TN30/TN30W Technical Specications . . . . . . . . . . . . . . . . . . . . . . . . . . . . . . . . . . . . . . . . . . . .10-1
Chapter 11: Appendix . . . . . . . . . . . . . . . . . . . . . . . . . . . . . . . . . . . . . . . . . . . . . . . . . . . . . . . . . . 11-1
Examples of Port Forwarding Setup on Routers . . . . . . . . . . . . . . . . . . . . . . . . . . . . . . . . . . . . . .11-1
Abocom WAA813rn Port Forwarding Setup. . . . . . . . . . . . . . . . . . . . . . . . . . . . . . . . . . . . . . . 11-1
ASUS RT-N12 Virtual Server Setup . . . . . . . . . . . . . . . . . . . . . . . . . . . . . . . . . . . . . . . . . . . . . 11-1
D-Link DIR-655 Virtual Serve Setup . . . . . . . . . . . . . . . . . . . . . . . . . . . . . . . . . . . . . . . . . . . . 11-2
TP-LINK wr1043n Virtual Server Setup . . . . . . . . . . . . . . . . . . . . . . . . . . . . . . . . . . . . . . . . . .11-3

1-1Regulatory Notice
<頁頁頁頁頁頁>
Chapter 1: Important Notices
Regulatory Notice
This device complies with Part 15 of the FCC Rules. Operation is subject to the following two conditions: (1)
This device may not cause harmful interference, and (2) This device must accept any interference received,
including interference that may cause undesired operation.
FCC Interference Statement
This equipment has been tested and found to comply with the limits for a Class B digital device, pursuant
to Part 15 of the FCC Rules. These limits are designed to provide reasonable protection against harmful
interference in a residential installation.
This equipment generates, uses and can radiate radio frequency energy and, if not installed and used in
accordance with the instructions, may cause harmful interference to radio communications. However, there is
no guarantee that interference will not occur in a particular installation. If this equipment does cause harmful
interference to radio or television reception, which can be determined by turning the equipment o and on,
the user is encouraged to try to correct the interference by one of the following measures:
• Reorientorrelocatethereceivingantenna.
• Increasetheseparationbetweentheequipmentandreceiver.
• Connecttheequipmentintoanoutletonacircuitdierentfromthattowhichthereceiverisconnected.
• Consultthedealeroranexperiencedradio/TVtechnicianforhelp.
To assure continued compliance, any changes or modifications not expressly approved by the party
responsible for compliance could void the user's authority to operate this equipment.
Operation Safety
Before starting using the camera, please read and follow the steps below to protect your IP camera.
• PleaseplacetheIPcameraonalevelsurfaceandoutofdirectsunshine.
• PleasekeeptheIPcameraindoorsandawayfromwater,dust,humidityormagneticproducts.
• PleasedonotdroptheIPCamerabodytotheoor;itmaycausethedamagetomainparts.
• Pleasedonotdisassembleorremodeltheproduct;itmaycausedamageorre.
• Donotshake,moveordisturbtheIPcamerawhenitisinoperation,assuchactionsmayresultinthe
malfunction of the device.
• PowerotheIPCameraassoonasitisfoundsmokingorsmeltunusual.
• PleasedonotplacetheIPCameraaroundtheheatsources,suchastelevisionormicrowaveoven.

1-2
<頁頁頁頁頁頁>
About this Manual
Compro TN30/TN30W Network Camera
About this Manual
This manual is only intended for the users of Compro TN30/TN30W network camera.
Conventions in this Manual
While you are using this manual, pay attention to some symbols and notations that are used to draw
attention to special situations such as:
Caution!
Information provided here is critical to prevent damage to the product or
injury to the user.
!
Important:
Here it provides instructions that a user must follow in order to complete
a task.
Note:
Additional information or tips to help the user operate the product.

2-1Key Features
<頁頁頁頁頁頁>
Chapter 2: Product Overview
Key Features
The small and compact Compro TN30 cloud network camera oers vividly clear image quality and a bounty
of practical surveillance features. Its small size makes it an ideal choice for securing homes, restaurants, small
oces, or any place where space is limited.
• Smallandfunctionaldesign
• Smartphonedigitalzoomcontrol
• MJPEGvideostreamingandcompression
• Airrmwareupdate,npPCrequired
• PIRsensorandIRLEDs
• ExclusiveC4HomeMsmartphone and tablet app
• Dropboxcloudstoragesupport,VideoSharingandPrivateModesetup
• Smartmotiondetectionandpushnotication
• Built-in802.11b/g/nwirelessmoduleandantenna(TN30Wonly)
Package Contents
Please check the package contents on your hand. If anything is missing, please don’t hesitate to contact your
local distributor.
2x 2x
Figure 1-1. Parts list
Network Camera
RJ-45LANCable
Screw for ceiling mount x 2, screw anchor x 2
Quick Installation Guide
Installation CD
Power Adapter (DC5V, 2A)

2-2
LED Status Indicator
Hardware Overview
Compro TN30/TN30W Network Camera
Hardware Overview
Figure 1-2. Front and rear view
LED status indicator – For indicating system status.
Lens
Ethernet port – Connect to the Ethernet port of your network hub/switch.
Power connector – DC 5V/2A power supply.
Microphone pinhole (on the bottom) – For receiving ambient sound.
IR LEDs – Enables night view in pitch darkness.
PIR Sensor – Passive Infrared sensor to detect invader.
Connection status indicator – Blinking yellow indicates network activity over the camera's Ethernet port.
Reset button – Press and hold the button to reset the camera back to factory defaults.
Network speed indicator – Constant green (100Mbps) or unlit (10Mbps).
9 10

2-3LED Status Indicator
Hardware Overview
Chapter 2: Product Overview
LED Status Indicator
When you power on the camera, it will start booting procedure. There are one blue LED and one red LED
inside the camera case. Depending on the booting status, the LED indicator will be lit in the followings way:
1. About 25 seconds after powering on the IP camera, both the blue LED and red LED indicator will become
lit (appears purple).
2. About 35 seconds after powering on the IP camera, the red LED will be turned o.
3. Cameratryingtoconnecttonetwork:bothblue&redLEDashingatanintervalof0.5second.
4. Camera established connection: blue LED constantly on (Red LED o)
5. Camerafailedtoconnect:ashingredLED.(BlueLEDo )
Red LED Blue LED Indication
On On System booting up
O On Successfully established network connection
On O Performing hardware test
O O Powered o
Blinking (every 0.5 sec.) O Failed to connect to network / failed to
establish a WPS connection
O Blinking (every 0.5 sec.) Attempting to establish a WPS connection
O Blinking (every 0.2 sec.
in a 3-second period) Successfully established a WPS connection
Blinking (every 0.5 sec.) Blinking Attempting to establish network connection
Table 1-1. LED status

2-4
<頁頁頁頁頁頁>
Compro TN30/TN30W Network Camera

3-1Connect the Cables
<頁頁頁頁頁頁>
Chapter 3: Installation
Connect the Cables
The illustration below shows the basic cabling of your network camera.
Setup Network Camera from iPhone/Android phone or tablet
Figure 3-1. Connection of cables
Connect an Ethernet cable between your network camera and your network switch/router.
Attach the power adapter to the camera’s power connector and connect the power plug to a power
outlet. When it power on successfully, the LED indicator will shows blue light.
Make sure your smartphone is able to go to internet via your wireless router. Then download the C4Home
app from Apple app store or Google Play and install to your smartphone. Start C4Home app and register
your personal C4Homeaccount..

3-2
Connect the Cables
Connect the Cables
Compro TN30/TN30W Network Camera
Login to the C4HomeTM account and click "+" to add new camera, we provide 3 ways to add your camera:
• Scan the QR code from the back side of camera, it will automatically add your camera to the list.
• Direct input the camera ID (10 digitals under the QR code) and password (default: admin) to add
your camera.
• Click "iWizard" button on add camera page to search the available network camera from your local
network and setup. In this wizard, you can setup camera and wireless adaptor.
Now you can watch live video of your network camera from your smartphone or tablet.
Setup TN30W Network Camera from WPS Connection
If your wireless router support WPS connection setup, you can use it to setup TN30W network camera directly
from WPS and no Ethernet cable required.
Plug in the power of your TN30W nerwork camera and do not connect the Ethernet cable to the network
camera. (If you connect the Ethernet cable, the network camera will running the cable mode.) The LED
indicator in the front of network camera will shows blinking red.
Press the WPS button on the wireless router about 3 sec. to turn on the WPS setup. (The WPS setup
maybe vary from dierent router manufacturers, please refer to the user’s manual of your wireless router
for WPS setup.)
WPS
WPS Button
One-click the RESET button on the network camera within 1 minute. And wait for about 1 minute for the
connection between wireless router and nerwork camera.
When the connection is established, the LED indicator will shows blue light.
Open the C4Home app from your smartphone and add camera to your list.
RESET Button

3-3Connect the Cables
Connect the Cables
Chapter 3: Installation
If the WSP setup is not working, please try to setup the network camea with Ethernet cable connection.
!
Important:
• WiththeTN30Wmodel,youcanalsooptionforusingthewireless
connection. Please keep in mind that you can only have one active
connection at a given time, either through LAN or wireless network.
• Ifthewirelessconnectiondropsrandomlyorplainlyseemsslow,try
bringing your IP camera in closer proximity to the wireless AP/router
and then see if the situation improves.
• Havingmorewallsandceilingsbetweenthewirelesslyconnected
Compro camera and your wireless AP/router will negatively aect your
wireless connection speed. Generally, the number of walls and ceilings
shall be kept in minimum.
• Materialsandobjectslikesolidmetal,aluminum,steel,water,brick,
and concrete will weaken the strength of the wireless signal. Allow
the wireless signal from your wirelessly connected camera and your
wireless AP/router to pass through open doorways when positioning
them.
• Theoperationofthewirelessnetworkmaybeinterferedshouldthere
be other 2.4 GHz devices working in the vicinity, e.g. microwave oven,
digital cordless camera, etc. You may experience slow frame rate or
dropsofconnection;insuchsituation,wesuggestyoutrymovingthe
IP camera away from the area or turning o other appliances.
• Sincewirelesscamerascancauseinterferencesontransmission,you
may encounter erratic behavior when there are more than 10 cameras
operating in close proximity.
• Thedefaultwirelessconnectionmethoduses802.11nstandardand
you should experience a stable connection on your camera within 20
meters of the access point. .

3-4
Connect the Cables
Connect the Cables
Compro TN30/TN30W Network Camera
Setup Network Camera from PC and Installation CD
Figure 3-2. Connection of cables
Connect an Ethernet cable between your PC and your network switch/router.
Connect an Ethernet cable between your network camera and your network switch/router.
Attach the power adapter to the camera’s power connector and connect the power plug to a power
outlet. When it power on successfully, the LED indicator will shows blue light.
Complete the cable connection, we provide 2 ways to add your camera:
• Login to C4Home website (www.c4home.com) and add camera to the list. C4Home website not
support the wireless setup of network camera. Please use C4Home app or installation CD for
wireless setup.
• Insert the installation CD to your CD/DVD drive, and running the iWizard.exe to install IP camera.
Caution!
• Whenyouunplugthepowerplugfromthewalloutletwhilethe
camera is still in operation, wait for 4 seconds before plugging the
power plug back in the wall outlet. And avoid too frequent plugging
and unplugging of power cable.
• Ifthepowercableandthenetworkcableconnectedtothecameraare
not securely fastened, it could lead to unstable connection.
Note:
You can add more Compro cloud network camera to your account
for management. C4Home app allow maximum 16 network cameras
installed.

3-5Connect the Cables
Connect the Cables
Chapter 3: Installation
To begin setup, insert the installation CD into your CD-ROM drive, and the iWizard will start automatically.
Note:
If Autorun has been disabled in your computer, please browse the
contents of the installation CD and double-click on the "iWizard.exe"
le to run the setup wizard.
1. Select the language for installation
network camera.
Figure 3-3. Language selection
2. Select your camera from the list, and
wait until the live video and camera
information are displayed on the right. (You
can double-check the device name and
the MAC ID which are printed on the serial
number sticker on the back of the camera
and on the package). Click [Next] when
you’re ready .
Figure 3-4. Camera selection
3. The default password is `admin.’ Enter a
new password here (please note down
your new password). You can also click
[Next] to skip this process.
Figure 3-5. Password setup

3-6
Connect the Cables
Connect the Cables
Compro TN30/TN30W Network Camera
4. Check the camera name, date and time
setting.
Figure 3-6. Camera conguration
5. Choose whether to use C4Home service
to remotely access your camera. C4Home
is a platform for viewing, managing
and sharing network cameras over the
internet. You may also use a different
C4Home server by clicking on [Advanced
Settings]. (Default server is www.c4home.
com) (If C4Home service is enabled, iDDNS
service will not be available for use on the
camera.)
Figure 3-7. C4Home setup
Note:
C4Home video streams are encrypted end-to-end and most of the
streams are sent through direct channels and don't pass through
C4Home server, which helps protect user privacy.
6. Choose to have the camera obtain
IP address automatically (DHCP) or
manually assign its IP address. Then set
the connection port and local power
line frequency settings (not available for
change when C4Home service is enabled)
Figure 3-8. Device conguration

3-7Connect the Cables
Connect the Cables
Chapter 3: Installation
7. (For TN30W wireless connection setup)
If you are using the TN30W, you can
choose to connect wirelessly by default.
The wizard will search for available access
points. Then select one access point to use.
Figure 3-9. Wireless connection setup
8. (For TN30W wireless connection setup)
Enter the correct passphrase, and choose
the IP address conguration.
Figure 3-10. Wireless connection setup
9. (Skip here if you have enabled C4Home
service)IfyouareusingoatingIP,youcan
use DDNS service and create a hostname
that links to your camera’s IP address. Click
[Yes] and input an address name. Then
click [Check Availability] button.
Figure 3-11. iDDNS conguration

3-8
Connect the Cables
Connect the Cables
Compro TN30/TN30W Network Camera
Note:
iDDNS is a free DDNS (Dynamic Domain Name Service) service offered by
Compro. iDDNS service is not be available for use when C4Home service is
enabled.IfyouareusingoatingIPaddress,youcanuseDDNSservicetocreatea
hostname that links to your home or oce IP address. Having created the iDDNS
address name, you can then enter `http://xxx (input by yourself).iddns.org’ into
your browser’s address bar to remotely access your camera.
If your local LAN and router have rewall to block attack from outside, you have
to congure the HTTP port on your router. For example, if you set the HTTP port
“2001” for your IP camera, your IP camera’s address will be http://xxx (entered by
you).iddns.org:2001.
10.(Skip here if you didn’t enable C4Home
service.) You need to login to your C4Home
account. If you don’t have a C4Home
account yet, choose to create a C4Home
account and continue with account
registration.
Figure 3-12. C4Home account setup
11.iWizard starts programming your camera
based on your settings. Please wait
patiently and DO NOT interrupt the
process. (If you didn’t enable C4Home
service, you’ll get to review your settings
before saving them.)
Figure 3-13. Saving Changes

3-9Connect the Cables
Connect the Cables
Chapter 3: Installation
12.The iWizard performs system diagnosis
based on your network settings and alert
you for inappropriate settings (marked
with a question mark icon).
Figure 3-14. System Diagnostics
13.iWizard indicates the setup has completed
successfully. You can click on the URL to
view the live video now. Or click [Yes] if
you wish you set up another camera from
scratch.
Figure 3-15. Multi-device Setup

3-10
<頁頁頁頁頁頁>
Mount the Camera
Compro TN30/TN30W Network Camera
Mount the Camera
If desired, you can mount the camera on a wall or ceiling. The following section explains how to mount your
camera.
1. Drill 2 mounting holes on the mounting surface. While you are at it, bear in mind that there will have to be
a minimum space of 2.5 mm (0.098 inch) between the screw head and the mounting surface. Also, the 2
mounting holes on the wall or ceiling should be spaced exactly 31 mm (1.22 inch) apart to correspond
to the position of screw holes on the camera's bracket base. Then, if you're mounting on a concrete wall,
insert a screw anchor into each of the mounting holes.
STEP 1
STEP 2
31mm
31mm
2.5mm
Fastening Nut
Bracket
Base
2. Loosen the fastening hex nut to detach the bracket from the camera.
STEP 1
STEP 2
31mm
31mm
2.5mm
Fastening Nut
Bracket
Base
3. Removethebasecoverbyinsertingaatbladescrewdriverintothesmallholeonthebracketbaseand
then pressing the screwdriver downward.
STEP 3
STEP 4
Base
Cover
4. Put a screw into each of the mounting holes. Then secure the bracket to the mounting surface.
STEP 3
STEP 4
Base
Cover
5. Finally, click the base cover back into position. After that, attach the camera body back to the bracket
and then adjust the camera to the desired viewing angle.
STEP 5
This manual suits for next models
1
Table of contents
Other COMPRO Security Camera manuals

COMPRO
COMPRO TN900 User manual

COMPRO
COMPRO TN96P User manual

COMPRO
COMPRO VideoMate IP50 User manual

COMPRO
COMPRO IP540 User manual

COMPRO
COMPRO TN70 User manual

COMPRO
COMPRO TN900R User manual

COMPRO
COMPRO NC3230 User manual

COMPRO
COMPRO TN900R User manual

COMPRO
COMPRO NC420 User manual

COMPRO
COMPRO TN1500 User manual