manuals.online logo
Brands
  1. Home
  2. •
  3. Brands
  4. •
  5. Conrad
  6. •
  7. Security System
  8. •
  9. Conrad 75 10 52 User manual

Conrad 75 10 52 User manual

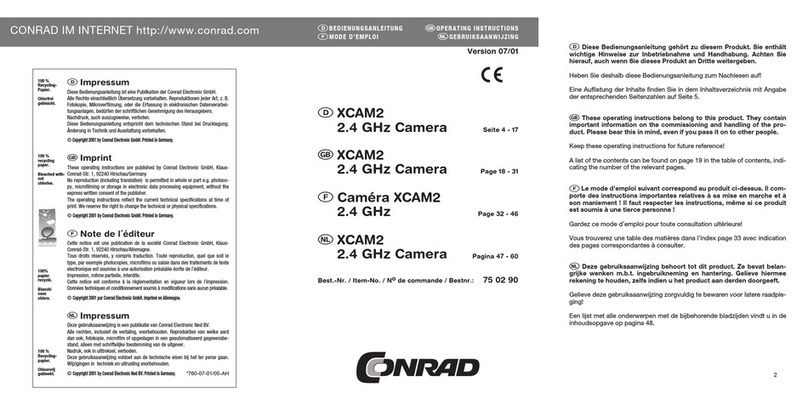
Version 06/02
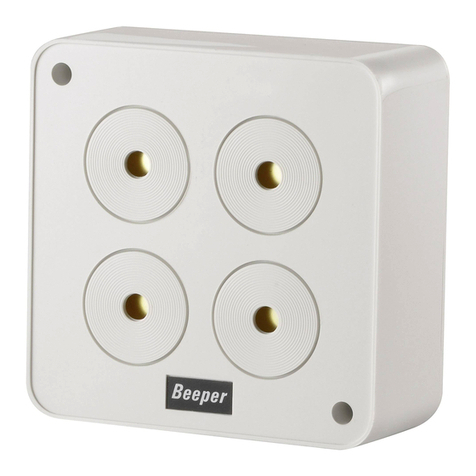
Tür-/Fensteralarm °
Best.-Nr. 75 10 52
Bestimmungsgemäße Verwendung
Bei diesem Tür-/Fensteralarm handelt es sich um ein Sicherheitsprodukt welches
Einbrecher abschreckt. Die Alarmaktivierung erfolgt über Magnetkontakt.
Die Spannungsversorgung erfolgt durch drei Knopfzellen á 1,5 Volt DC.
Der Kontakt mit Feuchtigkeit ist unbedingt zu vermeiden! Eine andere Verwendung
als zuvor beschrieben führt zur Beschädigung dieses Produktes. Das gesamte
Produkt darf nicht geändert, bzw. umgebaut werden!
Sicherheitshinweise
Bei Schäden, die durch Nichtbeachten dieser Bedienungsanleitung
verursacht werden, erlischt der Garantieanspruch! Für Folgeschäden
übernehmen wir keine Haftung!
Aus Sicherheits- und Zulassungsgründen (CE) ist das eigenmächtige Umbauen
und/oder Verändern des Tür-/Fensteralarms nicht gestattet!
Der Tür-/Fensteralarm und die Knopfzellen gehören nicht in Kinderhände!
Knopfzellen sind Sondermüll und gehören nicht in den Hausmüll! Die leeren
Knopfzellen können u.a. fachgerecht im Elektrofachhandel in den dafür vorgesehe-
nen Sammelbehältern entsorgt werden!
Achten Sie beim Einlegen der Knopfzellen auf die richtige Polung!
Lassen Sie Knopfzellen nicht offen herumliegen; es besteht Gefahr, daß diese von
Kindern oder Haustieren verschluckt werden! Suchen Sie im Falle eines
Verschluckens sofort einen Arzt auf!
Ausgelaufene oder beschädigte Knopfzellen können bei Berührung mit der Haut
Verätzungen verursachen; benutzen Sie deshalb in diesem Fall unbedingt geeignete
Schutzhandschuhe!
Achten Sie darauf, daß Knopfzellen nicht kurzgeschlossen, ins Feuer geworfen und
aufgeladen werden! In diesen Fällen besteht Explosionsgefahr!
Wenn der Tür-/Fensteralarm längere Zeit nicht verwendet wird, müssen die
Knopfzellen aus dem Batteriefach entfernt werden, da diese auslaufen können!
Achtung! Lauter Alarmton!
Setzen Sie Ihr Gehör diesem Ton nicht über einen längeren Zeitraum aus, da sonst
schwere Gehörschäden die Folge sein können!
Bedienung
1. Batteriewechsel
Beachten Sie hierzu auch die Sicherheitshinweise!
Sobald der Alarmton leiser wird, müssen die Knopfzellen gewechselt werden.
Schieben Sie dazu das Batteriefach an der Vorderseite des Gehäuses, wie in der
nachfolgenden Abbildung gezeigt, auf!
Ersetzen Sie die Knopfzellen immer komplett und nur durch neue gleichen Typs, z.B.
3 x LR 44! Beachten Sie hierzu die Polarität "+" und "-" (Kennzeichnung im
Batteriefach)! Anschließend das Batteriefach wieder verschließen!
2. Installation
Befestigen Sie den Tür-/Fensteralarm (Hauptgerät) mit dem Selbstklebestreifen an
der Seite des Fensters oder Türrahmen!
Den Magnetkontakt befestigen Sie hierzu parallel mit dem Selbstklebestreifen am
Fensterrahmen bzw. Türblatt! (Siehe Abbildung!) Bei geschlossener Tür bzw.
Fenster darf der Abstand zwischen den beiden Teilen nicht größer als 8 mm sein!
Schieben Sie den Schalter auf "ON" (Ein)! Beim Öffnen des Fensters oder der Tür
ertönt nun der Alarmton. In der Position "OFF" (Aus) ist der Tür-/ Fensteralarm außer
Funktion.
BEDIENUNGSANLEITUNG www.conrad.de
Montagebeispiel:
Technische Daten
Betriebsspannung : 4,5 Volt DC
3 x Knopfzelle LR44
Stromaufnahme : 65 mA bei Alarm
3µA (Standby)
Version 06/02
Door/Window Alarm °
Item-No. 75 10 52
Proper Use
This door/window alarm is a safety product for deterring burglars. Alarm activation
is accomplished via magnetic contact.
Voltage supply is achieved via three button cells with 1.5 volts DC each.
Contact with humidity must be avoided! A use other than the above described caus-
es damages to this product. The entire must not be modified or rebuilt!
Safety Notes
Damages resulting from the non-observance of this operating manu-
al invalidate the guarantee claim! We do not assume liability for con-
sequential damages!
For reasons of safety and approval (CE) unauthorised rebuilding and/or modification
of the door/window alarm is not permitted!
The door/window alarm and the button cells must be kept away from children!
Button cells are to be considered as special waste and such must not be disposed
of in the household waste! Empty button cells for example can be disposed of appro-
priately with electric dealers in collection boxes provided for this purpose!
When inserting button cells observe the correct polarity!
Do not leave button cells lie around unattended! They might be swallowed by chil-
dren or pets! In such a case seek immediate medical care!
Leaking or damaged button cells may cause cauterisation when in contact with the
skin; therefore use appropriate protection gloves!
Make sure not to short-circuit button cells, throw them into fire or charge them!
These cases involve explosion hazard!
If you have not used the door/window alarm for a prolonged period of time, remove
the button cells from the battery compartment because the may leak!
Caution! Loud alarm!
Do not expose your hearing to this alarm sound for a prolonged period of time as
otherwise your hearing may suffer severe injury!
Operation
1. Battery replacement
Observe also the safety instructions in this context!
As soon as the alarm diminishes, you must replace the button cells. To this end,
open the battery compartment on the front side as described in below illustration!
Always replace the entire set of button cells and use only fresh batteries of the same
type for replacement e.g., 3 x LR 44! Observe the correct polarity "+" and "-"
(imprinted in the battery compartment)! Afterwards close the battery compartment!
2. Installation
Attach the door/window alarm (main device) to the side of the window or door frame
by means of the adhesive tapes!
The magnetic contact must be attached to the window frame or door leaf in paral-
lel position using the adhesive tape! (See illustration!) The distance between these
two parts must not exceed 8 mm when the door or window is closed!
Set the switch to "ON"! An alarm will now sound when the door or window are
opened. In the position "OFF”, the door/window alarm is out of service.
OPERATING INSTRUCTIONS www.conrad.de
Mounting example:
Technical Data
Operating voltage : 4.5 volts DC
3 x button cells LR44
Power consumption : 65 mA during alarm
3µA (standby)
These operating instructions are published by Conrad Electronic GmbH,
Klaus-Conrad-Straße 1, D-92240 Hirschau/Germany.
The operating instructions reflect the current technical specifications at time
of print. We reserve the right to change the technical or physical specifications.
© Copyright 2002 by Conrad Electronic GmbH. Printed in Germany.
Diese Bedienungsanleitung ist eine Publikation der Conrad Electronic GmbH,
Klaus-Conrad-Straße 1, D-92240 Hirschau.
Diese Bedienungsanleitung entspricht dem technischen Stand bei Druck-
legung. Änderung in Technik und Ausstattung vorbehalten.
© Copyright 2002 by Conrad Electronic GmbH. Printed in Germany.
Hauptgerät
Ein-/Aus-
Schalter
Fenster-/
Tür-Alarm
Batteriefach
Magnetkontakt
Main device
On/Off
switch
Window-/
Door-Alert
Battery compartment
Magnetic contact
Version 06/02
Alarme porte/fenêtre °
N° de commande 75 10 52
Restrictions d’utilisation
La présente alarme porte/fenêtre est un appareil de protection faisant fuir les cam-
brioleurs. L’activation de l’alarme se fait par contact magnétique. L’alimentation en
courant est effectuée au moyen de trois piles bouton à 1,5 Volt DC.
Tout contact avec l’humidité est à éviter!
Toute utilisation autre que stipulée ci-dessus provoque l’endommagement de ce
produit Il n’est permis ni de modifier le produit, ni de le transformer!
Consignes de sécurité
En cas de dommages dus à la non observation de ce mode d’emploi,
la validité de la garantie est annulée! Nous déclinons toute responsa-
bilité pour d’éventuels dommages consécutifs!
Pour des raisons de sécurité et d’homologation (CE), il est interdit de modifier la
construction ou de transformer l’alarme porte/fenêtre soi-même!
Maintenez l’alarme porte/fenêtre et les piles bouton hors de la portée des enfants!
Les piles bouton sont des déchets spéciaux ne devant pas être jetés dans les ordu-
res ménagères! Veuillez rendre les piles bouton usagées entre autres dans le com-
merce spécialisé tenu de les reprendre dans des containers spéciaux mis à cet effet
à disposition dans les magasins!
Faites attention à insérer les piles bouton en respectant la polarité.
Ne laissez pas traîner les piles bouton, elles pourraient être avalées par un enfant
ou par un animal domestique. Si cela arrivait, consultez immédiatement un méde-
cin!
Les piles corrodées ou endommagées peuvent au toucher causer des brûlures sur
la peau. Mettez impérativement des gants de protection pour retirer de telles piles!
Veillez à ne pas court-circuiter les piles. Ne pas les jeter dans le feu. N’essayez
jamais de recharger des piles. Il y a risque d’explosion!
Enlevez les piles bouton du compartiment à piles si vous n’utilisez pas l’alarme por-
te/fenêtre pour une longue période car les piles pourraient fuir!
Attention! Alarme très bruyante!
N’exposez pas votre ouie outre mesure à ce bruit, il pourrait s’ensuivre de graves
séquelles auditives!
Mode d’emploi
1. Changement de piles
Prenez compte des consignes de sécurité!
Dès que le son produit par cette alarme devient plus faible, il faut changer les piles
bouton.
A cet effet, ouvrez le compartiment à piles qui se trouve sur le dessus du boîtier,
comme indiqué sur l’illustration ci-après!
Remplacez toujours toutes les piles bouton en même temps et par des piles du
même type, par ex.
3 x LR 44! Veillez à bien respecter la polarité requise "+" et "-" (indication à l’inté-
rieur du compartiment à piles)! Refermer ensuite le compartiment à piles!
2. Installation
Fixez l’alarme porte/fenêtre (appareil principal) au moyen du ruban adhésif sur le
côté de l’encadrement de la porte ou de la fenêtre!
Fixez le contact magnétique parallèlement à celui-ci au moyen du ruban adhésif sur
le châssis de fenêtre ou le panneau de porte (voir illustration!). Quand porte ou fenê-
tre sont fermées, l’intervalle entre les deux parties de l’appareil ne doit pas dépas-
ser 8 mm! Poussez l’interrupteur sur "ON" (en service)! A l’ouverture de la porte ou
de la fenêtre, l’alarme se déclenche. Sur la position "OFF" (hors service), l’alarme
porte/fenêtre ne se déclenche pas.
MODE D’EMPLOI www.conrad.de
Exemple de montage :
Caractéristiques techniques
Tension de service : 4,5 Volt DC
3 x piles bouton LR44
Consommation de courant : 65 mA pendant l’alarme
3µA (en veilleuse Standby)
Cette notice est une publication de la société Conrad Electronic GmbH,
Klaus-Conrad-Straße 1, D-92240 Hirschau/Allemagne.
Cette notice est conforme à la règlementation en vigueur lors de l´impression.
Données techniques et conditionnement soumis à modifications sans aucun
préalable.
© Copyright 2002 par Conrad Electronic GmbH. Imprimé en Allemagne.
*06-02/36-AH
appareil principal
interrupteur
alarme
porte/
fenêtre
compartiment à piles
contact magnétique

Other Conrad Security System manuals

Conrad 61 03 73 User manual

Conrad

Conrad 61 03 73 User manual

Conrad 75 16 99 User manual

Conrad

Conrad 75 16 99 User manual

Conrad 75 06 82 User manual

Conrad

Conrad 75 06 82 User manual

Conrad GKA100 User manual

Conrad

Conrad GKA100 User manual

Conrad 75 15 94 User manual

Conrad

Conrad 75 15 94 User manual

Conrad 75 16 36 User manual

Conrad

Conrad 75 16 36 User manual

Conrad EW01 Quick guide

Conrad

Conrad EW01 Quick guide

Conrad ZM 02 User manual

Conrad

Conrad ZM 02 User manual

Conrad 75 10 59 User manual

Conrad

Conrad 75 10 59 User manual

Conrad 75 19 13 User manual

Conrad

Conrad 75 19 13 User manual

Conrad 75 18 39 User manual

Conrad

Conrad 75 18 39 User manual

Conrad 75 16 23 User manual

Conrad

Conrad 75 16 23 User manual

Conrad XCAM2 User manual

Conrad

Conrad XCAM2 User manual

Conrad 75 06 61 User manual

Conrad

Conrad 75 06 61 User manual

Conrad 75 00 11 User manual

Conrad

Conrad 75 00 11 User manual

Conrad UC-AV10 User manual

Conrad

Conrad UC-AV10 User manual

Conrad AW50 User manual

Conrad

Conrad AW50 User manual

Conrad 751170 User manual

Conrad

Conrad 751170 User manual

Conrad 879608 User manual

Conrad

Conrad 879608 User manual

Conrad CC-4100 User manual

Conrad

Conrad CC-4100 User manual

Conrad GX110 User manual

Conrad

Conrad GX110 User manual

Popular Security System manuals by other brands

Samsung SSA-S4000 Specifications

Samsung

Samsung SSA-S4000 Specifications

PSC Secure USAB-1 quick start guide

PSC

PSC Secure USAB-1 quick start guide

Defender Security DFR-5MP-XBR4V2-BB quick start guide

Defender Security

Defender Security DFR-5MP-XBR4V2-BB quick start guide

Nice HSSOC Instructions and installation for use

Nice

Nice HSSOC Instructions and installation for use

SSS Siedle DCA 612 Series operating manual

SSS Siedle

SSS Siedle DCA 612 Series operating manual

King Pigeon S100 user manual

King Pigeon

King Pigeon S100 user manual

AKO 52067 manual

AKO

AKO 52067 manual

Kidde 7CO instructions

Kidde

Kidde 7CO instructions

jablotron GT 970 Installation and user manual

jablotron

jablotron GT 970 Installation and user manual

Eurogauge LAS31Z1 user guide

Eurogauge

Eurogauge LAS31Z1 user guide

Visonic PowerMax Partitions II quick start guide

Visonic

Visonic PowerMax Partitions II quick start guide

Temperange WSE29 quick start guide

Temperange

Temperange WSE29 quick start guide

Visonic MCS-730 installation instructions

Visonic

Visonic MCS-730 installation instructions

SRT SRT306 quick start guide

SRT

SRT SRT306 quick start guide

UTC 263B-CO-OEM user manual

UTC

UTC 263B-CO-OEM user manual

Rondish Nexus WCP-11 user manual

Rondish

Rondish Nexus WCP-11 user manual

Honeywell proX1 Installation and operating instructions

Honeywell

Honeywell proX1 Installation and operating instructions

Cisco ISA 3000 quick start guide

Cisco

Cisco ISA 3000 quick start guide

manuals.online logo
manuals.online logoBrands
  • About & Mission
  • Contact us
  • Privacy Policy
  • Terms and Conditions

Copyright 2025 Manuals.Online. All Rights Reserved.