manuals.online logo
Brands
  1. Home
  2. •
  3. Brands
  4. •
  5. Crestron
  6. •
  7. Switch
  8. •
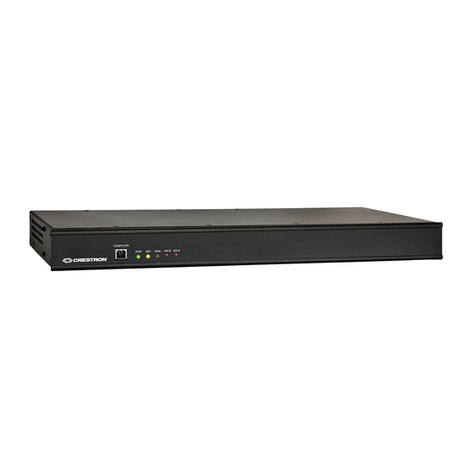
  9. Crestron DIN-HUB User manual

Crestron DIN-HUB User manual

Other Crestron Switch manuals

Crestron DM NVX Series User manual

Crestron

Crestron DM NVX Series User manual

Crestron ZUM-FLOOR-HUB User manual

Crestron

Crestron ZUM-FLOOR-HUB User manual

Crestron 8x8 DigitalMedia DM-MD8X8 User manual

Crestron

Crestron 8x8 DigitalMedia DM-MD8X8 User manual

Crestron CNLGE-8 User manual

Crestron

Crestron CNLGE-8 User manual

Crestron GreenLight DIN-8SW8 Original operating instructions

Crestron

Crestron GreenLight DIN-8SW8 Original operating instructions

Crestron C2N-MMS User manual

Crestron

Crestron C2N-MMS User manual

Crestron CEN-AVF-HUB Dimensional drawing

Crestron

Crestron CEN-AVF-HUB Dimensional drawing

Crestron DM-MD8X1-4K-C Dimensional drawing

Crestron

Crestron DM-MD8X1-4K-C Dimensional drawing

Crestron DigitalMedia DM-MD64X64 How to use

Crestron

Crestron DigitalMedia DM-MD64X64 How to use

Crestron 8x8 DigitalMedia DM-MD8X8 User manual

Crestron

Crestron 8x8 DigitalMedia DM-MD8X8 User manual

Crestron CNX-PVID8x4 User manual

Crestron

Crestron CNX-PVID8x4 User manual

Crestron HD-RX-4K-510-C-E User manual

Crestron

Crestron HD-RX-4K-510-C-E User manual

Crestron GREEN LIGHT GLPX-HSW-FT User manual

Crestron

Crestron GREEN LIGHT GLPX-HSW-FT User manual

Crestron CNXHUB User manual

Crestron

Crestron CNXHUB User manual

Crestron SIGNAMAX C-300 Series User manual

Crestron

Crestron SIGNAMAX C-300 Series User manual

Crestron DM-MD8X1-4K-C Owner's manual

Crestron

Crestron DM-MD8X1-4K-C Owner's manual

Crestron Network Device PWE-4803RU User manual

Crestron

Crestron Network Device PWE-4803RU User manual

Crestron DM Lite HD-RX-4K-510-C-E User manual

Crestron

Crestron DM Lite HD-RX-4K-510-C-E User manual

Crestron DigitalMedia DM-MD64X64 User manual

Crestron

Crestron DigitalMedia DM-MD64X64 User manual

Crestron Green Light GL-IPAC-SW8 User manual

Crestron

Crestron Green Light GL-IPAC-SW8 User manual

Crestron CEN-SWPOE-16 Dimensional drawing

Crestron

Crestron CEN-SWPOE-16 Dimensional drawing

Crestron USB-SW-200 User manual

Crestron

Crestron USB-SW-200 User manual

Crestron CLW-SLVS1W User manual

Crestron

Crestron CLW-SLVS1W User manual

Crestron DM Lite HD(I)-MD Series Owner's manual

Crestron

Crestron DM Lite HD(I)-MD Series Owner's manual

Popular Switch manuals by other brands

SMC Networks SMC6224M Technical specifications

SMC Networks

SMC Networks SMC6224M Technical specifications

Aeotec ZWA003-S operating manual

Aeotec

Aeotec ZWA003-S operating manual

TRENDnet TK-209i Quick installation guide

TRENDnet

TRENDnet TK-209i Quick installation guide

Planet FGSW-2022VHP user manual

Planet

Planet FGSW-2022VHP user manual

Avocent AutoView 2000  AV2000BC AV2000BC Installer/user guide

Avocent

Avocent AutoView 2000 AV2000BC AV2000BC Installer/user guide

Moxa Technologies PT-7728 Series user manual

Moxa Technologies

Moxa Technologies PT-7728 Series user manual

Intos Electronic inLine 35392I operating instructions

Intos Electronic

Intos Electronic inLine 35392I operating instructions

Cisco Catalyst 3560-X-24T Technical specifications

Cisco

Cisco Catalyst 3560-X-24T Technical specifications

Asante IntraCore IC3648 Specifications

Asante

Asante IntraCore IC3648 Specifications

Siemens SIRIUS 3SE7310-1AE Series Original operating instructions

Siemens

Siemens SIRIUS 3SE7310-1AE Series Original operating instructions

Edge-Core DCS520 quick start guide

Edge-Core

Edge-Core DCS520 quick start guide

RGBLE S00203 user manual

RGBLE

RGBLE S00203 user manual

Thrustmaster FLIGHT SIMULATOR X quick guide

Thrustmaster

Thrustmaster FLIGHT SIMULATOR X quick guide

Southwire SURGE GUARD 41390 RVC troubleshooting guide

Southwire

Southwire SURGE GUARD 41390 RVC troubleshooting guide

Buhler Nivotemp NT 61 Brief instructions

Buhler

Buhler Nivotemp NT 61 Brief instructions

Kramer VS-41HDCP user manual

Kramer

Kramer VS-41HDCP user manual

Techly IDATA AU-270 user manual

Techly

Techly IDATA AU-270 user manual

Belkin F1U109 user manual

Belkin

Belkin F1U109 user manual

manuals.online logo
manuals.online logoBrands
  • About & Mission
  • Contact us
  • Privacy Policy
  • Terms and Conditions

Copyright 2025 Manuals.Online. All Rights Reserved.

DIN-HUB
DIN Rail Cresnet®Distribution Hub
Installation Guide
Hardware Hookup
Make the necessary connections as called out in the illustration below. Apply power after
all connections have been made. When making connections to the DIN-HUB, use a
Crestron power supply.
CAUTION: Insufcient power can lead to unpredictable results or damage to the
equipment. Please use the Crestron Power Calculator to help calculate how much
power is needed for the system (www.crestron.com/calculators).
NOTE: Use Crestron Certifed Wire. Cresnet HP wire cannot be used.
NOTE: When making connections, strip the ends of the wires approximately 7/16 in
(11 mm). Use care to avoid nicking the conductors. Tighten the connector to 5 in-lb
(0.5 to 0.6 N-m). The wire gauge should be 14 to 26 AWG.
Hardware Connections for the DIN-HUB
Description
The DIN-HUB is a DIN rail-mounted Cresnet hub designed to facilitate the conguration of
large Cresnet networks. DIN rail mounting enables modular installation alongside
Crestron®DIN Rail lighting and automation control modules and other third-party DIN rail
mountable devices.
DIN-HUB Specications
Installation
CAUTION: This equipment is for indoor use only. Mount in a well-ventilated area. The
ambient temperature must be 32º to 104 ºF (0º to 40 ºC). The relative humidity must be
10% – 90% (noncondensing).
NOTE: Observe the following points:
• Install and use this product in accordance with appropriate electrical codes and
regulations.
• A licensed electrician should install this product.
NOTE: Before using the DIN-HUB, ensure the device is using the latest rmware. Check
for the latest rmware for the DIN-HUB at www.crestron.com/rmware. Load the
rmware onto the device using Crestron Toolbox™ software.
The DIN-HUB is designed for installation on a DIN rail. Refer to the following diagram
when installing.
1. Place the top of the DIN-HUB’s rail mount over the top of the DIN rail.
2. Tilt the bottom of the DIN-HUB toward the DIN rail until it snaps into place.
NOTE: When mounting DIN rail products, use a at-head screw driver to pull the
DIN rail release tab while snapping the device onto the DIN rail.
To remove the DIN-HUB from the DIN rail, use a small, at object (i.e., a at-head
screwdriver) to pull the DIN rail release tab, and tilt the bottom of the DIN-HUB away from
the DIN rail.
NOTE: Certain third-party DIN cabinets provide space for an informational label
between each DIN rail row. Crestron’s Engraver software (version 4.0 or later) can
generate appropriate labels for all Crestron DIN rail products.
Installing the DIN-HUB
Additional Resources
Visit the product page on the Crestron website (www.crestron.com)
for additional information and the latest rmware updates. Use a QR
reader application on your mobile device to scan the QR image.
DIN-HUB
Top
DIN rail
(not supplied)
DIN rail
release
NET HOST
NET PWR INPUT
24VDC
NET A
HOST
EXT
G
NET B
HOST
EXT
G
NET C
HOST
EXT
G
CRESNET DISTRIBUTION HUB
DIN-HUB
NET
PWR
NET C
PWR
NET
NET B
PWR
NET
NET A
PWR
NET
24 Y ZG24 YZG24 Y ZG24 YZG
24YZG 24YZG 24YZG
24 Y ZG
NET PWR INPUT:
24 Vdc jumpered from NET HOST
port or external supply. Each port
provides power to a segment.
NET A:
Connect to Cresnet
devices on segment A
NET C:
Connect to Cresnet
devices on segment C
NET:
To control system and
other Cresnet devices
NET B:
Connect to Cresnet
devices on segment B
SPECIFICATION DETAILS
Power Requirements
Cresnet Power Usage 0.6 W (0.03 A @ 24 Vdc)
Maximum Load per Segment 75 W (3.13 A @ 24 Vdc)
Environmental
Temperature 32° to 104 °F (0° to 40 °C)
Humidity 10% to 90% RH (noncondensing)
Heat Dissipation 2 Btu/h
As of the date of manufacture, the device has been tested and found to comply with specications for
CE marking.
Federal Communications Commission (FCC) Compliance Statement
This device complies with part 15 of the FCC Rules. Operation is subject to the following
conditions:(1) This device may not cause harmful interference and (2) this device must accept any
interference received, including interference that may cause undesired operation.
CAUTION: Changes or modications not expressly approved by the manufacturer responsible for
compliance could void the user’s authority to operate the equipment.
NOTE: This equipment has been tested and found to comply with the limits for a Class B digital
device, pursuant to part 15 of the FCC Rules. These limits are designed to provide reasonable
protection against harmful interference in a residential installation. This equipment generates, uses
and can radiate radio frequency energy and, if not installed and used in accordance with the
instructions, may cause harmful interference to radio communications. However, there is no guarantee
that interference will not occur in a particular installation. If this equipment does cause harmful
interference to radio or television reception, which can be determined by turning the equipment off
and on, the user is encouraged to try to correct the interference by one or more of the following
measures:
• Reorient or relocate the receiving antenna.
• Increase the separation between the equipment and receiver.
• Connect the equipment into an outlet on a circuit different from that to which the receiver is
connected.
• Consult the dealer or an experienced radio/TV technician for help.
The product warranty can be found at www.crestron.com/warranty.
The specic patents that cover Crestron products are listed at patents.crestron.com.
Certain Crestron products contain open source software. For specic information, please visit
www.crestron.com/opensource.
Crestron, the Crestron logo, Cresnet, and Crestron Toolbox are either trademarks or registered
trademarks of Crestron Electronics, Inc. in the United States and/or other countries. Other
trademarks, registered trademarks, and trade names may be used in this document to refer to either
the entities claiming the marks and names or their products. Crestron disclaims any proprietary
interest in the marks and names of others. Crestron is not responsible for errors in typography or
photography.
This document was written by the Technical Publications department at Crestron.
©2016 Crestron Electronics, Inc.
Crestron Electronics, Inc. Installation Guide - DOC. 6671B
15 Volvo Drive Rockleigh, NJ 07647 (2020753)
Tel: 888.CRESTRON 10.16
Fax: 201.767.7576 Specications subject to
www.crestron.com change without notice.
Troubleshooting
The following table provides corrective actions for possible trouble situations. If further
assistance is required, please contact a Crestron customer service representative.
DIN-HUB Troubleshooting
To power a segment externally, connect the external power supply to the EXT and G pins
on the segment’s NET PWR INPUT port.
Powering a Hub Segment Externally (Segment A Shown)
Power can be supplied from a DIN rail power supply or other Cresnet power supply
connected to the NET HOST port.
NOTE: The DIN-HUB can only be powered by the NET HOST port. Power cannot be
supplied from network devices that are connected to any of the segments.
Hub segments can be powered internally or from an external power supply. To power a
segment internally, install a jumper from the HOST pin to the EXT pin on the segment’s
NET PWR INPUT port.
Powering a Hub Segment Internally (Segment A Shown)
NET A
HOST
EXT
G
DIN-PWS50 or
other Crestron
24 Vdc supply
NET A
HOST
EXT
G
24 G
TROUBLE POSSIBLE CAUSE(S) CORRECTIVE ACTION
The NET HOST PWR
LEDs do not light.
The DIN-HUB is not
receiving power.
Determine that the NET
HOST port on the
DIN-HUB is properly
connected to a Cresnet
power supply.
The segment’s NET LED
does not light.
The segment is improperly
wired.
Verify wiring
connections: proper
connector is used, cable
is intact, and
connections are secure.
One or more devices
attached to the segment
are not properly identied
in SIMPL Windows.
Use Crestron Toolbox to
verify that the SIMPL
Windows program
recognizes all of the
devices.
Another segment is
improperly wired.
Remove all segment
connections except for
the segment attached to
the control system and
the segment for which
the LED is not lit.
The segment’s PWR LED
does not light.
The wiring at the NET
PWR INPUT port is
incorrect.
Verify that the NET PWR
INPUT port is wired
correctly for internal or
external power.
There is insufcient
power.
Verify that sufcient
power is available. If
necessary, connect the
NET PWR INPUT port to
an external power
supply.
The network is not
working, and only one
LED lights.
There is a wiring problem. Disconnect the segment
that resulted in the lit
LED, and correct the
wiring.