manuals.online logo
Brands
  1. Home
  2. •
  3. Brands
  4. •
  5. Dorma
  6. •
  7. Lock
  8. •
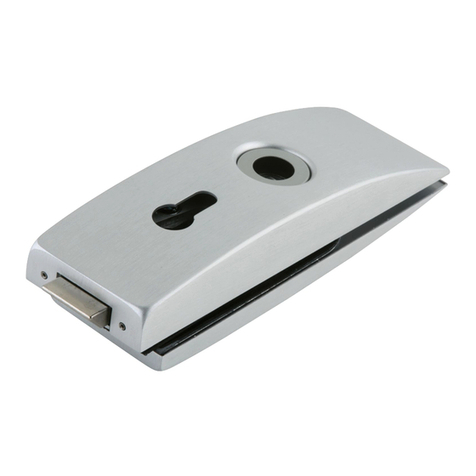
  9. Dorma ARCOS Office User manual

Dorma ARCOS Office User manual

ARCOS Office
(A)
(B)
(C)
(D)
(E)
(F)
(G)
ARCOS Office
Mounting instructions Lock / strike box
You receive a completely assembled lock. Please make sure
that the clamping surface of the glass is grease free for the
lock and the strike box.
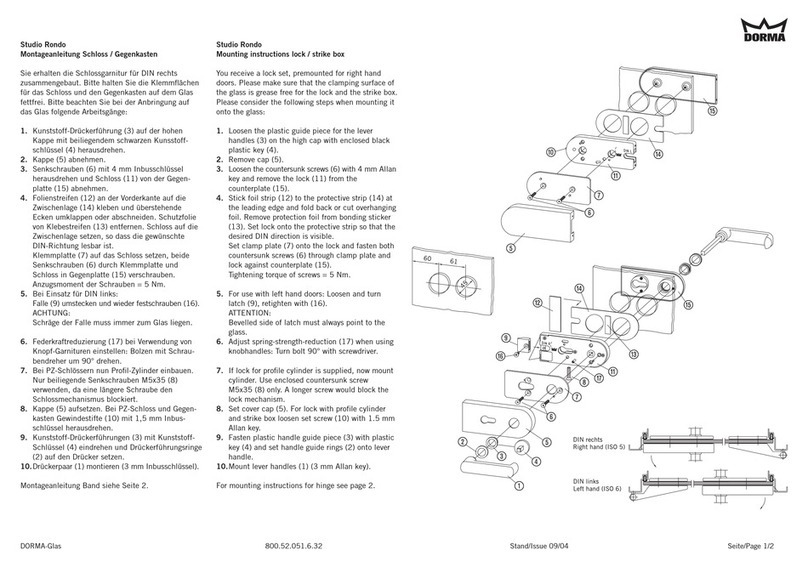
1. Mounting lock (G)
Loosen the countersunk screws (4) at the latch side.
2. Remove cap (3).
3. Loosen the now visible two countersunk screws M6x30
(5) with a 4 mm Allan key and remove lock plate (6) with
lock (7) from counterplate (9).
4. Before mounting the lock, stick the enclosed aluminium
strip (8) at the interior side onto the glass. The strip pre-
vents the sight into the lock at the short side of the back-
plate. After having mounted the lock, cut the overhanging
strip off.
5. Screw lock plate and lock with counterplate against the
glass.
Tightening torque of screws = 5 Nm
6. Fasten the cap (3) with countersunk screws (4) and
mount lever handles (1). To ensure a later dismantling of a
rose lever, a clipping catch should if possible be seen on the
topside of the lever rose base (2).
Attention:
The profile cylinder lock has a special clamp nut, which has
a tight square fit - light pressure point must be overcome.
7. Mounting strike box (F)
Put the tube sections (15) into drilled glass holes. Screw
through drilled holes with countersunk screw M6x30 (13) (4
mm Allan key) clamp plate (14) and counterplate (16)
together. Hook in cover caps (12) and (17) into clamp plate
and counterplate at pin side (11) and fasten with
countersunk screws (10).
Legend for illustrations
(A) interior side
(B) exterior side
(C) Illustration shows lock DIN left hand
(D) Illustration shows lock DIN right hand
(E) drilled glass holes
(F) strike box, DIN right hand
(G) lock, DIN left hand
Замок поставляется полностью собранным. Убедитесь,
что на крепежной поверхности стекла в месте установки
замка и ответной коробки нет смазки.
1. Установка замка (G)
Отверните винты с утопленными головками (4) со стороны
защелки.
2. Снимите крышку (3).
3. Отверните два ставших видимыми винта с утопленной
головкой М6х30 (5) с помощью ключа#шестигранника на 4
мм и отсоедините пластину замка (6) с замком (7) от
ответной пластины (9).
4. Перед установкой замка наклейте входящую в комплект
алюминиевую планку (8) с внутренней стороны на стекло.
Планка не позволяет увидеть замок со стороны короткой
части опорной пластины. После установки замка обрежьте
выступающую часть планки.
5. Приверните пластину замка с самим замком к ответной
пластине, закрепив их на стекле.
Момент затяжки винтов = 5 Нм.
6. Приверните крышку (3) винтами с утопленной головкой
(4) и установите нажимные ручки (1). Для того чтобы в
дальнейшем можно было снять розетку ручки, зажим
должен быть по возможности виден сверху на основании
розетки ручки (2).
Внимание:
Профильный цилиндрический замок снабжен
специальной зажимной гайкой, которая заворачивается
туго и при установке которой необходимо преодолеть
некоторое сопротивление.
7. Установка ответной коробки (F)
Вставьте трубки (15) в отверстия в стекле. Соедините
через эти отверстия зажимную пластину (14) и ответную
пластину (16) с помощью винтов с утопленной головкой
размером М6х30 (13) (используя ключ#шестигранник на 4
мм). Закрепите крышки (12) и (17) на зажимной пластине
и ответной пластине, и закрепите их со стороны штифта
(11) винтами с утопленной головкой (10).
Инструкции по установке замка/ ответной коробки
Пояснения к иллюстрациям
внутренняя сторона
внешняя сторона
На рисунке показан левосторонний замок DIN
На рисунке показан правосторонний замок DIN
отверстия в стекле
ответная коробка, DIN, правосторонняя
замок, DIN, левосторонний
Страница/Page 1/2
Издание/Issue 10/02
DORMA-Glas 800.52.057.6.32
ARCOS Office
(E)
(I)
(M)
ARCOS Office
Mounting instructions Hinge
Please make sure that the clamping surface of the glass is
grease free for the hinges.
1. Place glass door panel into door frame and set 7 mm
spacer plates (lower clearance), then align sides.
2. Insert frame portions (10) into frame and fix them. Set
cover bush (11).
3. Make sure that the ball bearing (9) is fitted in the correct
way.
4. Slide hinge (6) onto frame portion, insert bolt (8) and
secure it with setscrew (7).
5. Insert the plastic rings (5) into the glass holes. Fasten
clamp plate (4) with countersunk screws M6x24 (3) (4 mm
Allan key) against hinge from the exterior side.
Tightening torque of screws = 12 Nm
6. Stick cover cap (2) with double sided adhesive tape (1)
onto clamp plate (4).
Legend for illustrations
(E) drilled glass hole
(I) hinge, DIN left hand
(M) frame pivots
35.5
45
16
E
I
M
10
6
11
4
2
3
8
5
7
1
9
Инструкции по установке петли
Убедитесь, что на крепежной поверхности стекла в
месте установки петель нет смазки.
1. Поместите стеклянное дверное полотно враму и
установите 7-миллиметровые проставки (минимальный
зазор), после чего выровняйте стороны.
2. Вставьте части рамы (10) враму изакрепите их.
Закройте их крышками (11).
3. Убедитесь, что шарикоподшипник (9) установлен
правильно.
4. Наденьте петлю (6) на вставленную враму часть,
вставьте болт (8) изакрепите его установочным винтом
(7).
5. Вставьте пластиковые кольца (5) вотверстия в
стекле. Закрепите зажимную пластину (4) винтами с
утопленной головкой М6х24 (3) (спомощью ключа-
шестигранника на 4 мм) на петле свнешней стороны.
Момент затяжки винтов = 12 Нм.
6. Приклейте крышку (2) на зажимную пластину (4) с
помощью двухсторонней клейкой ленты (1).
Пояснения к рисункам
Отверстие встекле
Петля,DIN левосторонняя
Оси рамы
Страница/Page 2/2
Издание/Issue 10/02
DORMA-Glas 800.52.057.6.32
Other Dorma Lock manuals

Dorma DB600 Series Guide

Dorma

Dorma DB600 Series Guide

Dorma C300 User manual

Dorma

Dorma C300 User manual

Dorma ES 110-4 Series User manual

Dorma

Dorma ES 110-4 Series User manual

Dorma CL700 User manual

Dorma

Dorma CL700 User manual

Dorma EM 7500-D AM User manual

Dorma

Dorma EM 7500-D AM User manual

Dorma M9000 User manual

Dorma

Dorma M9000 User manual

Dorma EM Series User manual

Dorma

Dorma EM Series User manual

Dorma Studio Classic User manual

Dorma

Dorma Studio Classic User manual

Dorma PT 41 User manual

Dorma

Dorma PT 41 User manual

Dorma EM 3000-EW AH User manual

Dorma

Dorma EM 3000-EW AH User manual

Dorma CL853 User manual

Dorma

Dorma CL853 User manual

Dorma ARCOS Studio User manual

Dorma

Dorma ARCOS Studio User manual

Dorma EML320 User manual

Dorma

Dorma EML320 User manual

Dorma EM Series User manual

Dorma

Dorma EM Series User manual

Dorma G-EMF Manual

Dorma

Dorma G-EMF Manual

Dorma C500 User manual

Dorma

Dorma C500 User manual

Dorma EM 15000-D AM User manual

Dorma

Dorma EM 15000-D AM User manual

Dorma Studio Rondo User manual

Dorma

Dorma Studio Rondo User manual

Dorma EM Series User manual

Dorma

Dorma EM Series User manual

Dorma SVP 22 Series User manual

Dorma

Dorma SVP 22 Series User manual

Dorma Duo OFFICE 712 User manual

Dorma

Dorma Duo OFFICE 712 User manual

Dorma ARCOS Office User manual

Dorma

Dorma ARCOS Office User manual

Dorma EM Series User manual

Dorma

Dorma EM Series User manual

Popular Lock manuals by other brands

Belkin SafeTech F8E503 Instruction guide

Belkin

Belkin SafeTech F8E503 Instruction guide

COMPX Stock Locks C8051 Dimensional drawing

COMPX

COMPX Stock Locks C8051 Dimensional drawing

Alarm Lock Trilogy PDL3500 Tech tips

Alarm Lock

Alarm Lock Trilogy PDL3500 Tech tips

Verkada Schlage Engage install guide

Verkada

Verkada Schlage Engage install guide

LOCK ALARM MINI manual

LOCK ALARM

LOCK ALARM MINI manual

Yale 7130F Series installation instructions

Yale

Yale 7130F Series installation instructions

LaGard 3035 operating instructions

LaGard

LaGard 3035 operating instructions

Masterlock master lock operating instructions

Masterlock

Masterlock master lock operating instructions

Borglocks BL2605MG Parts List, Installation and General Information

Borglocks

Borglocks BL2605MG Parts List, Installation and General Information

effeff 819 Installation and mounting instructions

effeff

effeff 819 Installation and mounting instructions

gebatronic TCS-Cody-Light Assembly instructions

gebatronic

gebatronic TCS-Cody-Light Assembly instructions

effeff ePED 1386D10 Installation and operating instructions

effeff

effeff ePED 1386D10 Installation and operating instructions

Masterlock 5440EURD instructions

Masterlock

Masterlock 5440EURD instructions

Abus Bordo 6000 PZ quick start guide

Abus

Abus Bordo 6000 PZ quick start guide

Masterlock 4400 instructions

Masterlock

Masterlock 4400 instructions

Masterlock 3685 instructions

Masterlock

Masterlock 3685 instructions

SmartLock LOCKONE Technical manual

SmartLock

SmartLock LOCKONE Technical manual

SAFE-TECH Quicklock quick start guide

SAFE-TECH

SAFE-TECH Quicklock quick start guide

manuals.online logo
manuals.online logoBrands
  • About & Mission
  • Contact us
  • Privacy Policy
  • Terms and Conditions

Copyright 2025 Manuals.Online. All Rights Reserved.