2100, 4100, 6100 Series Top Mount Drive Package for Standard Load 50 Hz Gearmotors SOMM
Dorner Mfg. Corp. 7851-295 Rev. A
Required Tools
DHex key wrenches
–2 mm, 2.5 mm, 3 mm & 5 mm
DAdjustable wrench (for hexagon head screws)
DStraight edge
DExternal snap ring pliers
DTorque wrench
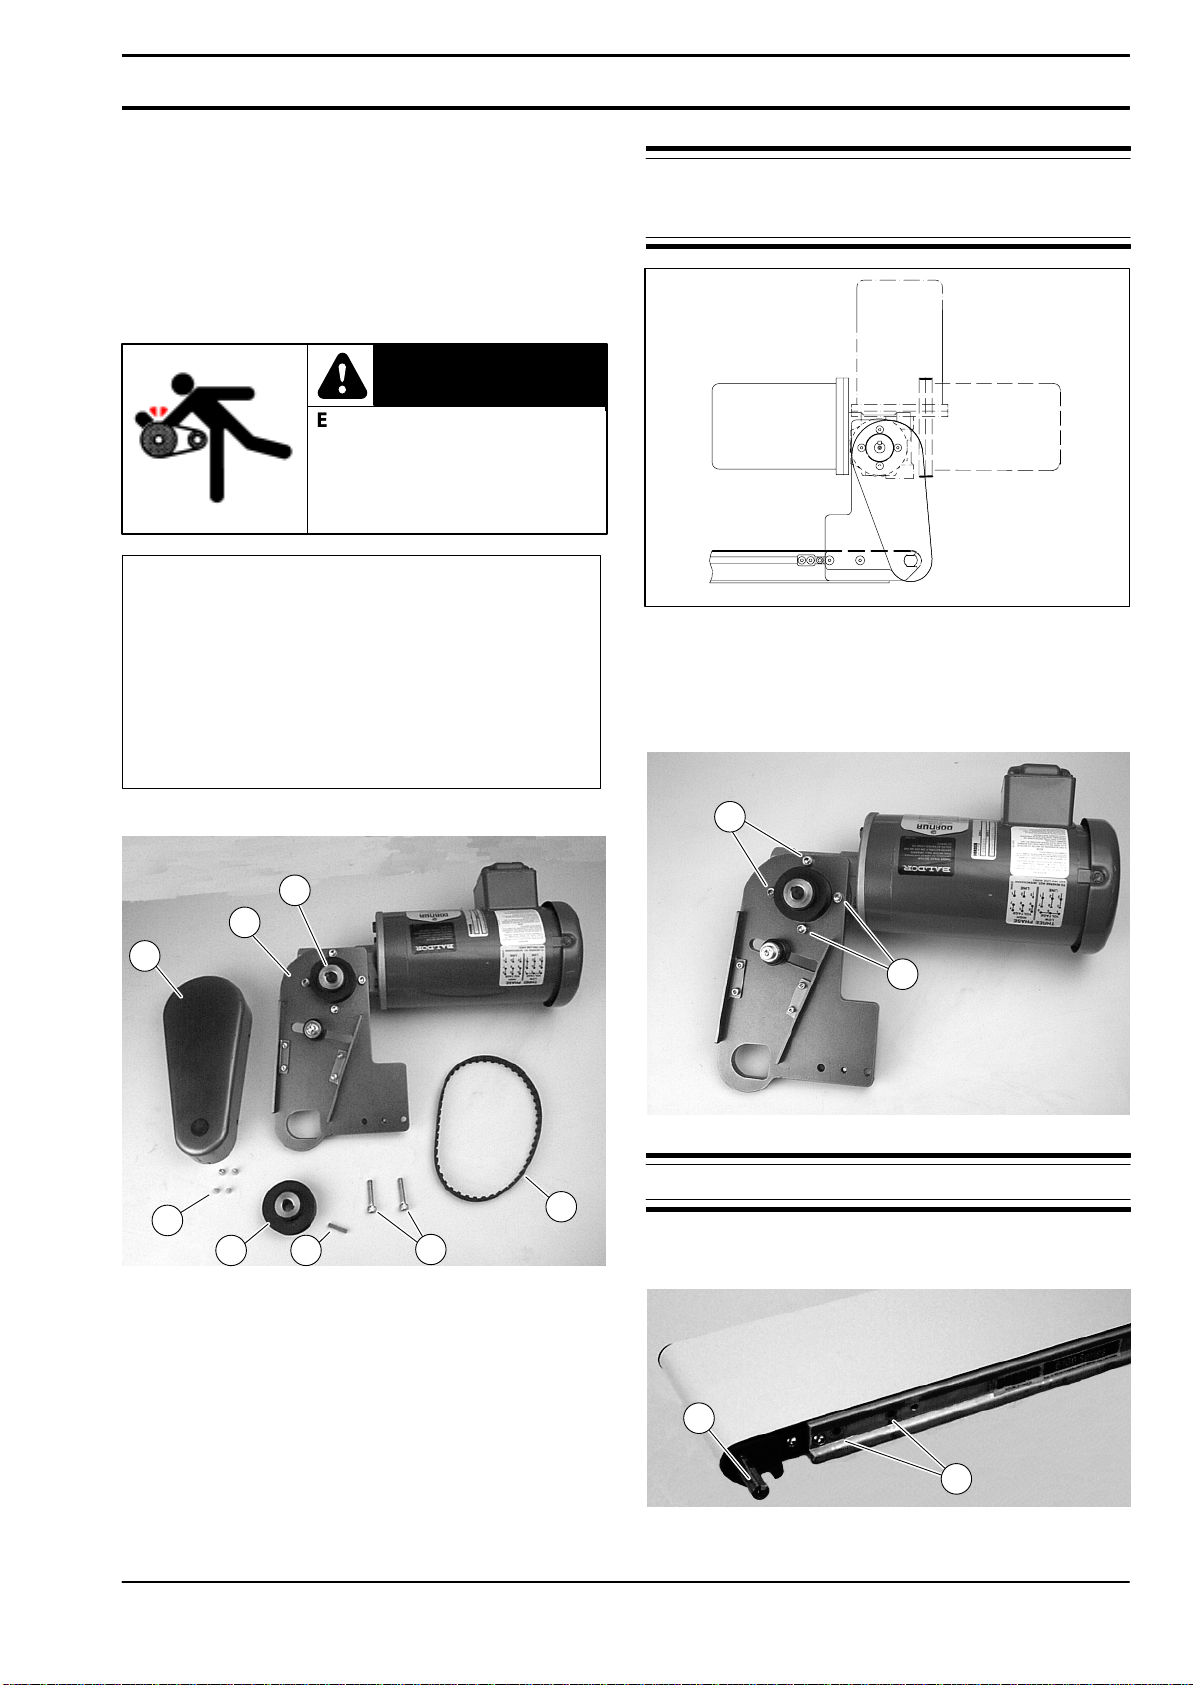
Timing Belt Tensioning
Exposed moving parts can
cause severe injury.
LOCK OUT POWER before
removing guards or
performing maintenance.
WARNING
1.Remove four (4) screws (L of Figure 10) and remove
cover (K).
2.Loosen tensioner (V of Figure 11).
Figure 11
V
3.Depending on conveyor belt travel (direction 1 or 2),
locate timing belt tensioner (V of Figure 9) as shown.
Tension timing belt to obtain 3 mm deflection for
456 grams of force at timing belt mid-point (W).
Tighten tensioner screw to 12 Nm.
4.Install cover (K of Figure 10) with four (4) screws
(L). Tighten screws to 4 Nm.
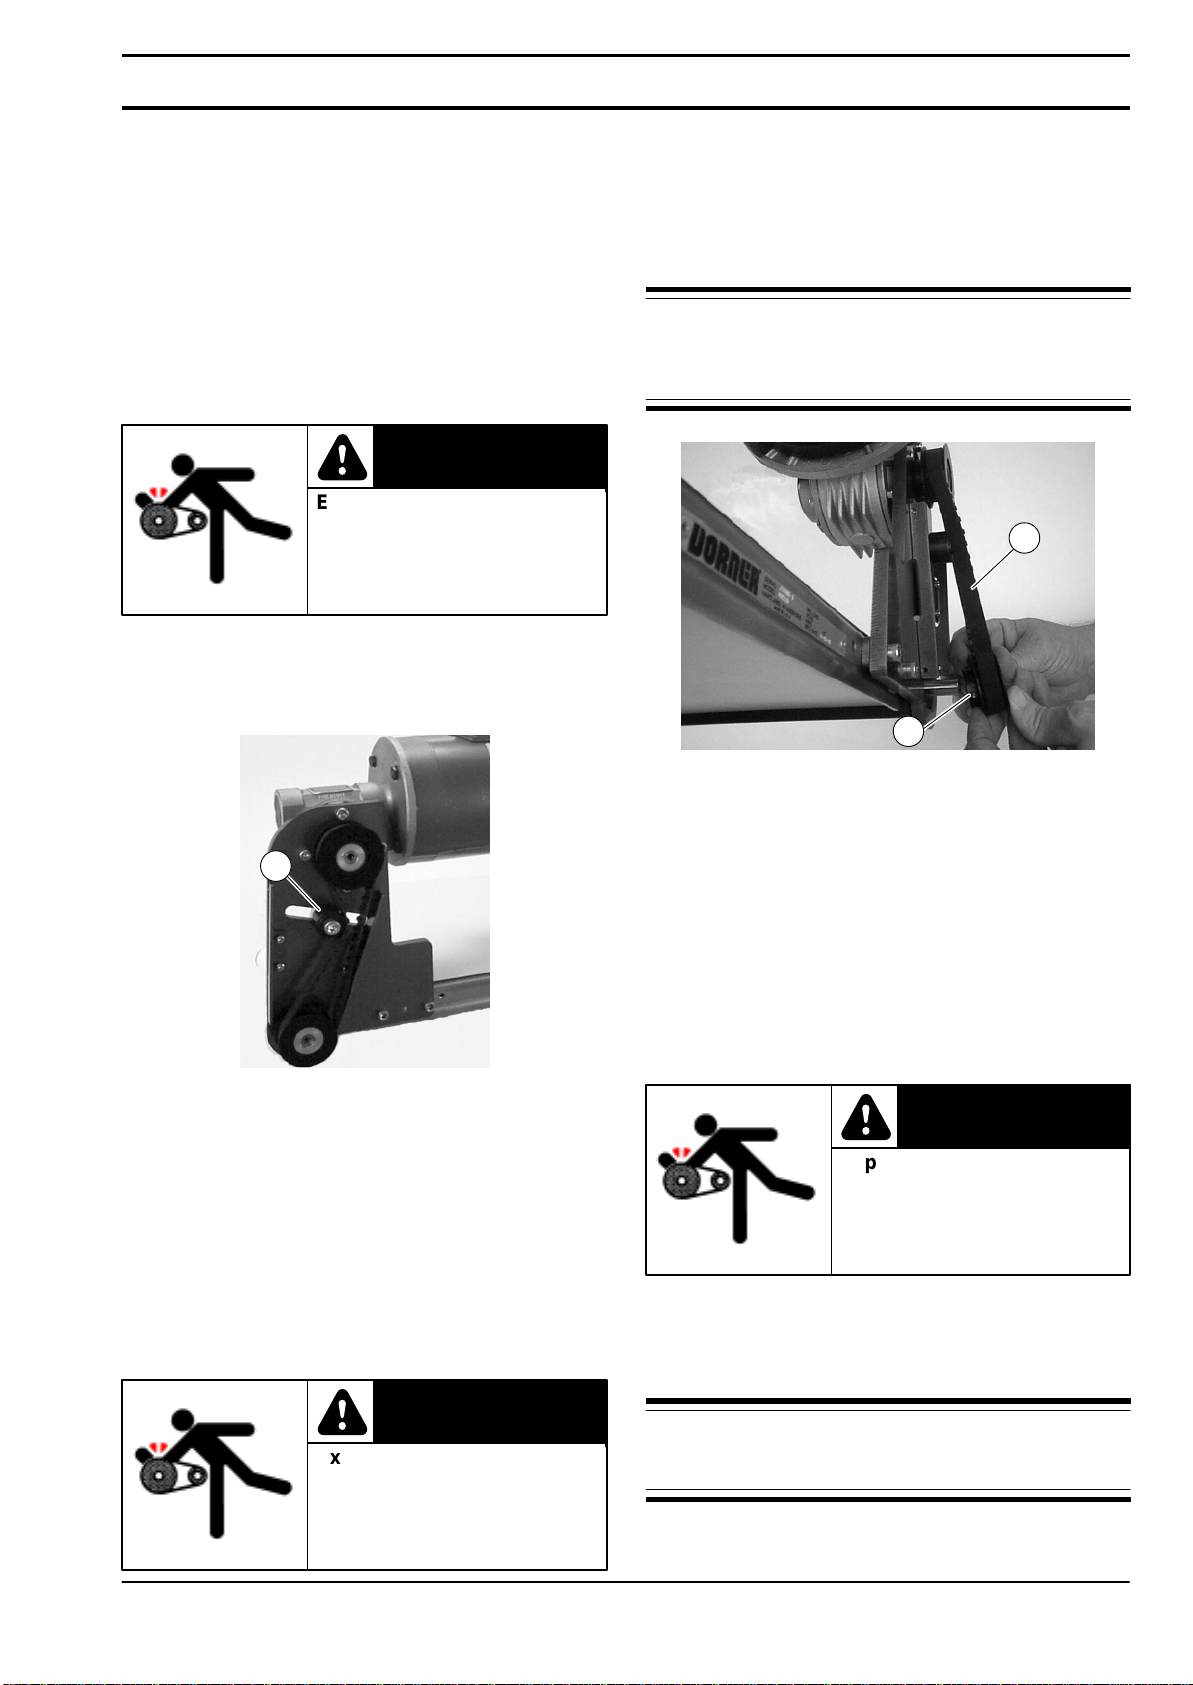
Timing Belt Replacement
Exposed moving parts can
cause severe injury.
LOCK OUT POWER before
removing guards or
performing maintenance.
WARNING
1.Remove four (4) screws (L of Figure 10) and remove
cover (K).
2.Loosen tensioner (V of Figure 11).
3.Remove timing belt (P of Figure 12).
NOTE: If timing belt does not slide over pulley
flange, loosen driven pulley set screws (U of Figure
12) and remove pulley with belt (P). For
re-installation, see steps 6 and 7 on page 6.
Figure 12
U
P
4.Install new timing belt.
5.Depending on conveyor belt travel (direction 1 or 2),
locate timing belt tensioner (V of Figure 9) as shown.
Tension timing belt to obtain 3 mm deflection for
456 grams of force at timing belt mid-point (W).
Tighten tensioner screw to 12 Nm.
6.Install cover (K of Figure 10) with four (4) screws
(L). Tighten screws to 4 Nm.
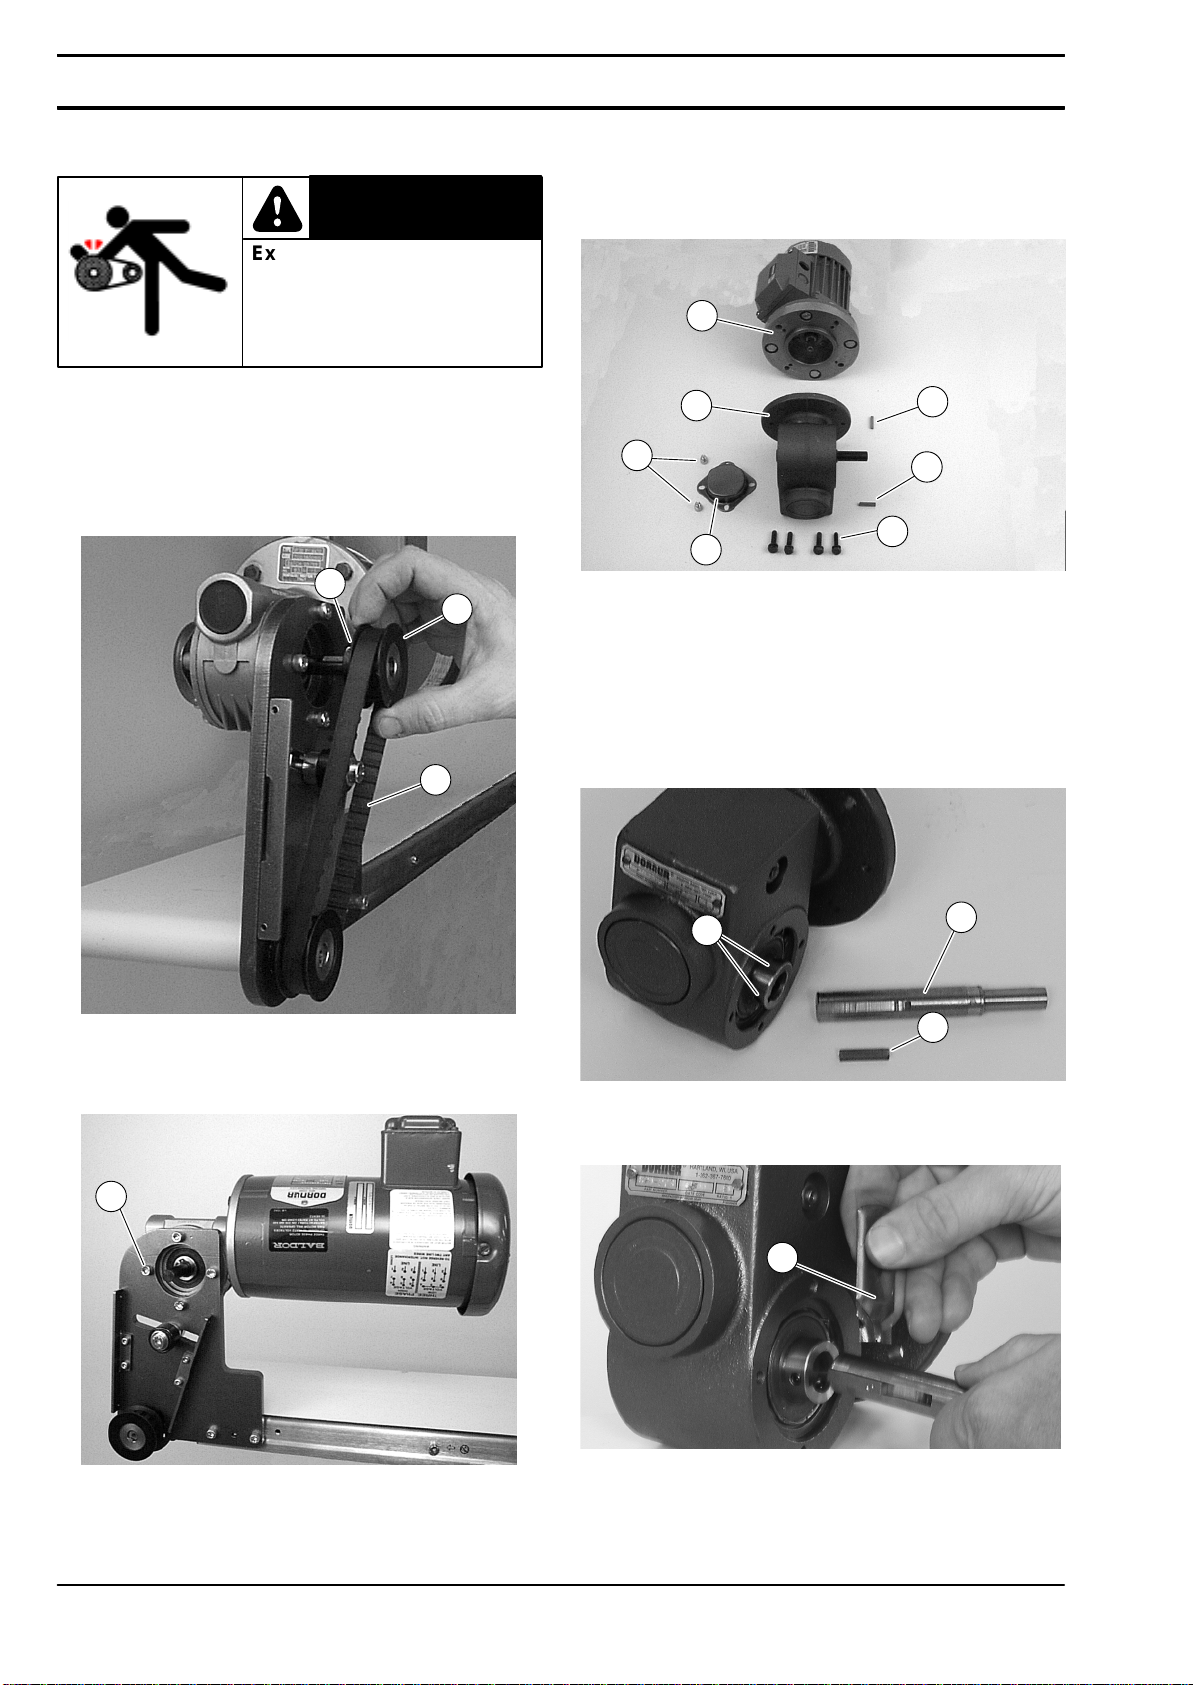
Drive or Driven Pulley Replacement
Exposed moving parts can
cause severe injury.
LOCK OUT POWER before
removing guards or
performing maintenance.
WARNING
1.Complete steps 1 through 3 of “Timing Belt
Replacement”section on this page.
2.Loosen set screws and remove drive or driven pulley.
NOTE: If drive pulley (J of Figure 13) is replaced,
wrap timing belt around drive pulley and complete
step 3.
3.Completesteps6through9of“Installation”section
on page 6.
Preventive Maintenance and Adjustment